642
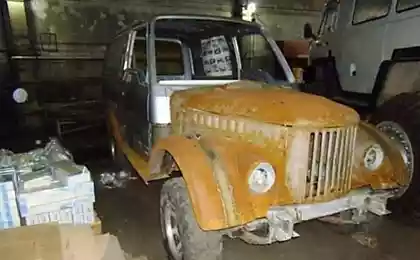
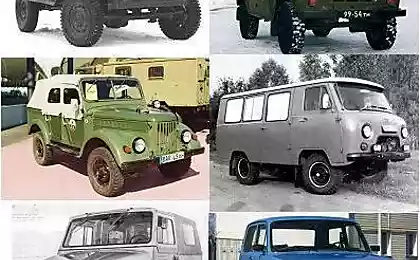
Homemade lights for UAZ
It was a cold winter evening in Siberia, there was nothing.
I sat and thought for 12 years as we live in the 21st century, and our cars somehow remained in the tube of the 20th century, and to somehow bring them closer to our near future, it is necessary to have something radically change. And what can be changed, and to do a little blood, and it was good, and that is beautiful, and even though slightly add personality? "Well, of course! change the car! "says the cunning reader. No, it is not our method. We go through self-construction and construction.

So, I decided to start with, what can be done literally at home. Craft lights rear stop lamp, with its own design, based on the bright LEDs.
Basic conditions to lanterns were part of the terms of reference:
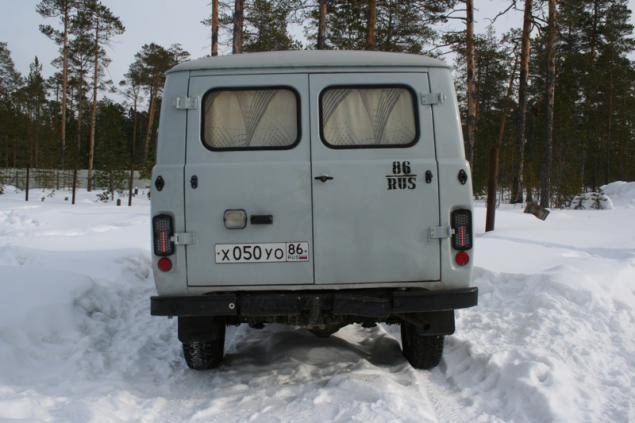
Installing in a regular place
-Nadёzhnost
-Quantitative Indication
Decrease in consumption of el. Energy
-Advanced To turn signals, stop and dimensions add fog lamp not go beyond the boundaries of regular housing
-Alternativny Design
-Operativnaya Replacement, if necessary, at regular lights
The cost of the project:
Enclosures - 2 x 168 rubles.
Boards - 2 x 75 rubles.
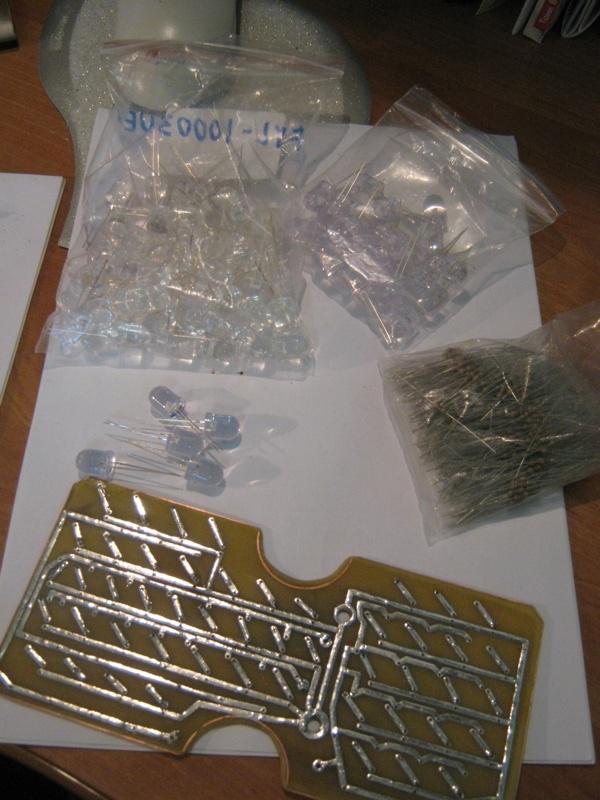
LEDs (FYL-10003UEC red) - 62 pcs. 6, 6 rubles.
LEDs (FYL-10003UYC yellow) - 36 pcs. 6, 6 rubles.
Resistors (MLT-560 0.5 ohm) - 98 pcs. at 0, 42 rubles.
personal time - priceless =)
For other small things do not specify because the cost is negligible, or got free
total: 1200 rubles. for both the lantern.
For the experiments acquired a native lamp, she took off her size and made a model of the future lights. Dimension (pictured orange) decided to extend in length to increase its visibility.
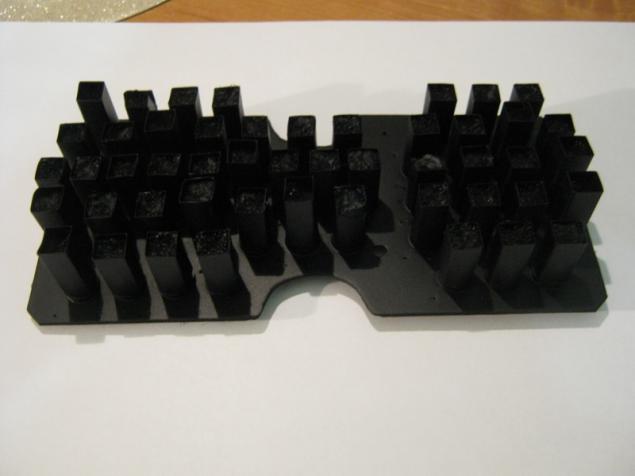
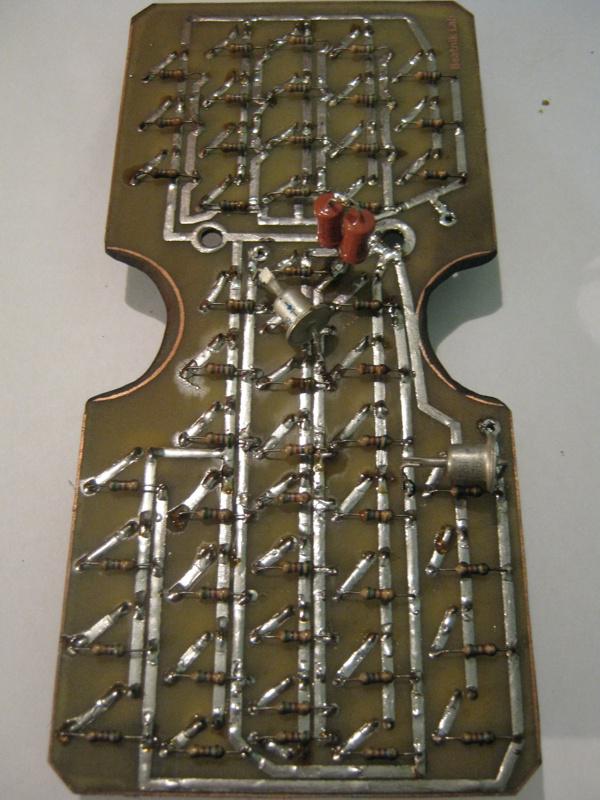
Since the main requirement is to lanterns reliability, all the elements are mounted on the circuit board. These boards has made me Dima (aka Beatnik) for which he thanks a lot! (as well as for other advice on the creation of lights).
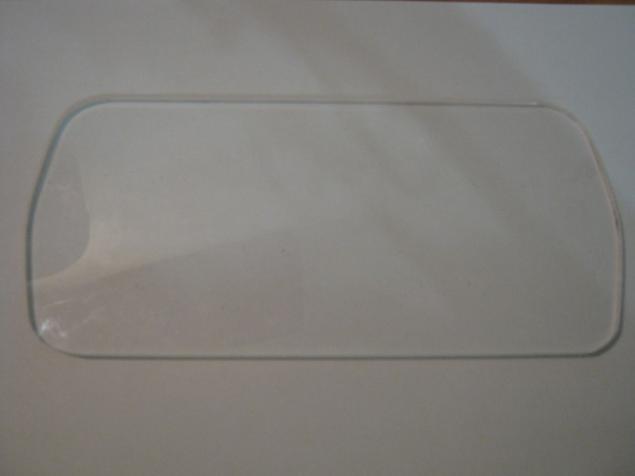
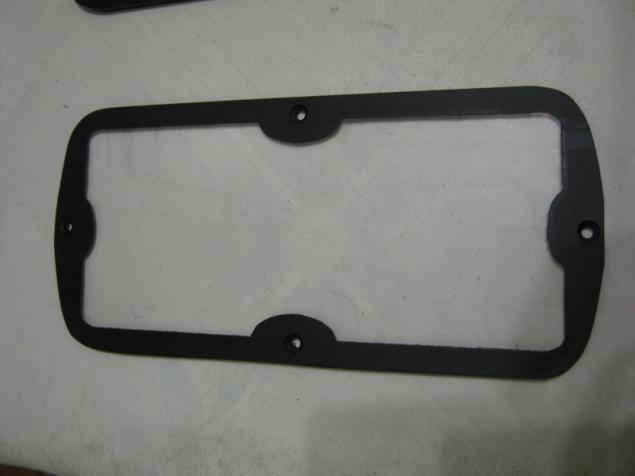
Naturally, the staff has the glass does not fit as It changed the location of the light elements, and therefore it was decided to make it out of 5mm Plexiglas. Sketch I went to Rinat (flymaster) and he sharpened movements quickly produced professional I wanted Circuits on the sly machine (for which he thanks a lot!). Also, I was given precious advice, it is better not to overwrite Plexiglas, giving it a matte finish, as it can not be done uniformly and easier to buy a matte plyonochku and paste it. (there is no film)
After initial processing fee she was an example to his future residence. There it fits perfectly and looked.
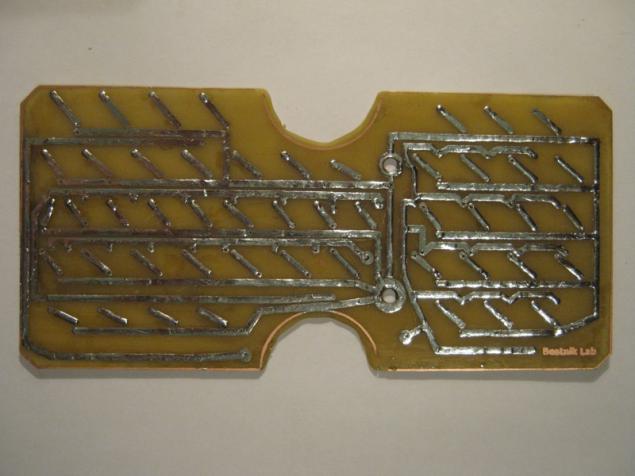
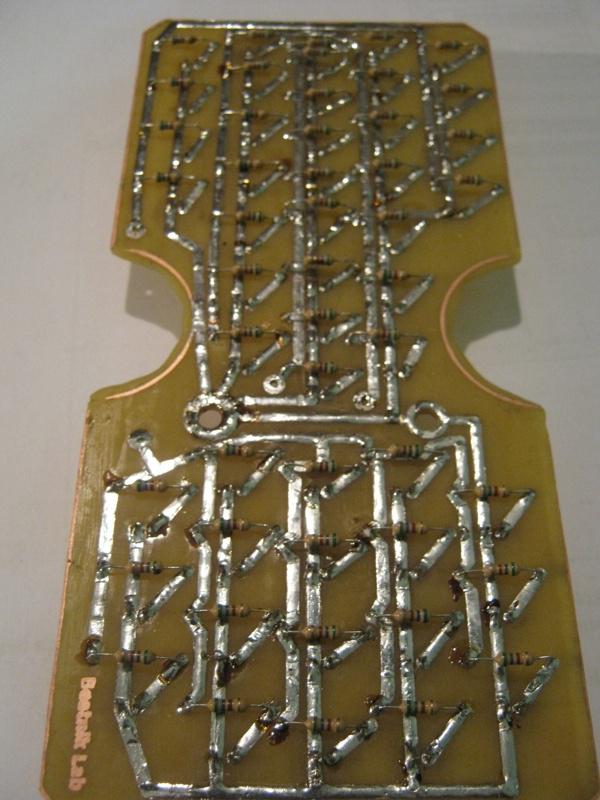
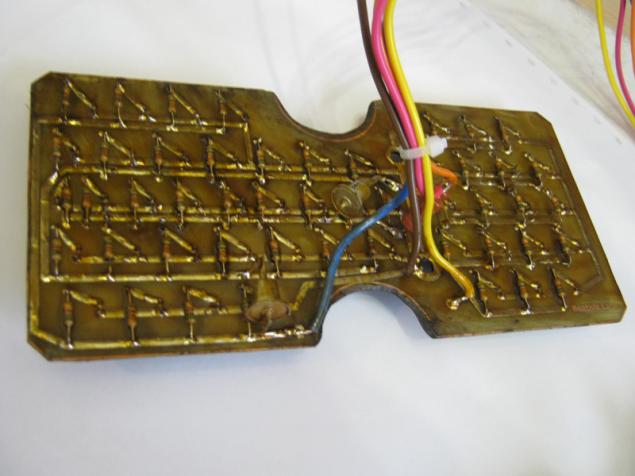
According to the technology, it is necessary to tin all the tracks of the PCB. This ensures not only protection against oxidation of copper traces, but also increases the surface area of the tracks, and it is necessary not to fear that a large current can also damage them. Of course currents there are not that high (from 0, 0 to 15A, 82A (for a total mass)) but it's better to err.
Having regard to the pricing in Surgut (the greed of merchants), all the details have been ordered from the Internet. For example, LEDs are ordered by 6, 6 rubles. Surgut and they are already 25-30 rubles. Attention to the question, which pocket is the residue Seller
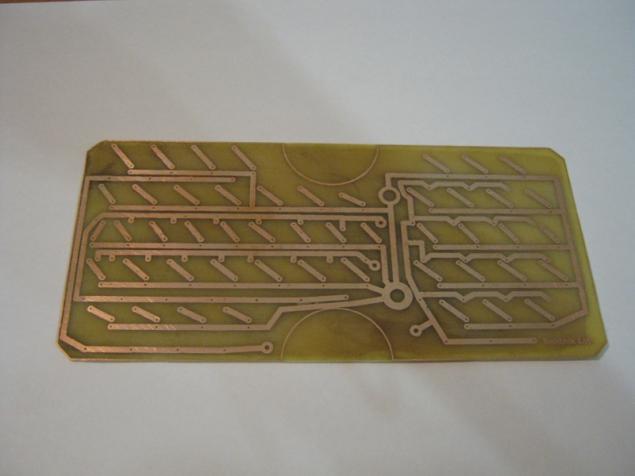
Circuits arrived
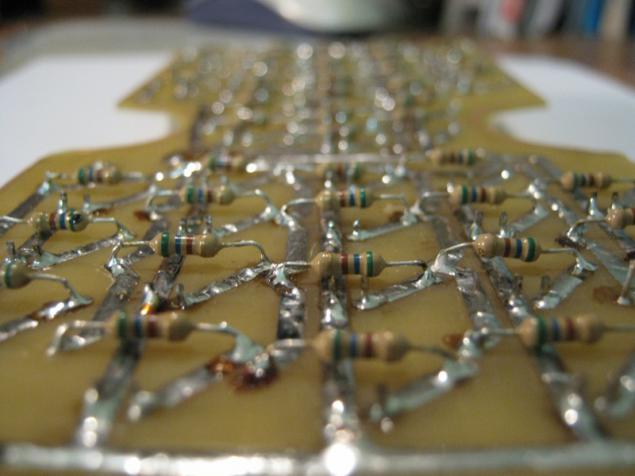
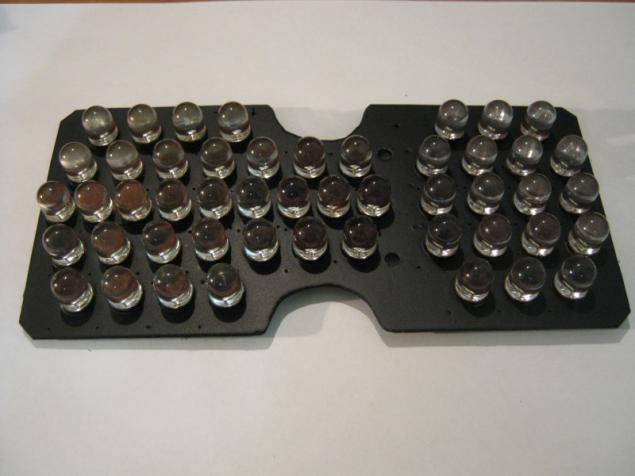
Yes, each LED is powered by its own individual resistor, which is fixed on the front side of the PCB. There was a discussion about how to mount resistors, hinged mounting or zasverlivat holes for them. Busting lazy yet been made holes, thereby improving the quality of installation and reliability, respectively.
In the photo montage it looks scary, but the visual inspection experts have drawn the conclusion that all is well
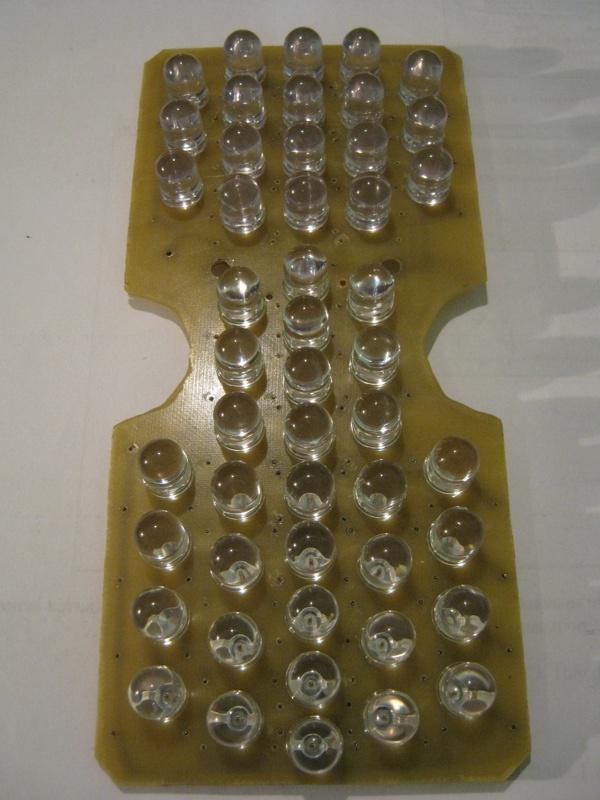
The LEDs are soldered on the back side of the resistors
Initial inspection of the assembled collective farm (in the background kanonichnogo mat coolness +5)
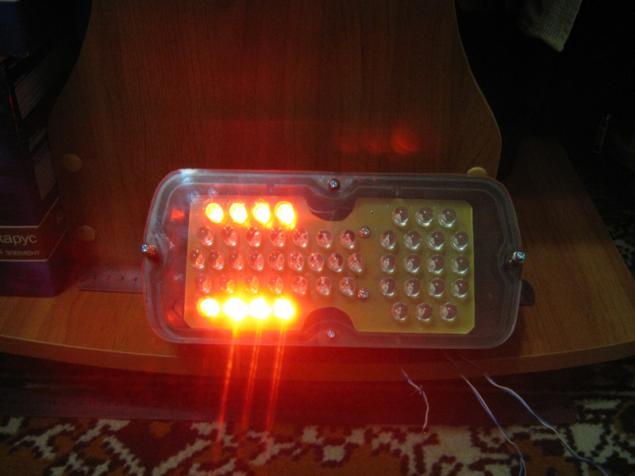
Verifying indicator
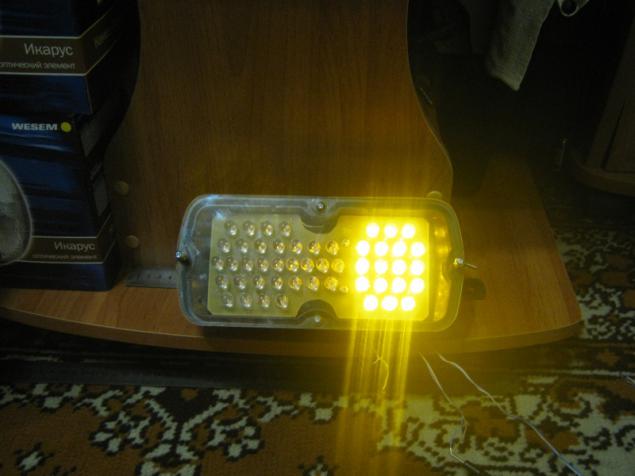
Verifying PTF
Initially, I did not plan to paint the board since thought behind frosted glass of the collective farm will not be visible, and light background will give more brightness due to light reflection, but as seen in the photo above, it atsky farm, in connection with which it was decided to paint the board in black color, because . In this case, the board is of the same body with light and visually merged with it. Since LEDs have been soldered, and to dismantle them did not want to because of the danger of overheating the track with their subsequent detachment (and was too lazy), I produced for each LED cap made of paper and covered them all. In the photo is the last stage of painting, as well as a layer of paint still rests primer. All of the usual painted cans.
Covered LEDs remain clean of paint, and the fee acquired smooth black matte color.
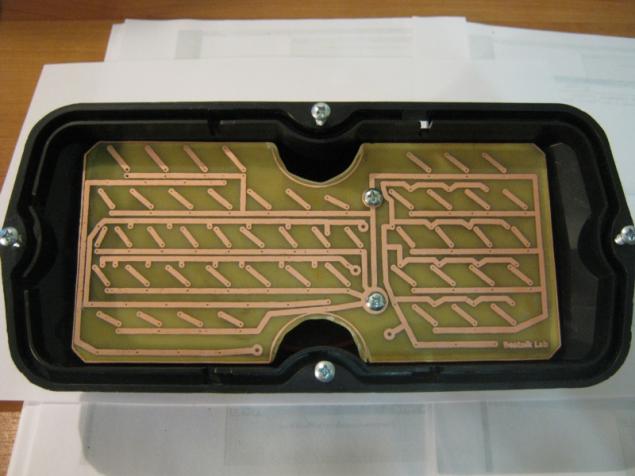
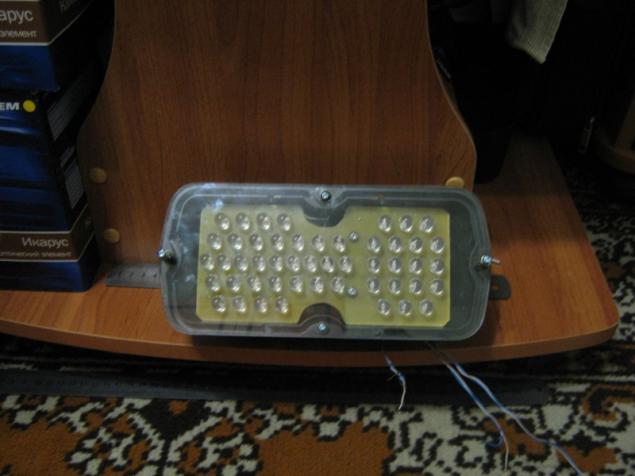
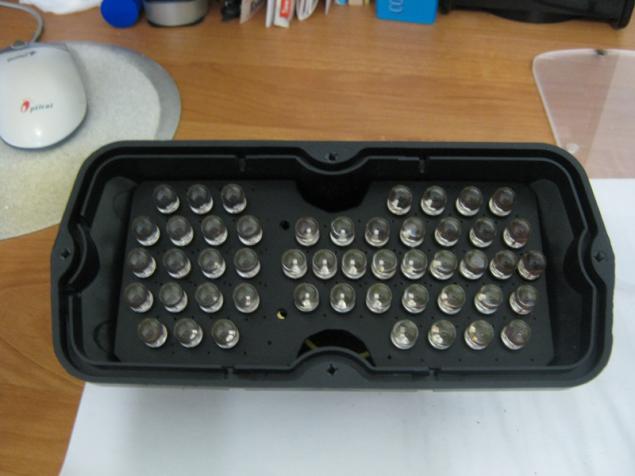
Fitting the housing (turned out very gothic).
Stёklyshko itself was very dull look unfinished, after simple manipulations, it has acquired a frame
To control the size and stoplight added "clever" electronics. because All LEDs and resistors are the same, and they shine with equal intensity, but the brightness of the envelope should be different from the brightness of the stop signal and the PTF. To do this, the cluster dimension has been added in parallel a pair of resistors MLT-1560 ohms. Their power will be enough not to die of the total current consumption of dimensional cluster.
Diodes are designed to manage the division stoplight and PTF, as well as the brightness of the envelope as when you press the brake pedal marker lights with the same brightness signal of the brake, which increases the overall brightness of the stop signal. The division sold through a diode D226G on calculations, it holds 12 volts 5 amps, so 130mA he did not even notice
Always remember about reliability and technology. To prevent corrosion, the reverse side is covered with varnish.
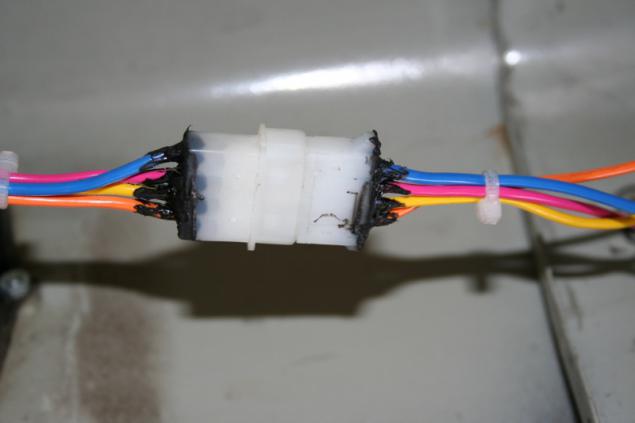
To be able to quickly change the headlights on full-time, embedded in the wiring connectors from the plume of computer power. For reliability, all nodes are treated with silicone sealant. Staff did not use the connector since he has only three pins, but I needed four.
Mounting leave behind the scenes. Cooking spotlight looks like:
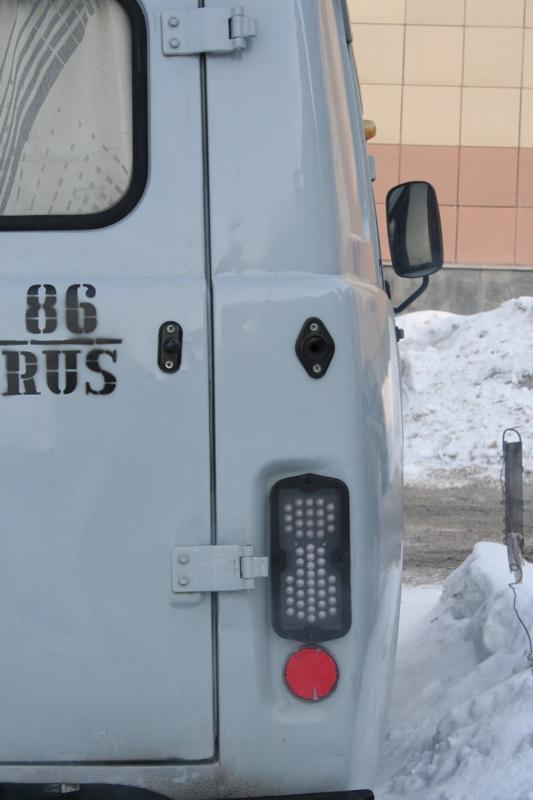
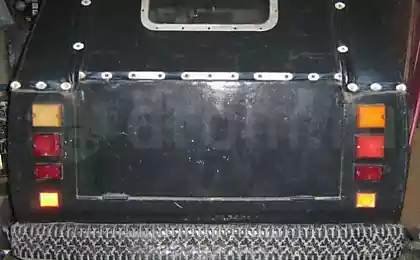
. all together as follows: (Dimensions day)
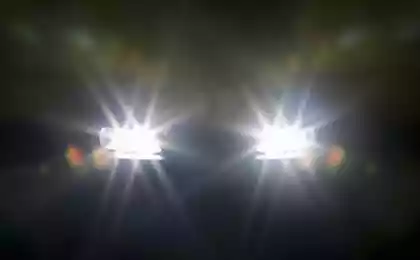
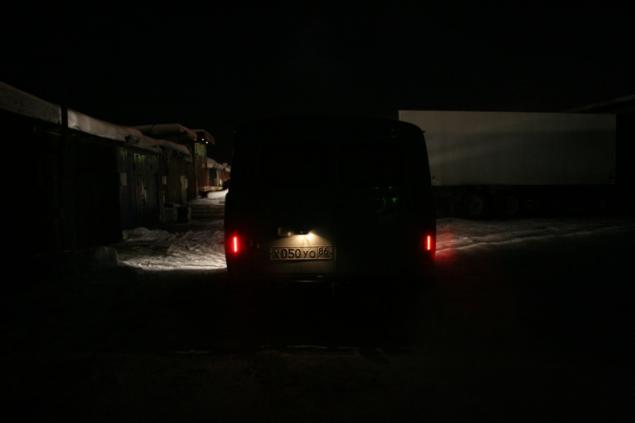
Unfortunately the photo does not manage to convey a real glow. (dimensions).
Posted in [mergetime] 1331224888 [/ mergetime]
In conclusion, we note that the term of production, taking into account the delivery of wireless components, was 2-3 months. And because All conditions have been met TK, the author was very pleased.
And a little help on the current consumption:
size 0, 15A
Stop 0, 39A
0 PTF 13A
0 rotation 3A
Considering that the standard cost for 6-watt bulb, which corresponds to 0, 5A, the difference in reducing the consumption of obvious
Oh yes, I almost forgot this upgrade + 1'd cross
While all.
Your comments.
Source:
I sat and thought for 12 years as we live in the 21st century, and our cars somehow remained in the tube of the 20th century, and to somehow bring them closer to our near future, it is necessary to have something radically change. And what can be changed, and to do a little blood, and it was good, and that is beautiful, and even though slightly add personality? "Well, of course! change the car! "says the cunning reader. No, it is not our method. We go through self-construction and construction.

So, I decided to start with, what can be done literally at home. Craft lights rear stop lamp, with its own design, based on the bright LEDs.
Basic conditions to lanterns were part of the terms of reference:
Installing in a regular place
-Nadёzhnost
-Quantitative Indication
Decrease in consumption of el. Energy
-Advanced To turn signals, stop and dimensions add fog lamp not go beyond the boundaries of regular housing
-Alternativny Design
-Operativnaya Replacement, if necessary, at regular lights
The cost of the project:
Enclosures - 2 x 168 rubles.
Boards - 2 x 75 rubles.
LEDs (FYL-10003UEC red) - 62 pcs. 6, 6 rubles.
LEDs (FYL-10003UYC yellow) - 36 pcs. 6, 6 rubles.
Resistors (MLT-560 0.5 ohm) - 98 pcs. at 0, 42 rubles.
personal time - priceless =)
For other small things do not specify because the cost is negligible, or got free
total: 1200 rubles. for both the lantern.
For the experiments acquired a native lamp, she took off her size and made a model of the future lights. Dimension (pictured orange) decided to extend in length to increase its visibility.
Since the main requirement is to lanterns reliability, all the elements are mounted on the circuit board. These boards has made me Dima (aka Beatnik) for which he thanks a lot! (as well as for other advice on the creation of lights).

Naturally, the staff has the glass does not fit as It changed the location of the light elements, and therefore it was decided to make it out of 5mm Plexiglas. Sketch I went to Rinat (flymaster) and he sharpened movements quickly produced professional I wanted Circuits on the sly machine (for which he thanks a lot!). Also, I was given precious advice, it is better not to overwrite Plexiglas, giving it a matte finish, as it can not be done uniformly and easier to buy a matte plyonochku and paste it. (there is no film)

After initial processing fee she was an example to his future residence. There it fits perfectly and looked.

According to the technology, it is necessary to tin all the tracks of the PCB. This ensures not only protection against oxidation of copper traces, but also increases the surface area of the tracks, and it is necessary not to fear that a large current can also damage them. Of course currents there are not that high (from 0, 0 to 15A, 82A (for a total mass)) but it's better to err.

Having regard to the pricing in Surgut (the greed of merchants), all the details have been ordered from the Internet. For example, LEDs are ordered by 6, 6 rubles. Surgut and they are already 25-30 rubles. Attention to the question, which pocket is the residue Seller
Circuits arrived

Yes, each LED is powered by its own individual resistor, which is fixed on the front side of the PCB. There was a discussion about how to mount resistors, hinged mounting or zasverlivat holes for them. Busting lazy yet been made holes, thereby improving the quality of installation and reliability, respectively.

In the photo montage it looks scary, but the visual inspection experts have drawn the conclusion that all is well

The LEDs are soldered on the back side of the resistors

Initial inspection of the assembled collective farm (in the background kanonichnogo mat coolness +5)

Verifying indicator

Verifying PTF

Initially, I did not plan to paint the board since thought behind frosted glass of the collective farm will not be visible, and light background will give more brightness due to light reflection, but as seen in the photo above, it atsky farm, in connection with which it was decided to paint the board in black color, because . In this case, the board is of the same body with light and visually merged with it. Since LEDs have been soldered, and to dismantle them did not want to because of the danger of overheating the track with their subsequent detachment (and was too lazy), I produced for each LED cap made of paper and covered them all. In the photo is the last stage of painting, as well as a layer of paint still rests primer. All of the usual painted cans.

Covered LEDs remain clean of paint, and the fee acquired smooth black matte color.

Fitting the housing (turned out very gothic).

Stёklyshko itself was very dull look unfinished, after simple manipulations, it has acquired a frame

To control the size and stoplight added "clever" electronics. because All LEDs and resistors are the same, and they shine with equal intensity, but the brightness of the envelope should be different from the brightness of the stop signal and the PTF. To do this, the cluster dimension has been added in parallel a pair of resistors MLT-1560 ohms. Their power will be enough not to die of the total current consumption of dimensional cluster.
Diodes are designed to manage the division stoplight and PTF, as well as the brightness of the envelope as when you press the brake pedal marker lights with the same brightness signal of the brake, which increases the overall brightness of the stop signal. The division sold through a diode D226G on calculations, it holds 12 volts 5 amps, so 130mA he did not even notice

Always remember about reliability and technology. To prevent corrosion, the reverse side is covered with varnish.

To be able to quickly change the headlights on full-time, embedded in the wiring connectors from the plume of computer power. For reliability, all nodes are treated with silicone sealant. Staff did not use the connector since he has only three pins, but I needed four.

Mounting leave behind the scenes. Cooking spotlight looks like:

. all together as follows: (Dimensions day)

Unfortunately the photo does not manage to convey a real glow. (dimensions).
Posted in [mergetime] 1331224888 [/ mergetime]
In conclusion, we note that the term of production, taking into account the delivery of wireless components, was 2-3 months. And because All conditions have been met TK, the author was very pleased.
And a little help on the current consumption:
size 0, 15A
Stop 0, 39A
0 PTF 13A
0 rotation 3A
Considering that the standard cost for 6-watt bulb, which corresponds to 0, 5A, the difference in reducing the consumption of obvious
Oh yes, I almost forgot this upgrade + 1'd cross
While all.
Your comments.

Source: