693
Civilize shop
This story goes back to the Stone Age.
As soon as the monkey fell from a palm tree and broke her tail, then immediately started looking for a warm and cozy cave for licking the injury. Since then, found the first mention of the arrangement, the design of premises and residential apartments.
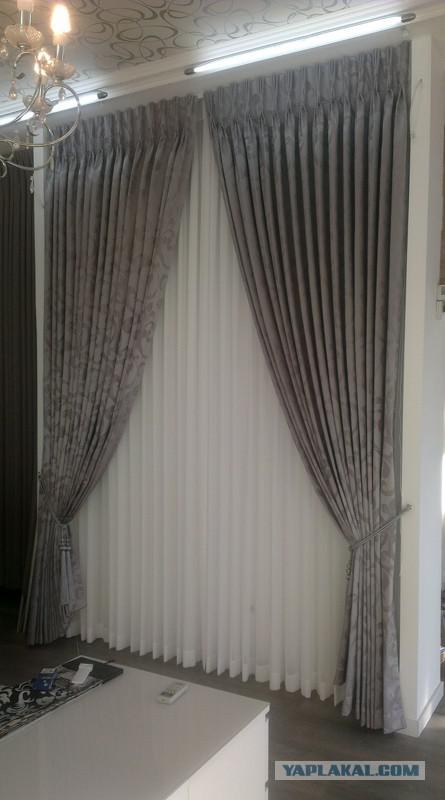
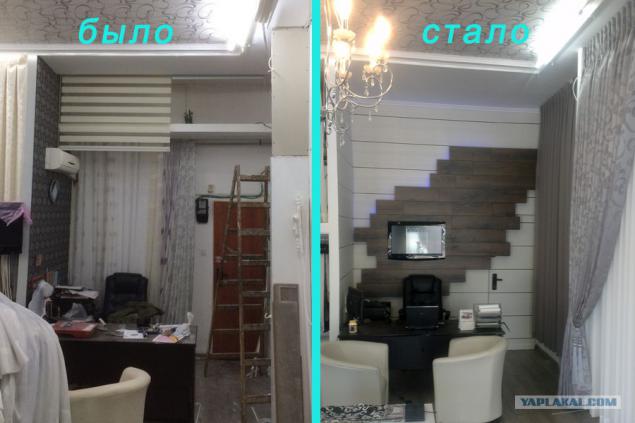
Almost the same as happened in my case. One morning, going into my store, I realized that something must change. Shop sells curtains, wallpaper and laminate. And I decided to make a niche plasterboard afigenno big and beautiful curtains.
But we are not talking about it ...
32 photo.
But as plasterboard ordered with an excess of the same time and I decided to ennoble the place seller.
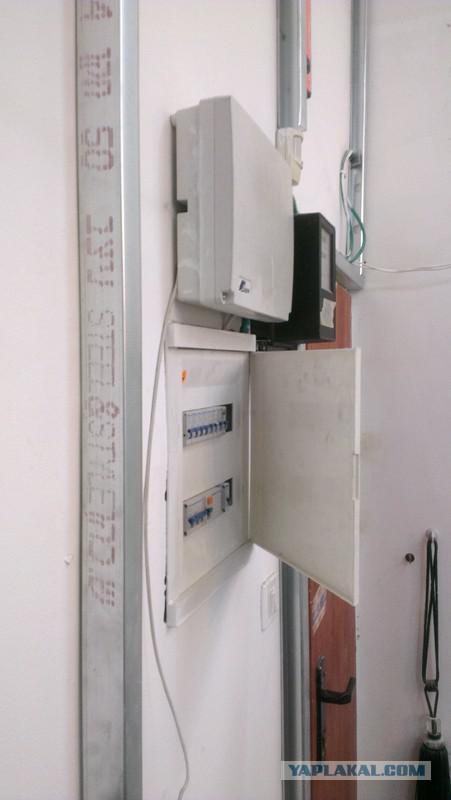
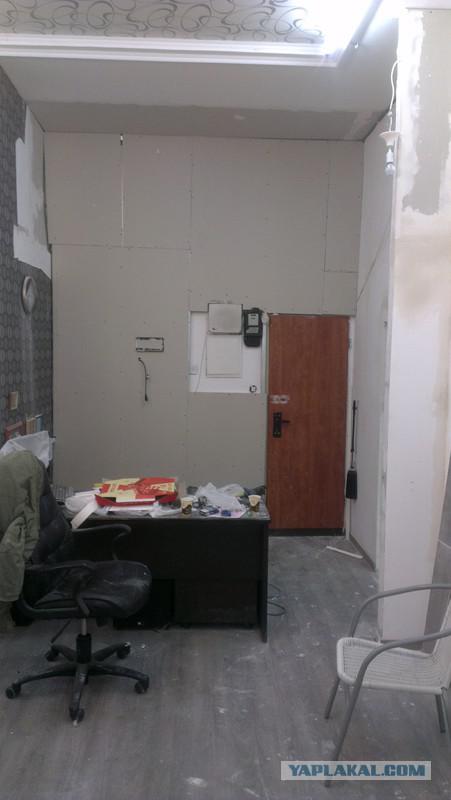
For the seller has a wall hung with all the confusing wires. There was the same and the counter and cupboard door and the signaling
in the utility room. Before all this beauty, I just closed the curtains in several layers. Eyes do not see - the heart does not hurt.
Photo 1

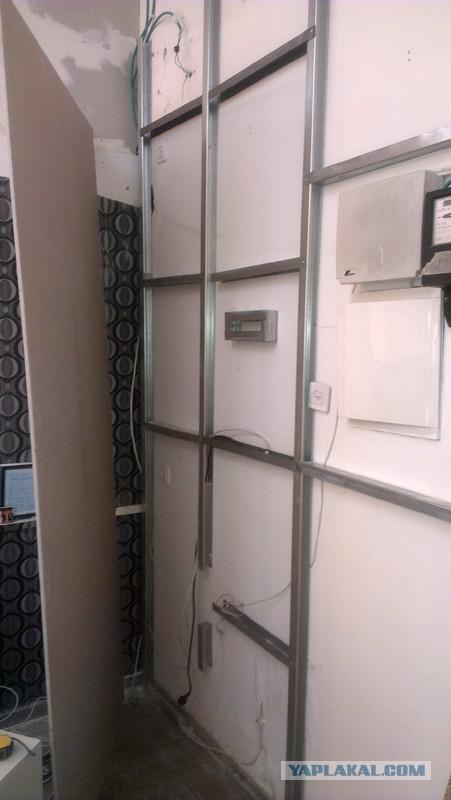
Stripped all the curtains destroyed obscure shelf. Air Conditioning - r burner. I align the ceiling nasverlil wall profile. Extra
wire removed and have something like paved between profiles.
Photo 2
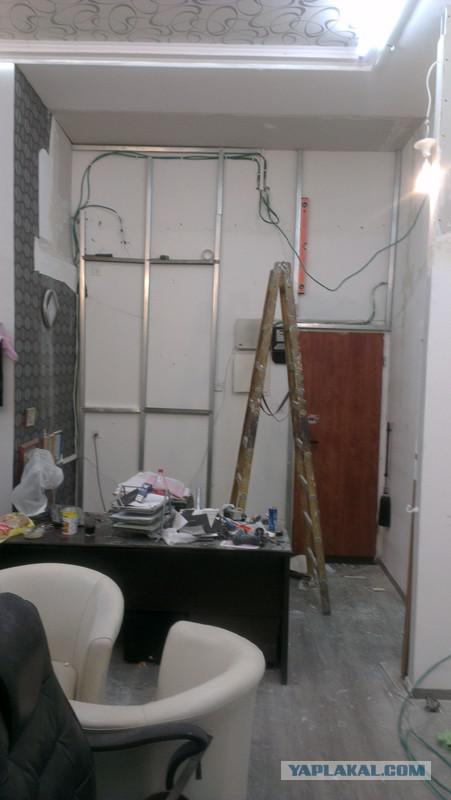
Photo 3

Photo 4
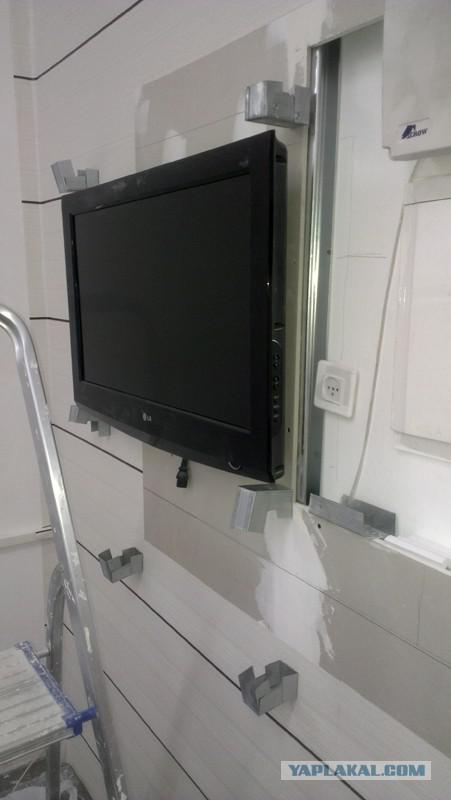
We put a sheet of drywall. The square of the profiles - a mount for your TV. And it is not much I believe in televisions that hang on the cast without all of the gains.
Photo 5
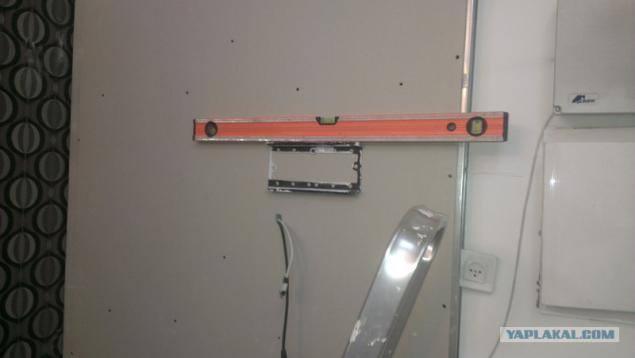
Screw the sheet. With the level of pre-produced measurements, riveted taped under zomboyaschik. Through dyrdochki
led wire HDMI and 220
Photo 6
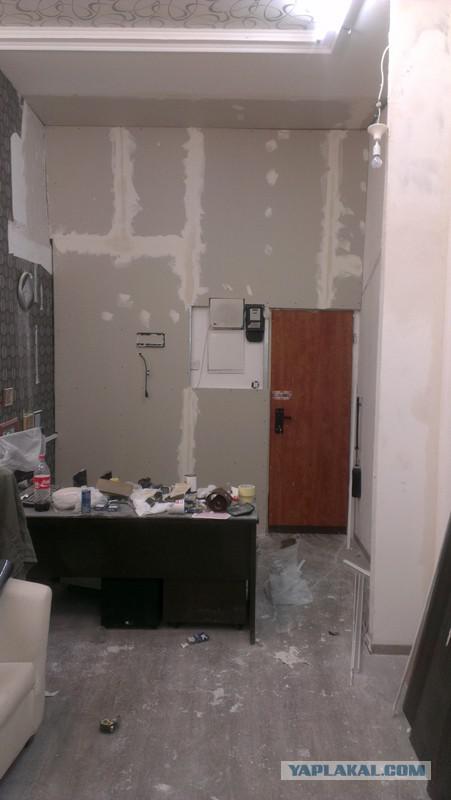
Plasterboard to achieve a total area of
Photo 7
spatula toil over huge gaps that have turned out as a result of my squint.
Photo 8
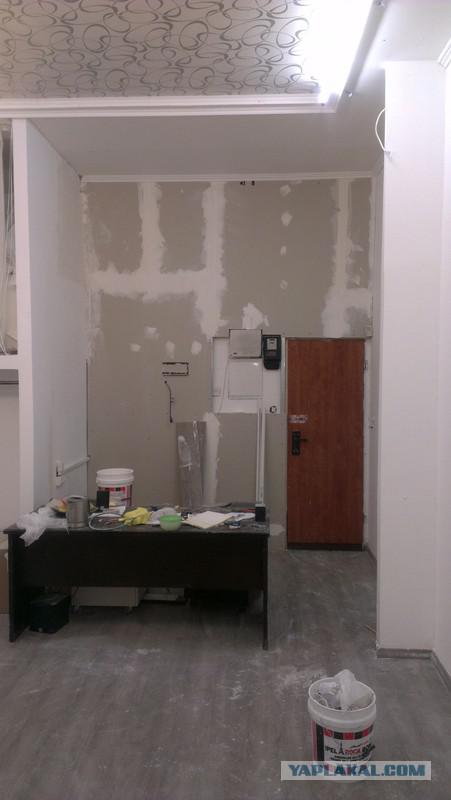
stripped the old wallpaper paint the ceiling and walls
Photo 9
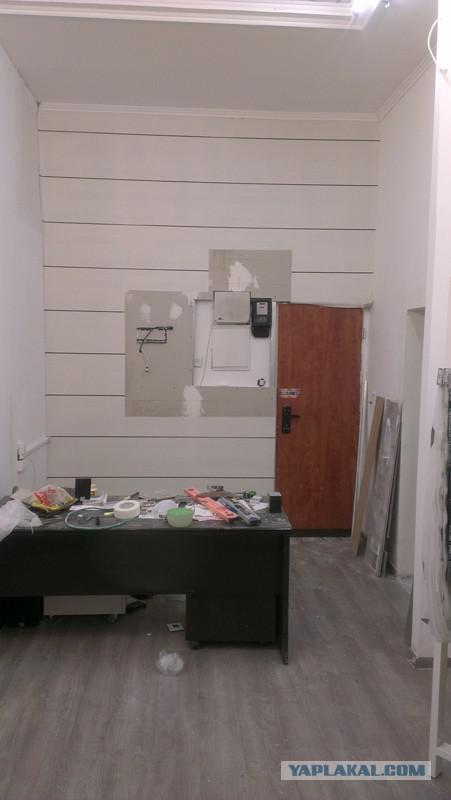
Clay new wallpaper
Photo 10
At this point I start a new phase in realizing his debut design solutions.
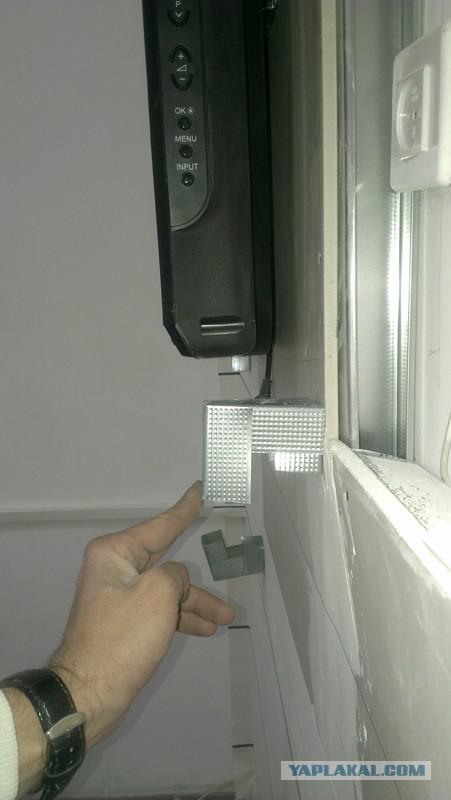
I append to place the TV on the wall and nasverlivayu (prisverlivayu sure to tinny rails that under plasterboard) small attachment made from the remnants of profiles.
Photo 11
Legs do two centimeters shorter than the front side of the TV
Photo 12
I mold them in a chaotic manner. The main thing that got used in a profile. (the one under the plasterboard)
Photo 13
Then, get my feet screwed thin sheets of MDF 8mm. Although it is possible and easy to do with plywood. but I just used what unnecessarily pylilos closet.
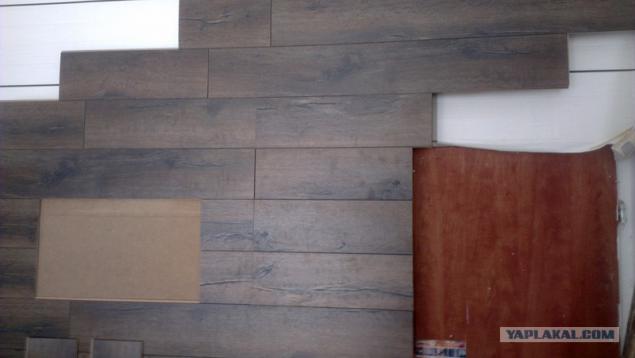
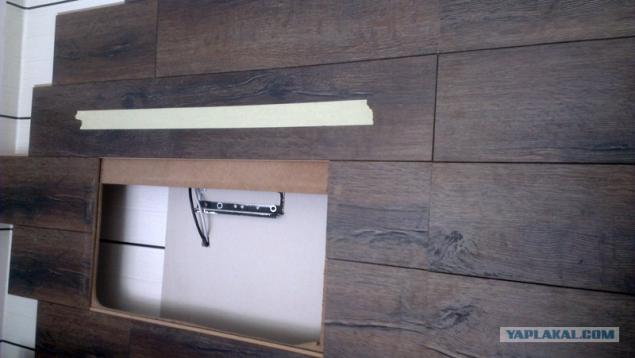
I do not close these doors and sheets only place where there are traffic jams counter and the signaling.
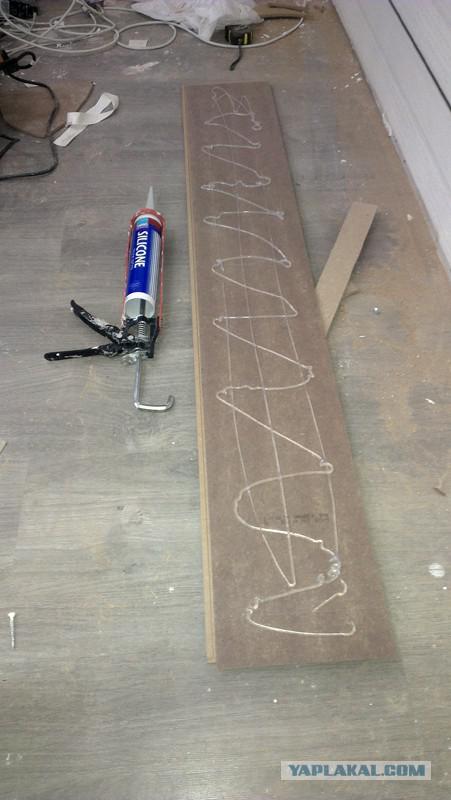
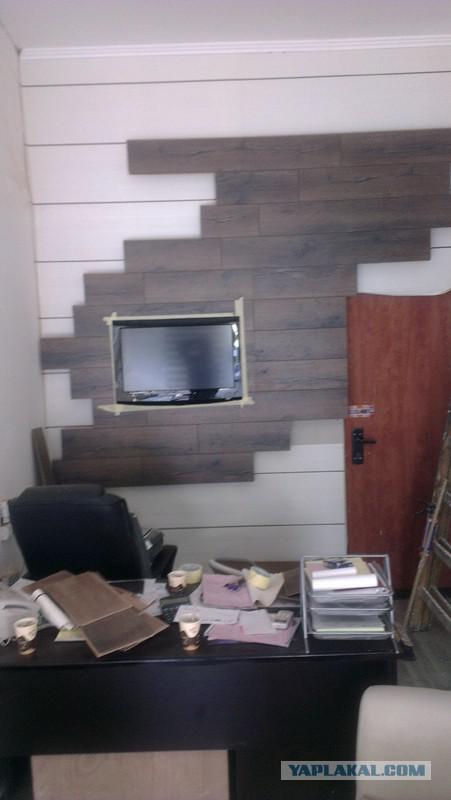
On the resulting wall starting with silicone and hot-melt adhesive residues begin to mold the laminate are not allowed to throw a toad. Three square meters in total.
Photo 14
Bonding technology is very simple. Apply silicone on the back of the laminate and then put a couple of points of hot glue on the corners and the center. And then quickly - quickly, I had not had time to harden hotmelt - or laminate are putting into place.
Photo 15
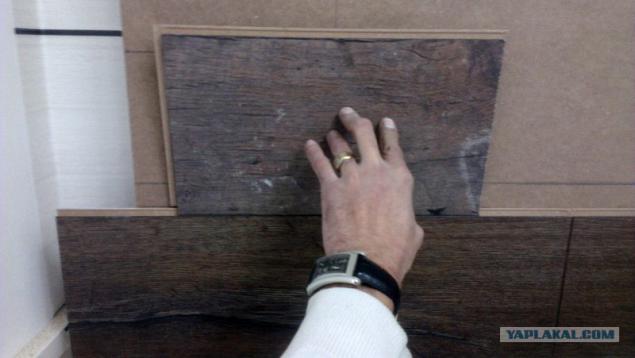
The idea is that the adhesive grasps immediately but keeps lousy. But silicone tightly enough but more than a day to dry. How dry you can be sure that nothing has never will fall off.
Photo 16
Laminate collect for the same system and that on the floor. lock to lock only from the bottom - in the upper
Photo 17
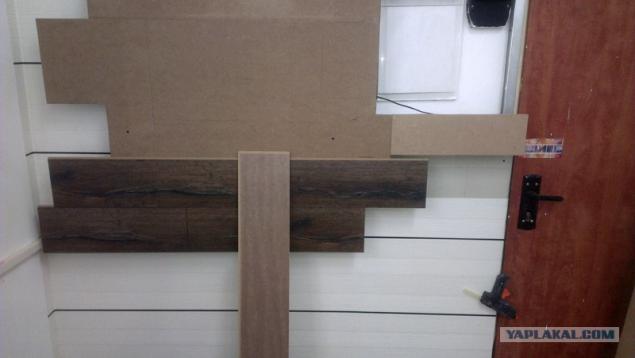
importantly securely attach the very first strip laminate and allow it to dry. and the rest will go like clockwork.
For 40 minutes it turned here is:
Photo 18
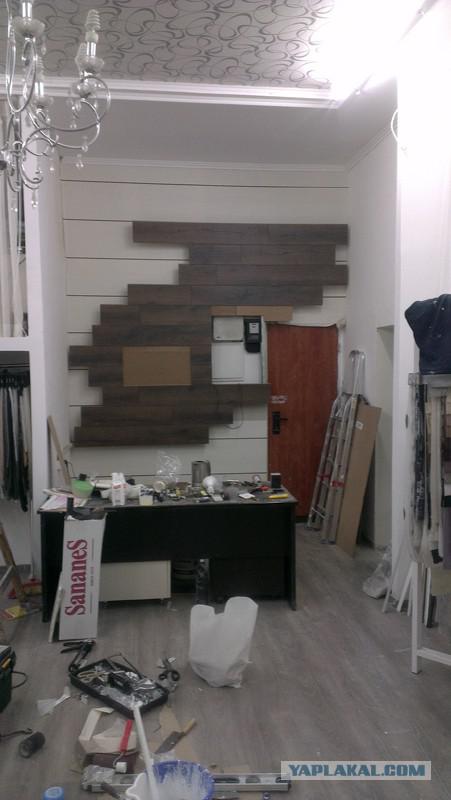
neighbor angle
Photo 19
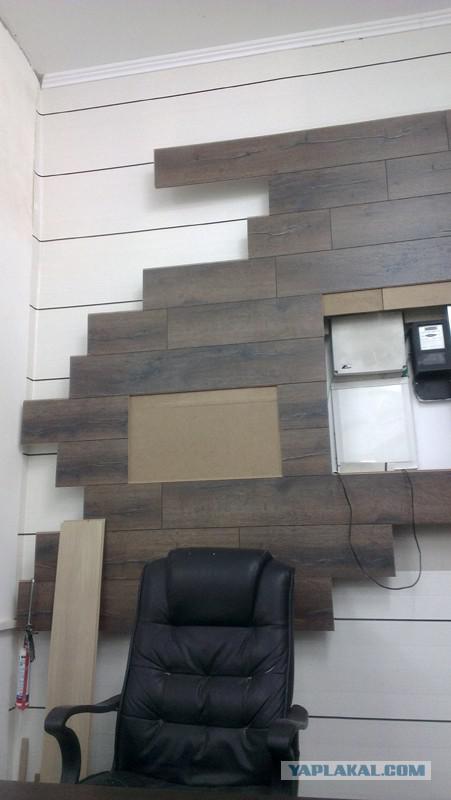
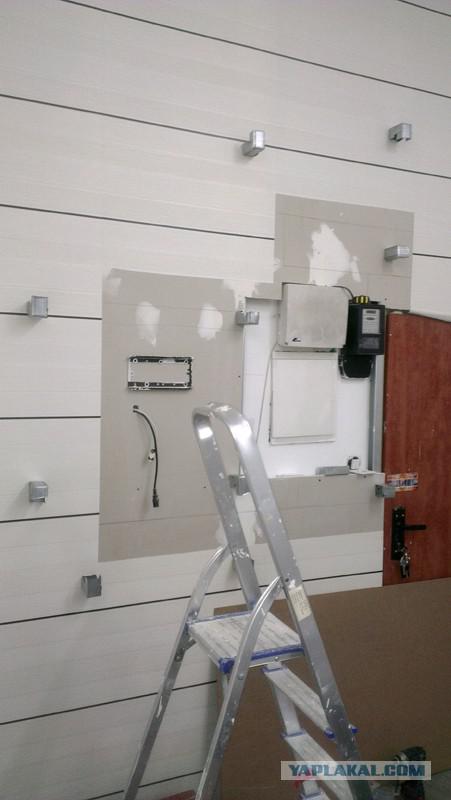
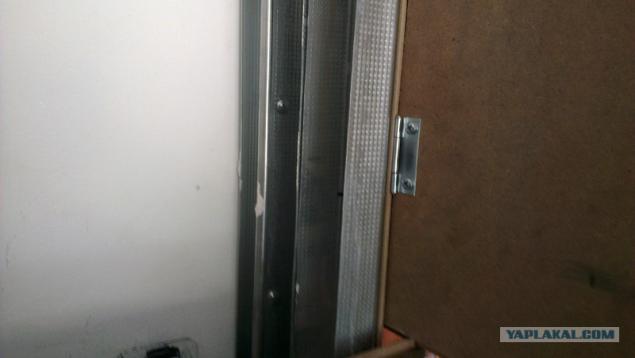
Then, from the same make MDF door on hinges for all electro-a feature that the wall.
Doshtukovuyu profile to the level of the resulting laminate walls and put a small loop on the screws and nuts directly to the profile.
Photo 20
the resulting laminate is pasted over the door trying to get into the grain pattern. (I have not really got it because protupila. And I remind you that the sculpted design of the remains.)
Photo 21

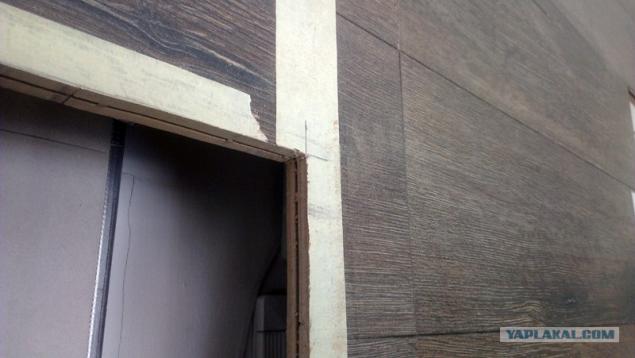
Importantly do not forget to cut the locks with the top and bottom of the laminate. What would the door could be opened freely.
Photo 22
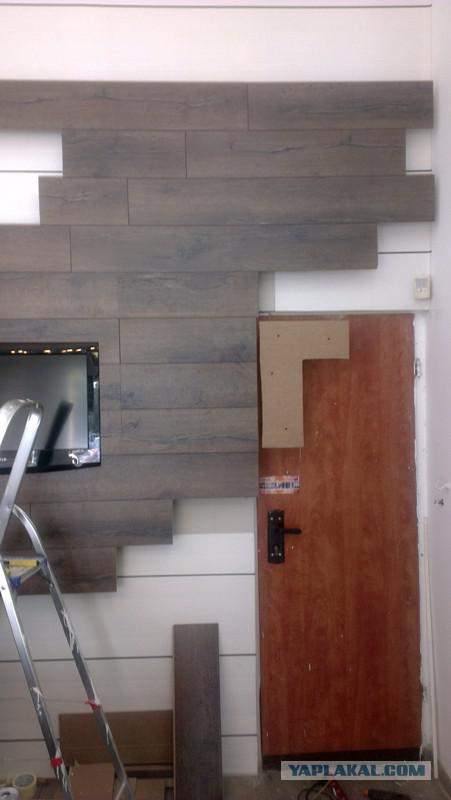
Go to carving a niche for the TV.
To start cut about. And when he got to mount then in turn let the precise measuring instruments. Ruler and tape measure with the level.
Photo 23
When the size and position of the screen have been pasted accurately calculated the alleged place of cutting masking tape and mark all over it. Then, right front side of all electro-sawed jigsaw.
Photo 24
Attention. Before sawing out the window do not forget to put a new blade with smaller teeth. I for example used for sawing aluminum. A glued masking tape will help you avoid chipping the edges of the laminate, as you cut it from the front.
Photo 25
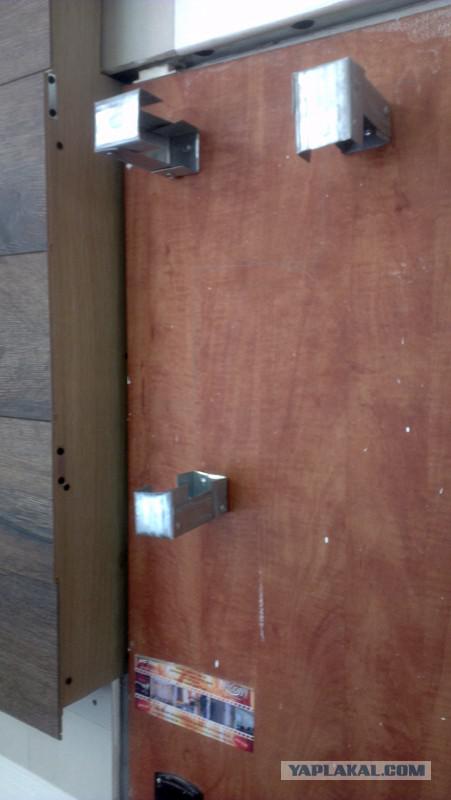
Now go to the door. Rivet-those same legs of the profiles on the door. drove them to the size of
Photo 26
Everything else on the knurled pattern. MDF and laminate top.
Photo 27
The doors to seal wallpaper. Wallpaper glued to iron lousy, so all I had to glue the edge is folded and rubber cement.
Photo 28

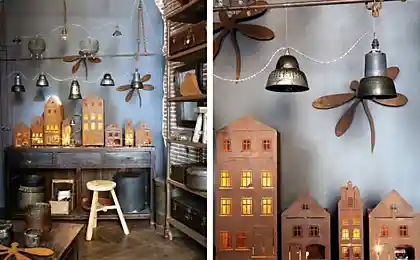
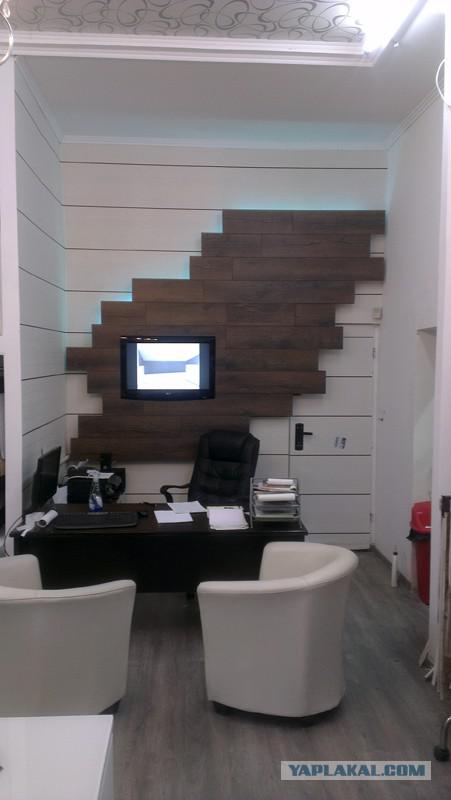
Dokleivayu wallpaper for the remainder of the wall and throws ice illumination between the laminate and plasterboard. Navozhu "Finish»
Picture 29.
here so briefly and turned ...
30
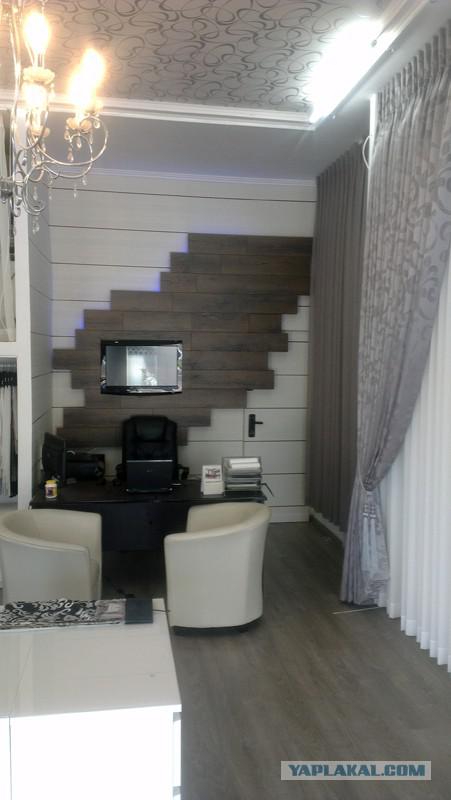
Picture for illustration ... kako was kako was.
Photo 31
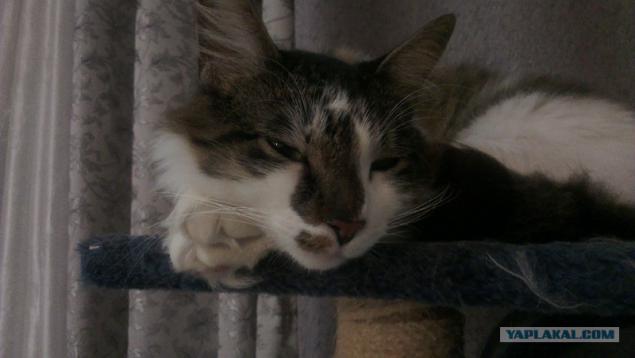
Cats on the job do not hold so that the accompanying homemade pet photo.)))
Photo 32
Posted in [mergetime] 1391616130 [/ mergetime]
You can break. Scold praise ... ... but do not forget. Plasterboard dealt me the first time. The notion and the idea and execution of mine. It does not steal from internet but purely on inspiration.
Source:
As soon as the monkey fell from a palm tree and broke her tail, then immediately started looking for a warm and cozy cave for licking the injury. Since then, found the first mention of the arrangement, the design of premises and residential apartments.
Almost the same as happened in my case. One morning, going into my store, I realized that something must change. Shop sells curtains, wallpaper and laminate. And I decided to make a niche plasterboard afigenno big and beautiful curtains.
But we are not talking about it ...
32 photo.

But as plasterboard ordered with an excess of the same time and I decided to ennoble the place seller.
For the seller has a wall hung with all the confusing wires. There was the same and the counter and cupboard door and the signaling
in the utility room. Before all this beauty, I just closed the curtains in several layers. Eyes do not see - the heart does not hurt.
Photo 1

Stripped all the curtains destroyed obscure shelf. Air Conditioning - r burner. I align the ceiling nasverlil wall profile. Extra
wire removed and have something like paved between profiles.
Photo 2

Photo 3

Photo 4

We put a sheet of drywall. The square of the profiles - a mount for your TV. And it is not much I believe in televisions that hang on the cast without all of the gains.
Photo 5

Screw the sheet. With the level of pre-produced measurements, riveted taped under zomboyaschik. Through dyrdochki
led wire HDMI and 220
Photo 6

Plasterboard to achieve a total area of
Photo 7

spatula toil over huge gaps that have turned out as a result of my squint.
Photo 8

stripped the old wallpaper paint the ceiling and walls
Photo 9

Clay new wallpaper
Photo 10

At this point I start a new phase in realizing his debut design solutions.
I append to place the TV on the wall and nasverlivayu (prisverlivayu sure to tinny rails that under plasterboard) small attachment made from the remnants of profiles.
Photo 11

Legs do two centimeters shorter than the front side of the TV
Photo 12

I mold them in a chaotic manner. The main thing that got used in a profile. (the one under the plasterboard)
Photo 13

Then, get my feet screwed thin sheets of MDF 8mm. Although it is possible and easy to do with plywood. but I just used what unnecessarily pylilos closet.
I do not close these doors and sheets only place where there are traffic jams counter and the signaling.
On the resulting wall starting with silicone and hot-melt adhesive residues begin to mold the laminate are not allowed to throw a toad. Three square meters in total.
Photo 14

Bonding technology is very simple. Apply silicone on the back of the laminate and then put a couple of points of hot glue on the corners and the center. And then quickly - quickly, I had not had time to harden hotmelt - or laminate are putting into place.
Photo 15

The idea is that the adhesive grasps immediately but keeps lousy. But silicone tightly enough but more than a day to dry. How dry you can be sure that nothing has never will fall off.
Photo 16

Laminate collect for the same system and that on the floor. lock to lock only from the bottom - in the upper
Photo 17

importantly securely attach the very first strip laminate and allow it to dry. and the rest will go like clockwork.
For 40 minutes it turned here is:
Photo 18

neighbor angle
Photo 19

Then, from the same make MDF door on hinges for all electro-a feature that the wall.
Doshtukovuyu profile to the level of the resulting laminate walls and put a small loop on the screws and nuts directly to the profile.
Photo 20

the resulting laminate is pasted over the door trying to get into the grain pattern. (I have not really got it because protupila. And I remind you that the sculpted design of the remains.)
Photo 21

Importantly do not forget to cut the locks with the top and bottom of the laminate. What would the door could be opened freely.
Photo 22

Go to carving a niche for the TV.
To start cut about. And when he got to mount then in turn let the precise measuring instruments. Ruler and tape measure with the level.
Photo 23

When the size and position of the screen have been pasted accurately calculated the alleged place of cutting masking tape and mark all over it. Then, right front side of all electro-sawed jigsaw.
Photo 24

Attention. Before sawing out the window do not forget to put a new blade with smaller teeth. I for example used for sawing aluminum. A glued masking tape will help you avoid chipping the edges of the laminate, as you cut it from the front.
Photo 25

Now go to the door. Rivet-those same legs of the profiles on the door. drove them to the size of
Photo 26

Everything else on the knurled pattern. MDF and laminate top.
Photo 27

The doors to seal wallpaper. Wallpaper glued to iron lousy, so all I had to glue the edge is folded and rubber cement.
Photo 28

Dokleivayu wallpaper for the remainder of the wall and throws ice illumination between the laminate and plasterboard. Navozhu "Finish»
Picture 29.

here so briefly and turned ...
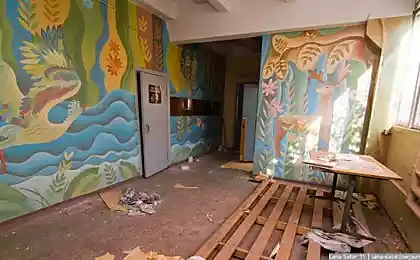
30

Picture for illustration ... kako was kako was.
Photo 31

Cats on the job do not hold so that the accompanying homemade pet photo.)))
Photo 32
Posted in [mergetime] 1391616130 [/ mergetime]
You can break. Scold praise ... ... but do not forget. Plasterboard dealt me the first time. The notion and the idea and execution of mine. It does not steal from internet but purely on inspiration.

Source: