574
Young fathers as interesting
Install a ramp on the porch was not no difficulty.
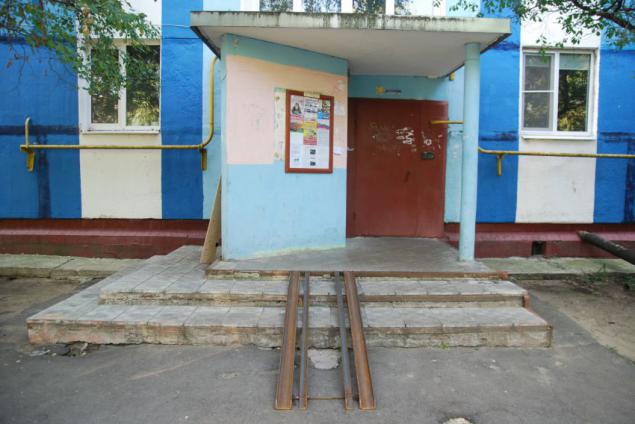
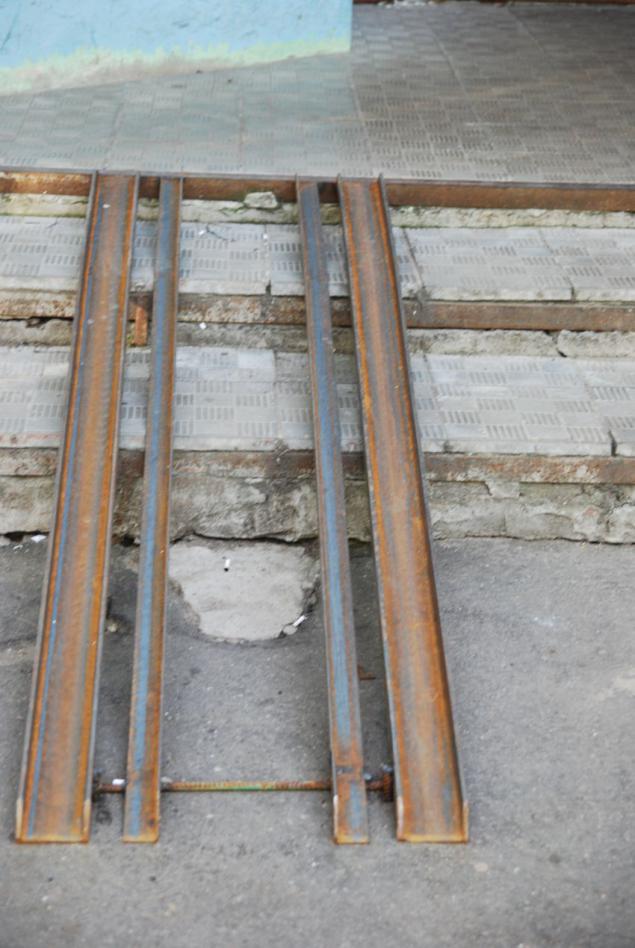
The only extra lanes were installed for the front castors (the distance between them is somewhat narrower than that between the rear).
It proved much more difficult to solve the problem with the installation of a ramp inside the entrance (6 steps before the lift).
The opening is narrow, and installing a ramp like the one on the porch, would have caused a flurry of indignation on the part of the residents entrance. In the end, the people (especially the elderly) can be screwed on the modified stairs.
Solved the problem as follows:
1. Place a sheet of plywood on the steps of a width of 80 centimeters.
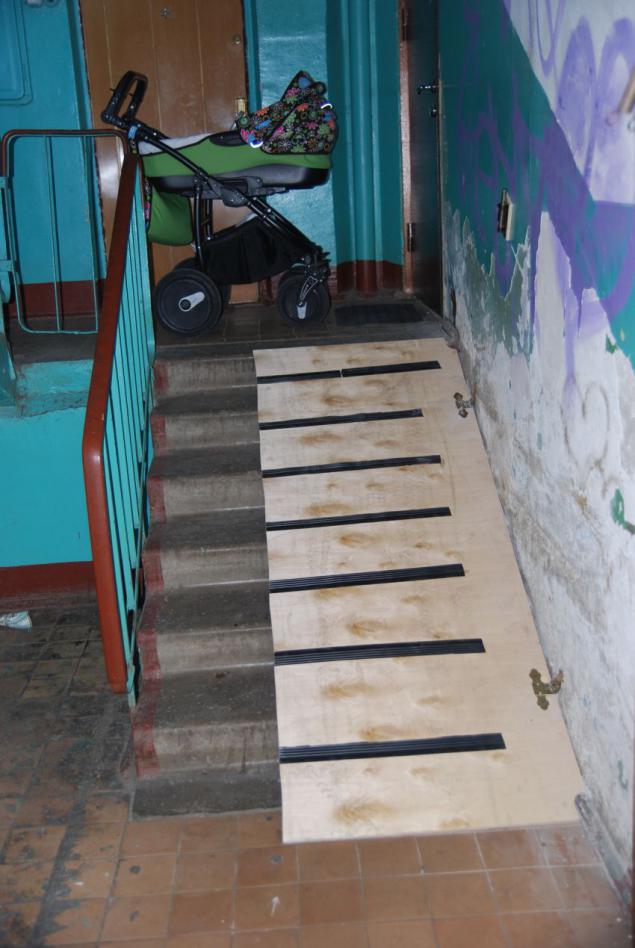
2. On the front of the liquid nails stuck on the rubber strip, so as not to slip on the board (especially in winter, when the soles of shoes under the mess of snow and mud).
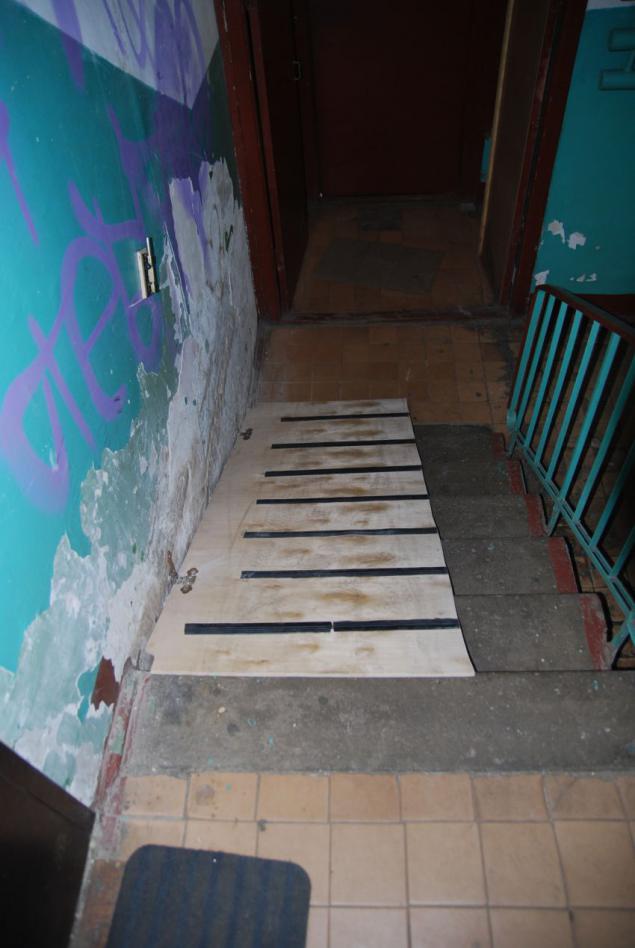
3. Attach the plywood to the hinges to the wall entrance
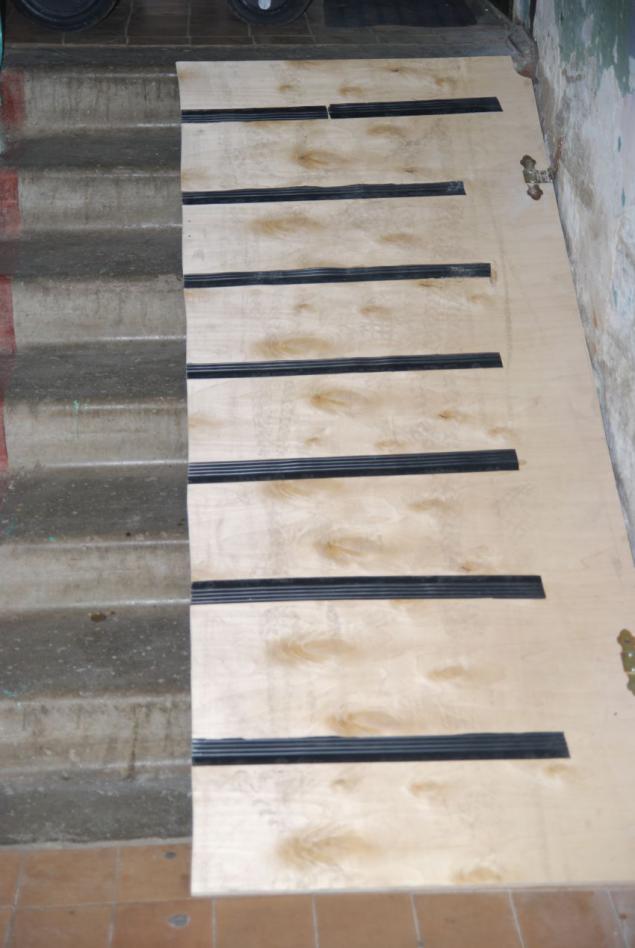
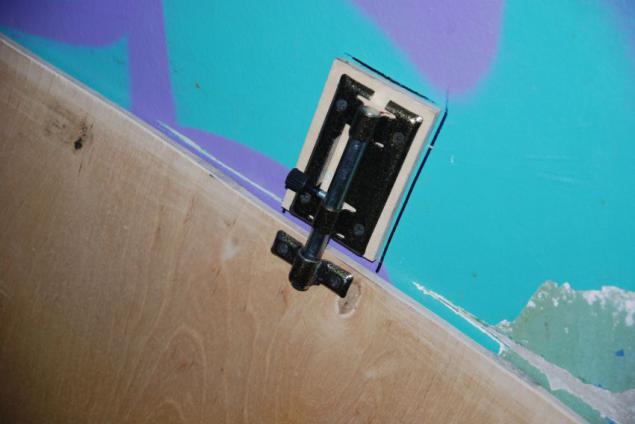
4. Installed bolt on the same wall
In the open form, ready for use, you have already seen my ramp.
So it looks fully assembled, the neighbors do not interfere.
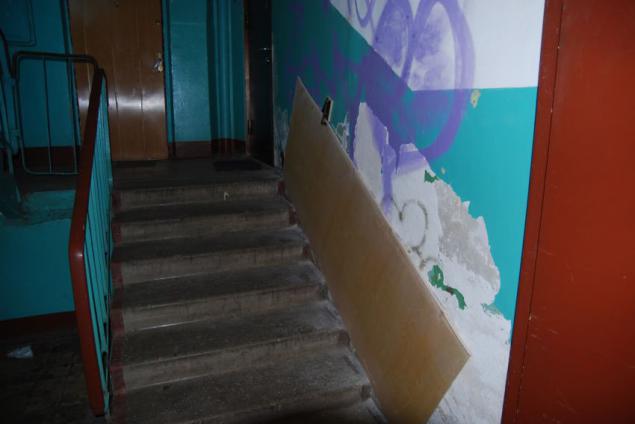
Do not claim to be the inventor of this construction probably already have these. And do not pretend that this design - the best way to solve this problem.
I hope this post will help dads, faced with a similar problem.
--img8--

The only extra lanes were installed for the front castors (the distance between them is somewhat narrower than that between the rear).

It proved much more difficult to solve the problem with the installation of a ramp inside the entrance (6 steps before the lift).
The opening is narrow, and installing a ramp like the one on the porch, would have caused a flurry of indignation on the part of the residents entrance. In the end, the people (especially the elderly) can be screwed on the modified stairs.
Solved the problem as follows:
1. Place a sheet of plywood on the steps of a width of 80 centimeters.

2. On the front of the liquid nails stuck on the rubber strip, so as not to slip on the board (especially in winter, when the soles of shoes under the mess of snow and mud).

3. Attach the plywood to the hinges to the wall entrance

4. Installed bolt on the same wall

In the open form, ready for use, you have already seen my ramp.
So it looks fully assembled, the neighbors do not interfere.

Do not claim to be the inventor of this construction probably already have these. And do not pretend that this design - the best way to solve this problem.
I hope this post will help dads, faced with a similar problem.
--img8--

