831
Maintenance and modernization of Mac Book Pro 13
So it was my turn to join the ranks of friendly rukozhopov.
Today I want to tell you how I maintain and update its MacBook Pro 13.
21 photo.
This notebook I bought in Hong Kong, in the autumn of 2010. Before that, I thought for a long time - if I want to get acquainted with the Mac OS, or well, it nafig. Still, curiosity won out and I decided to try.
After four years of continuous operation, I can tell you that this is quite different from Vind operating system, with its advantages and disadvantages. Something better implemented on Windows, something here, but I'm not a bit sorry that I bought a poppy beech.
But, no matter how steep the apple was not technology, it is still necessary Serviced. Some parts wear out, so it's time to TO my typewriter.
First of all I need to change the battery, and then clean the dust, and replace hard disk drives in the more capacious as 320GB is not enough.
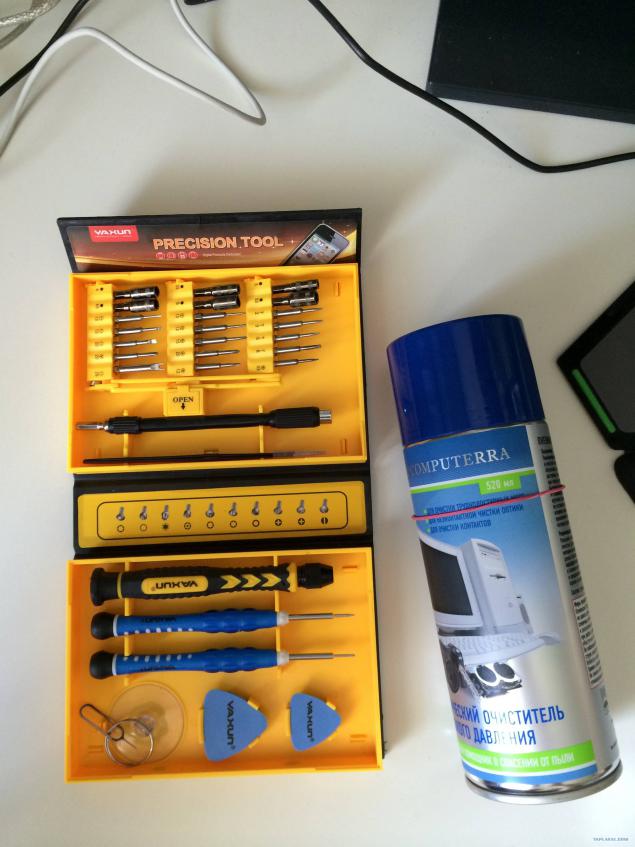
To work on noutom was bought by such a set of tools and spray to clean the dust. Very cool stuff, that's only after I read his part, the language is no longer rise to call it - "air balloon» :)
Hellish mix.
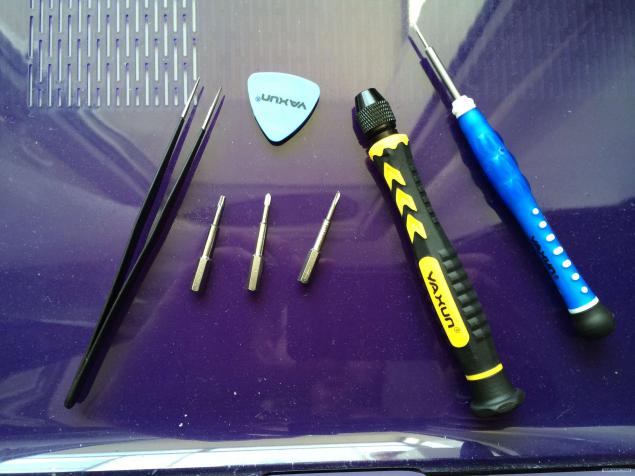
For concrete work with the laptop you need the following tools:
1. 2 Phillips screwdriver - one more small to cover larger for loosening hard, and a radiator with his mother.
2. smart-ass with tetrahedral screwdriver slotted to unscrew the battery mounting.
4. Torx to loosen cooler, mother, and so on.
5. extractor and forceps to release the loops, and so on.
Generally, giblets from poppy are very well organized. All disassembled very simple and easy.
Screw cap nouta. She comes from a single piece of aluminum.
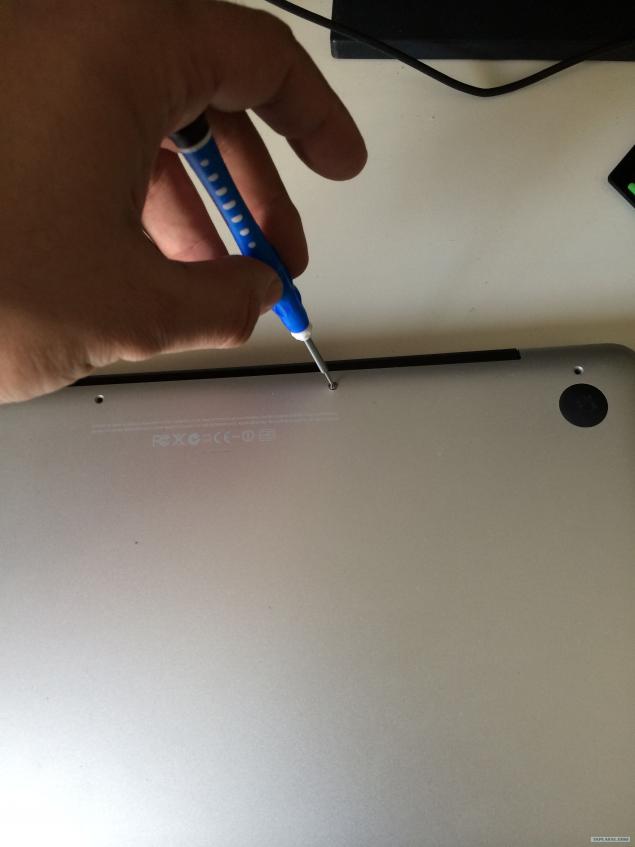
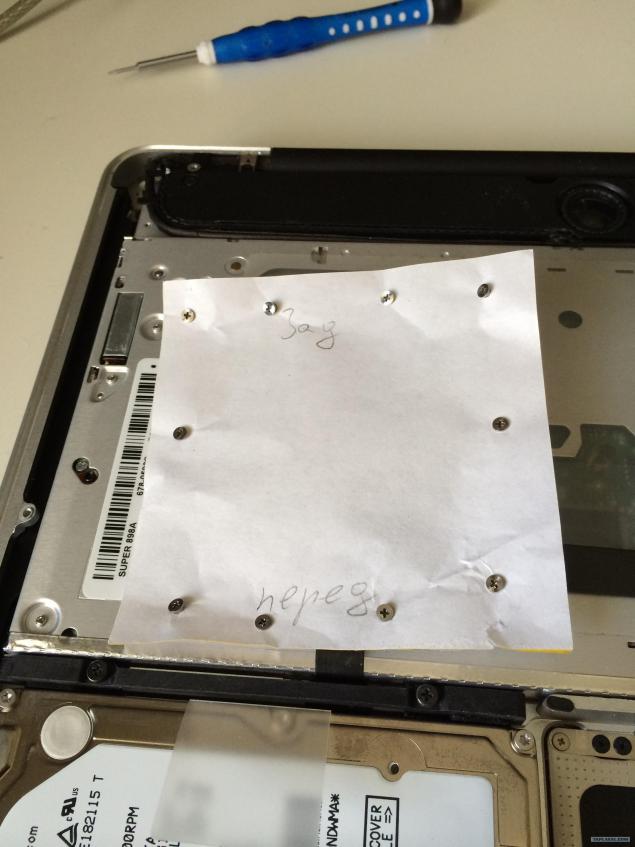
In order not to lose and not to confuse the screws to stick them in the paper as twisted.
This convenient and effective method I spied Ed from the TV program "Schemers" that played on Discovery.
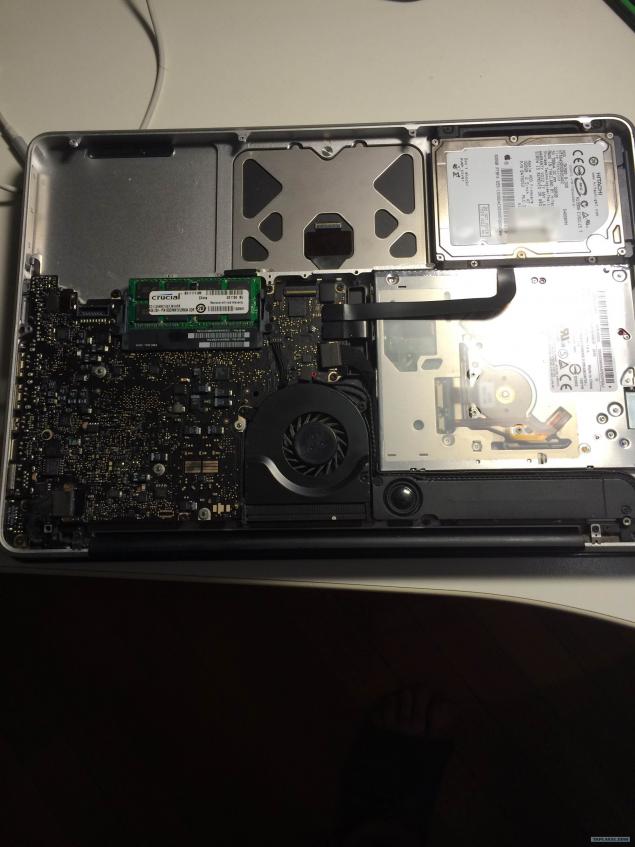
That the inside of the Mac.
There have already been removed battery.
If you go the hourly arrows: an empty space - the battery.
Then the hard disk drive.
Then the CD drive. By the way, in his place, absolutely legally possible to put a second hard.
Apple sells poppies for special slide.
The rectangular, black, crap - subwoofer. And I thought that this sounds good.
Then cooler cooling system and the motherboard itself.
Culler close. The screws have loosened.
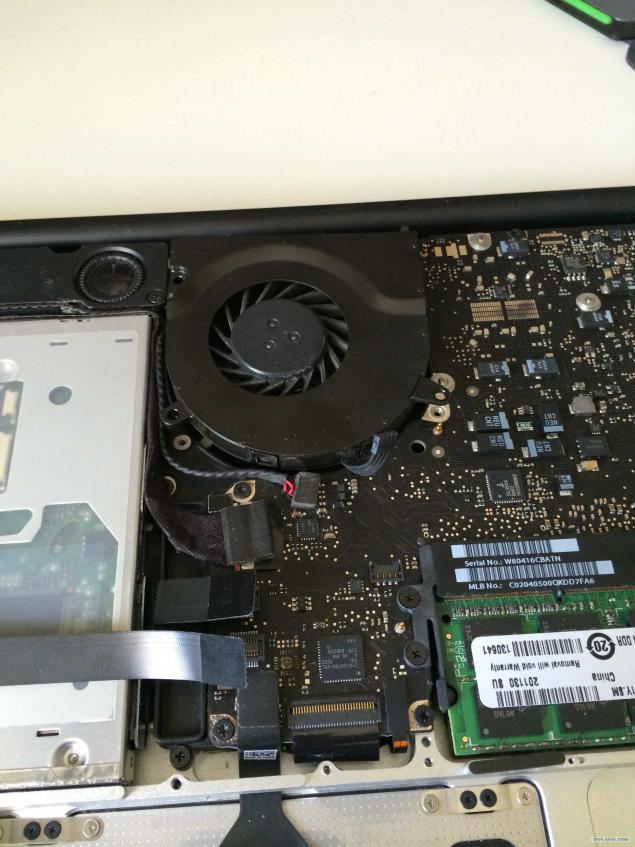
By the way, pay attention.
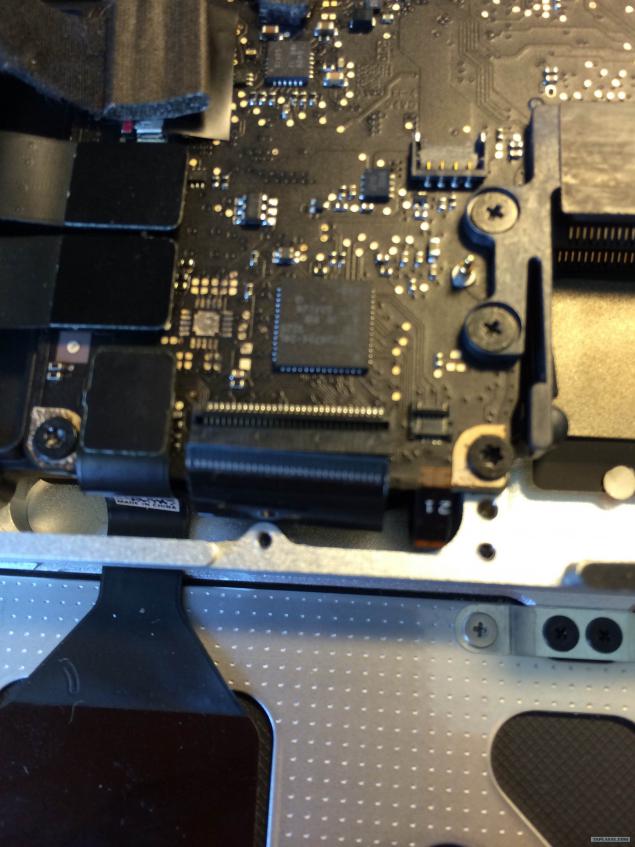
All the trains that the calculated for a quick withdrawal - flat with finger strap, and removed by pulling on itself, which is very convenient.
System same cables are removed by sliding to the side, and with the need to look closely, most of them on the connector has a lock flag to be raised before the pull.
Unfortunately, the picture zamylenny, but seen.
Flat cables from the HD and CD on the left, the system directly from below.
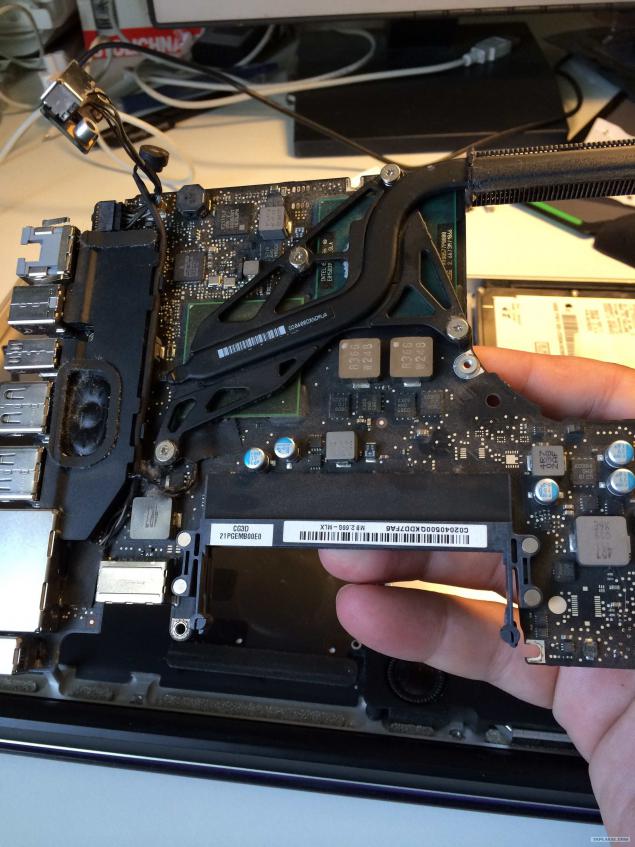
Unscrew and remove the mother.
In the photo she is already in the hands.
There is nothing complicated. It is necessary to loosen a few screws, ordinary Phillips screwdriver. When you twist - cautious, spring-loaded screws. Do not lose the springs.
Disconnect all connectors, unscrew the Torx and take out the only problem may be with the board microphone, it must be carefully peeled off from the body. In the photo he is hanging in the upper left corner.
Then drag all the balcony and purified from the "balloon with air."
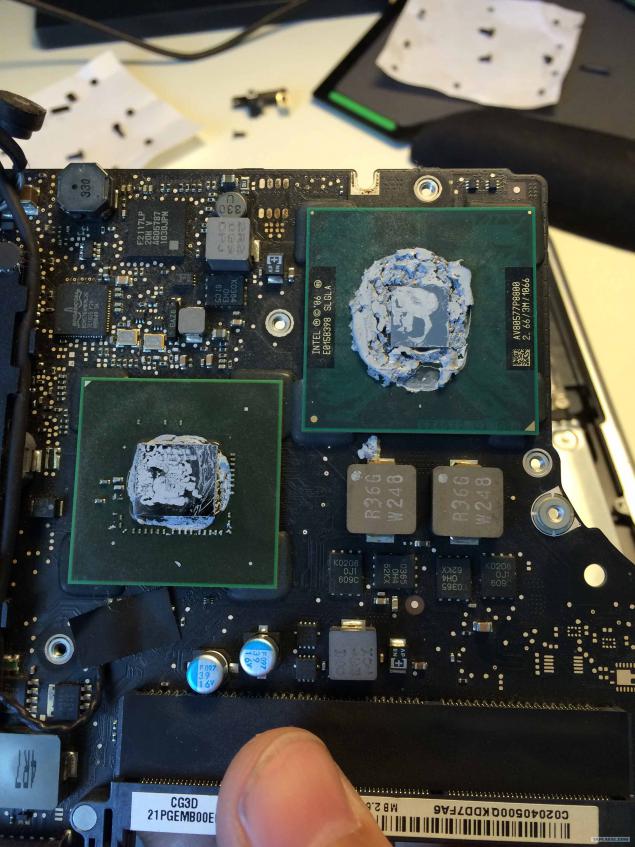
And so here look chips Mac without a radiator.
The CPU is powered by Intel
Video of Nvidia
Clean off the old thermal paste, take up your favorite KPT-8 and causes the thermal grease on all this beauty.
Grease is already dry, easily cleaned off with your fingers.
Then we assemble everything in reverse order.
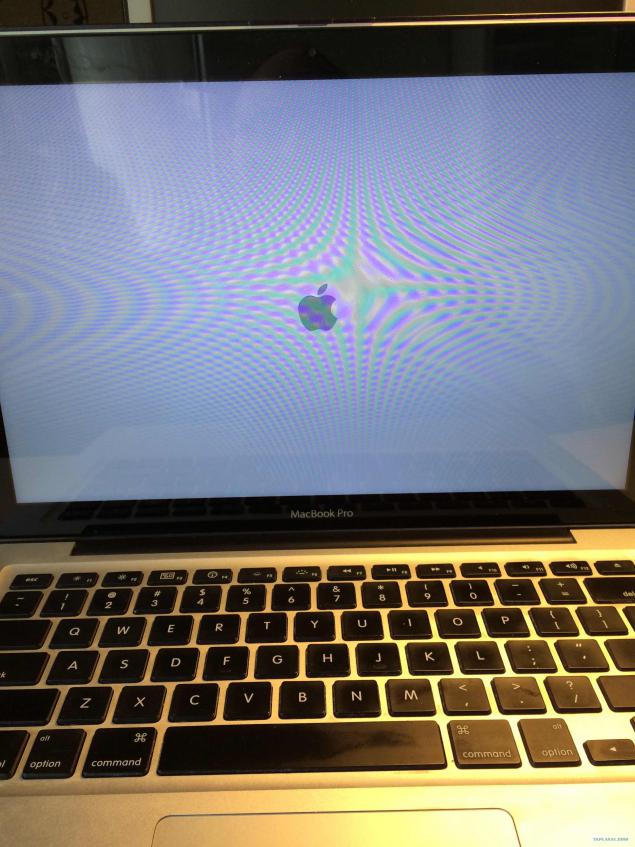
And include.
Yes, how to plow. Exhale.
It reached the main thing - the temperature of the system has fallen, as when buying.
Nout is no longer heated as the plague.
Go to the bacteria.
In fact, all the work took several nights. For I am not in a hurry.
After cleaning and assembly, I put back the old battery, and the old hard drive, and so yuzal laptop until you have some free time for the final spurt.
The photo batteries native and Chinese.
By the way, through the touchpad battery very much sucks dust on it. When I took it, it was covered in dust.
It makes sense to her once a year to remove and clean.
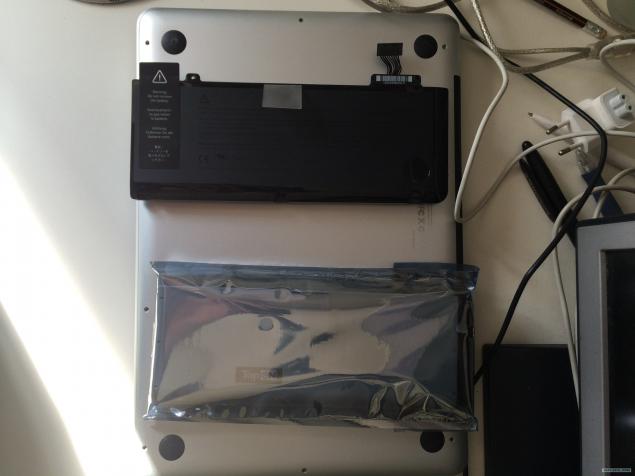
As you know, I took it off at the very beginning.
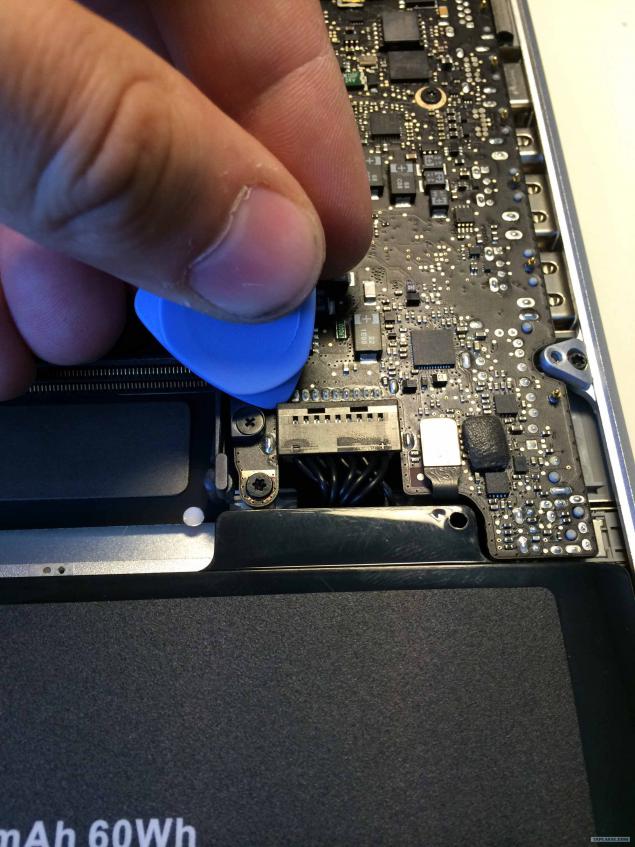
Here is a photo as it is removed connector.
Remove it very simple.
Okruchivaet 2 screws tricky triangular screwdriver.
Turning off the connector, pull the tab, and disable.
New set out in the reverse order.
Yes, I strangled the toad native to buy the battery for 4-5 thousand rubles, according to this, I bought chum for 2000P.
And miscalculated, the battery holds no more than 2.5-3 hours, despite the fact that the new native calmly held about 4-5 hours, and if all connected, all the 6.
In general, there are no miracles, but I knew what was going on. A year later, I buy home, laptop, or have already changed.
Yes, after you install do the calibration - full charge until the laptop is not disconnected, do not touch the computer for about 5 hours, and then fully charge.
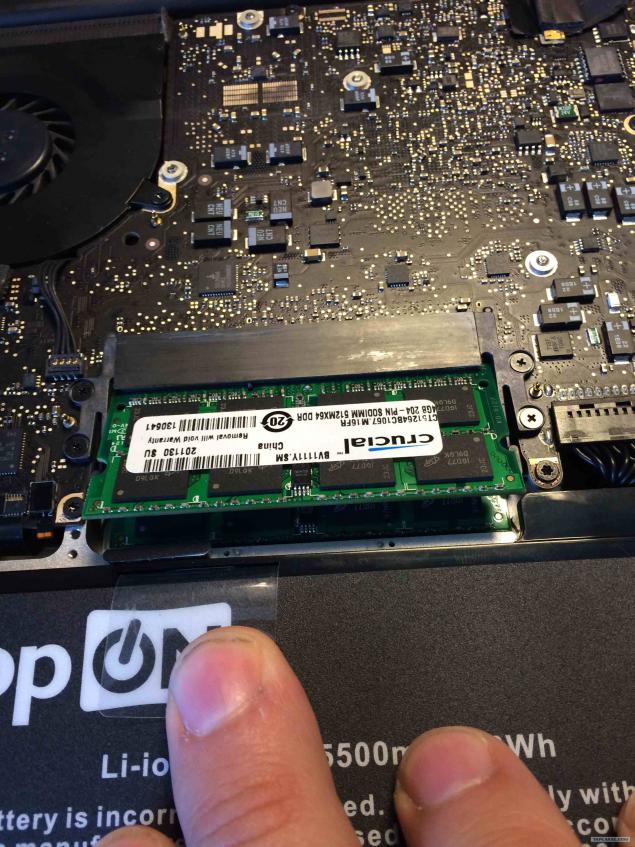
In any case, how to shoot a photo spread memory.
There generally are no tricks, like all other new laptop.
Wring out two antennae, she jumped die.
Yes, bazavo on the Mac went to 4GB of RAM, I even brought 4GB, for apple appliances I have always loved what would have been a lot of memory.
Having dealt with the battery, go to the hard disk.
I decided to try to 1TB Seagate Hybrid.
Long thought about buying it, since the first models people complained that the hybrid of the rapidly dying. Now, like, all fixed.
Here, both Hardy.
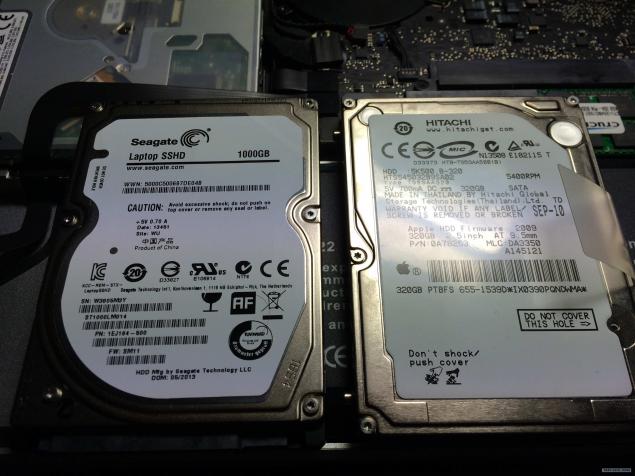
Replacement is very simple.
Unscrew the two screws, take out the hard-tab disconnect.
Turn off with Hardy expanders that it is held within the housing.
By the way, they fall on the rubberized lodgements, this disc is not fixed in the housing tightly.
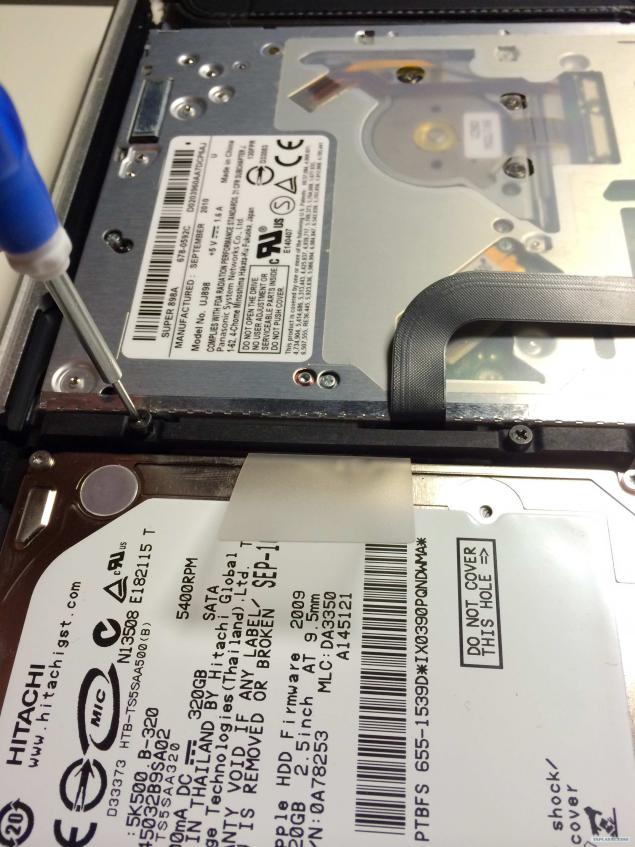
Putting it all in reverse order. Tab glue.
Yes, the railway gives another I did not get enough attention from others. Hug me and sundry. operation - it is much less heated old.
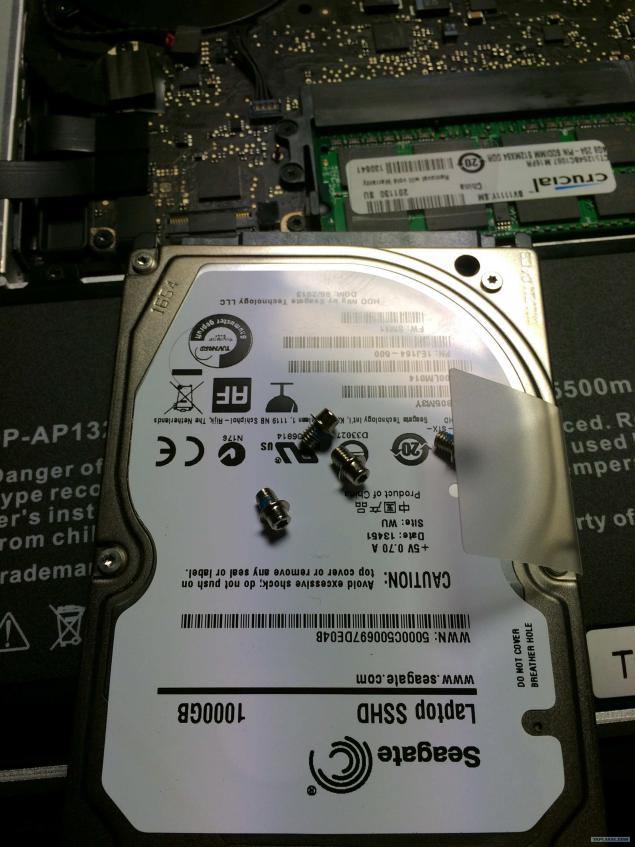
Turn with a bootable USB drive with Mavericks.
How to do it - a lot of guides on the network.
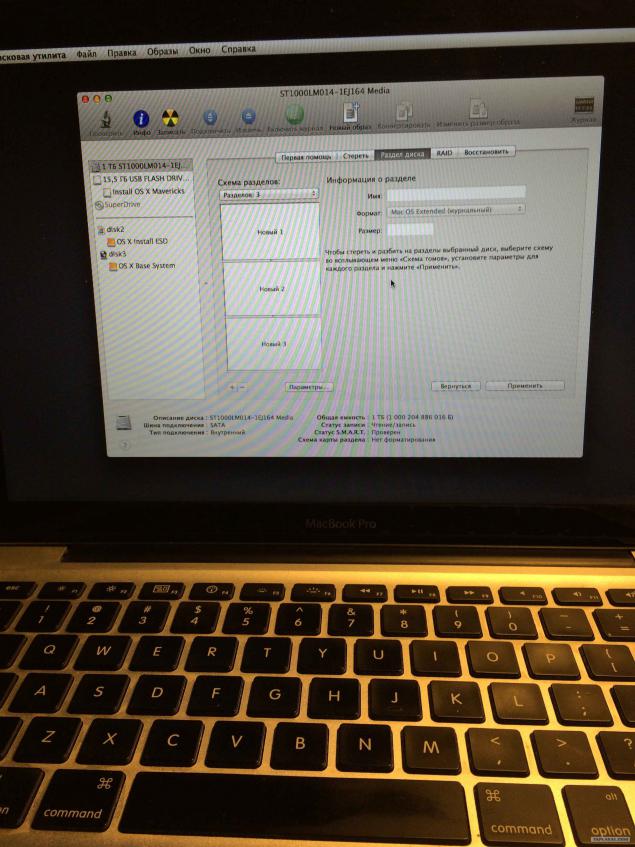
Georgia, go into Disk Utility.
By the way, great invention. It is very easy to work with disks.
Format the hard into 3 sections.
The first system to 350gb.
The second is for the rest to 500GB.
Third for Windows, which I want to put through Boot Camp at 150gb.
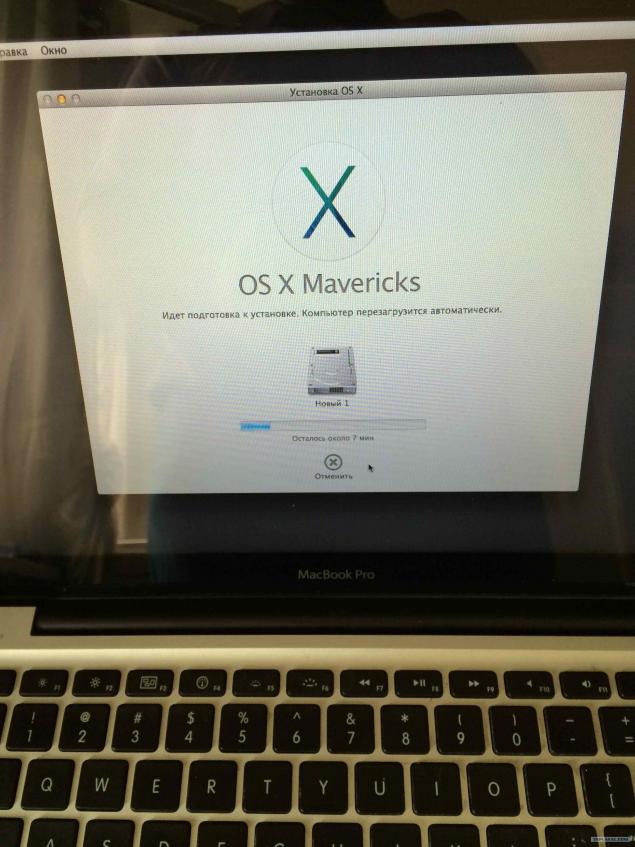
We begin installing Mavericks.
It is the first time did not want to wake up.
It turned out to deliver only through reinstallation, resuming with all necessary from the Internet.
But it fell all OK.
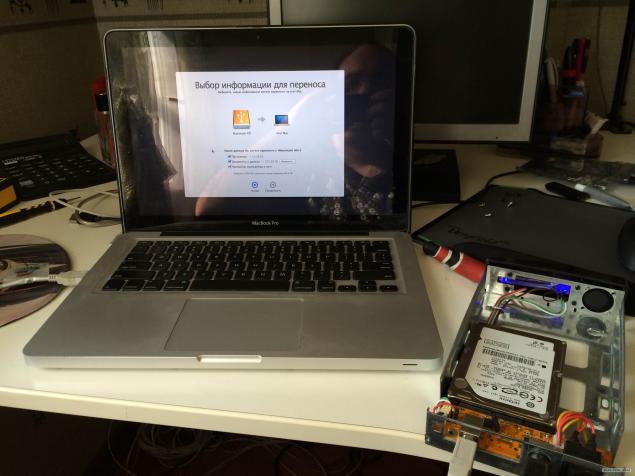
Then connect the old hard disk drive as an external, and run the migration assistant.
The second brilliant prog. Again - standard.
It brings all the user's files from the old disk new.
However, do not be quick, you need about 6 hours.
On this we leave the laptop alone, and go for the evening also find a full PC, with all programs, files, pictures desktop, and so on. Just the place became more.
Very convenient, and there is no hassle, something forgotten, something moved, something you do not know how to move.
P.S.
By the way, in the background an old NEC LCD Monitor 15 inches.
A bunch of years passed, and he still works.
Very convenient to juzat second monitor.
That's all.
At the exit we get rejuvenated for several years Mac Book, which is no longer trying to become a frying pan, quietly works without "drip", and does not suffer from dementia :)
There will be questions, ask.
Tomorrow will tell, as I went through my first laptop, which bought the winter of 2004, a very interesting machine.
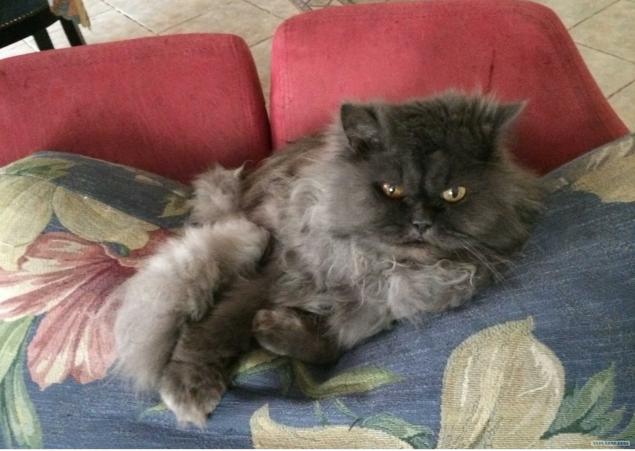
By tradition, the head of OTC Photo :)
He was very unhappy because he wants to the country.
Today I want to tell you how I maintain and update its MacBook Pro 13.
21 photo.

This notebook I bought in Hong Kong, in the autumn of 2010. Before that, I thought for a long time - if I want to get acquainted with the Mac OS, or well, it nafig. Still, curiosity won out and I decided to try.
After four years of continuous operation, I can tell you that this is quite different from Vind operating system, with its advantages and disadvantages. Something better implemented on Windows, something here, but I'm not a bit sorry that I bought a poppy beech.
But, no matter how steep the apple was not technology, it is still necessary Serviced. Some parts wear out, so it's time to TO my typewriter.
First of all I need to change the battery, and then clean the dust, and replace hard disk drives in the more capacious as 320GB is not enough.
To work on noutom was bought by such a set of tools and spray to clean the dust. Very cool stuff, that's only after I read his part, the language is no longer rise to call it - "air balloon» :)
Hellish mix.
For concrete work with the laptop you need the following tools:
1. 2 Phillips screwdriver - one more small to cover larger for loosening hard, and a radiator with his mother.
2. smart-ass with tetrahedral screwdriver slotted to unscrew the battery mounting.
4. Torx to loosen cooler, mother, and so on.
5. extractor and forceps to release the loops, and so on.

Generally, giblets from poppy are very well organized. All disassembled very simple and easy.
Screw cap nouta. She comes from a single piece of aluminum.

In order not to lose and not to confuse the screws to stick them in the paper as twisted.
This convenient and effective method I spied Ed from the TV program "Schemers" that played on Discovery.

That the inside of the Mac.
There have already been removed battery.
If you go the hourly arrows: an empty space - the battery.
Then the hard disk drive.
Then the CD drive. By the way, in his place, absolutely legally possible to put a second hard.
Apple sells poppies for special slide.
The rectangular, black, crap - subwoofer. And I thought that this sounds good.
Then cooler cooling system and the motherboard itself.

Culler close. The screws have loosened.

By the way, pay attention.
All the trains that the calculated for a quick withdrawal - flat with finger strap, and removed by pulling on itself, which is very convenient.
System same cables are removed by sliding to the side, and with the need to look closely, most of them on the connector has a lock flag to be raised before the pull.
Unfortunately, the picture zamylenny, but seen.
Flat cables from the HD and CD on the left, the system directly from below.

Unscrew and remove the mother.
In the photo she is already in the hands.
There is nothing complicated. It is necessary to loosen a few screws, ordinary Phillips screwdriver. When you twist - cautious, spring-loaded screws. Do not lose the springs.
Disconnect all connectors, unscrew the Torx and take out the only problem may be with the board microphone, it must be carefully peeled off from the body. In the photo he is hanging in the upper left corner.
Then drag all the balcony and purified from the "balloon with air."

And so here look chips Mac without a radiator.
The CPU is powered by Intel
Video of Nvidia
Clean off the old thermal paste, take up your favorite KPT-8 and causes the thermal grease on all this beauty.
Grease is already dry, easily cleaned off with your fingers.
Then we assemble everything in reverse order.

And include.
Yes, how to plow. Exhale.
It reached the main thing - the temperature of the system has fallen, as when buying.
Nout is no longer heated as the plague.

Go to the bacteria.
In fact, all the work took several nights. For I am not in a hurry.
After cleaning and assembly, I put back the old battery, and the old hard drive, and so yuzal laptop until you have some free time for the final spurt.
The photo batteries native and Chinese.
By the way, through the touchpad battery very much sucks dust on it. When I took it, it was covered in dust.
It makes sense to her once a year to remove and clean.

As you know, I took it off at the very beginning.
Here is a photo as it is removed connector.
Remove it very simple.
Okruchivaet 2 screws tricky triangular screwdriver.
Turning off the connector, pull the tab, and disable.
New set out in the reverse order.
Yes, I strangled the toad native to buy the battery for 4-5 thousand rubles, according to this, I bought chum for 2000P.
And miscalculated, the battery holds no more than 2.5-3 hours, despite the fact that the new native calmly held about 4-5 hours, and if all connected, all the 6.
In general, there are no miracles, but I knew what was going on. A year later, I buy home, laptop, or have already changed.
Yes, after you install do the calibration - full charge until the laptop is not disconnected, do not touch the computer for about 5 hours, and then fully charge.

In any case, how to shoot a photo spread memory.
There generally are no tricks, like all other new laptop.
Wring out two antennae, she jumped die.
Yes, bazavo on the Mac went to 4GB of RAM, I even brought 4GB, for apple appliances I have always loved what would have been a lot of memory.

Having dealt with the battery, go to the hard disk.
I decided to try to 1TB Seagate Hybrid.
Long thought about buying it, since the first models people complained that the hybrid of the rapidly dying. Now, like, all fixed.
Here, both Hardy.

Replacement is very simple.
Unscrew the two screws, take out the hard-tab disconnect.
Turn off with Hardy expanders that it is held within the housing.
By the way, they fall on the rubberized lodgements, this disc is not fixed in the housing tightly.

Putting it all in reverse order. Tab glue.
Yes, the railway gives another I did not get enough attention from others. Hug me and sundry. operation - it is much less heated old.

Turn with a bootable USB drive with Mavericks.
How to do it - a lot of guides on the network.
Georgia, go into Disk Utility.
By the way, great invention. It is very easy to work with disks.
Format the hard into 3 sections.
The first system to 350gb.
The second is for the rest to 500GB.
Third for Windows, which I want to put through Boot Camp at 150gb.

We begin installing Mavericks.
It is the first time did not want to wake up.
It turned out to deliver only through reinstallation, resuming with all necessary from the Internet.
But it fell all OK.

Then connect the old hard disk drive as an external, and run the migration assistant.
The second brilliant prog. Again - standard.
It brings all the user's files from the old disk new.
However, do not be quick, you need about 6 hours.
On this we leave the laptop alone, and go for the evening also find a full PC, with all programs, files, pictures desktop, and so on. Just the place became more.
Very convenient, and there is no hassle, something forgotten, something moved, something you do not know how to move.
P.S.
By the way, in the background an old NEC LCD Monitor 15 inches.
A bunch of years passed, and he still works.
Very convenient to juzat second monitor.

That's all.
At the exit we get rejuvenated for several years Mac Book, which is no longer trying to become a frying pan, quietly works without "drip", and does not suffer from dementia :)
There will be questions, ask.
Tomorrow will tell, as I went through my first laptop, which bought the winter of 2004, a very interesting machine.
By tradition, the head of OTC Photo :)
He was very unhappy because he wants to the country.


