279
Instructions for making a tree from an old umbrella
Everyone wants a real holiday. Even if you are an adult and a serious person, the soul craves New Year’s fuss and an elegant Christmas tree at home. However, it is not necessary to buy a live tree to create a New Year atmosphere in the house. For human pleasure, too many trees have been damaged. We offer to leave live trees in the forest, and for the house to make a tree from improvised materials.

DepositPhotos
Editorial "Site" It tells you how to do it. house-tree. They're so cute, no words!
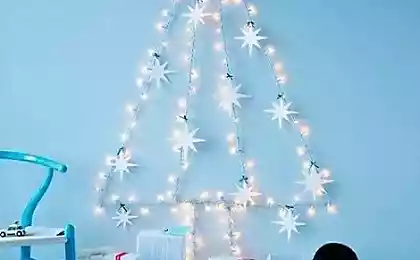
To make an original and cute Christmas tree with your own hands, you will need a pair of umbrellas. In the example, they are green, but any will do, because it is not in color, but in shape. If you have only one extra umbrella, we recommend making the first option, but if there are at least four, feel free to take up the second. So, let’s start with a more detailed instruction.
Tree-making
This is the first option, it is simpler and much more compact. Such a small tree can be placed anywhere. Perfect solution for a small apartment. If you want something bigger, we suggest the second option.
And here is a video in which you can see the process of making a Christmas tree from an umbrella. And don’t let Spanish scare you, because the essence of the process we described in detail above!
about:blank
Agree, to make such a tree will not be difficult, but how much joy and comfort it brings. After the holidays, it can be saved or thrown away, not so sorry. You do not have to spend extra money on an artificial tree, and the living one will remain quietly growing in the forest!
If you like to make simple and inexpensive jewelry, be sure to see our material on how to decorate the house and yard for the New Year, without spending anything extra.
And be sure to see a wonderful selection of original and unusual crafts from cones for the home.
What kind of tree will you put in your house this year? Tell me in the comments.
Photo by depositphotos preview.

DepositPhotos
Editorial "Site" It tells you how to do it. house-tree. They're so cute, no words!
To make an original and cute Christmas tree with your own hands, you will need a pair of umbrellas. In the example, they are green, but any will do, because it is not in color, but in shape. If you have only one extra umbrella, we recommend making the first option, but if there are at least four, feel free to take up the second. So, let’s start with a more detailed instruction.
Tree-making
- So, for the first Christmas tree you will need an umbrella, a small plastic bucket and a dozen New Year's toys. Take care of the sustainability of your tree. Put something heavy in the bucket. Then stick a strip of tape on top to create a kind of grid. Hide the ends of the scotch under the ribbon.
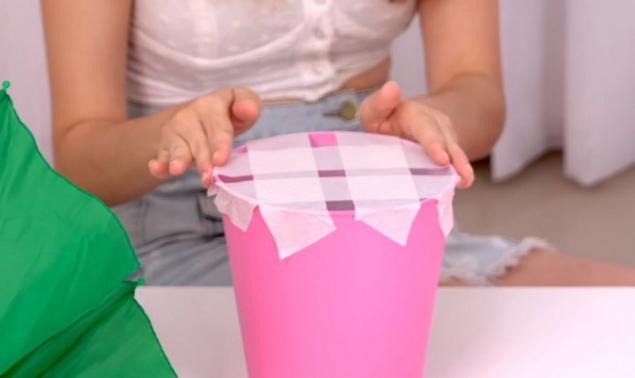
- Now slightly open the umbrella to give your future tree volume. Secure the mechanism of the umbrella with a piece of tape so that it does not fold back.
- Put the umbrella in the center of the bucket, between the scotch strips.

- In fact, the Christmas tree is ready, it remains only to dress it beautifully. Add here your favorite toys, garlands and other jewelry. In general, decorate as you like. By the way, toys to the umbrella is best sewn with threads, so they will hold better.


This is the first option, it is simpler and much more compact. Such a small tree can be placed anywhere. Perfect solution for a small apartment. If you want something bigger, we suggest the second option.
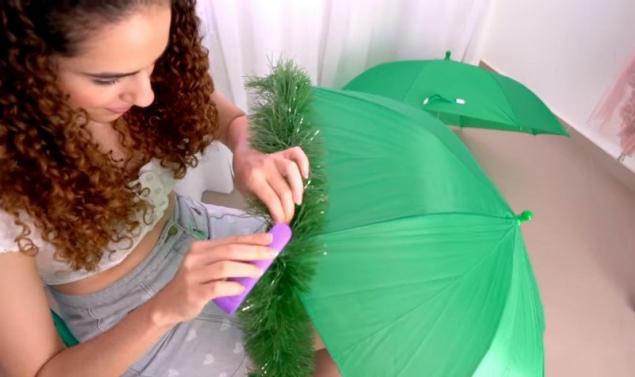
- To do this, you will need five umbrellas, a pair of ribbons of Christmas tinsel, line, threads with needles or a stapler and, of course, Christmas decorations. So, first attach tinsel ribbons to the edges of each umbrella.
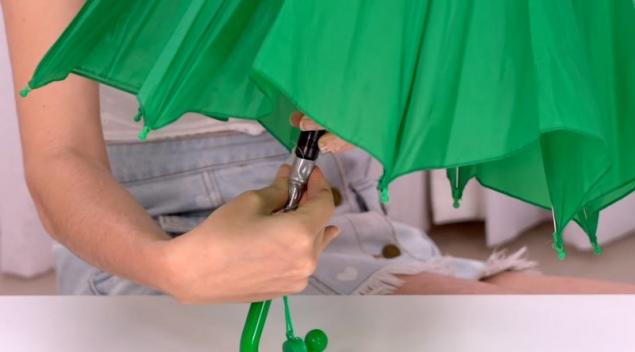
- The first umbrella, which will be the top, needs to be remade a little. You need to remove the spring with which it closes, then it will fold easily. Spread it to the desired state and fasten it with tape, as in the previous version.
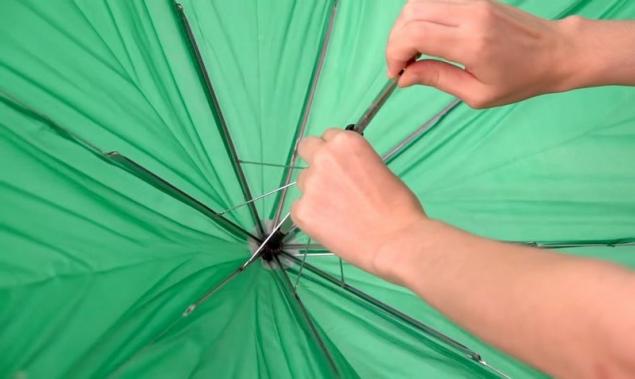
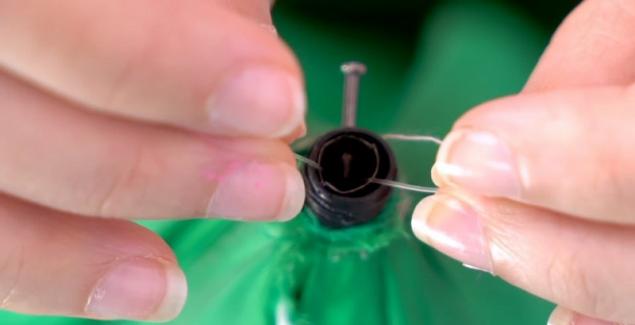
- Then cut off the handle and most of the tube from the umbrella, leaving only a small piece that will serve as the rod of our Christmas tree. So do with the upper umbrellas. Also remove the upper caps from the umbrellas and screw a small carnation into the pipe on top. Cut off a large piece of fishing line and fold it in half. With its help, hang the first umbrella to the ceiling, running the line through the remaining tube and fixing with a nail. Also secure all other umbrellas. You can see more in the video below.
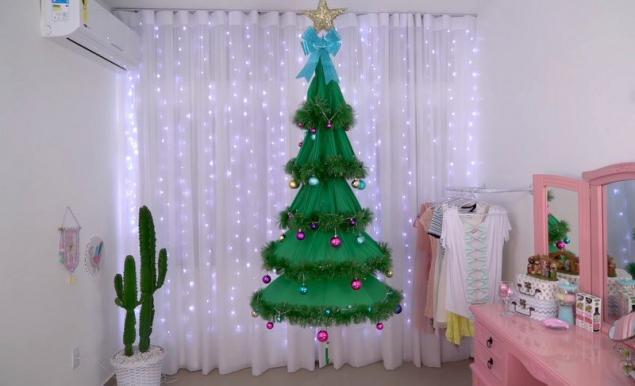
- The last umbrella that's still intact, put it on the bottom. Here's your tree ready. All I have to do is dress up to my taste!


And here is a video in which you can see the process of making a Christmas tree from an umbrella. And don’t let Spanish scare you, because the essence of the process we described in detail above!
about:blank
Agree, to make such a tree will not be difficult, but how much joy and comfort it brings. After the holidays, it can be saved or thrown away, not so sorry. You do not have to spend extra money on an artificial tree, and the living one will remain quietly growing in the forest!
If you like to make simple and inexpensive jewelry, be sure to see our material on how to decorate the house and yard for the New Year, without spending anything extra.
And be sure to see a wonderful selection of original and unusual crafts from cones for the home.
What kind of tree will you put in your house this year? Tell me in the comments.
Photo by depositphotos preview.