471
Practice bedroom lighting led strip
On geektime again raised the topic of led lighting as a major in the room, but did not disclose it completely, and readers have any questions. I want to share practical experience a full transition to LEDs. This method is suitable for almost any geek.
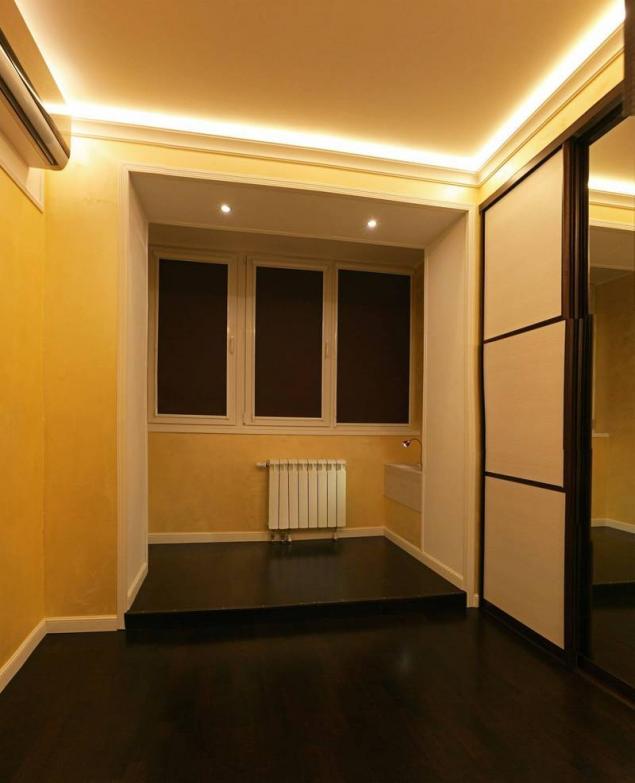
The selection and purchaseWhen I began planning repairs in the apartment, I immediately set a goal — get rid of the chandeliers and make led lighting. The obsession came to a head in 2009, when the LEDs just started to come into use. Over the years of tedious repair I tried on "the stand" different led strip from both the local and Chinese stores. Some of them had a low CRI, some unpleasant range, some quickly fade, and some even had an unpleasant odor.
When in 2014 I finished the repairs in the bedroom, it's time to buy, production tape and I plunged into the search for more decent option LEDs. After some time, came across the tape Dreamled from Centrsvet. On the website it was alleged that in the tape, CRI = 97 Ra, so, without thinking twice, I went to the showroom to verify this for themselves. Of course, devices to measure me there were not any, but the lighting from the tapes was really pleasant and natural. According to my calculations there were enough models Dreamled 50, therefore the sample I bought 1 reel (5 meters) of tape GOLD (tely light) and one reel of tape PLATINUM (neutral light).
Comparison of the "PLATINUM 50" 4000K 15 W/m and noname-tape 3500K 14 W/m:

Both photos were made without automatic white balance, same aperture, and wideray.
Compare PLATINUM 4000K and "GOLD" from 2700K Centrsvet
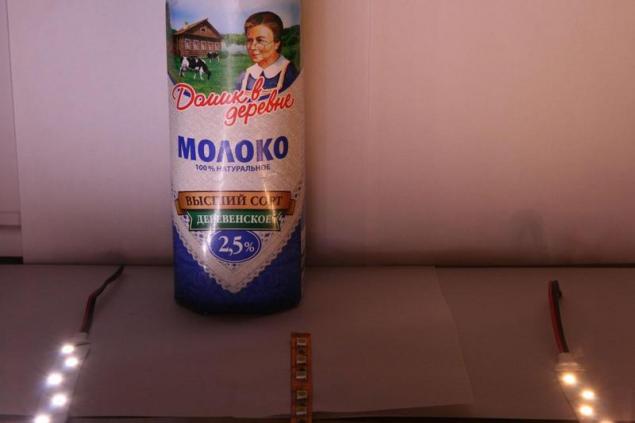
Have led strips Dreamled 50 on-Board LEDs form factor SMD 5050 deployed at an angle of 45 degrees, and the width of the tape is different from the usual — 15mm. In the summer of 2014 have been 50 series and tape width was reduced to 12mm. Another difference from the common market of strips — voltage in 24 Volt.

After checking the strips in "combat" conditions, I decided that for the interior of a bedroom more suitable model GOLD with a warm light and bought another one drum in August 2014. Area bedrooms ~10m2, but the design of the ceiling tape had about 8 running meters.
The difference in the specifications of the old (foreground) and new (background) GOLD series:
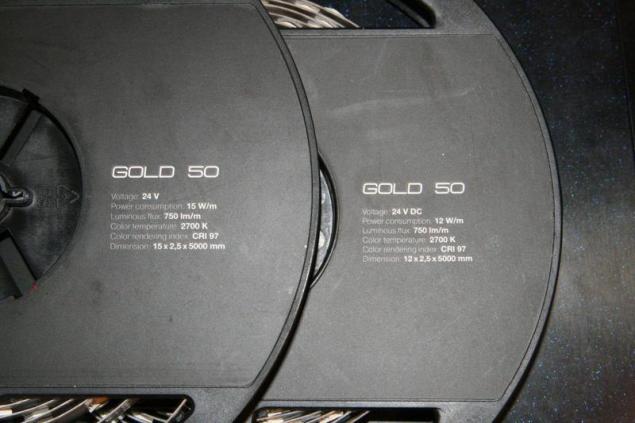
As you can see, has changed not only width, but also the power strips.
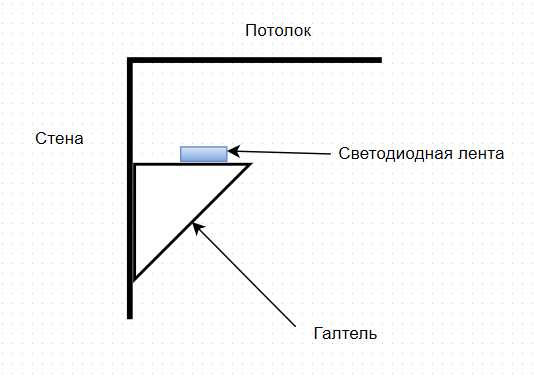
InstallationIn the course of many hours of test runs, I measured the temperature of the tape. Unfortunately, a year later numbers, I don't remember, but then they are clearly given to understand that you can do without the cooling radiators. Therefore, the installation is much easier — I decided to just stick the tape on the ceiling quirk led to the ceiling. I have the fillet is wide enough, and if you stick the tape to the wall, most of the light will remain in the groove between the wall and the fillet.
Unfortunately, the connectors for this tape I found, so I had to solder:

Mounting tape on the throat

Connection tapes
Total for materials:
— Two tapes with a total length of 8.3 meters and a power of 110W (5m * 12W + 3.3 m * 15m)
— Power supply unit with an output of 150 Watts and 24 Volts.
— ~2 meters SHVVP 0. 75mm2 for connection of the strips with each other and with PD.
Costs:
— Led strip: 3000 + 4700 (second drum bought in 8 months, and the price has changed because of the exchange rate) = 7700 rubles;
Power: 2200 rubles;
— Duct tape + liner + terminal blocks + wire: ~100 roubles;
Total: 10 000.
VerdictFeeling over the past year is very positive. The light is not annoying, but rather creates a positive mood. Eyes feel quite comfortable. Bedroom like the summer sun lit hours of eight in the evening. It's funny, but sometimes, on cloudy days, seeing the reflected light from the bedroom caught the bait: "Wow, the sun is peeking out?". And then you remember that this is LEDs.
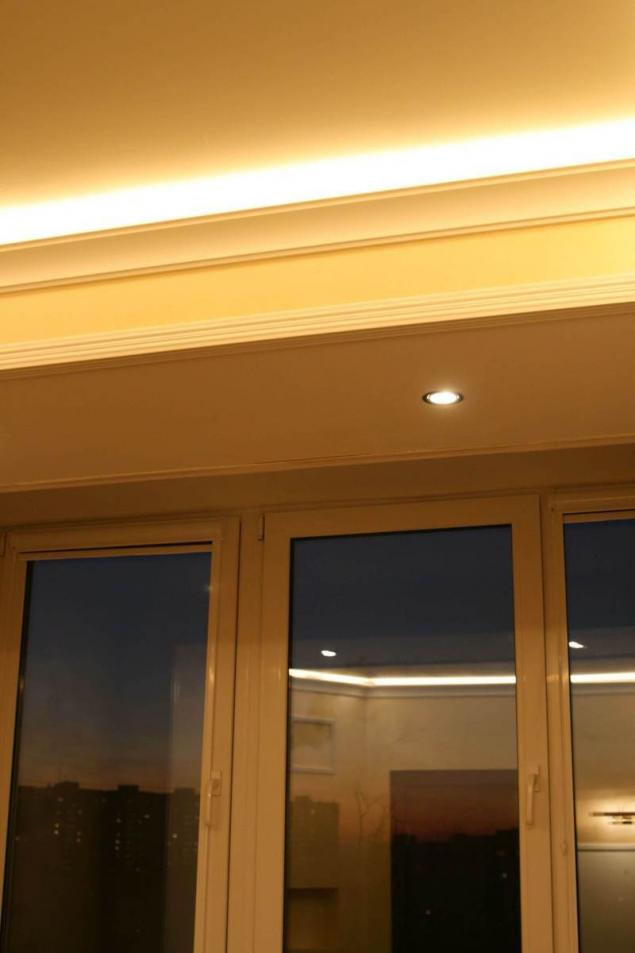
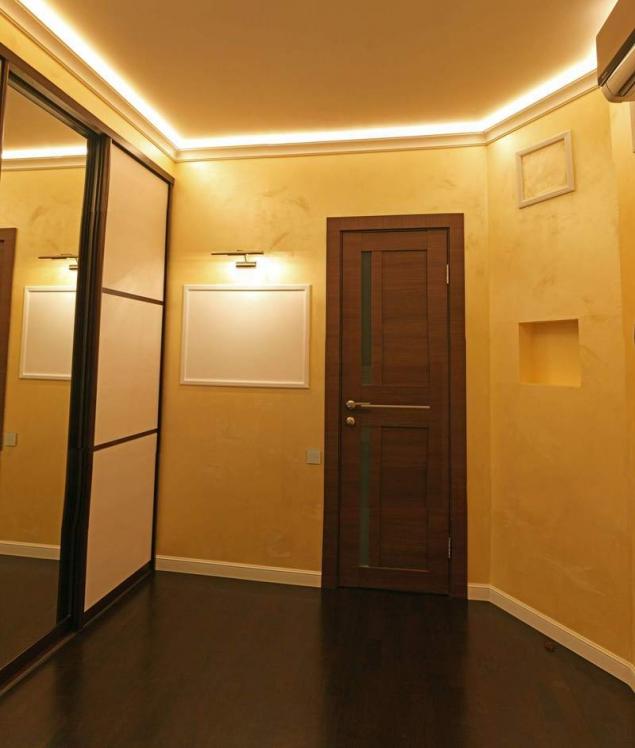
The decision to mount the strips on the ceiling fillets were very good: simple and cheap. Yes, the total cost of the solution cost more budget chandelier with light bulbs somewhere in half to two times. But, in comparison with a chandelier, is a huge plus: no bright stimulus in the center, and has a comfortable uniform illumination along the contour. This solution will suit those who does not do capital repair of multi-level ceilings. published
P. S. And remember, only by changing their consumption — together we change the world! © Join us at Facebook , Vkontakte, Odnoklassniki
Source: geektimes.ru/post/267838/

The selection and purchaseWhen I began planning repairs in the apartment, I immediately set a goal — get rid of the chandeliers and make led lighting. The obsession came to a head in 2009, when the LEDs just started to come into use. Over the years of tedious repair I tried on "the stand" different led strip from both the local and Chinese stores. Some of them had a low CRI, some unpleasant range, some quickly fade, and some even had an unpleasant odor.
When in 2014 I finished the repairs in the bedroom, it's time to buy, production tape and I plunged into the search for more decent option LEDs. After some time, came across the tape Dreamled from Centrsvet. On the website it was alleged that in the tape, CRI = 97 Ra, so, without thinking twice, I went to the showroom to verify this for themselves. Of course, devices to measure me there were not any, but the lighting from the tapes was really pleasant and natural. According to my calculations there were enough models Dreamled 50, therefore the sample I bought 1 reel (5 meters) of tape GOLD (tely light) and one reel of tape PLATINUM (neutral light).
Comparison of the "PLATINUM 50" 4000K 15 W/m and noname-tape 3500K 14 W/m:

Both photos were made without automatic white balance, same aperture, and wideray.
Compare PLATINUM 4000K and "GOLD" from 2700K Centrsvet

Have led strips Dreamled 50 on-Board LEDs form factor SMD 5050 deployed at an angle of 45 degrees, and the width of the tape is different from the usual — 15mm. In the summer of 2014 have been 50 series and tape width was reduced to 12mm. Another difference from the common market of strips — voltage in 24 Volt.

After checking the strips in "combat" conditions, I decided that for the interior of a bedroom more suitable model GOLD with a warm light and bought another one drum in August 2014. Area bedrooms ~10m2, but the design of the ceiling tape had about 8 running meters.
The difference in the specifications of the old (foreground) and new (background) GOLD series:

As you can see, has changed not only width, but also the power strips.
InstallationIn the course of many hours of test runs, I measured the temperature of the tape. Unfortunately, a year later numbers, I don't remember, but then they are clearly given to understand that you can do without the cooling radiators. Therefore, the installation is much easier — I decided to just stick the tape on the ceiling quirk led to the ceiling. I have the fillet is wide enough, and if you stick the tape to the wall, most of the light will remain in the groove between the wall and the fillet.

Unfortunately, the connectors for this tape I found, so I had to solder:

Mounting tape on the throat

Connection tapes
Total for materials:
— Two tapes with a total length of 8.3 meters and a power of 110W (5m * 12W + 3.3 m * 15m)
— Power supply unit with an output of 150 Watts and 24 Volts.
— ~2 meters SHVVP 0. 75mm2 for connection of the strips with each other and with PD.
Costs:
— Led strip: 3000 + 4700 (second drum bought in 8 months, and the price has changed because of the exchange rate) = 7700 rubles;
Power: 2200 rubles;
— Duct tape + liner + terminal blocks + wire: ~100 roubles;
Total: 10 000.
VerdictFeeling over the past year is very positive. The light is not annoying, but rather creates a positive mood. Eyes feel quite comfortable. Bedroom like the summer sun lit hours of eight in the evening. It's funny, but sometimes, on cloudy days, seeing the reflected light from the bedroom caught the bait: "Wow, the sun is peeking out?". And then you remember that this is LEDs.


The decision to mount the strips on the ceiling fillets were very good: simple and cheap. Yes, the total cost of the solution cost more budget chandelier with light bulbs somewhere in half to two times. But, in comparison with a chandelier, is a huge plus: no bright stimulus in the center, and has a comfortable uniform illumination along the contour. This solution will suit those who does not do capital repair of multi-level ceilings. published
P. S. And remember, only by changing their consumption — together we change the world! © Join us at Facebook , Vkontakte, Odnoklassniki
Source: geektimes.ru/post/267838/
Unique three recipes to speed up metabolism
How to ease the cleaning process: 7 secrets of Mary Condo

