614
How to make a wind generator with their hands
Wind generators have long been used by humans as an inexpensive and convenient sources of electric power, simplicity of its manufacture and ecological. The ranks of the so-called "wind turbines", picturesquely spread their blades against the background of natural landscapes, adorned at the time, many corners of our planet, and their industrial production has been established in the shortest possible time. In our days the wind turbines in industrial production are widely used in those regions of Russia where the effect of their use is justified.
Of course, homemade wind generator, homemade, today will surprise nobody. But, nevertheless, the issue of how to make a wind turbine with your hands, you should be taken very seriously and proceed to work only after careful consideration of all the material on the topic. In this article we will try to help you with this and consider one of possible variants of the manufacture of such device.

Design wind turbine generator
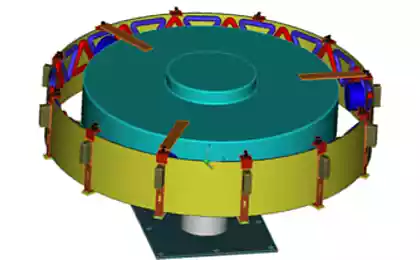
It is assumed that the generator design will consist of the following main parts:
the actual wind generator, assembled on the basis of engine industrial manufacturing;
electronic control unit for charging;
set of connecting wires;
mounting the mast;
stretch marks.
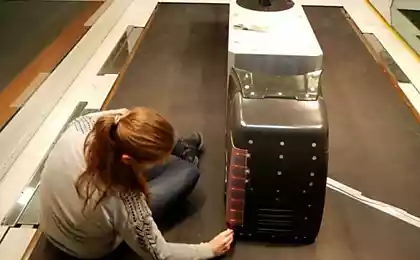
As electric actuator in this design uses a DC motor, which are equipped with some models of the so-called "running track" (260V 5A). The reverse (generator) effect, we get due to the fact that any device of this type in respect of which it generates the electromagnetic field is reversible. In the presence of rotational forces on the shaft of the motor automatically becomes a generator.

The materials used
Most of the materials used in this product, you will be ableto purchase at any hardware store.
In addition to the engine from the track you will need the following set of components and consumables:
a special threaded sleeve;
the bridge diode for currents of 30-50A;
a piece of PVC pipe.
In addition, for the manufacture of the shank and the body of the generator must prepare the following parts and consumables:
The square tube 25x25 mm;
Flange masking;
Pipe;
Screws;
Bolts;
Washer;
Scotch.

Generator Assembly
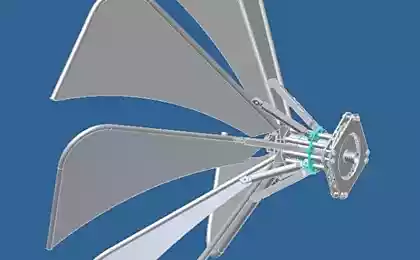
Manufacturer of wind turbines start with the training blades which can be cut from thin strips of aluminum. An exemplary form of the blades of the generator are given below.
Before mounting the workpiece should be processed carefully with sandpaper until the desired profile, so that the front edge was rounded, and the back were pointed.
The shank being made of sheet metal, and its size and form do not play a decisive role as long as it was rigid enough.
Then take a shot from a treadmill motor attached to a sleeve and mark on it the location of the three holes at a distance of approximately 10 cm from the center (at equal distance from each other). Then drilled in the resulting marking the hole and cut threads on the mounting bolts.
We recommend you to mark the place of attachment of each blade to the hub, which will allow you not to confuse them during Assembly.
Installation of wind turbine generator
The final Assembly of the wind turbine carried out in the following sequence:
Cut the PVC tube into two parts and make the resulting material then place on a square pipe where you are going to mount your engine. Position the diode bridge close to the engine and secure it with screws.
Connect coming out of the engine the wire is black with a "plus" of the diode bridge.
Attach coming from the engine the red lead to the "minus" of bridge.
The position of the shank set up so that the plane of the whole system was parallel to the ground. Adjusts the shank to the pipe, and fasten it on it with the help of pre-prepared screws.
Posted tagged blade into place and fasten them with bolts and washers on the bushing, and closest to the hole axis installed two washers (each side of the base of the blade). For the three outer holes install one washer (from the bolt). Then thoroughly tighten the resulting compounds.
Securely fixing the motor shaft, put on his sleeve with blades and using pliers wrap it all the way, counterclockwise.
Then turn the nozzle to the mask flange with a gas key.
Then hold the balancing the base of the pipe fixed thereto the motor and the shank and note the point of the equilibrium position.
At this point produce the fastening of the supporting base to the mast (for convenience, you may have to Unscrew this bushing and shank).
Fasten the base on the screws and restore the previously removed nodes.
Wind generators can last you much longer if you paint the blades, but also the base, a shank and a protective engine cover.
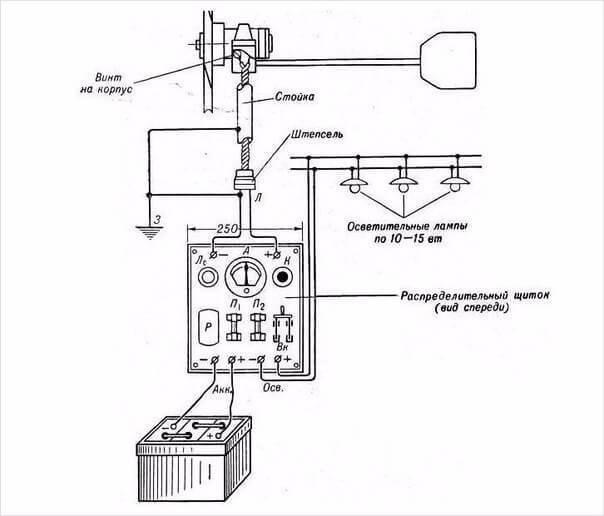
To enable the wind turbine device to a working mains you will need a wiring kit, battery charge controller, ammeter and load (battery).
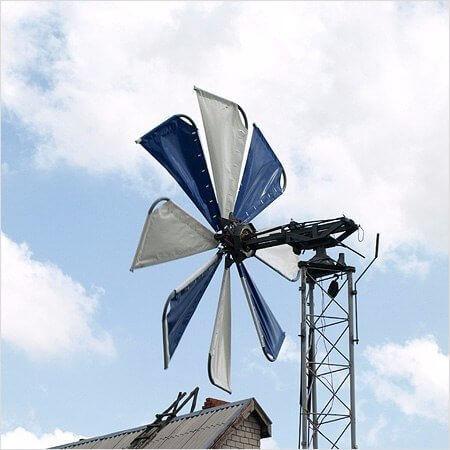
With regard to the bearing of the mast, just note its special importance for the reliable fastening of the generator that ensures a long and trouble-free operation. This subassembly must not only be strong enough, but also must have good stability. Besides, it wouldn't hurt if the mast will be equipped with a simple mechanism for lowering and lifting the base with the engine.
Note also the fact that the higher the mast the more powerful the air flow will be available to your makeshift plant. Used for mounting of the mast a wire stretching you can set intervals of 5.0-5.5 m in height. published
P. S. And remember, only by changing their consumption — together we change the world! ©
Join us in Facebook , Vkontakte, Odnoklassniki
Source: vk.com/house.lifehack?w=wall-86260425_8568
Of course, homemade wind generator, homemade, today will surprise nobody. But, nevertheless, the issue of how to make a wind turbine with your hands, you should be taken very seriously and proceed to work only after careful consideration of all the material on the topic. In this article we will try to help you with this and consider one of possible variants of the manufacture of such device.

Design wind turbine generator
It is assumed that the generator design will consist of the following main parts:
the actual wind generator, assembled on the basis of engine industrial manufacturing;
electronic control unit for charging;
set of connecting wires;
mounting the mast;
stretch marks.
As electric actuator in this design uses a DC motor, which are equipped with some models of the so-called "running track" (260V 5A). The reverse (generator) effect, we get due to the fact that any device of this type in respect of which it generates the electromagnetic field is reversible. In the presence of rotational forces on the shaft of the motor automatically becomes a generator.

The materials used
Most of the materials used in this product, you will be ableto purchase at any hardware store.
In addition to the engine from the track you will need the following set of components and consumables:
a special threaded sleeve;
the bridge diode for currents of 30-50A;
a piece of PVC pipe.
In addition, for the manufacture of the shank and the body of the generator must prepare the following parts and consumables:
The square tube 25x25 mm;
Flange masking;
Pipe;
Screws;
Bolts;
Washer;
Scotch.

Generator Assembly
Manufacturer of wind turbines start with the training blades which can be cut from thin strips of aluminum. An exemplary form of the blades of the generator are given below.
Before mounting the workpiece should be processed carefully with sandpaper until the desired profile, so that the front edge was rounded, and the back were pointed.
The shank being made of sheet metal, and its size and form do not play a decisive role as long as it was rigid enough.
Then take a shot from a treadmill motor attached to a sleeve and mark on it the location of the three holes at a distance of approximately 10 cm from the center (at equal distance from each other). Then drilled in the resulting marking the hole and cut threads on the mounting bolts.
We recommend you to mark the place of attachment of each blade to the hub, which will allow you not to confuse them during Assembly.

Installation of wind turbine generator
The final Assembly of the wind turbine carried out in the following sequence:
Cut the PVC tube into two parts and make the resulting material then place on a square pipe where you are going to mount your engine. Position the diode bridge close to the engine and secure it with screws.
Connect coming out of the engine the wire is black with a "plus" of the diode bridge.
Attach coming from the engine the red lead to the "minus" of bridge.
The position of the shank set up so that the plane of the whole system was parallel to the ground. Adjusts the shank to the pipe, and fasten it on it with the help of pre-prepared screws.
Posted tagged blade into place and fasten them with bolts and washers on the bushing, and closest to the hole axis installed two washers (each side of the base of the blade). For the three outer holes install one washer (from the bolt). Then thoroughly tighten the resulting compounds.
Securely fixing the motor shaft, put on his sleeve with blades and using pliers wrap it all the way, counterclockwise.
Then turn the nozzle to the mask flange with a gas key.
Then hold the balancing the base of the pipe fixed thereto the motor and the shank and note the point of the equilibrium position.
At this point produce the fastening of the supporting base to the mast (for convenience, you may have to Unscrew this bushing and shank).
Fasten the base on the screws and restore the previously removed nodes.
Wind generators can last you much longer if you paint the blades, but also the base, a shank and a protective engine cover.
To enable the wind turbine device to a working mains you will need a wiring kit, battery charge controller, ammeter and load (battery).

With regard to the bearing of the mast, just note its special importance for the reliable fastening of the generator that ensures a long and trouble-free operation. This subassembly must not only be strong enough, but also must have good stability. Besides, it wouldn't hurt if the mast will be equipped with a simple mechanism for lowering and lifting the base with the engine.
Note also the fact that the higher the mast the more powerful the air flow will be available to your makeshift plant. Used for mounting of the mast a wire stretching you can set intervals of 5.0-5.5 m in height. published
P. S. And remember, only by changing their consumption — together we change the world! ©
Join us in Facebook , Vkontakte, Odnoklassniki
Source: vk.com/house.lifehack?w=wall-86260425_8568