604
As gash photo in 10 minutes
For a long time there was nothing written on the topic of treatment, each time sitting down at the keyboard and worried - whether my post interesting, because there is nothing about the Crimea, polite people, tanks near the border, etc.
From rhetoric to reality today is very simple, and, as usual, a quick example of rendering and processing photos with Nastya.
© letohin
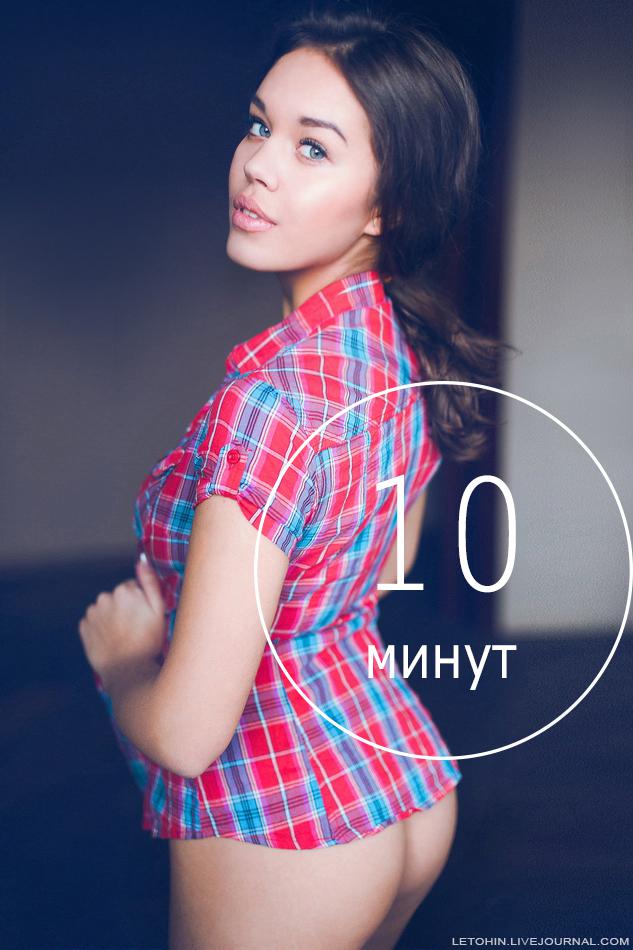
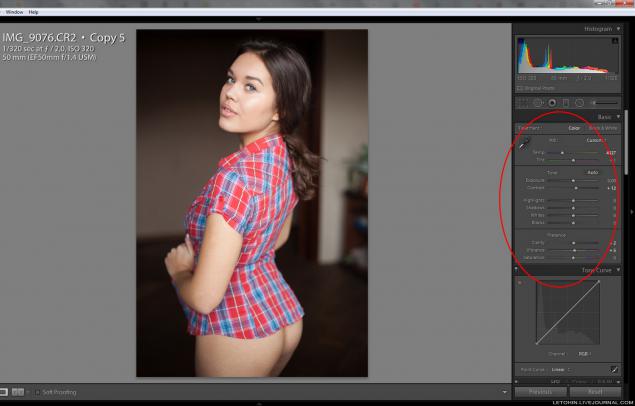
1. Crude equal, almost no change.
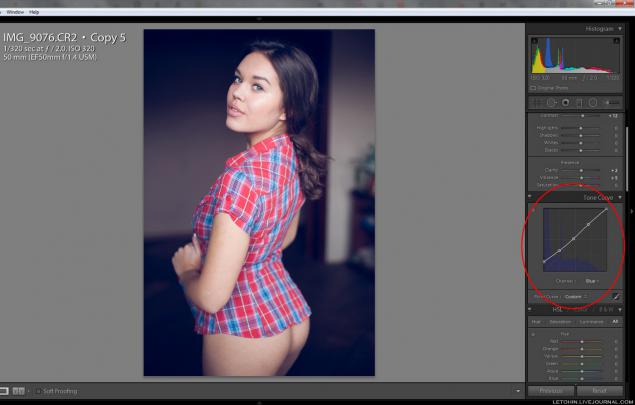
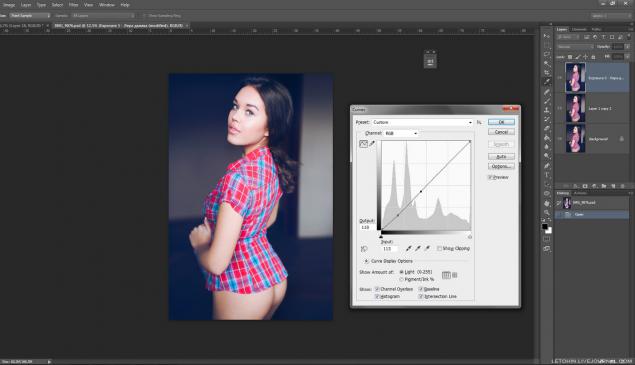
2. Curve zatoniruem shade blue (choose the blue channel), I, personally, curves much easier to use Photoshop, but you can here.
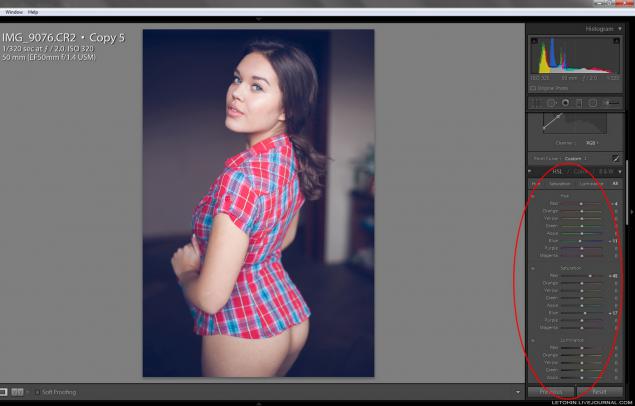
3. Slightly twisted colors, beat bright shirt - made richer red.
4. Here's a simple trick to correct the distortion (distortion) optics, though here and 50 mm, it can be a little pull - choose instead 35.
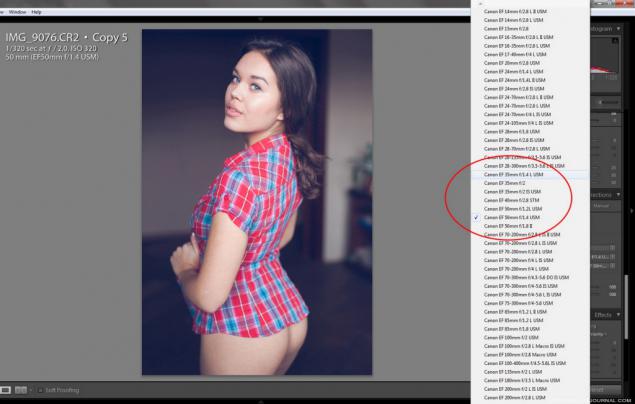
5. slider and twist Distortion.
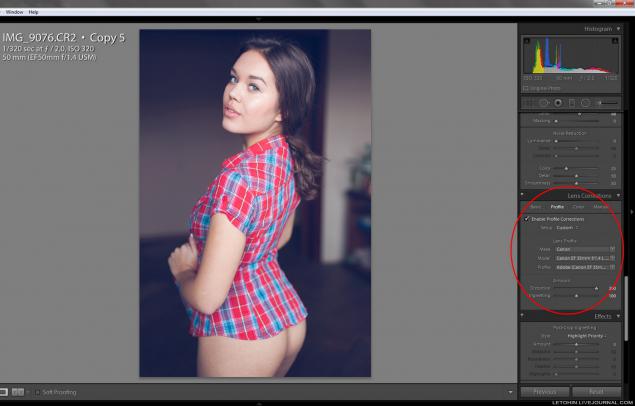
6. Slightly darken the edges, a modicum of noise and a bit camera kalibrayshn.
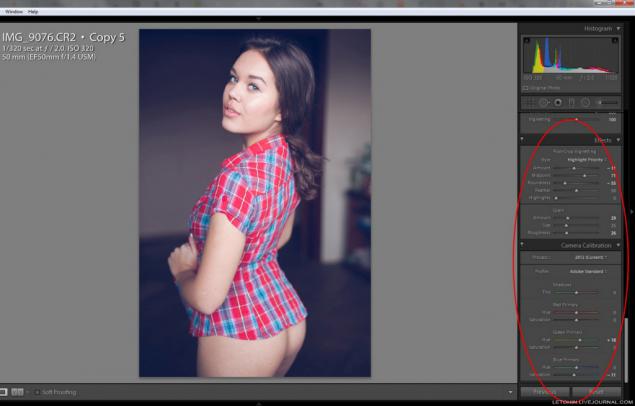
7. Still, back to the curve and did a little more contrast.
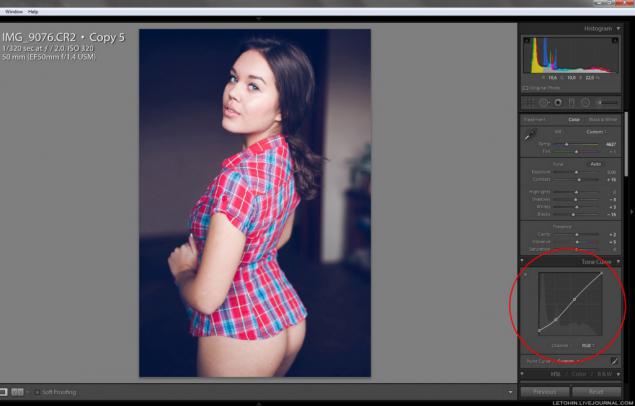
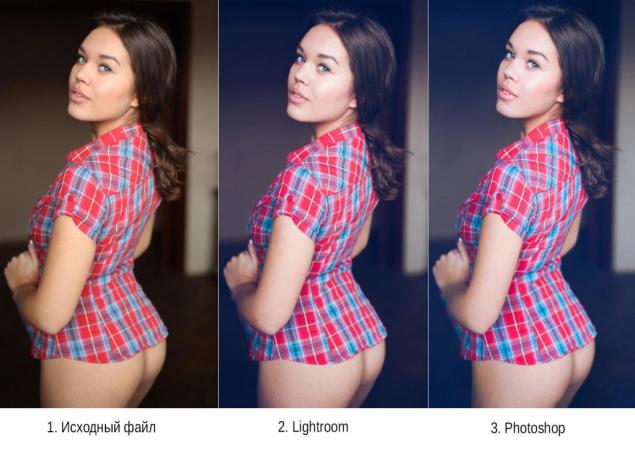
8. Before / after step laytruma. Here is preset. But, of course, try to twist themselves so much more interesting.
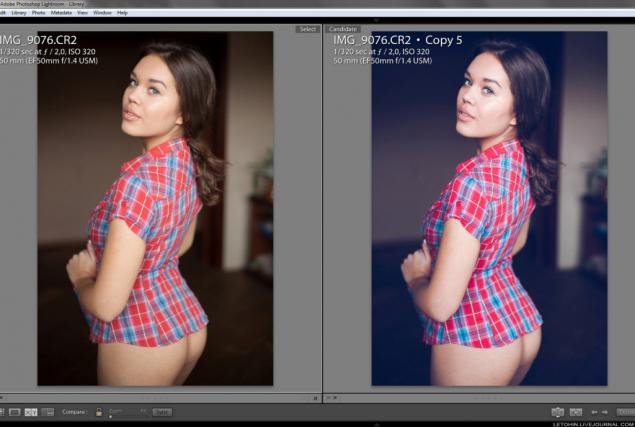
9. As you can see - there are no global problems with the skin there.
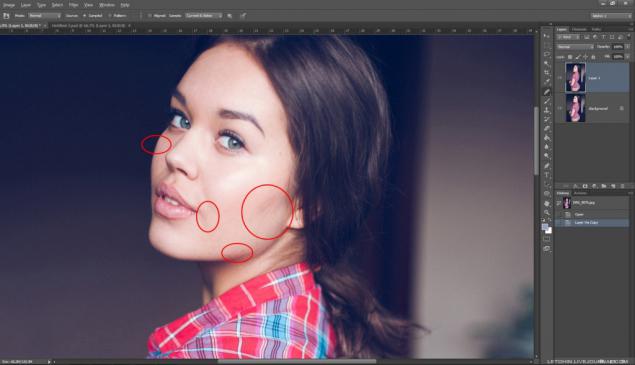
10. Few Portretury through a mask over the body.
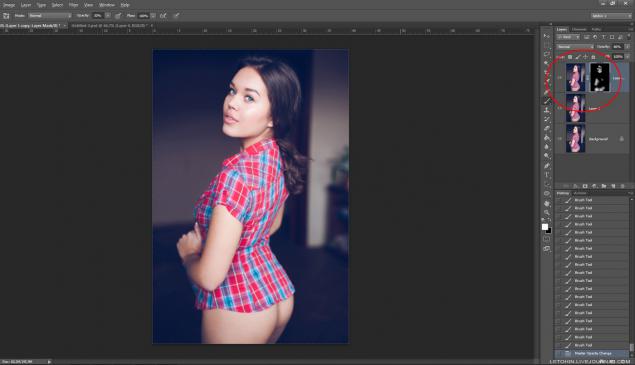
11. Likvifay - our all.
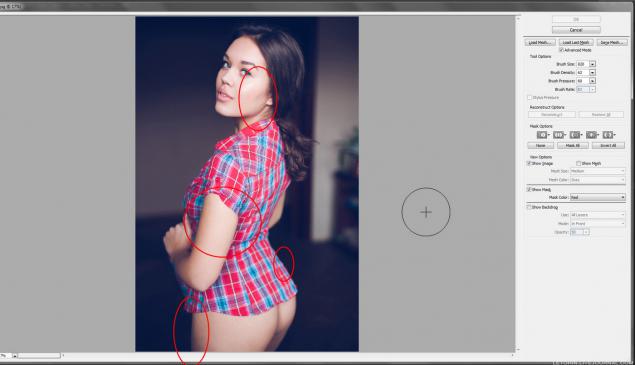
12. Acceptance of lightening / darkening. There is quite a bit worked cheekbones and eye area.
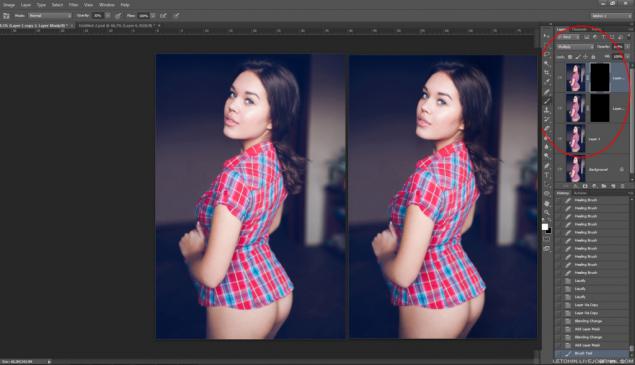
13. Cheap and cheerful, but rather just as effective as a shovel and crowbar - highlights areas of (a chest of drawers in the back) press Ctrl + T (Free Transform) and simply pulls him aside.
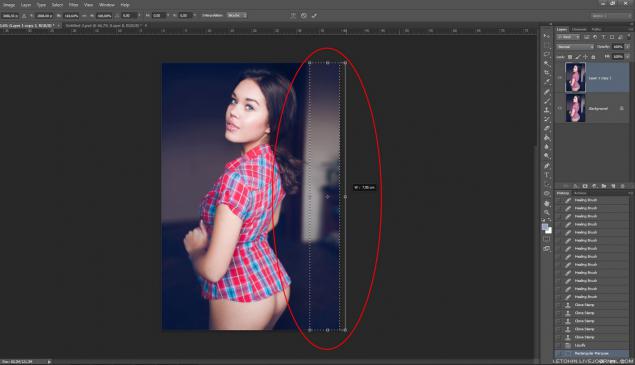
14. Double-click the stamp and is perfect :)
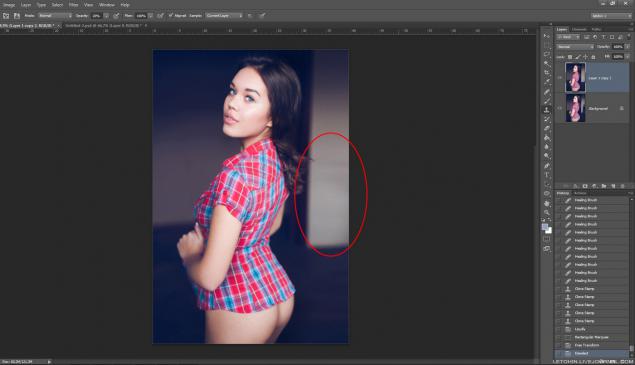
15. Chest as had happened :)
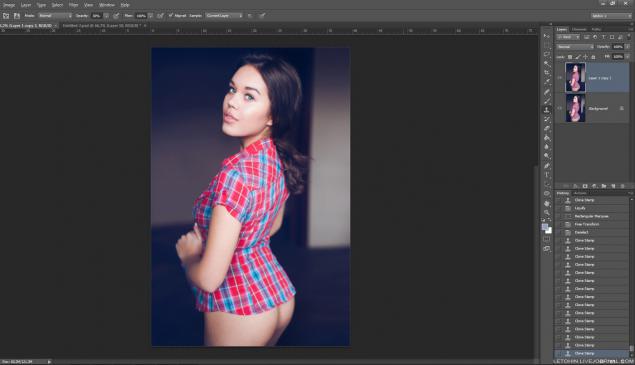
16. Sponges (left frame) become juicier very simple way - a copy of the layer mode Overlay + + mask. Gently wipe the white brush them, and ... mmmm!
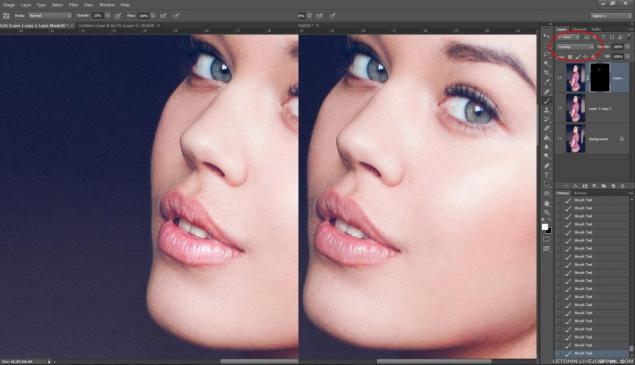
17. Slightly podrkutil hue. It's all up to you.
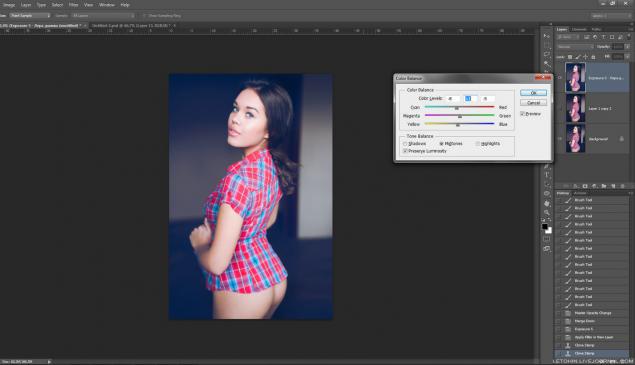
18. Let us add sharpness.
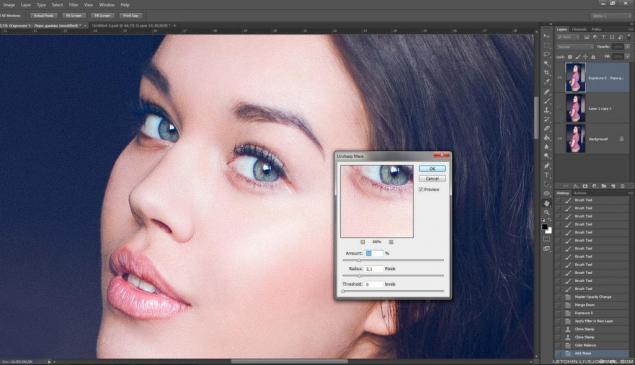
19. Ctrl + A + Ctrl + T - I pull frame slightly upward (like elongated features).
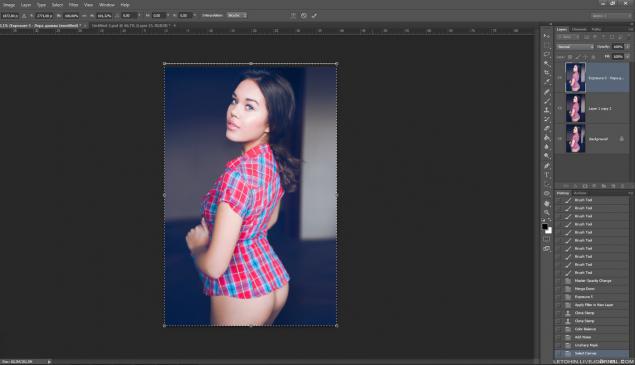
20. Decided not to be lazy, put the excess saturation in the left wrist and leg (dick / satureyshn + mask layer).
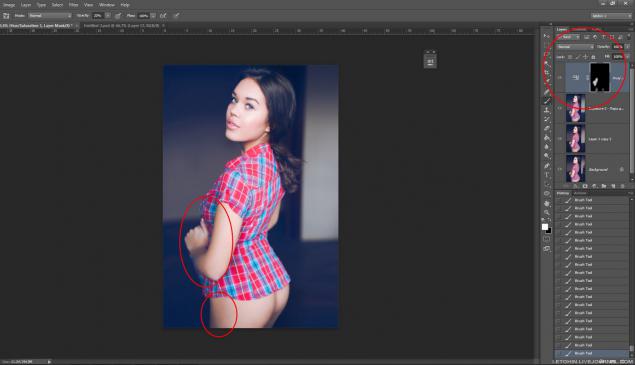
21. I can not go to the curves at the finish. (Curves - the coolest instrument would zadrotom - would make a tattoo on his shoulder with them)
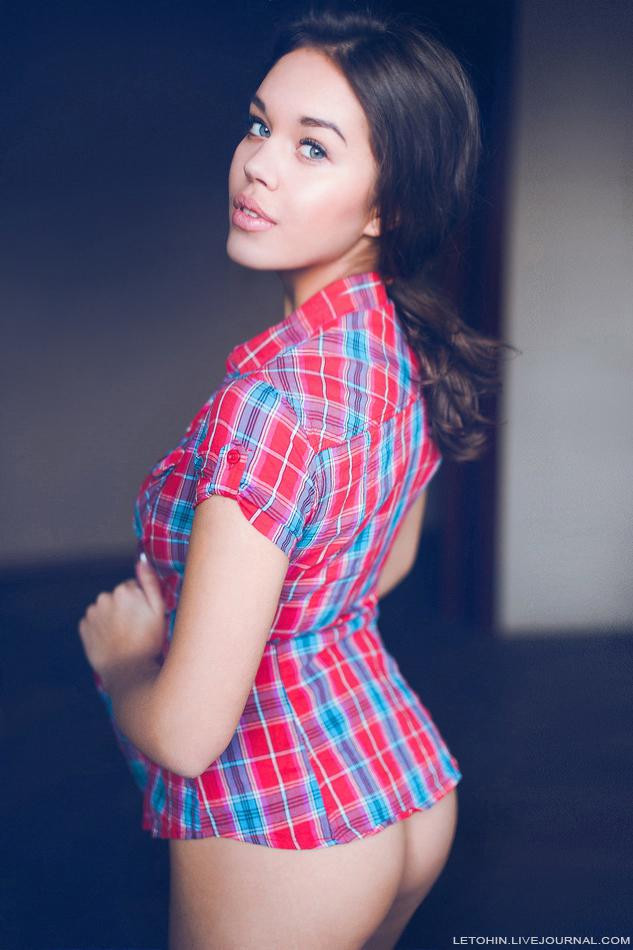
22. 10 minutes behind.
23. 1-2-3.
Source:
From rhetoric to reality today is very simple, and, as usual, a quick example of rendering and processing photos with Nastya.
© letohin

1. Crude equal, almost no change.

2. Curve zatoniruem shade blue (choose the blue channel), I, personally, curves much easier to use Photoshop, but you can here.

3. Slightly twisted colors, beat bright shirt - made richer red.

4. Here's a simple trick to correct the distortion (distortion) optics, though here and 50 mm, it can be a little pull - choose instead 35.

5. slider and twist Distortion.

6. Slightly darken the edges, a modicum of noise and a bit camera kalibrayshn.

7. Still, back to the curve and did a little more contrast.

8. Before / after step laytruma. Here is preset. But, of course, try to twist themselves so much more interesting.

9. As you can see - there are no global problems with the skin there.

10. Few Portretury through a mask over the body.

11. Likvifay - our all.

12. Acceptance of lightening / darkening. There is quite a bit worked cheekbones and eye area.

13. Cheap and cheerful, but rather just as effective as a shovel and crowbar - highlights areas of (a chest of drawers in the back) press Ctrl + T (Free Transform) and simply pulls him aside.

14. Double-click the stamp and is perfect :)

15. Chest as had happened :)

16. Sponges (left frame) become juicier very simple way - a copy of the layer mode Overlay + + mask. Gently wipe the white brush them, and ... mmmm!

17. Slightly podrkutil hue. It's all up to you.

18. Let us add sharpness.

19. Ctrl + A + Ctrl + T - I pull frame slightly upward (like elongated features).

20. Decided not to be lazy, put the excess saturation in the left wrist and leg (dick / satureyshn + mask layer).

21. I can not go to the curves at the finish. (Curves - the coolest instrument would zadrotom - would make a tattoo on his shoulder with them)

22. 10 minutes behind.

23. 1-2-3.

Source:
