627
Medallion Maori with their hands
Maori - the indigenous people, the general population of New Zealand before the arrival of Europeans. The number of Maori in New Zealand is more than 526 thousand. Pers., About 10 thousand. People. live in Australia and the USA.
__
17 ph via nalimov
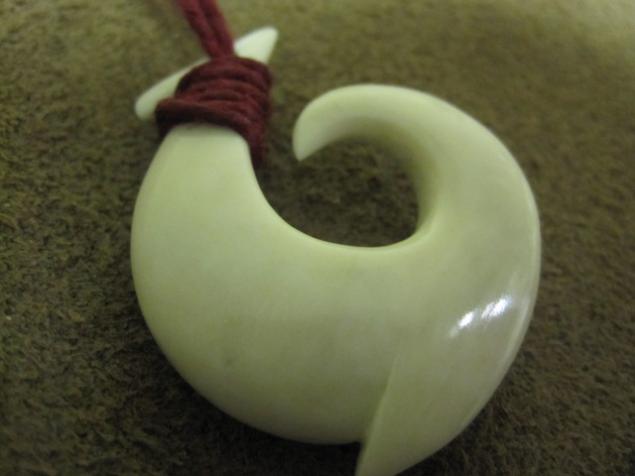
This hook Maori, which I cut from beef bones. Bone carving is quite slow ... I cut medallion for two days.
Cutting personal "totem", as this is the plunge. Very personal experiences ... When, after all invested time and hard work, get something nice and neat ... what you cut, this feeling is to test each (but so few people do something with their own hands).
Before you cut your hook, I recommend reading about the Maori culture. It is exciting and will help you the inspiration you need for "immersion".
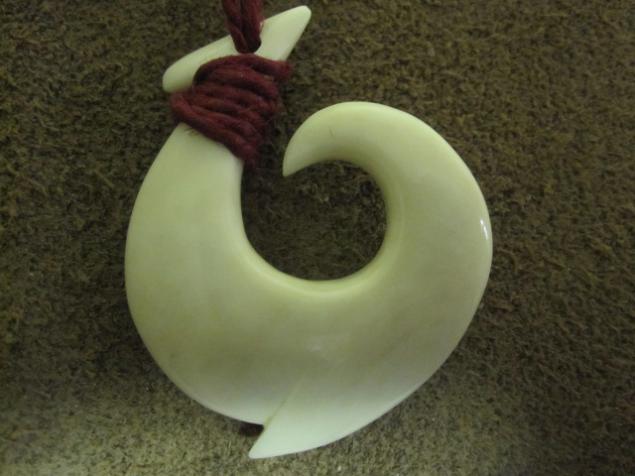
Step 1: Apply the pattern
Draw hook Maori incredibly difficult. I recommend Googling on «Maori Hook» and draw on the paper form you liked. Cut the drawing hook and drag it to clean the bones (in pencil).
Choosing a cow bone carving, make sure it is as white as paper. If it is translucent or yellow fat it contains. Fat destroy your thread! Do not cut the bone of fat! You can buy a bone in pet supplies. In a purified bone-toys for dogs (those that are made of genuine cow bone). You can even find bones in your backyard, pritaschennye some sort of dog (or your own!).
From now on, safety glasses are required!
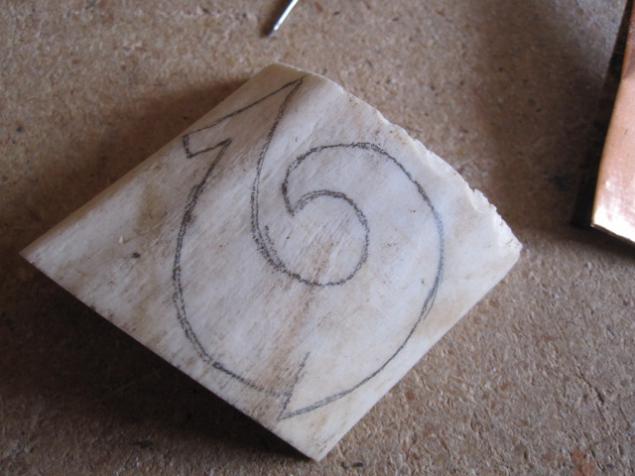
Step 2. Rough trimming
I did this curly electric saw. You can use for this purpose jig saw, electric saw but faster. The canvas of my blade is too large to cut it out of the middle, so I removed it with a jigsaw in the next step.
I drilled a hole to lower a jigsaw to cut.
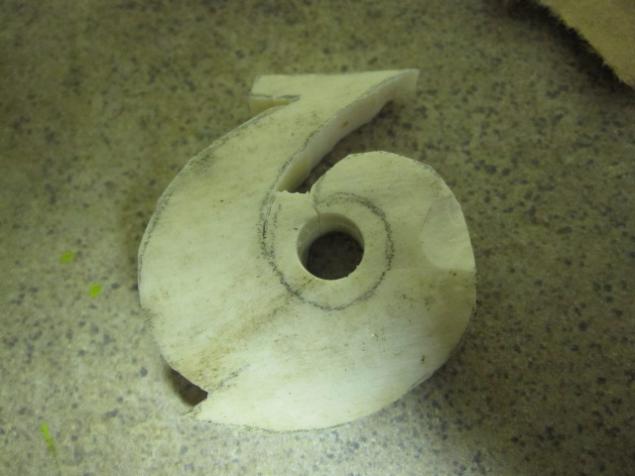
Step 3. Cut inside
Use a jigsaw to cut the workpiece in all the things that you could not get an electric saw ...
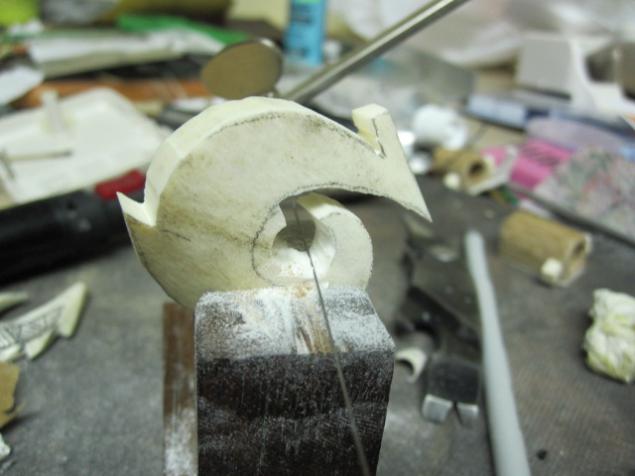
...
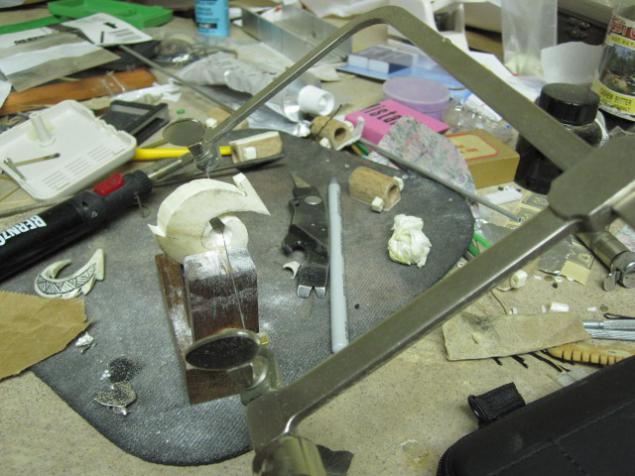
Step 4. aligns
Use a saw for fine processing. Remove jagged irregularities and "dead ends" in the corners.
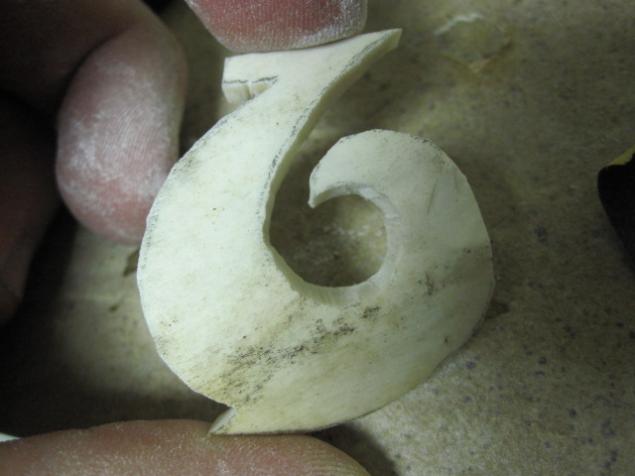
Step 5: Remove excess material
We used a drum sander. The idea is to hide the stroke bones ... to do everything, rounded and smooth. The back of the medallion too!
You must wear a respirator for this. Bone dust can damage your lungs!
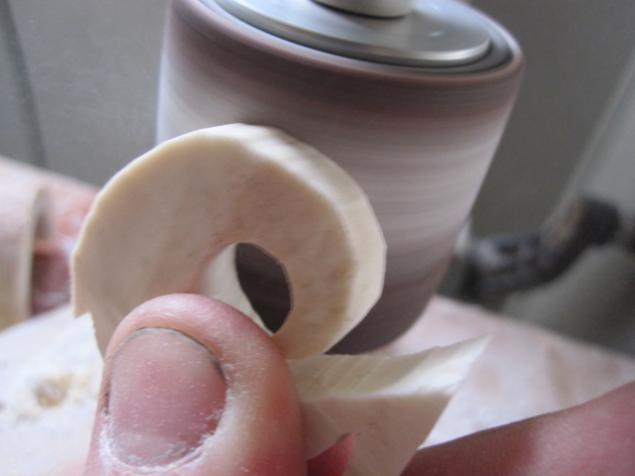
...
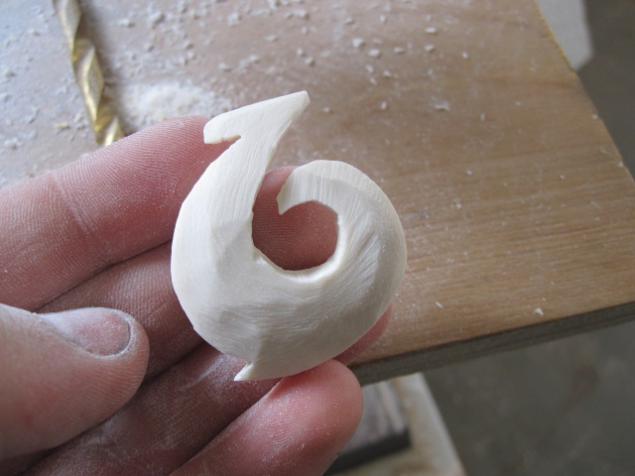
Step 6. Cleaning
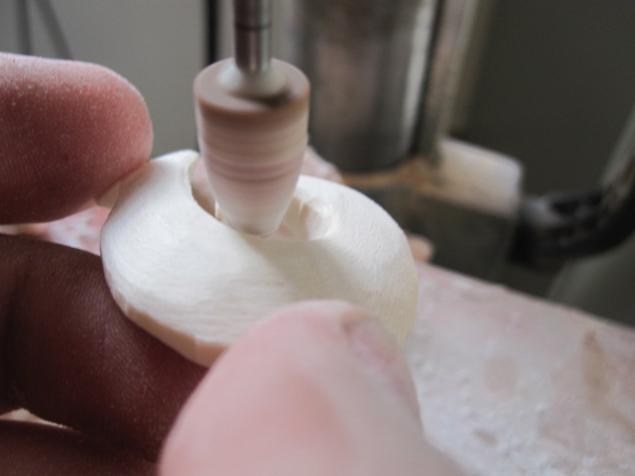
Use small tapered Dremel with grinding head, turned on at high speed to further improve form.
Remove all traces left by previous tools!
...
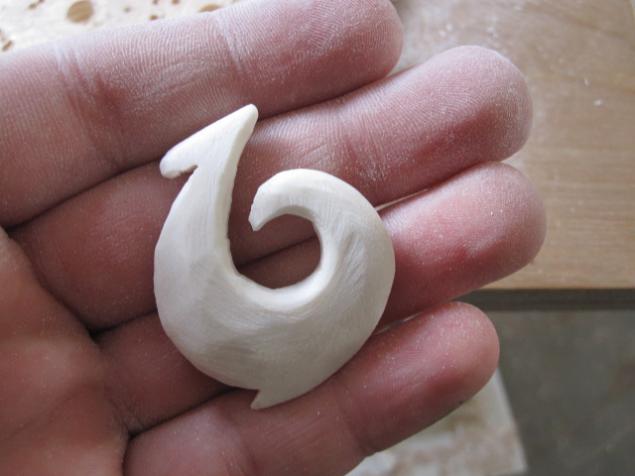
Step 7. From this moment only hand tools!
All other steps should be performed only with the use of hand tools.
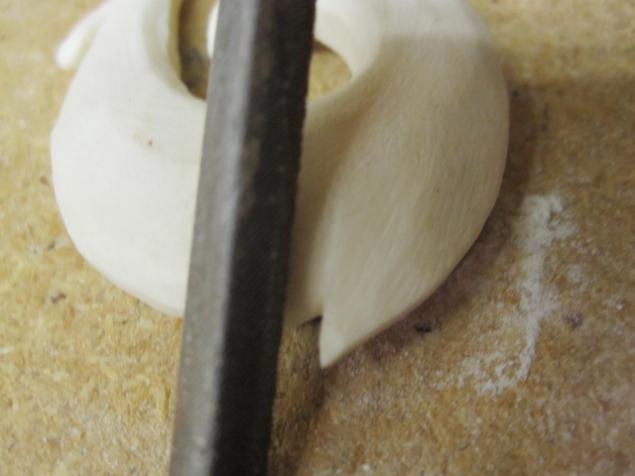
In particular, the files. All sorts of files ... such as triangular and round Files Files and miniature Needle.
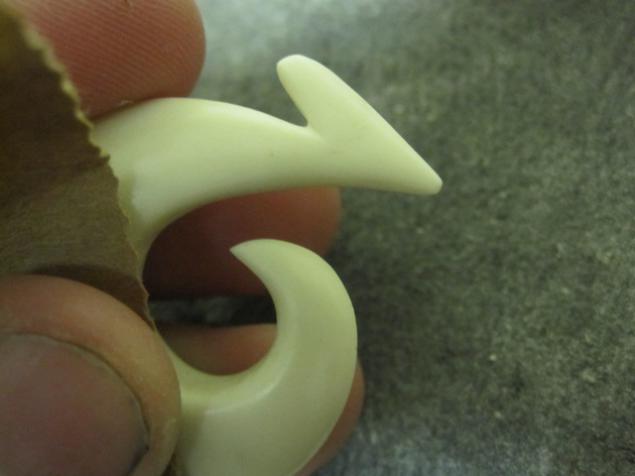
Align and round off ... around every plane and angle. This thing should look as if she had grown up in a tree or something like that. Perfectly smooth, elegant and organic ... like a fish.
You should also highlight the teeth. See. Photo ...
Step 8. Grinding
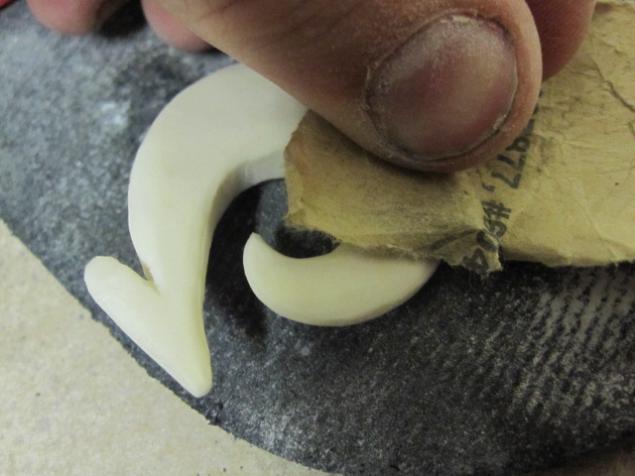
Remove all traces of a file left over from the previous step. It will take some time ... when you're ready, replace the sandpaper to the very fine to fine processing.
After fine processing, you get hooked very dusty and even dirty. Carefully rinse the hook with warm water and soap. After washing, it will be incredibly slippery (even when dry!) ... Do not drop it, it may break.
...
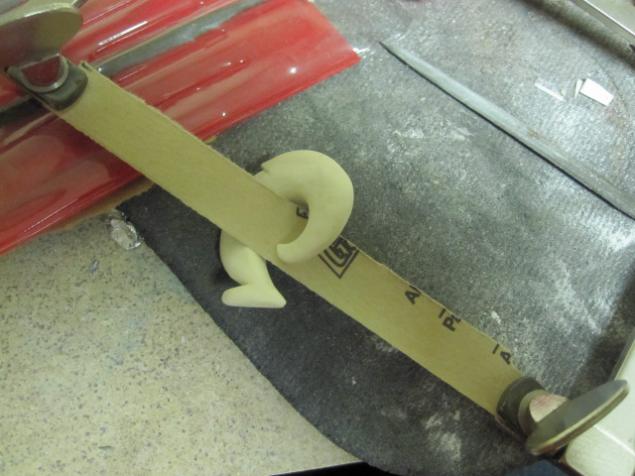
Step 9. Completion
Use pieces of brown paper bag to handle the hook. This will prepare the surface for the next step.
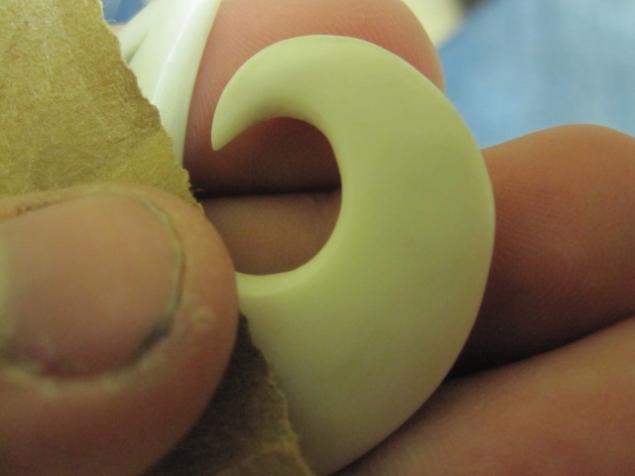
...
Step 10. Polishing
Use car wax with abrasives. Apply car wax to the soft felt cloth and treat her the entire surface of the medallion. It will not look very nice, until you will wash it.
After cleaning, polish it with a towel (like beach). After using the towel, use a clean piece of felt to finish shine. From this point, the locket will look more brilliant than the glass ... it's incredible.
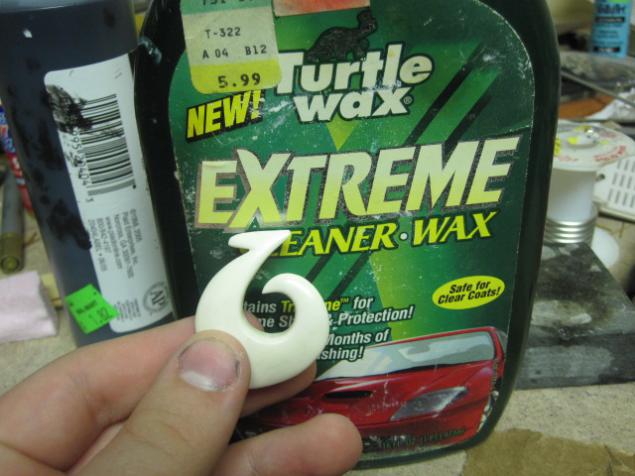
After all glittered, I drilled a hole for the strap. With regards to site, it is at your discretion. It's very simple to do so, as on my photos. There are about 4,000 ways to do it ... so choose some sort!
For some reason, I can not grasp the camera shine! I assure you that it reflects like a mirror!
Source:
__
17 ph via nalimov
This hook Maori, which I cut from beef bones. Bone carving is quite slow ... I cut medallion for two days.
Cutting personal "totem", as this is the plunge. Very personal experiences ... When, after all invested time and hard work, get something nice and neat ... what you cut, this feeling is to test each (but so few people do something with their own hands).
Before you cut your hook, I recommend reading about the Maori culture. It is exciting and will help you the inspiration you need for "immersion".

Step 1: Apply the pattern
Draw hook Maori incredibly difficult. I recommend Googling on «Maori Hook» and draw on the paper form you liked. Cut the drawing hook and drag it to clean the bones (in pencil).
Choosing a cow bone carving, make sure it is as white as paper. If it is translucent or yellow fat it contains. Fat destroy your thread! Do not cut the bone of fat! You can buy a bone in pet supplies. In a purified bone-toys for dogs (those that are made of genuine cow bone). You can even find bones in your backyard, pritaschennye some sort of dog (or your own!).
From now on, safety glasses are required!

Step 2. Rough trimming
I did this curly electric saw. You can use for this purpose jig saw, electric saw but faster. The canvas of my blade is too large to cut it out of the middle, so I removed it with a jigsaw in the next step.
I drilled a hole to lower a jigsaw to cut.

Step 3. Cut inside
Use a jigsaw to cut the workpiece in all the things that you could not get an electric saw ...

...

Step 4. aligns
Use a saw for fine processing. Remove jagged irregularities and "dead ends" in the corners.

Step 5: Remove excess material
We used a drum sander. The idea is to hide the stroke bones ... to do everything, rounded and smooth. The back of the medallion too!
You must wear a respirator for this. Bone dust can damage your lungs!

...

Step 6. Cleaning
Use small tapered Dremel with grinding head, turned on at high speed to further improve form.
Remove all traces left by previous tools!

...

Step 7. From this moment only hand tools!
All other steps should be performed only with the use of hand tools.
In particular, the files. All sorts of files ... such as triangular and round Files Files and miniature Needle.
Align and round off ... around every plane and angle. This thing should look as if she had grown up in a tree or something like that. Perfectly smooth, elegant and organic ... like a fish.
You should also highlight the teeth. See. Photo ...

Step 8. Grinding
Remove all traces of a file left over from the previous step. It will take some time ... when you're ready, replace the sandpaper to the very fine to fine processing.
After fine processing, you get hooked very dusty and even dirty. Carefully rinse the hook with warm water and soap. After washing, it will be incredibly slippery (even when dry!) ... Do not drop it, it may break.

...

Step 9. Completion
Use pieces of brown paper bag to handle the hook. This will prepare the surface for the next step.

...

Step 10. Polishing
Use car wax with abrasives. Apply car wax to the soft felt cloth and treat her the entire surface of the medallion. It will not look very nice, until you will wash it.
After cleaning, polish it with a towel (like beach). After using the towel, use a clean piece of felt to finish shine. From this point, the locket will look more brilliant than the glass ... it's incredible.

After all glittered, I drilled a hole for the strap. With regards to site, it is at your discretion. It's very simple to do so, as on my photos. There are about 4,000 ways to do it ... so choose some sort!
For some reason, I can not grasp the camera shine! I assure you that it reflects like a mirror!

Source:
