629
Carved flash drive from bone and wood
That's decided to share one of their theme. Not new of course, but not tyrnete expanses furrowed. We will do an exclusive USB flash drive carved from bone and wood. It takes not very many tools, but also do not forget about the fact that the tool is not enough. In general, need a drill, dental burs of different styles, diamond burs, nazhdachki and polishing wheels, polishing paste, solvent, and a little patience.
Bones is not difficult to prepare, but you can just catch of soup and wash with the "Fairy." I must say that a bone in processing all sorts of Bulgarians and grinders much stinks so nervous preparing to engage in undesirable bone, it is easier to buy ready-made bone plates, for example through tyrnet. Glue the body - it is better to come up as anyone, to your taste. Superglue copes well with this case. Pieces of wood can be hand cut jigsaw.
But this subject will be discussed on how to make your own image on a flash drive.
There will be 30 pictures
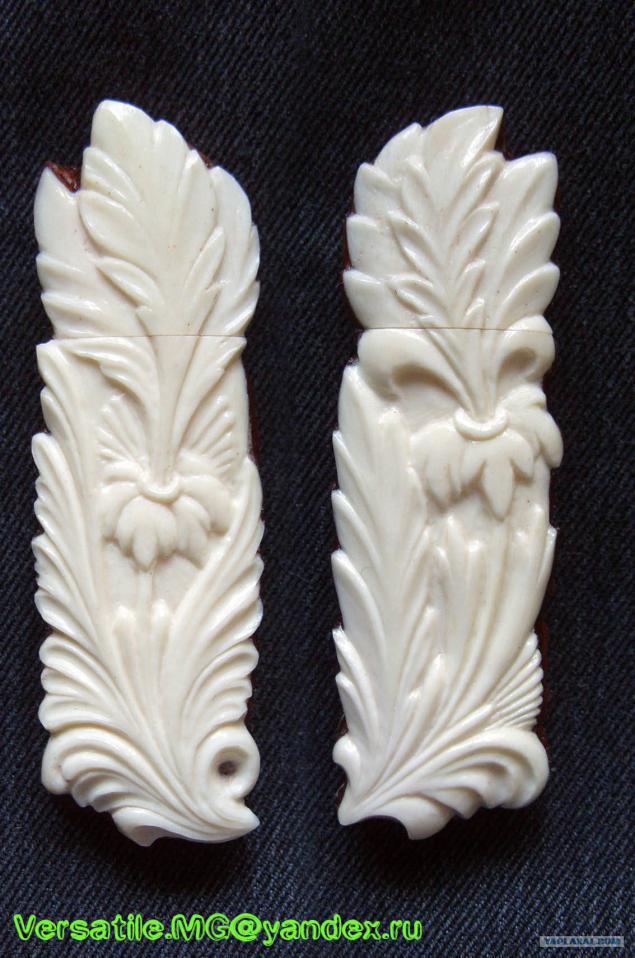
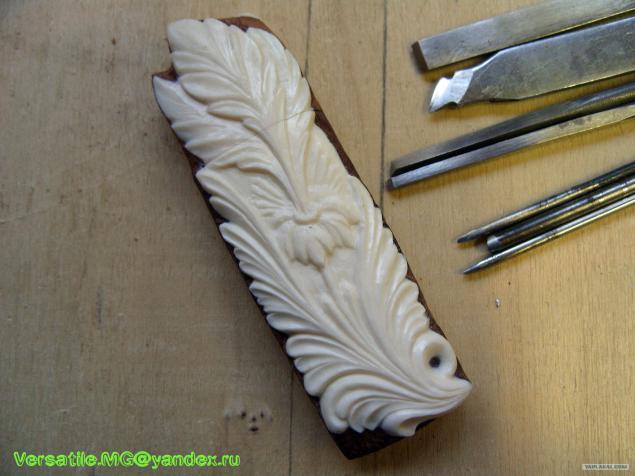
So here's this flehi we finally get:
More details can be found in the MC in the forum, or here? There's all sorts of stuff about painted.
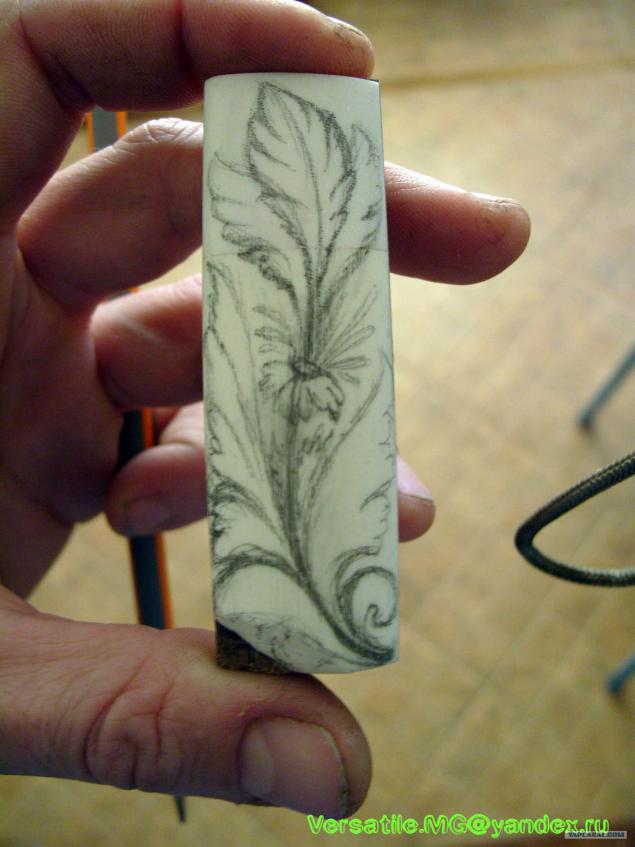
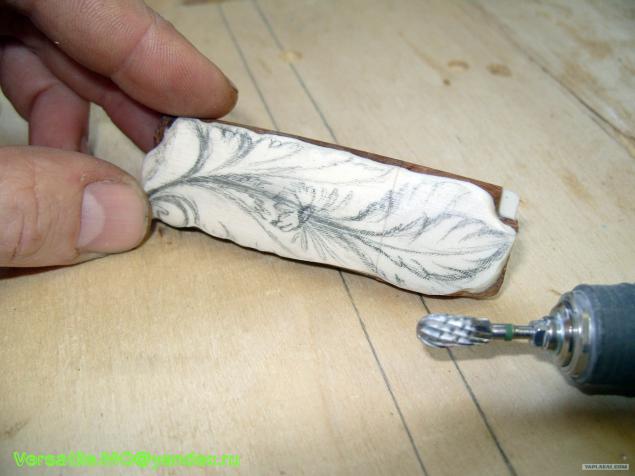
First grind the workpiece and a drawing
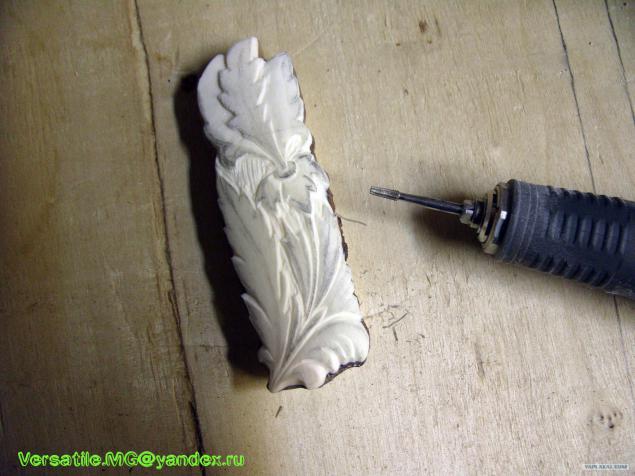
Nibbling contours and any surplus rough mill.
We express the basic line of the cylindrical cutter. Since then the easiest way to begin to immediately visually separate elements from each other.

After this operation, you can delete a pencil, since it will only spoil the blank and nothing more will not help.
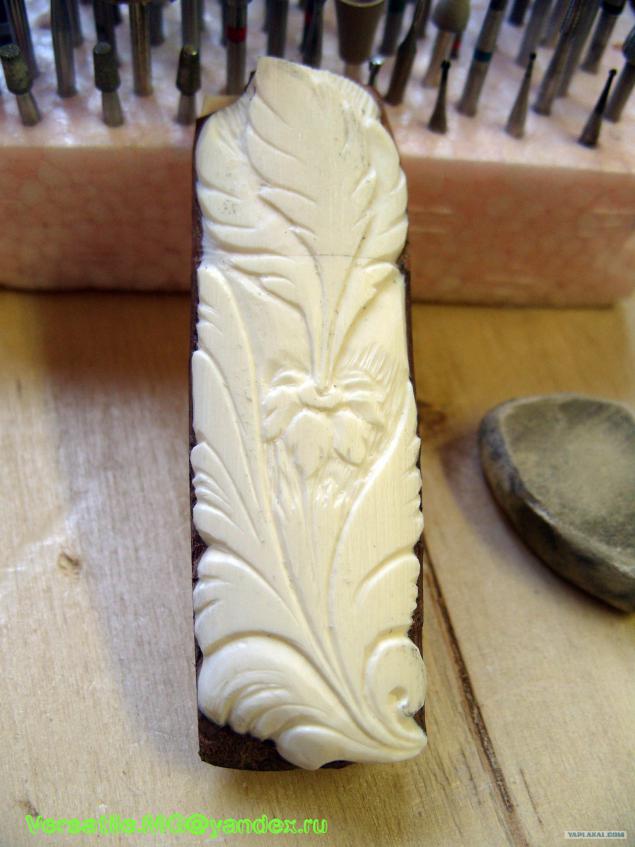
Acute triangular lance penetrate deeper into the leaves and add detailing. Main now - to designate the groove.
Choose background ball diameter boron 1-1, 5 mm. Now we need to create depth, highlight the volume.
That is the same, but bigger
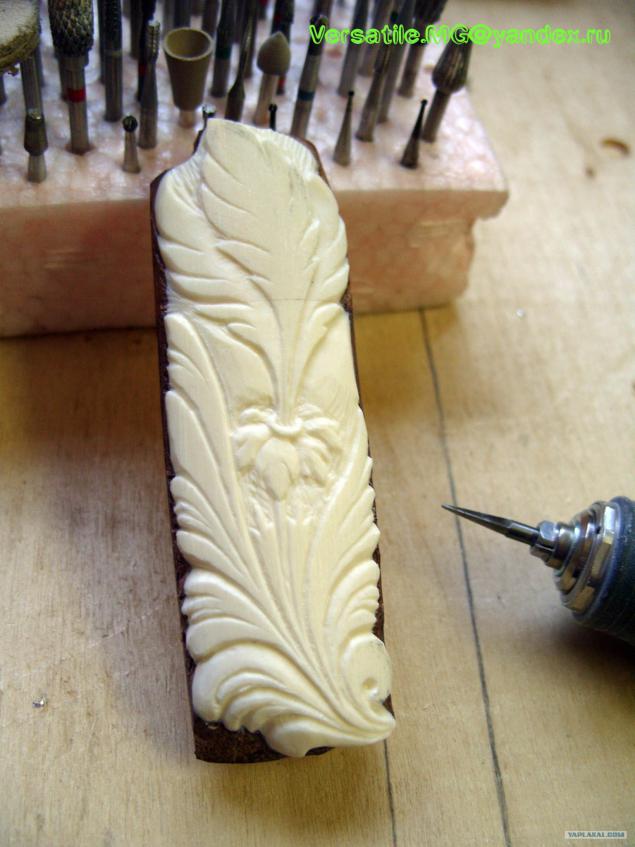
Truncated cone is convenient to cut convex surfaces, as well as cut grooves

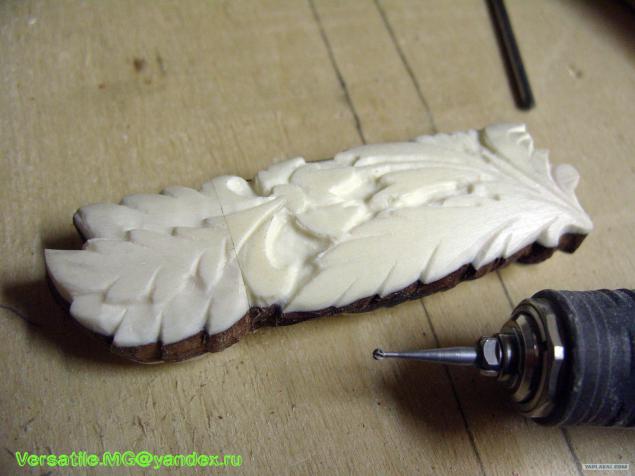
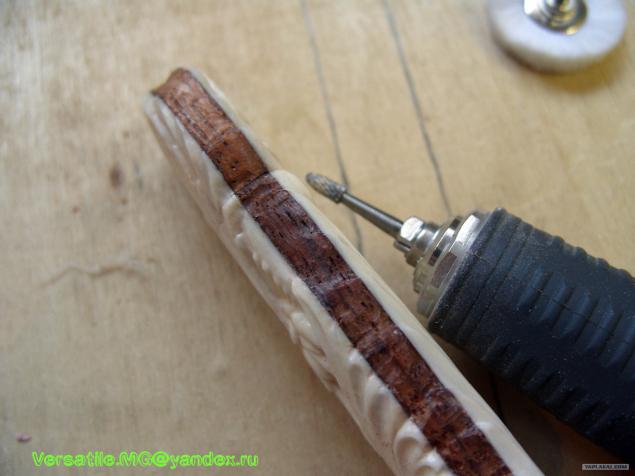
Now you can proceed to cutting the concave surfaces of the leaves. This is done in spherical burs of different diameters
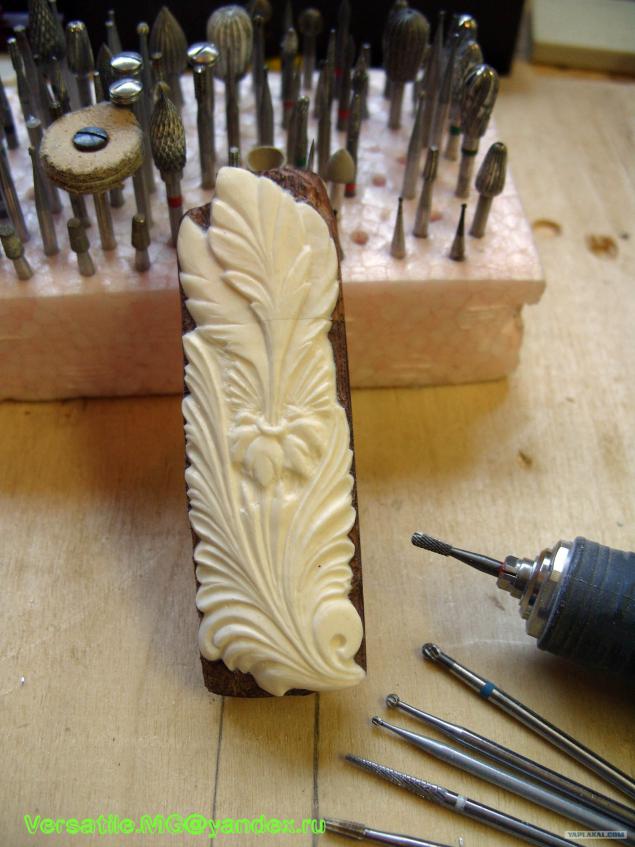
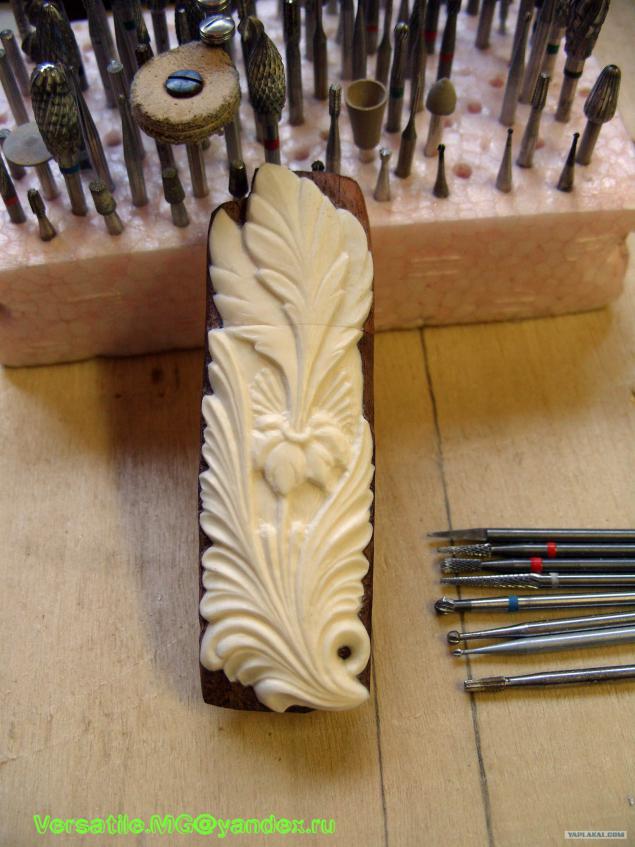
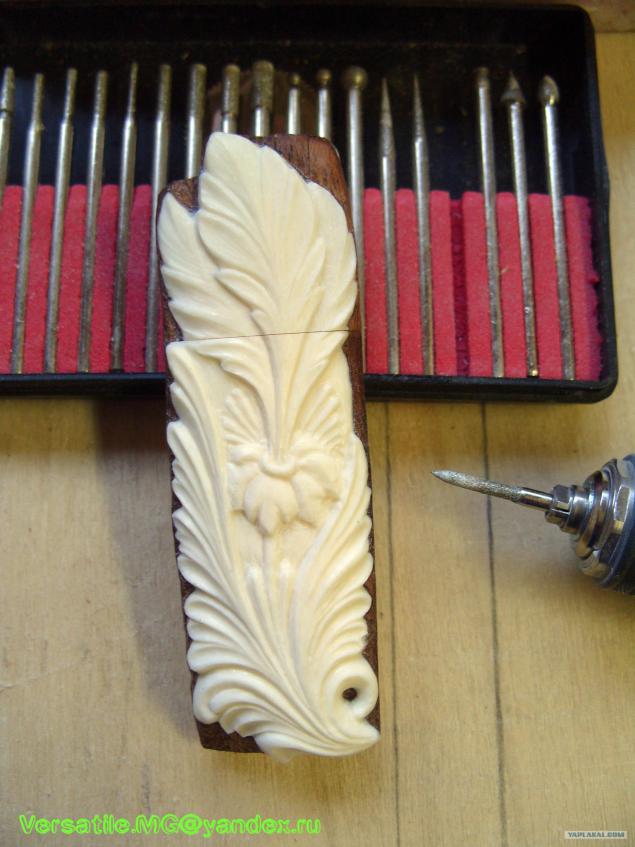
That this arsenal is enough to make a picture. (from the fact that postponed the bottom right)
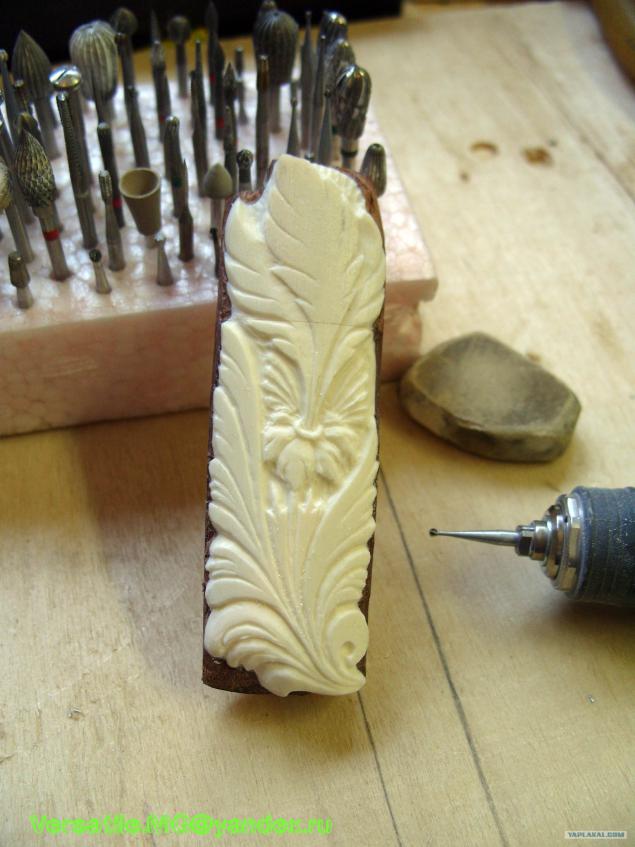
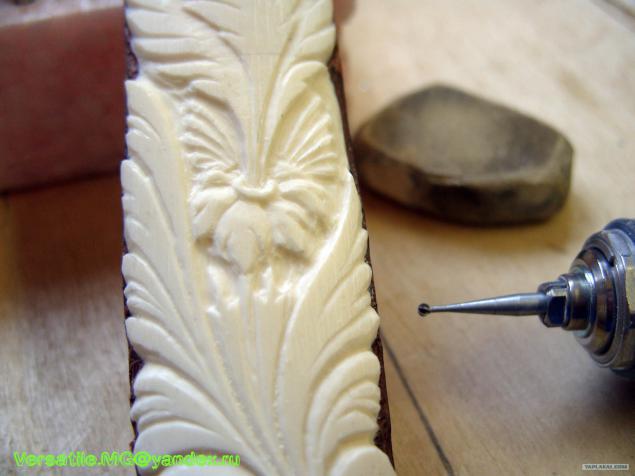
Now you can work and diamond burs. It will approach the Chinese cheap, but you can buy and dental
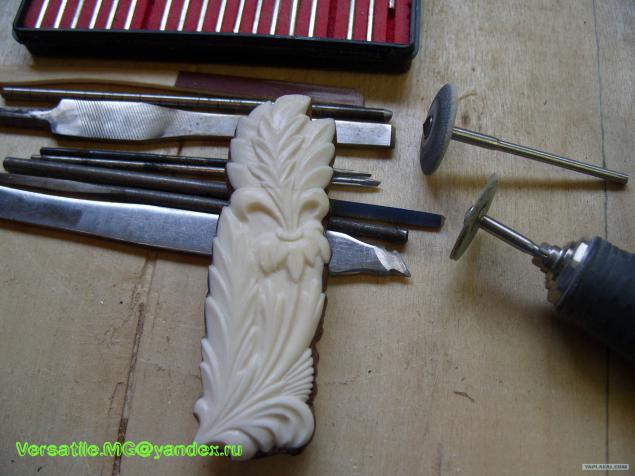
If the result is not quite like it, you can manually modify the graver, which are usually made of broken off Needle. Shtihelem usually applied to the smallest details and undercut any flaws. At the initial level, you can do without them
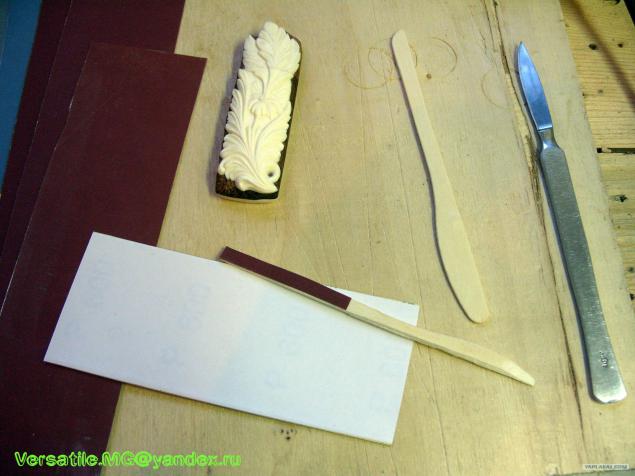
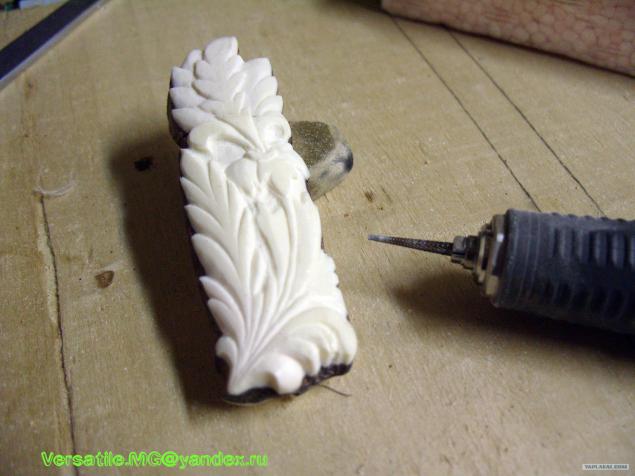
And now you can poshlifovat. Grit sandpaper from 500 to 2500, new ice cream on a stick, or simply folded, perfectly cope with this task. But patience is needed.
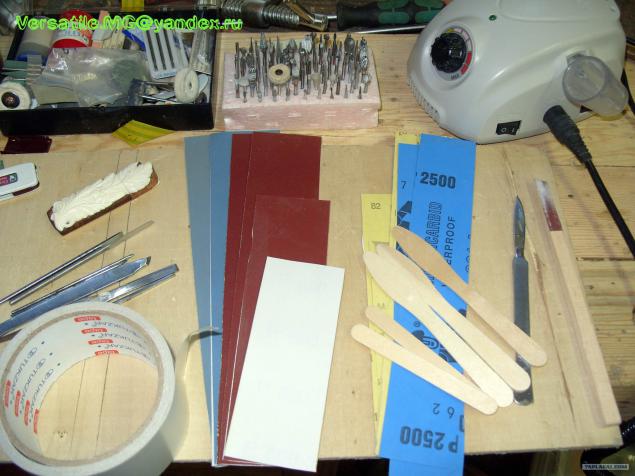
Here's a tool able to grind anywhere))))
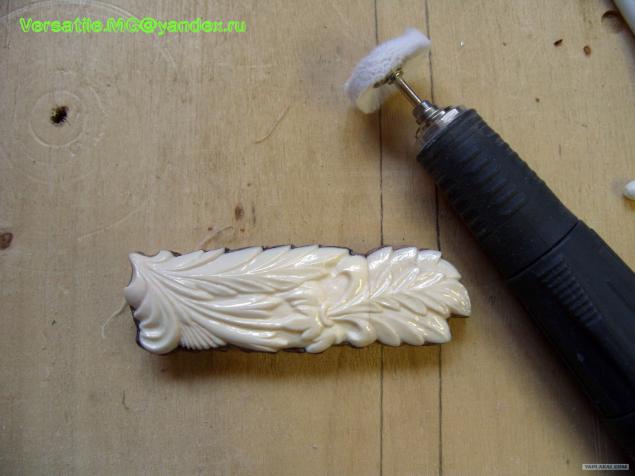
For polishing a lot of different pastas, but we must remember that the bone is porous and paste clogged pores. The paste is then washed GOI will not succeed, so I use only light pastas.
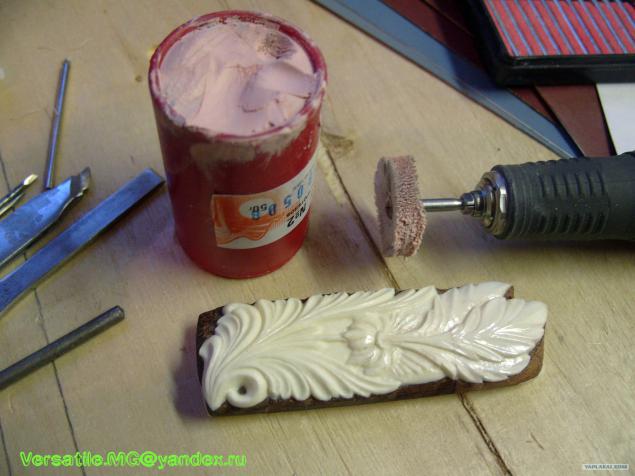
After polishing is still not clear what and how. The paste should be washed off
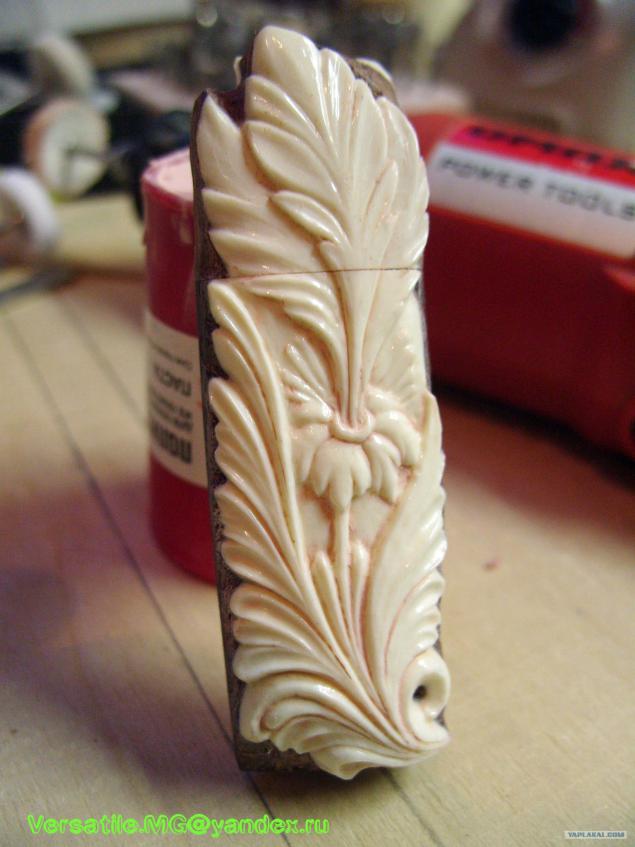
USB flash drive-sink looks like

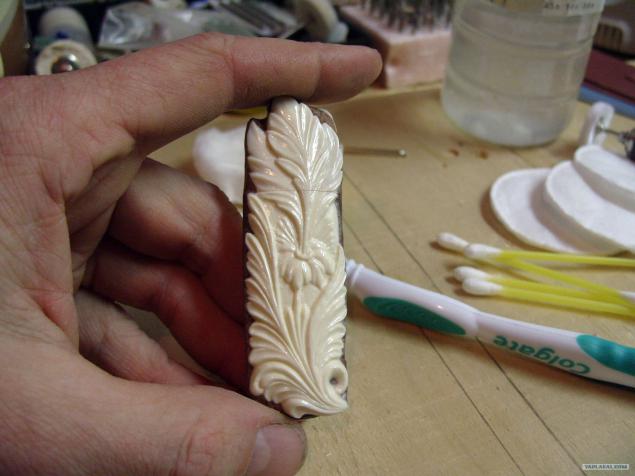
My solvent, lightly polish the disc tissue, and now one is ready.
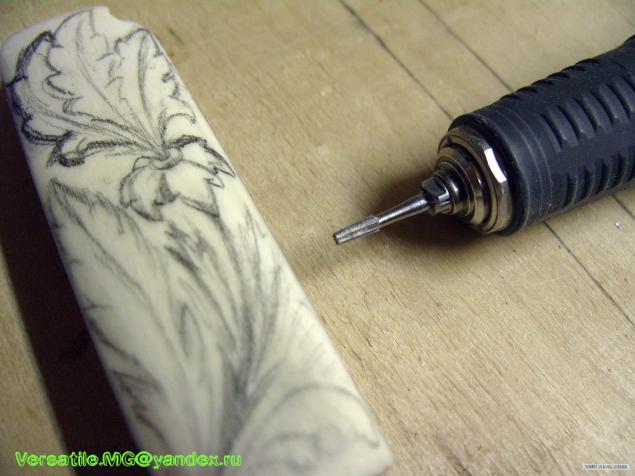
In the second stick side to do so. Draw a pattern
Cut baselines
Choose background ball
Truncated cone cut convex surfaces
Spherical burs are working on concave surfaces

And this is - the best place universal boron. They are usually carried out prior to finishing polishing with diamonds.

Some places can shlifanut and discs and abrasive rubber bands, but do not need to get involved - they are too good bite and smooth surface.
After polishing

Wash off the paste solvent

We direct brilliance clean cloth circle
As the parties have different contours of the stick, it would be necessary to bring them somehow Poplavnoi. To do this, boron nibbling at its discretion. After still need to be sanded and varnished furniture or expensive oil, but I did not save these foty, alas.
That's all.
Source:
Bones is not difficult to prepare, but you can just catch of soup and wash with the "Fairy." I must say that a bone in processing all sorts of Bulgarians and grinders much stinks so nervous preparing to engage in undesirable bone, it is easier to buy ready-made bone plates, for example through tyrnet. Glue the body - it is better to come up as anyone, to your taste. Superglue copes well with this case. Pieces of wood can be hand cut jigsaw.
But this subject will be discussed on how to make your own image on a flash drive.
There will be 30 pictures
So here's this flehi we finally get:

More details can be found in the MC in the forum, or here? There's all sorts of stuff about painted.
First grind the workpiece and a drawing

Nibbling contours and any surplus rough mill.

We express the basic line of the cylindrical cutter. Since then the easiest way to begin to immediately visually separate elements from each other.

After this operation, you can delete a pencil, since it will only spoil the blank and nothing more will not help.

Acute triangular lance penetrate deeper into the leaves and add detailing. Main now - to designate the groove.

Choose background ball diameter boron 1-1, 5 mm. Now we need to create depth, highlight the volume.

That is the same, but bigger

Truncated cone is convenient to cut convex surfaces, as well as cut grooves

Now you can proceed to cutting the concave surfaces of the leaves. This is done in spherical burs of different diameters

That this arsenal is enough to make a picture. (from the fact that postponed the bottom right)

Now you can work and diamond burs. It will approach the Chinese cheap, but you can buy and dental

If the result is not quite like it, you can manually modify the graver, which are usually made of broken off Needle. Shtihelem usually applied to the smallest details and undercut any flaws. At the initial level, you can do without them

And now you can poshlifovat. Grit sandpaper from 500 to 2500, new ice cream on a stick, or simply folded, perfectly cope with this task. But patience is needed.

Here's a tool able to grind anywhere))))

For polishing a lot of different pastas, but we must remember that the bone is porous and paste clogged pores. The paste is then washed GOI will not succeed, so I use only light pastas.

After polishing is still not clear what and how. The paste should be washed off

USB flash drive-sink looks like

My solvent, lightly polish the disc tissue, and now one is ready.

In the second stick side to do so. Draw a pattern

Cut baselines

Choose background ball

Truncated cone cut convex surfaces

Spherical burs are working on concave surfaces

And this is - the best place universal boron. They are usually carried out prior to finishing polishing with diamonds.

Some places can shlifanut and discs and abrasive rubber bands, but do not need to get involved - they are too good bite and smooth surface.

After polishing

Wash off the paste solvent

We direct brilliance clean cloth circle

As the parties have different contours of the stick, it would be necessary to bring them somehow Poplavnoi. To do this, boron nibbling at its discretion. After still need to be sanded and varnished furniture or expensive oil, but I did not save these foty, alas.
That's all.

Source: