475
Seamstress cut paloposki a handkerchief... after 20 minutes I was enchanted by the result!
Paloposki handkerchief — a real springboard for creativity! Many of the world's designers, inspired by this item of clothing, created the entire collection in the Russian style. They are inherent in an unforgettable color, brightness and originality. Today our editors share their favorite readers the secret to creating elegant blouse from pablopicasso handkerchief.
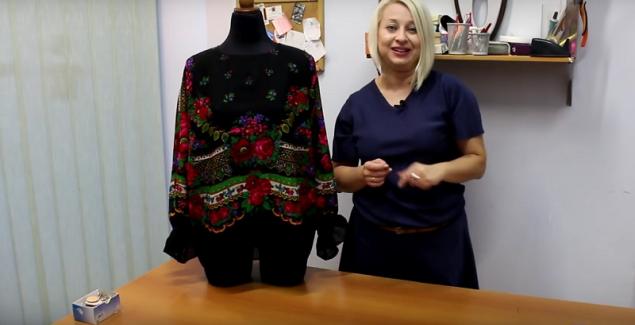
Blouse your rugamite need
Progress
See in this video how to cut out the sleeves and pair them with the basis for the blouse.
If you liked this nifty idea to refresh the wardrobe, share this article with friends!
The author
Victoria Poplavskaya Believes that art knows no rest! Enjoys drawing, used to look at life with a painter's eye. Cleaning the house and cooking finds work, a pleasure after all to any business can be creative! Loves unorthodox methods of solving problems. Favorite book Victoria — "Three comrades" E. M. Remarque.

Blouse your rugamite need
- pavloposad shawl
- thread
- sewing machine
- elastic tape or elastic band
- inch for sewing
- tailor's chalk
- line
- scissors
Progress
- Fold the handkerchief in half and measure 70 inches at the bend. Get one allowance of 1 cm and mark it on the fabric with tailor's chalk. Draw a chalk 2 horizontal stripes: one along the line of the seam allowance and one inch below.
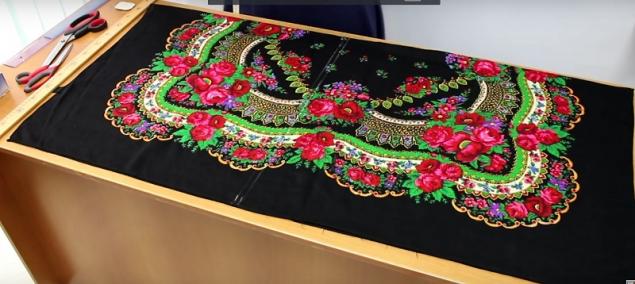
- On the line of the seam allowance cut off part pablopicasso handkerchief.
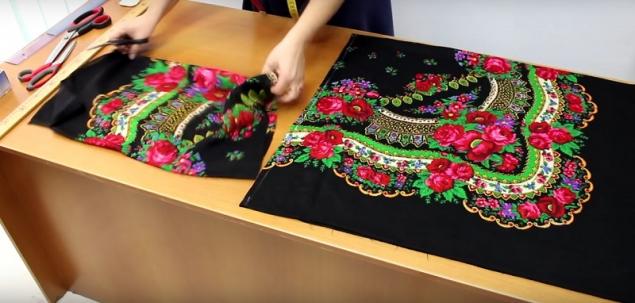
- To determine where to place future sleeve blouses, divide in half the width of the scarf. Make match marks on the fabric and draw a horizontal line with chalk.
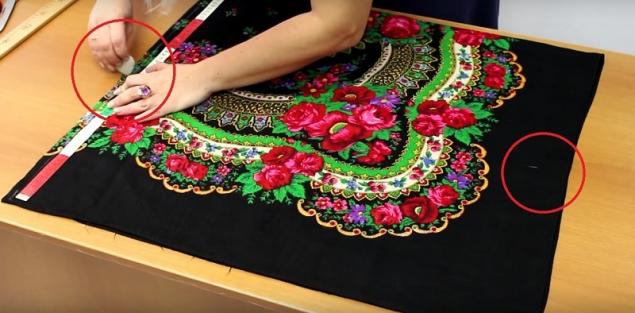
- To form a line of openings, recede down from the extreme point of 25 cm Then divide this area into 3 equal parts and put the appropriate mark, as shown in the photo.
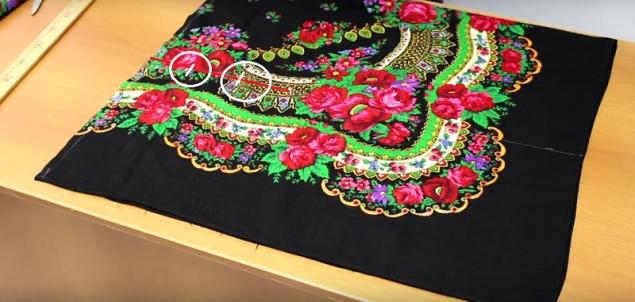
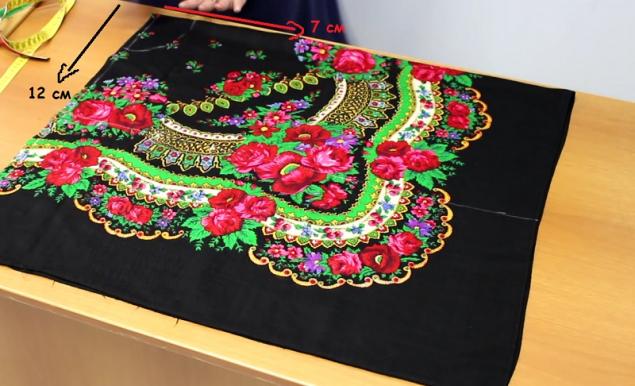
- To form the neck, enough to retreat from the fold-down 7 cm and 12 cm to the left. Connect these points with a smooth line, not forgetting to make allowance to 0.5 cm.
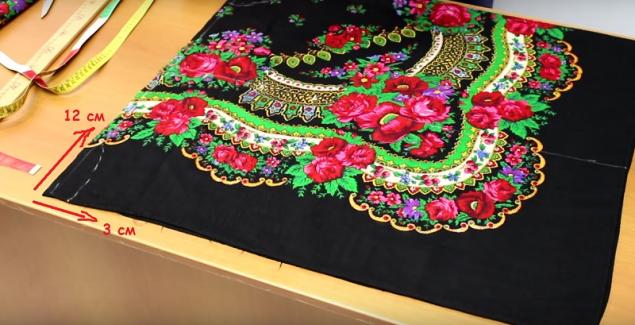
- Shape the neckline at the back. To do this, back away from the opposite edge of the fabric 12 cm right and 3 cm down. Connect these points with a smooth line.
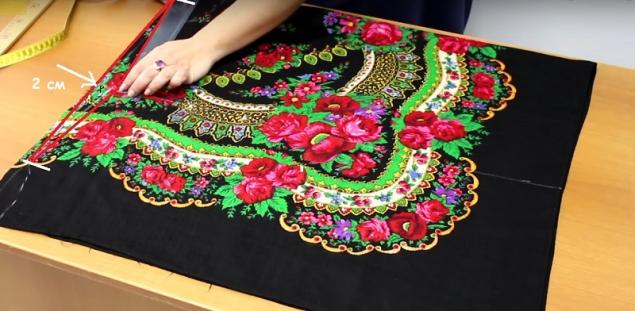
- Back down 2 cm down from the location shown on the photo, and make a mark on the fabric. Then connect the upper point of the neck on the back with this mark and the upper point of the neck shelves.
- Depart: 2 cm right and left from the points shown in the photo. Then connect them with a smooth line.
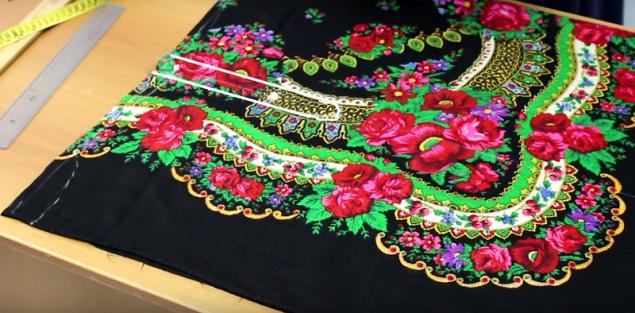
- The center back will be a seam. To mark it on the fabric, back off 1.5 cm from the edge, which is opposite the fold, and draw a horizontal line with chalk.
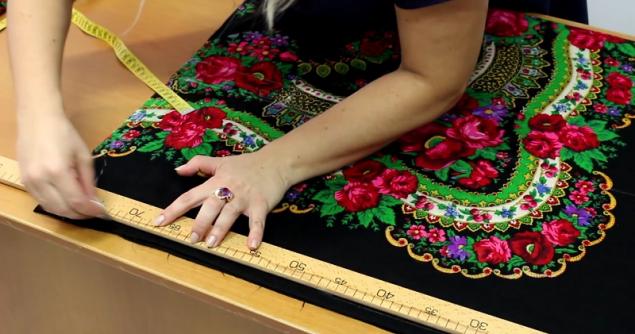
- Carefully cut the neck of the shelves, shoulder seam, armhole and the neckline of the back. Don't forget to do all over the allowance of 1 cm.
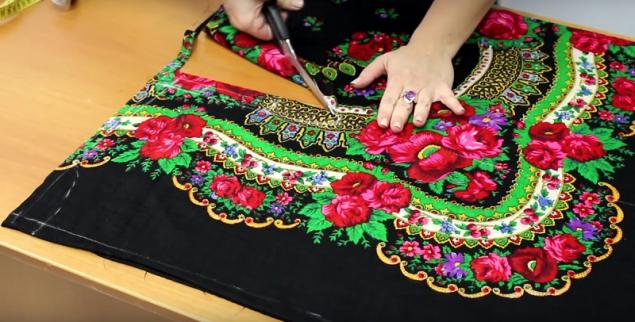
See in this video how to cut out the sleeves and pair them with the basis for the blouse.
If you liked this nifty idea to refresh the wardrobe, share this article with friends!
The author

Victoria Poplavskaya Believes that art knows no rest! Enjoys drawing, used to look at life with a painter's eye. Cleaning the house and cooking finds work, a pleasure after all to any business can be creative! Loves unorthodox methods of solving problems. Favorite book Victoria — "Three comrades" E. M. Remarque.
Always suffered with the creation of hairstyles until I discovered THIS... Very practical tips!
In the peel of Mandarin is a great power. 7 recipes that save you.


