1376
Print tabs on the 3D printer or our Kote against the Japanese MiMi
animatronics - the creation of mobile robots that mimic the movements of living things, real or imagined.
A little over a year ago I was shown a concept video «necomimi» - frankly frikovsky gadget. This cat ears controlled using brain signals read by two neyrosensorov. Very emotional toy. First wanted to buy her disassemble and reassemble somehow different. Why do differently? I looked online video about a lot of these "Mimi" and realized that firstly ears move in only one plane that looks like something awkward. These koshariki move ears in all degrees of freedom. And secondly These neural signals with neyrodatchikami some questionable technology. Small girls could barely move his ears, as if they are not wrinkled his forehead, trying to ice cream cone. One even cried.
We all will be different: the ears will be free to move in two planes, and manage them will simply pressing a button on the remote. And for each button and come up with your program a special effect. Shorter. Collect simple robot animatronics programmed to movement simulating the movement of the cat's ears.
What do we need?
1. The microcontroller Arduino Nano or MP1511 from trowels
2. Four servos. Micro or mini. 180 degrees.
3. Five buttons and switch
4. Power Supply 5-6 (four penlight batteries or even better poverbank smartphone)
5. A little wires, soldering
6. Thread a needle with
7. Two flap felt cloth of different colors
8. A couple of hours of free time
9. But most importantly - access to a 3D printer. It then will print frame ears and kinematics.
10. Free evening))
Files tabs frame and rim for mounting servos are laid out in the form of STL-files on our website at this page . They are adapted for printing on MC3. But, however, they can be printed on any 3D printer. Housing for the controller and buttons each can come up with myself.
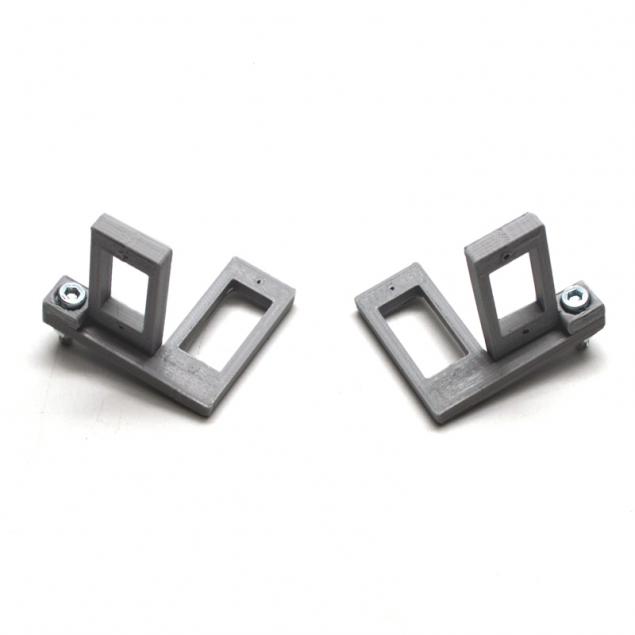
Build kinematics When all items will be printed, proceed to the assembly. Kit for each ear is divided into three parts: the tab itself, and the two parts for fastening servomotorchikov.
The fastening screw and nut parts for servomotorchikov as shown in the figure. Should receive two symmetrical frame:
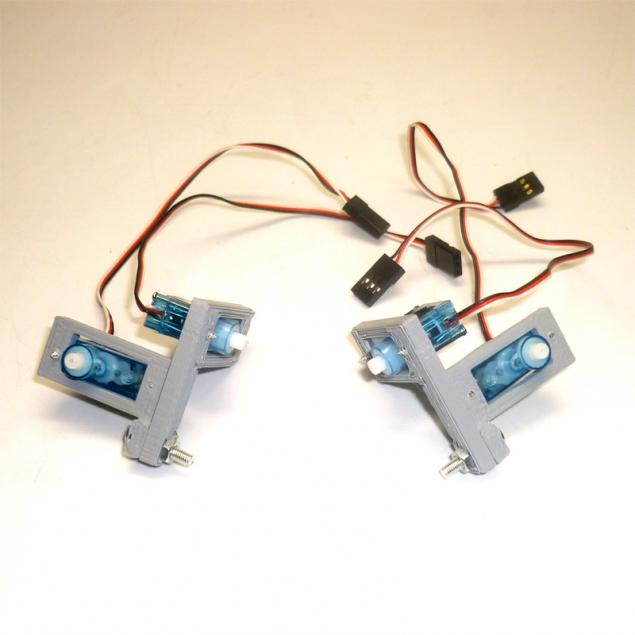
On previously made frames attach the servo as shown in the figures. Need three screw - two large and one small (servos are always complete with screws). Two large screws screwed itself servo and a small rocking to its axis.
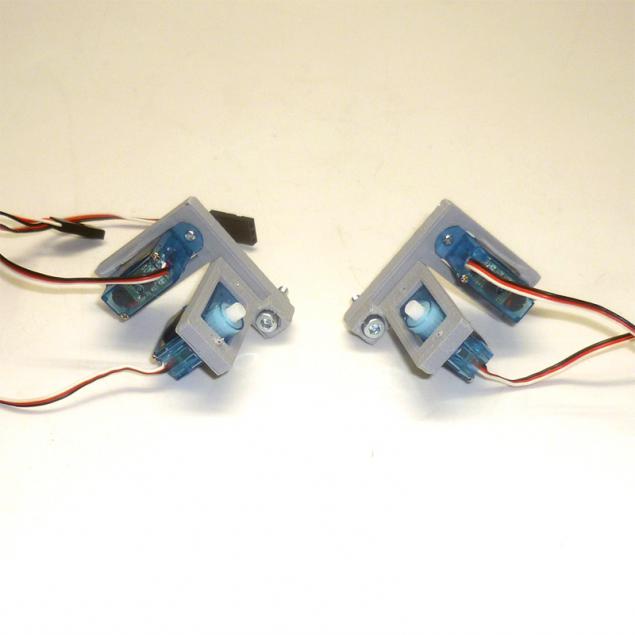
Attach ears It is first necessary to center the axle. Axis servo can only move 180 degrees. Dress on the axis of a long rocking gently scrolling axis, we find extreme points, we derive the middle of the axis, take out and re-establish the rocking her body perpendicular to the servos. Second servo to be mounted on the rim center the same way.
Further, through the hole in the platform for mounting servos small screws anchoring the machine on the ear. Carefully look at the drawings:
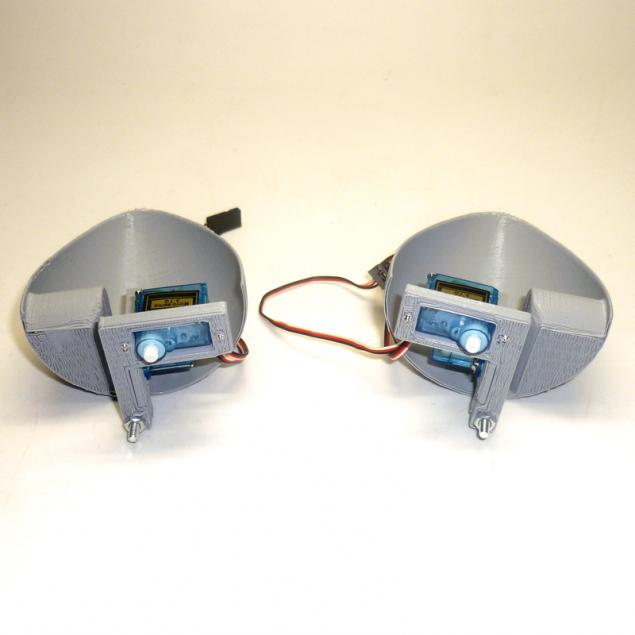
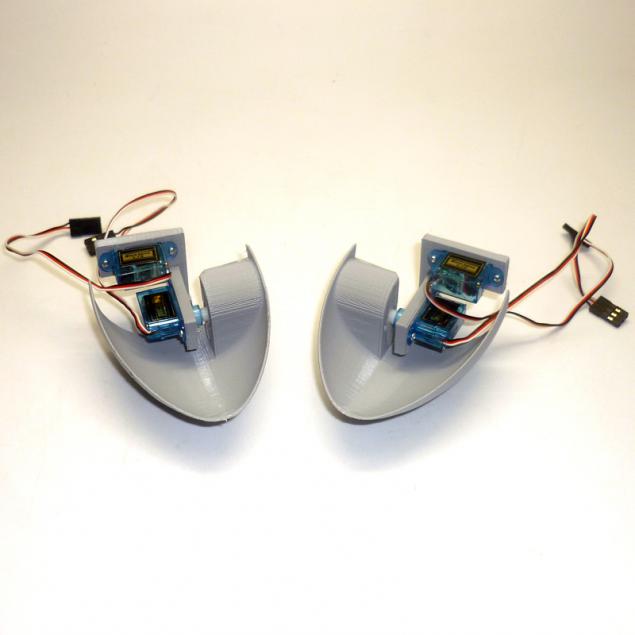
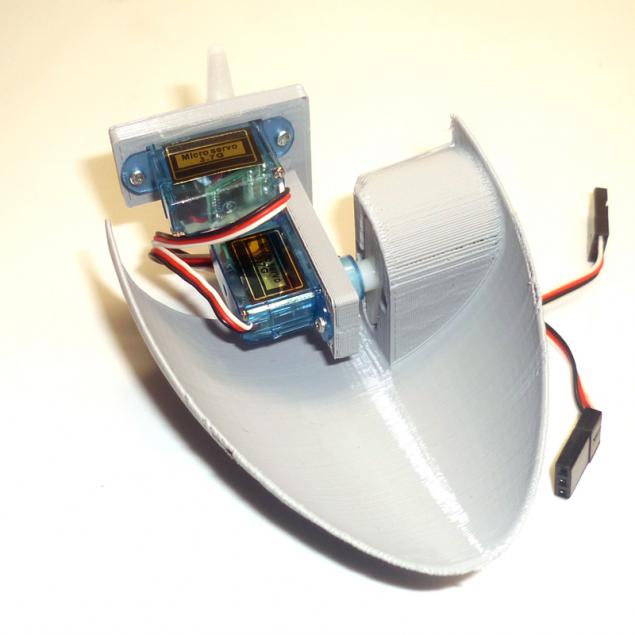
By the rim ears attached small screws through the hole. To fully understand, consider drawings:
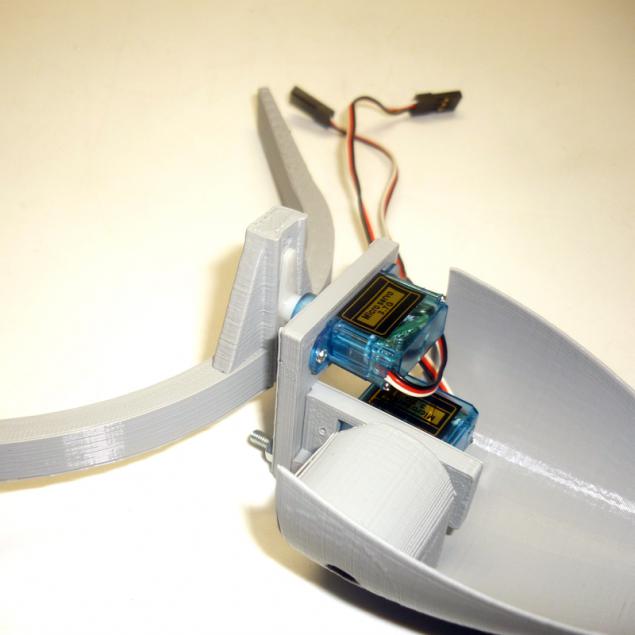
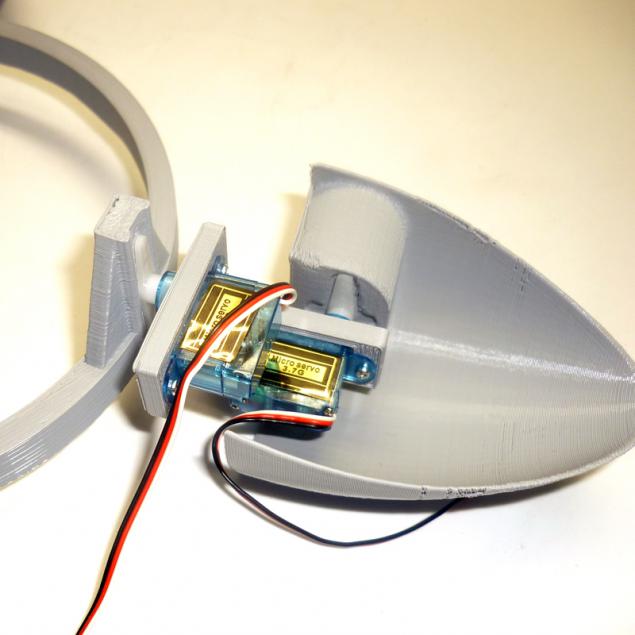
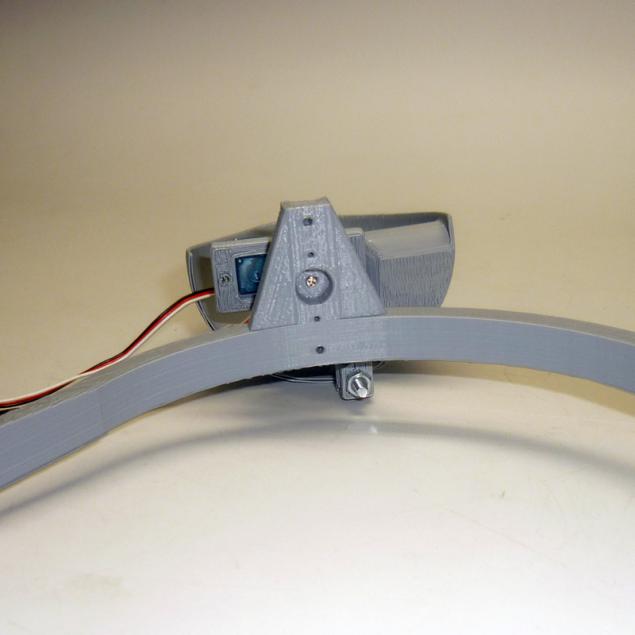
As a result, we obtain:
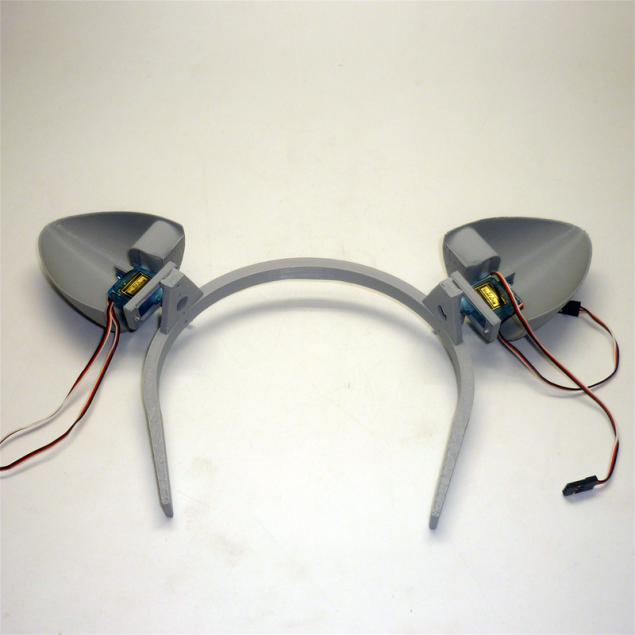
Electrical scheme Servomotorchiki ears are controlled by a controller Arduino Nano or MP1511. Sketches for download Arduino microcontrollers can also be downloaded from our site .
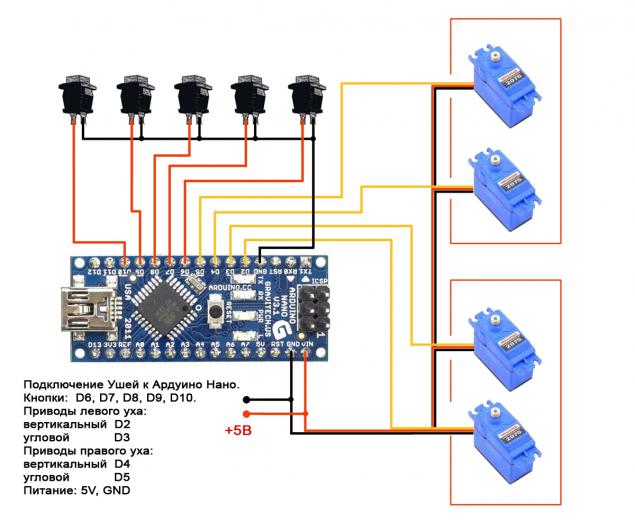
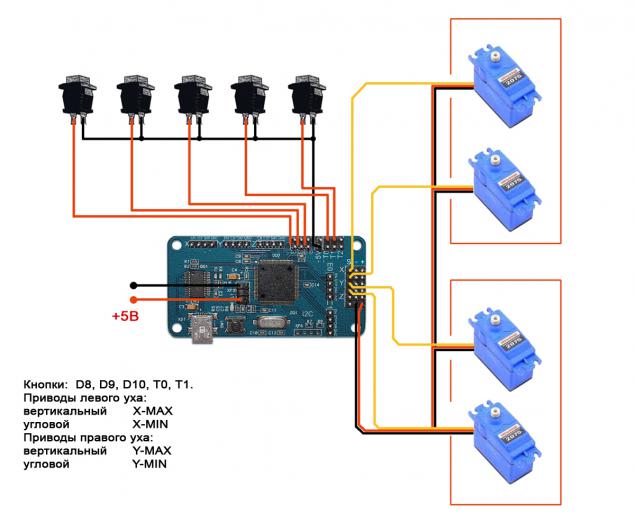
For ears were invented 5 special effects, each of which is activated by pressing a button. These are: waving his left ear, right ear waving, waving both ears, both ears lowered, lifted both ears. But you can come up with their effects, and convert the sketch.
Now let us compare.
Our Kote:
Japanese MiMi:
Material provided by our DIY-direction - Master Kit.
Source: geektimes.ru/company/dadget/blog/247130/