Repair of children's long six months
 Bashny.Net
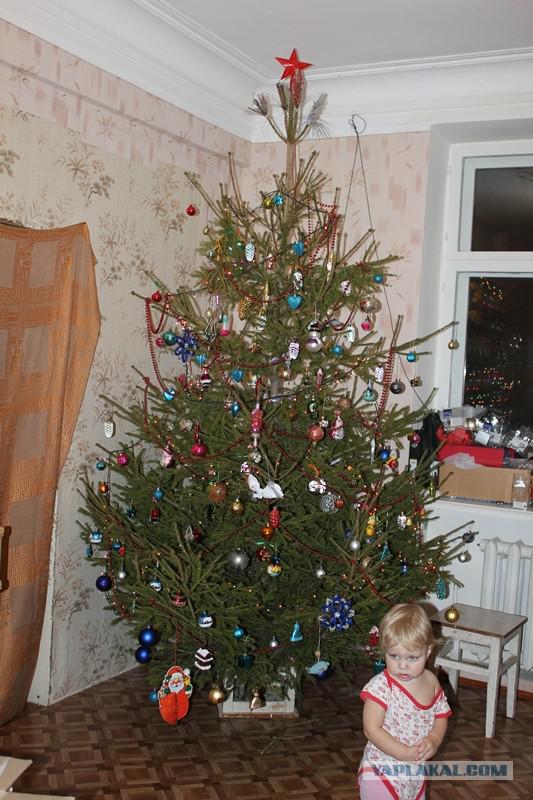
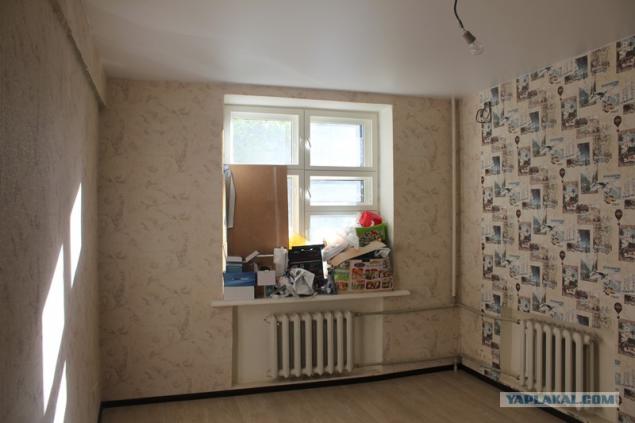
In December last year we moved into a new apartment. New in the sense that we buy it. Buying Process deserves a separate post, but oh is not about that. House built in 1946, Stalin, 3m ceilings. Flat condition - you can live, but the family council it was decided that the repair - to be! At the time of purchase, we had 2 children now from day to day expected completion, which, however, was planned a year ago. Therefore, it was decided to allocate children to the largest room.
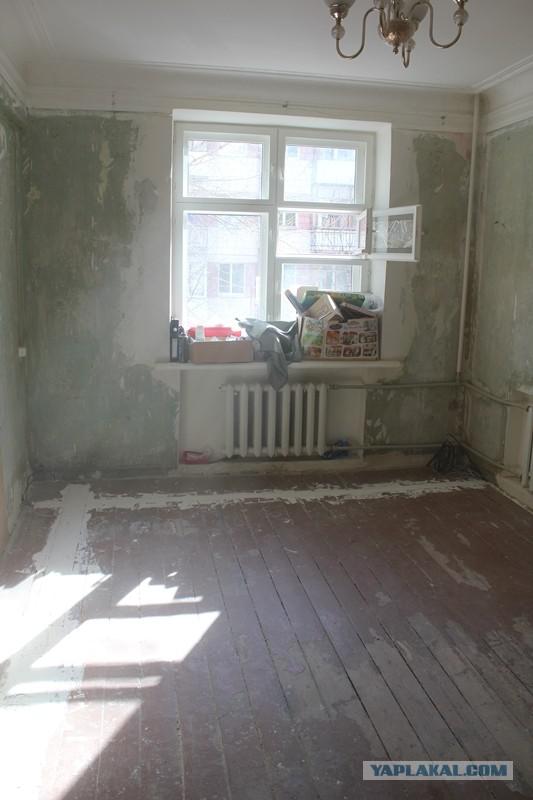
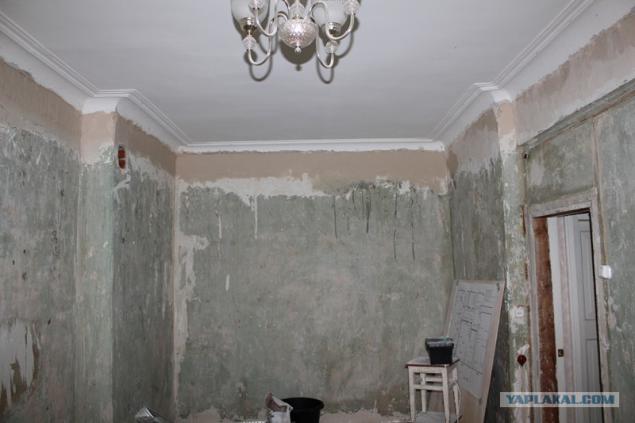
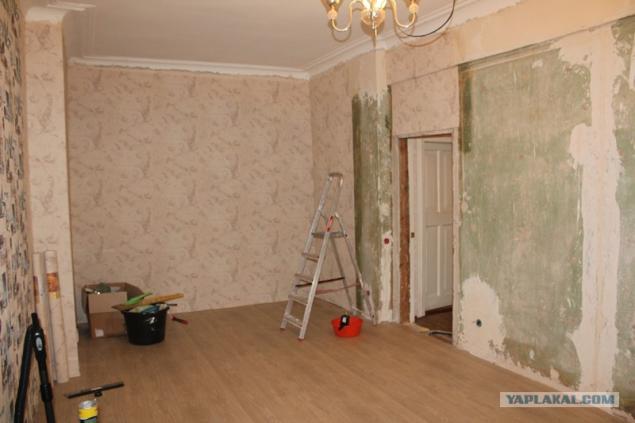
Repair decide to do on their own. Also, because of my manic obsession with the ideas of automation of everything, was painted a new wiring diagram, for living with outer aluminum twisted pair wiring and 1 machine for the 21st century - at least ashamed, as a maximum - is unsafe. Especially considering all the equipment such as dishwashers, stiralki, mikrovovolnovki etc., without which it can live, but it is better with them. The new scheme provides a compound of the star, which is located in the center of the switchboard and at the ends of the rays are the end points - sockets, switches, tips for svettilnikov, air conditioners and so on. Plus twisted throughout the apartment. Plus coaxial cable in some places. And that means not just a lot of wires, it means a lot of wires. And so, after a meeting of the new year, repairs started. Next are pictures with comments. That kind of room before renovation, no other pictures, but for this you can imagine about the state at that time. The room was originally a 2-input, 1 corridor, the second of the entrance of the room, we decided to remove this entry.
So is 78 pictures.
The first thing ripped wallpaper. Mostly departed whole stripes, sometimes had to handle metilanovskoy Remover wallpaper.
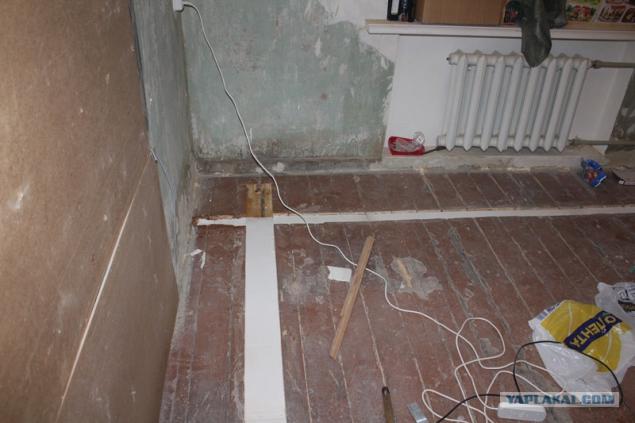
The floor was linoleum, under it - hardboard sheets. Floor - wooden planks thickness of 5 cm, the floor did not creak, so it did not begin to touch. Whoever nailed sheets of hardboard, obviously spared no nails, because I just rip them zadolbalsya. The sheets were broken, the nails are pulled "meat" that they had vykolupyvat mites.
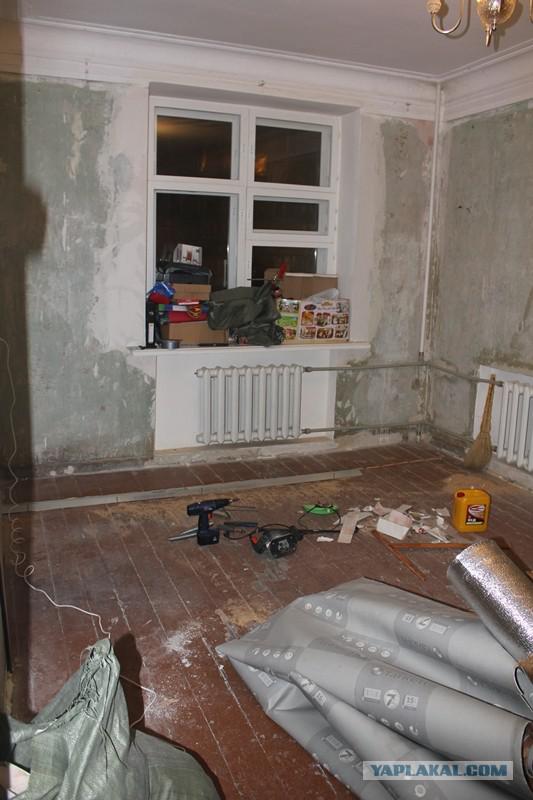
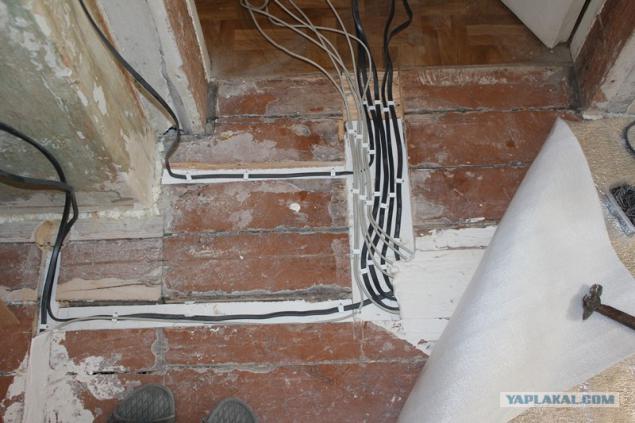
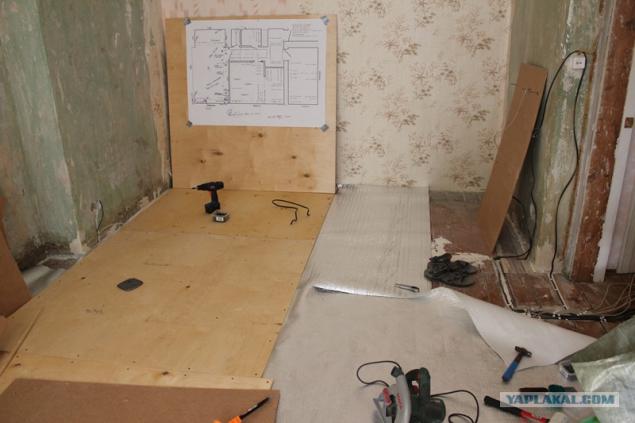
Regarding the posting - I do not remember exactly what spodviglo me to decide to place the cables in the floor. Perhaps there was some reason that will determine in the future the amount of crap that I was raped. The idea was - to make a groove in the floorboards 3cm deep, for fire safety at the bottom of the grooves pave noncombustible substrate thickness of 1 cm, put the wires and pour it all gypsum. This result has been done, but the cost of such efforts, which is not describe. Initially, I tried to cut it out of the groove a router. Here a general view of the work environment:
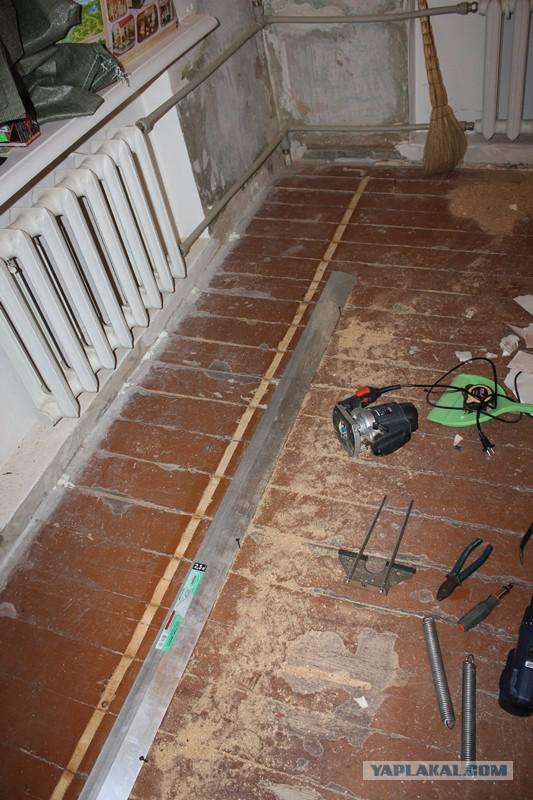
Here you can see the groove made to the router does not leave aside bought the rights, I drilled 3 holes in it and screwed with screws to the floor, and the mill rests on the rule.
So:
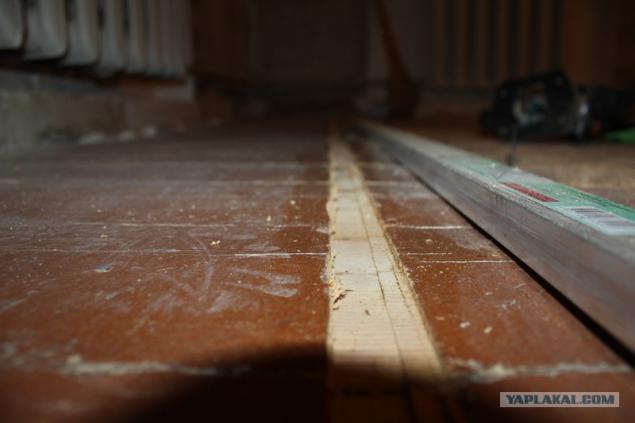
The groove closer. Here we see that the depth of no more than 1 cm, the width of the order of 20mm - diameter of the largest mills in the kit. If we consider that in some places I will need the width and depth of 15cm 3cm everywhere, and this groove it took me 10-20 minutes - the work I was there for a week, maybe more.
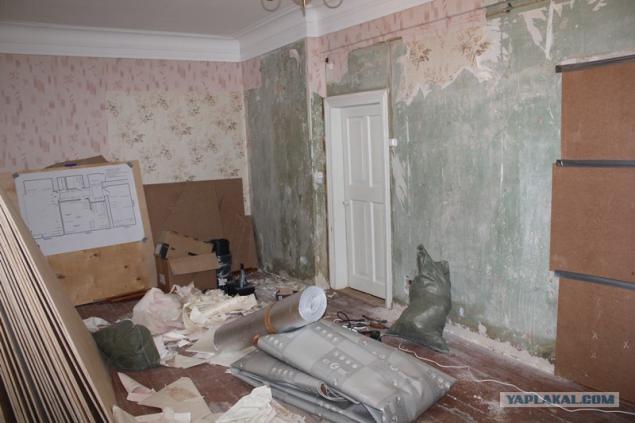
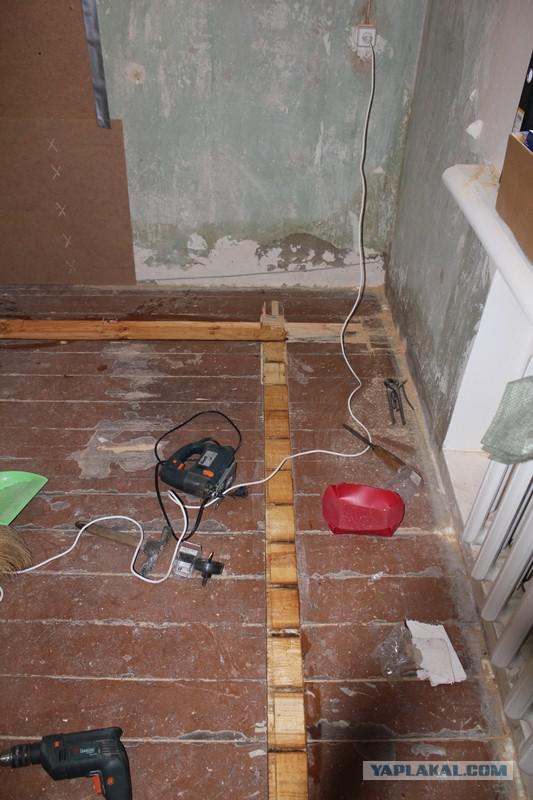
Then, it was on February 2, I suddenly thundered to the hospital with appendicitis. And as much as 2 months fell out of repair, for nothing is impossible to lift, bend, then the problem is not that crawl on the floor with a router. That is the state of the room at the time:
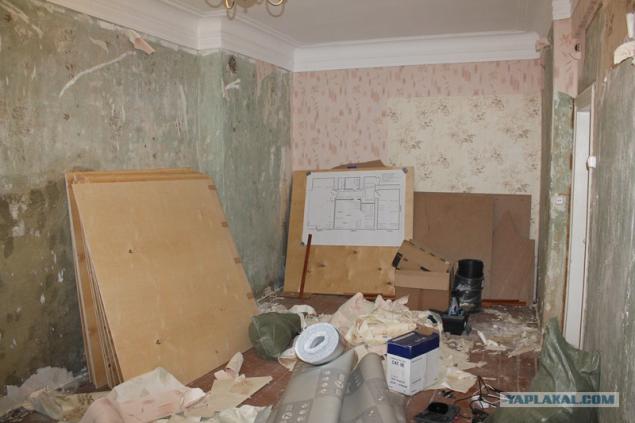
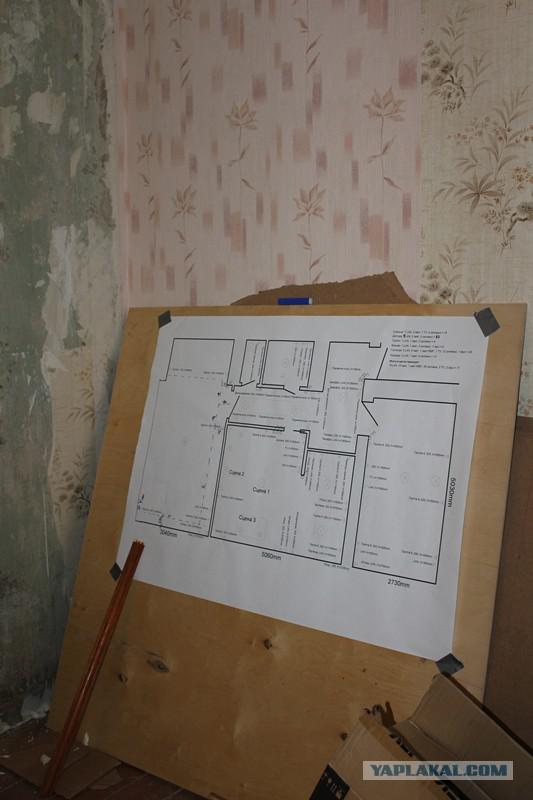
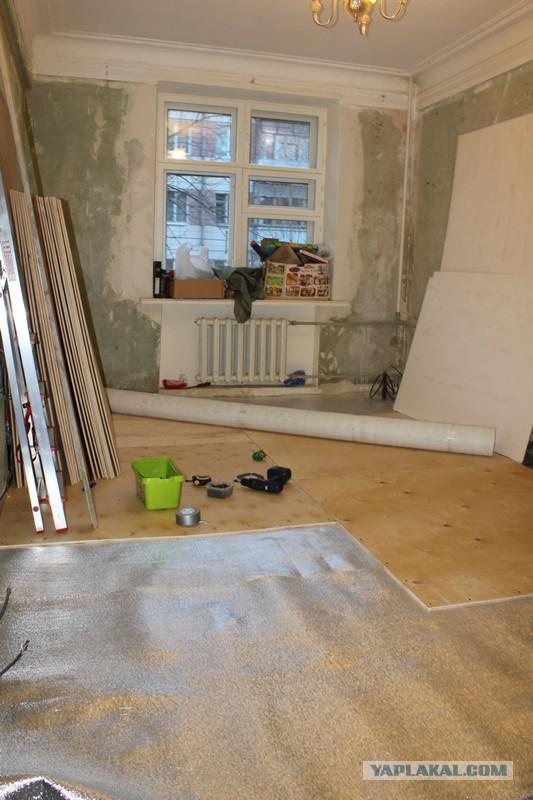
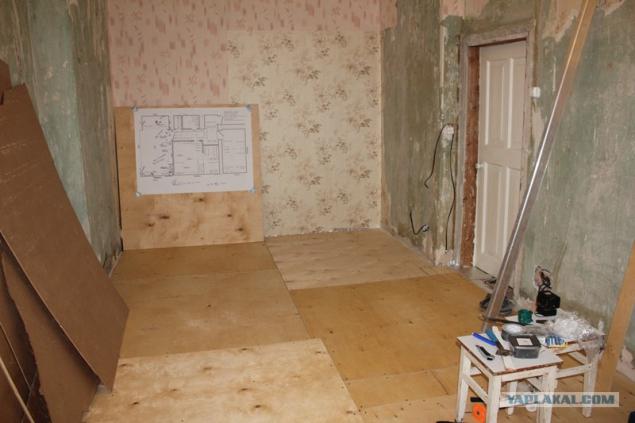
From a different angle. In the background is a printed plan of the apartment with the wiring diagram. Along the way there are real distance between points and lines cabling, so that later in which case do not fall into the wire. One can see the plywood that will be laid on the floor. In the center you can see a roll of insulation that will lie under the plywood.
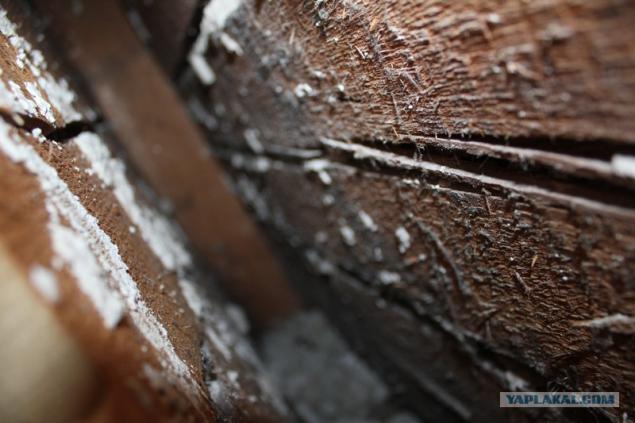
Stupid trait - to grasp all at once. I have not yet finished with the cable and already want to do Enclosures. One wall in the room wooden hollow - poles on top of the board, on top of shingles on top of the plaster. Drill the holes and how to safely accommodate podrozetnik - not come up once.
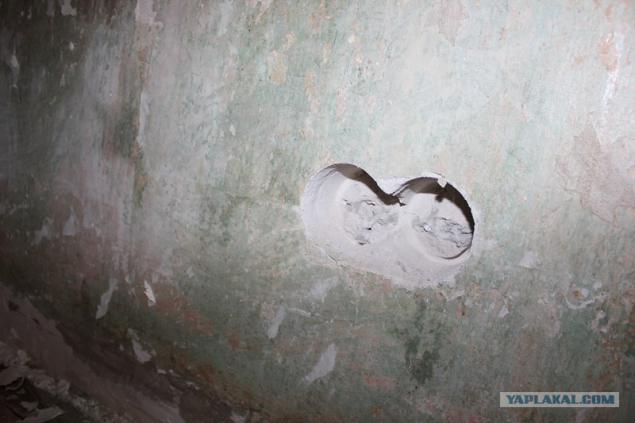
The retaining wall is simpler - the crown for concrete + drill 2 holes cut out. How would when installing sockets - not horizontally (((
Floor plan larger
And here is the cable. He took a flat VVG-ng-LS, lighting 3 * 1.5, on the outlet - 3 * 2.5. Cable-flammable, low smoke emission from. In general, the cable is produced in different plants, some of them share the old ghosts who does something for new TS - in the end decided not to save and take the cable GOST verified plant.
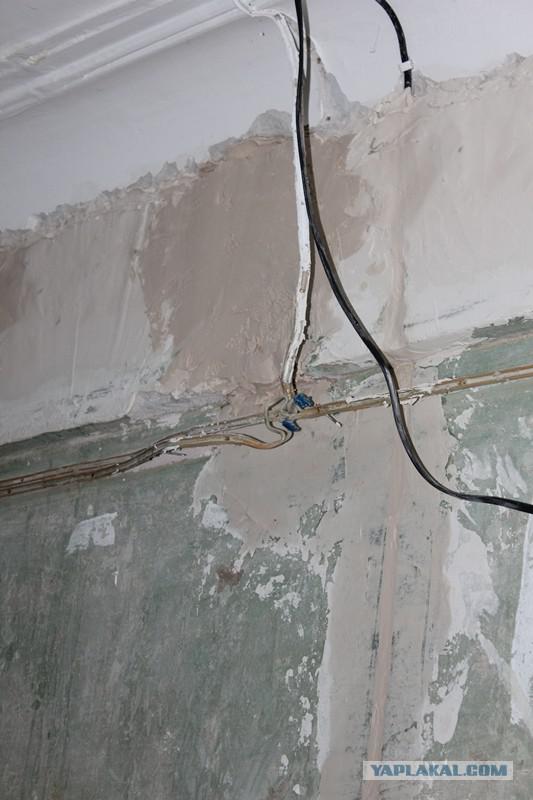
That's the old wiring was under wallpaper, seen carrying concrete beams under it begins wooden wall.
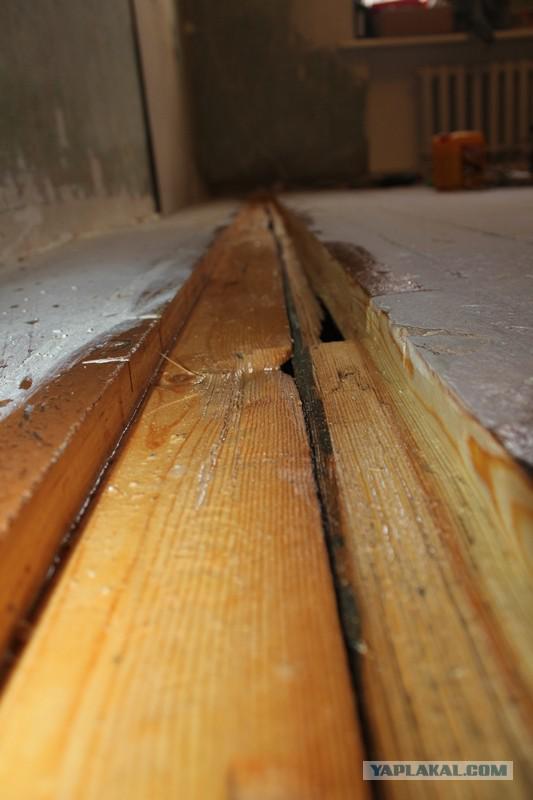
Returning to the subject of the grooves wire harness - the solution was found! It was bought by a circular saw, it was exhibited at the depth of the saw 3 cm, made two parallel saw with the correct distance between them, and then beaten out pieces of a chisel. When propyl walked across the boards - it was all just jumped on board once or twice. But when propyl walked along the boards - it was a lot harder to beat, the pieces came off the length in meters or more, however, with nail puller and such a mother it worked out. The final stage was the processing of a router, buy widest cutter, which could find - 3cm in diameter, regular mill site was not enough for the width of a piece of chipboard produced a wider area.
All wood handles impregnated fire - safety first!
Before the walls of any router or circular saw did not reach, here it was necessary to drill a drill crown of the tree, to cut sawing jigsaw with a short - well, again perversion.
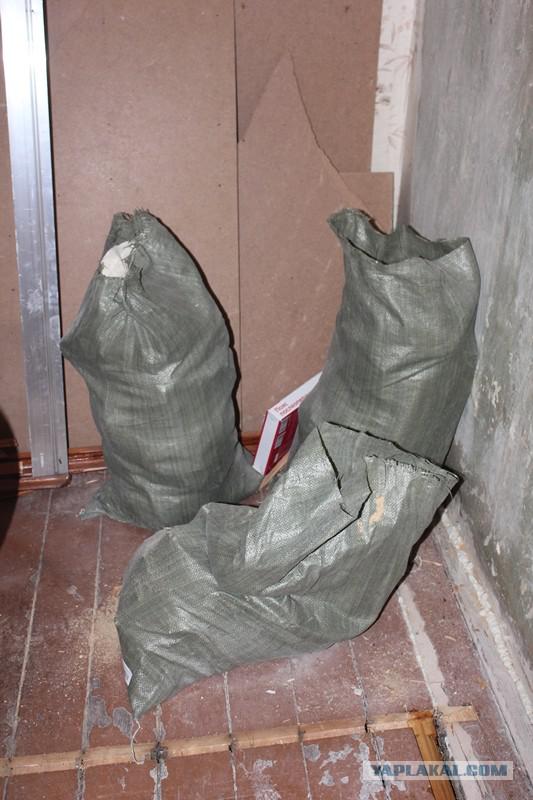
Bags of wood taken out. If my memory serves me, this is only part of the collection.
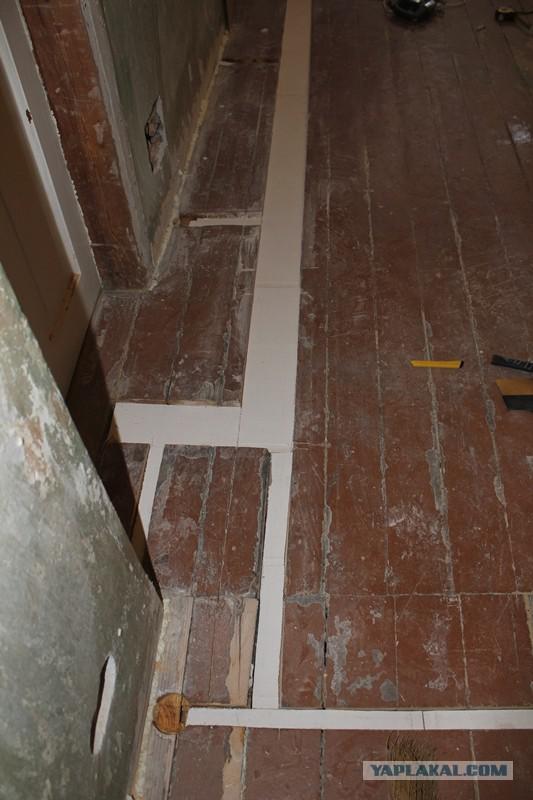
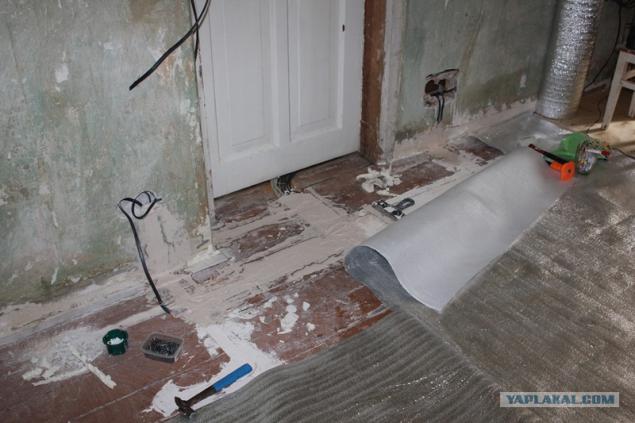
There is already stacked substrate on the bottom of the grooves.
And another
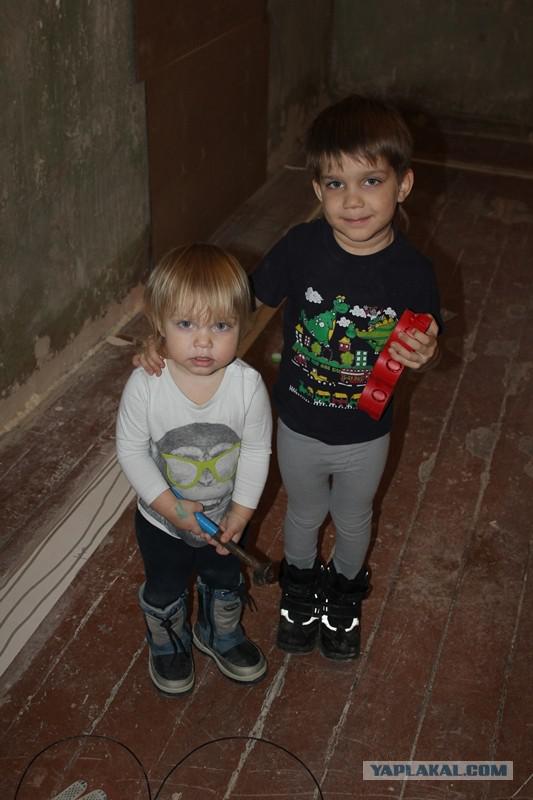
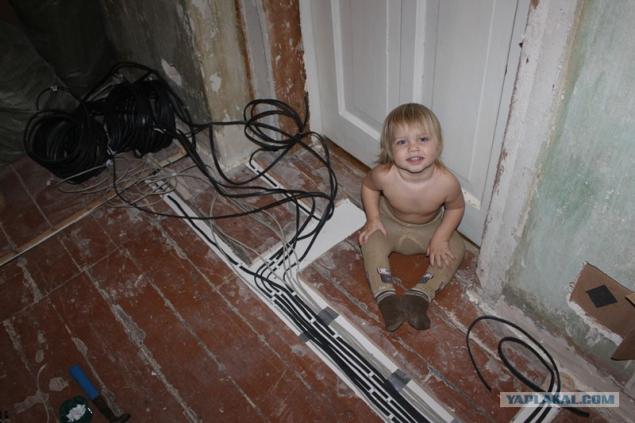
Here's assistant - where the same without them. And only have to be distracted, not to stuali hammer on the walls ...
The process of laying the cable. As it turned out, the flat cable is constantly twisted, need a special rotating platform for its unwinding without twisting.
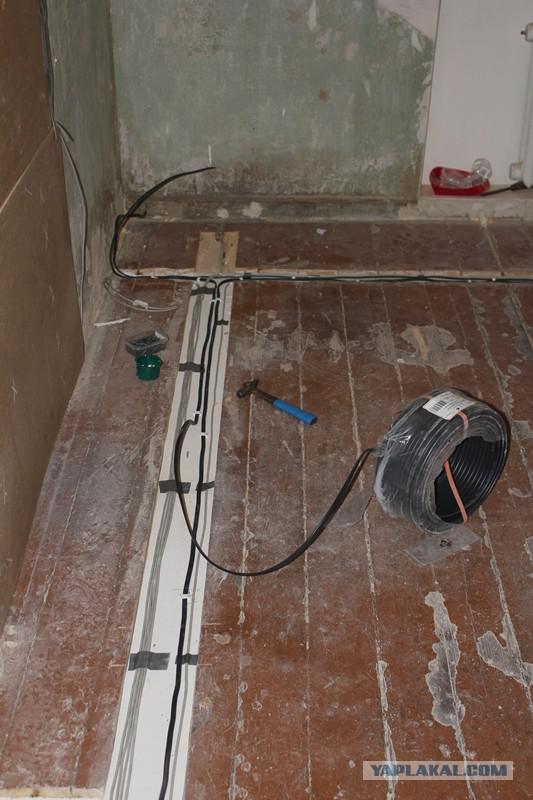
Another flat cable requires a certain turning radius ...
Somewhere cable beaten with plastic mounts, forgot the name. Somewhere glued tape - still then pour plaster.
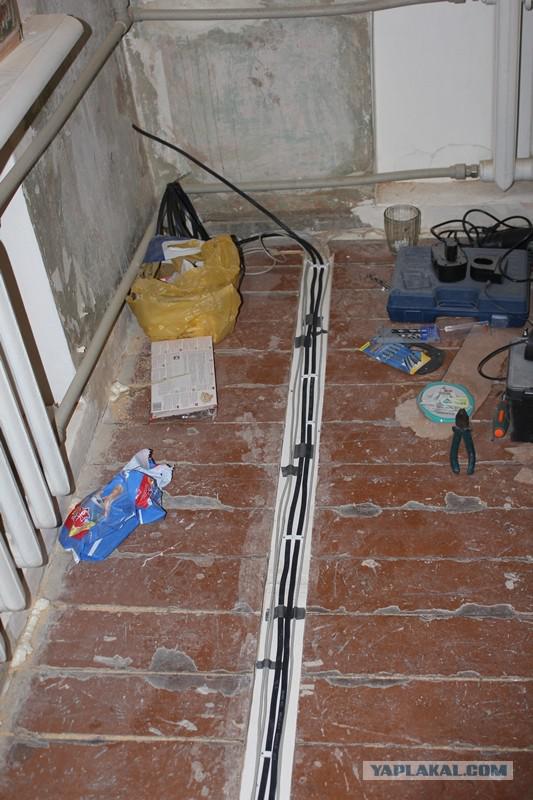
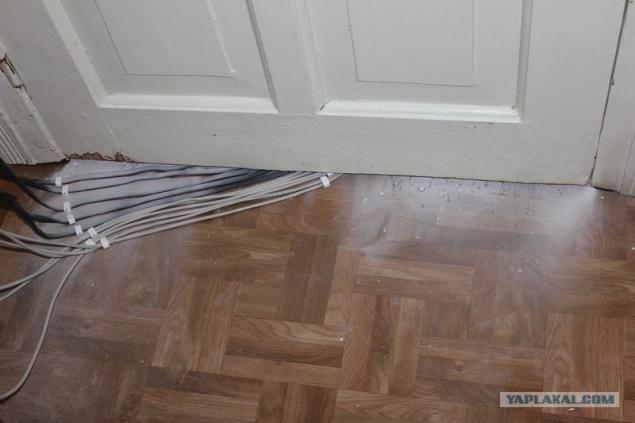
Cable metered and rolled into the bay. Then he steps into the hallway where the front door is about a junction box. The younger generation of process controls, simultaneously wiping the dust from the floor.
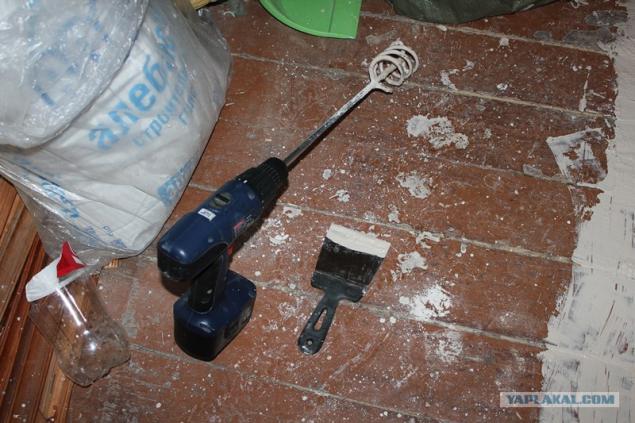
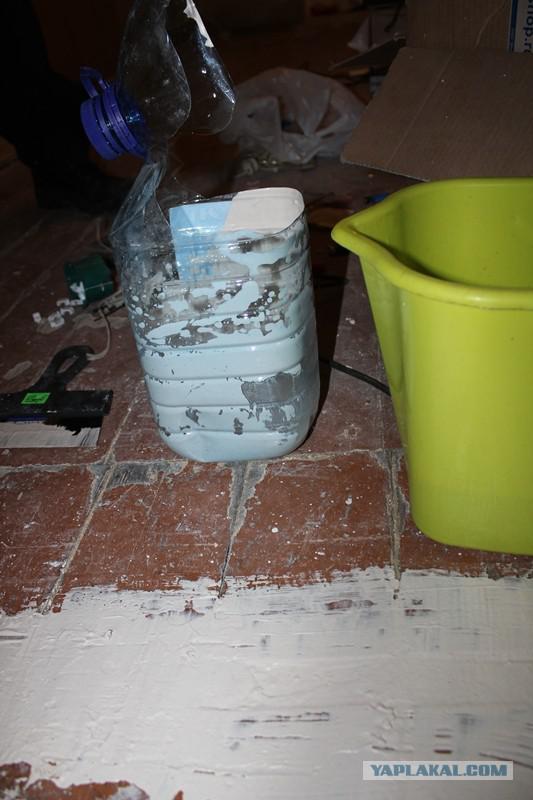
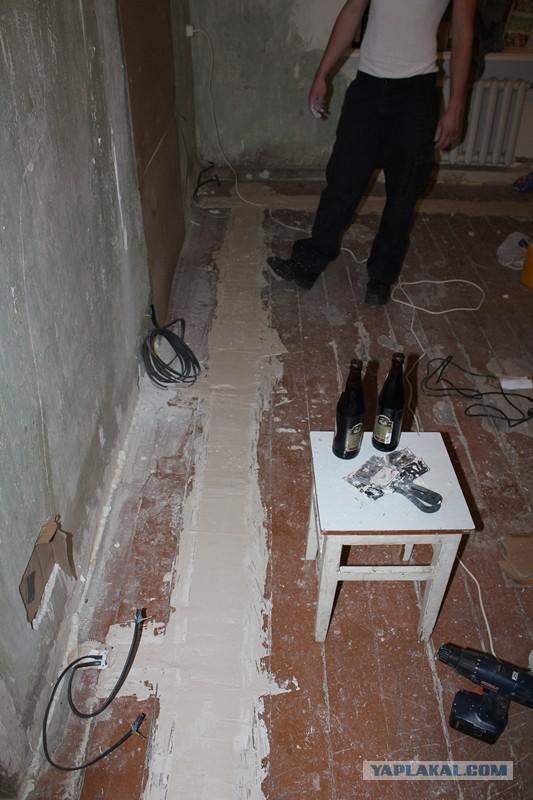
Knead gypsum. It freezes instantly, first bucket had to throw together with all grabbed a stone plaster - did not manage to get to the place, and he had stood in a bucket. So then we made thinner consistency of sour cream, and kneaded in a 5L canister - because it is easiest to pick out the remnants of plaster. Nuisance screwdriver, it is convenient to control the speed, or spray in all directions.
And here is the bottle. Wieden piece drenched grooves.
A small piece of doping and the assistant - like beer and drink, and like and do repair ...
He restored order in the room. Dust is a pillar after sweeping.
Cooking utpeplitel ...
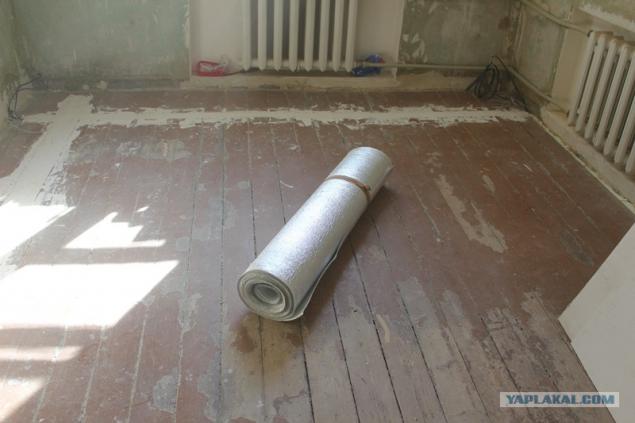
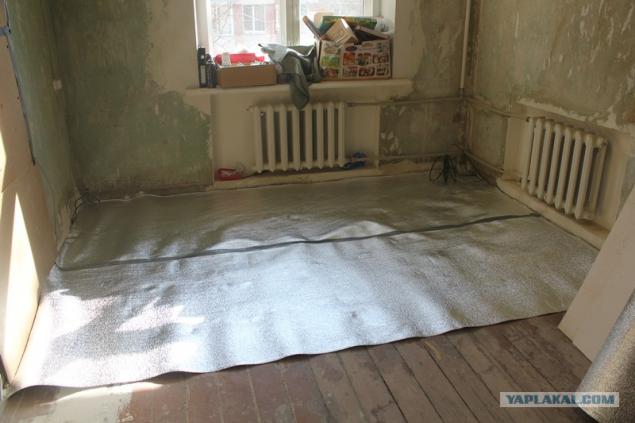
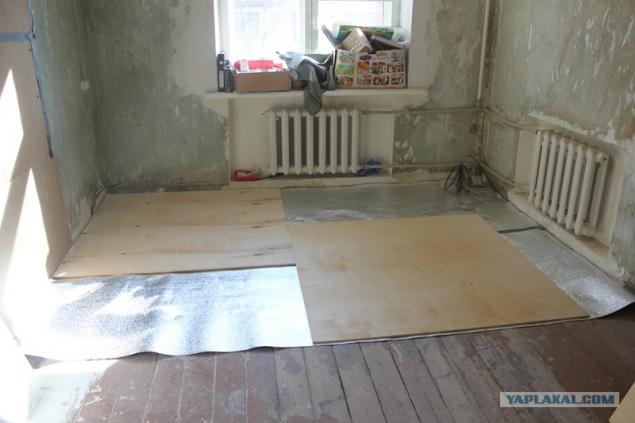
... And rolled it. Long thought which side to put in the end decided to put up a foil to all the heat reflected back into the room.
Lay the first sheet of plywood. The Extension, all as it should ...
Immediately draw the location of wiring - here you can not twist the screws!
Twist drill, screws pictured short, buy long.

The process is brought linoleum.
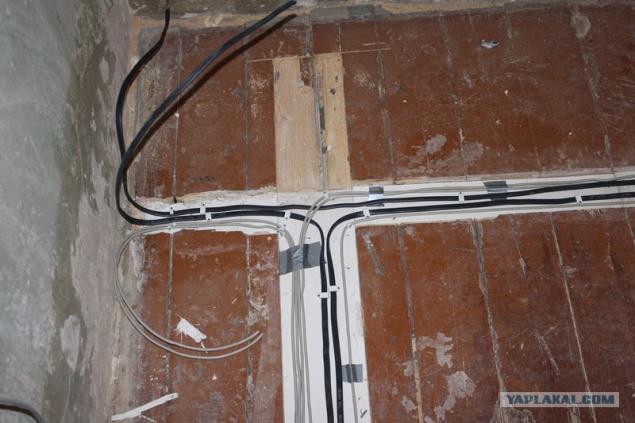
The cable goes into the corridor. Not all filled with plaster.
One band reached the end.
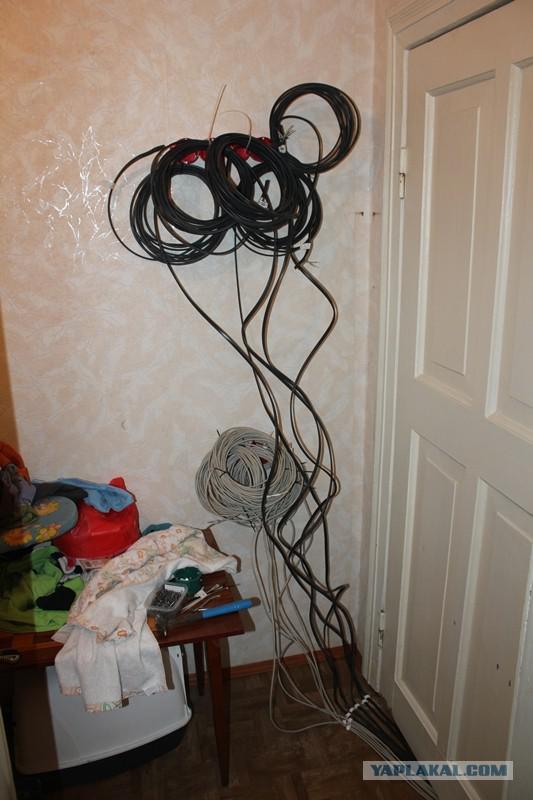
And here and cables. They settled on the wall in the hallway. Because in the hallway repairs will be done last.
Filled missing piece
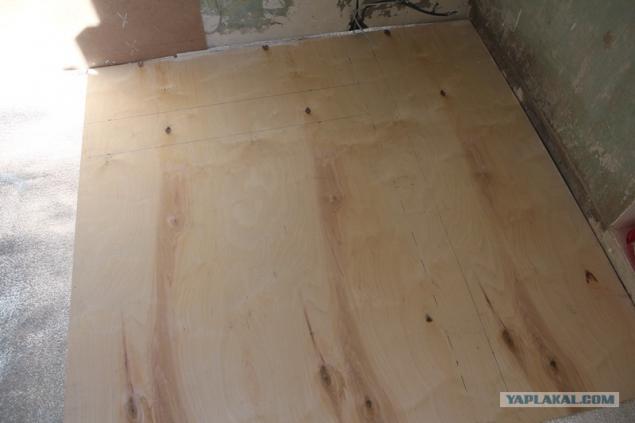
Plywood laid on the entire floor
And then, when neat plywood stacked, I guess, about what I thought? And I thought about the fact that he still had to knock down the walls of stucco, to as high as possible and then pull the ceilings and walls to align. Stucco knocked down the hammer. Saying that the room was dusty - to say nothing.
Here are my once friendly plywood floors. And I did not think to cover the tools and stuff ...
Fretwork knocked down ... all in the dust ...

Closer ... the background of wooden walls, it knocked a piece of plaster. Came neighbors complained that they Wall shakes)))
At first, I tried to collect pyd and debris with a broom. Literally 5 minutes later I realized how hopeless - very fine dust to collect on the floor unrealistic. Household vacuum cleaner worked 30 seknud and stopped sucking - filters are blocked instantly. The decision came after a couple of days - rented building cleaner. It Said - done - went and took a vacuum cleaner
At the same time I took the wall chaser
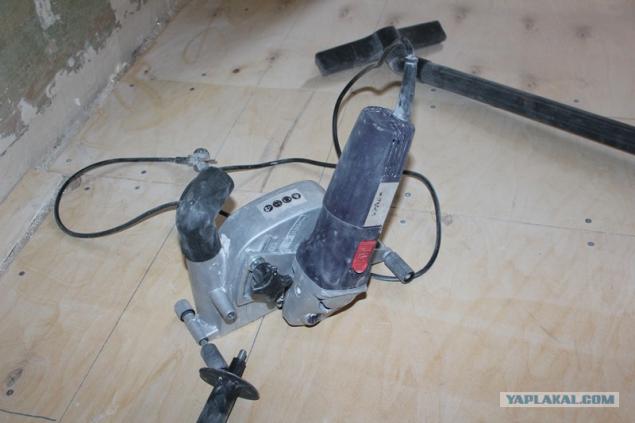
The process of garbage collection. Large pieces to collect the shovel and bag the rest collect a vacuum cleaner. In general, a vacuum cleaner - zaeryuga not expect such a suction power, if a piece of creeping into the hose - with unstoppable force, he sucked in. Inside the way no bags, the whole body is a container for disposal. When it is filled - with the engine cover is removed and the container is shaken out just garbage.

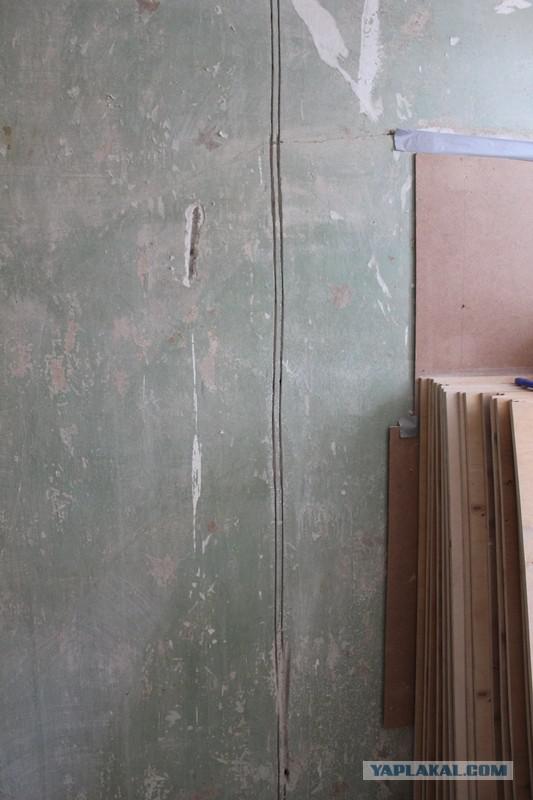
But the result of the work 30sec wall chaser. For comparison - the left attempt proshtrobit wall chisel. The difference is visible to the naked eye.
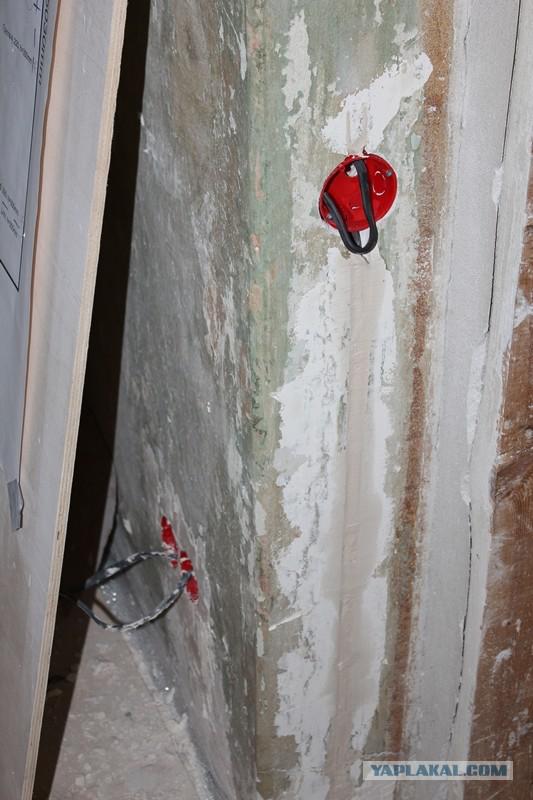
Future switch
And then a group of outlets had to be moved below - afraid that is not enough length of twisted-pair cable.
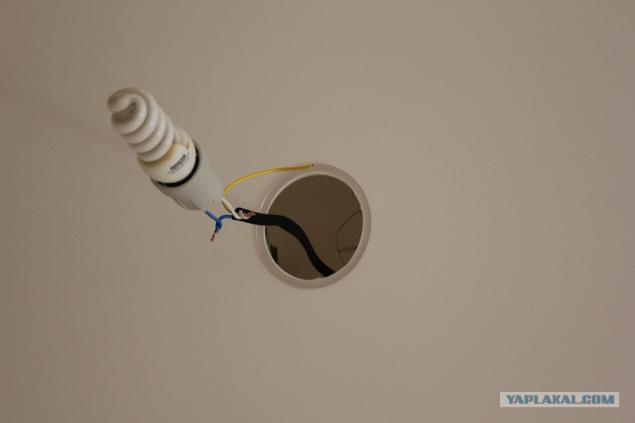
New cable for chandeliers.
General view of the already plastered walls
All vmazat - switches and sockets in the background
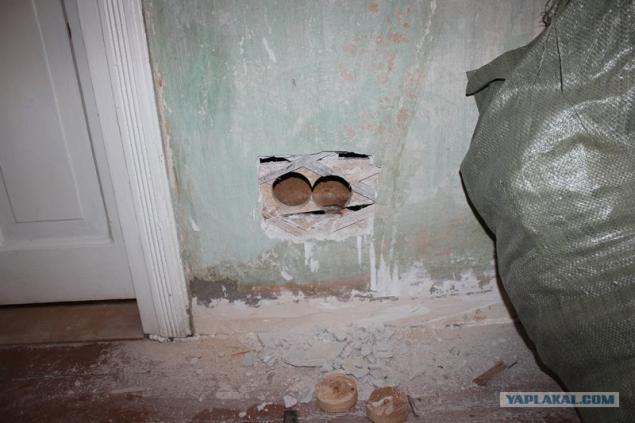
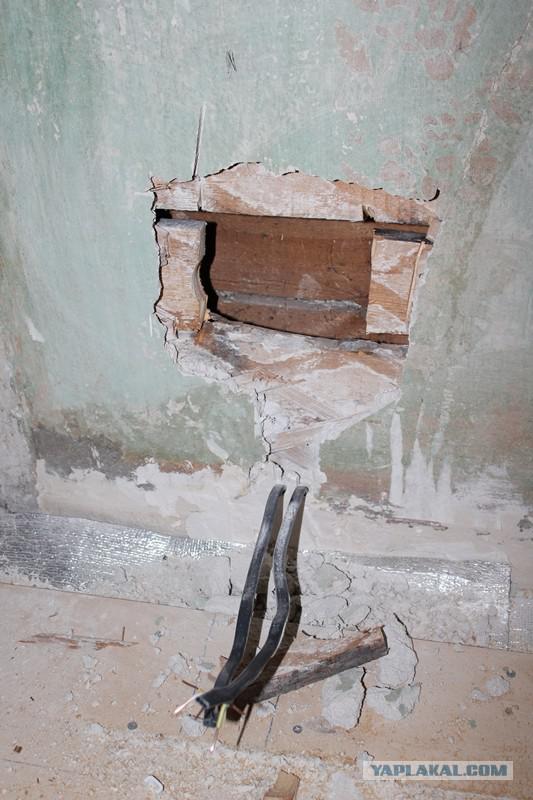
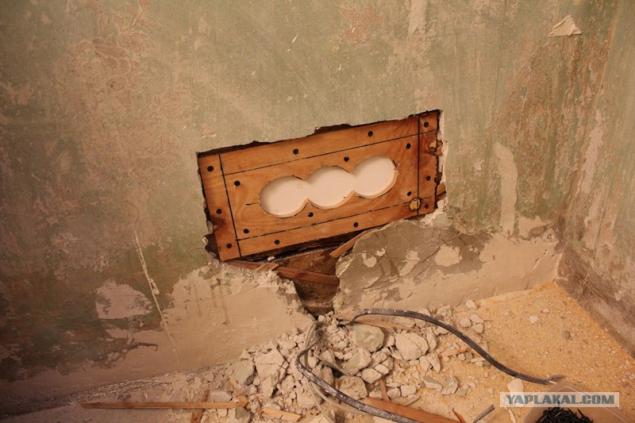
And here is the very outlet of the wooden wall - cut a big hole ...
This is just such a disk on a tree
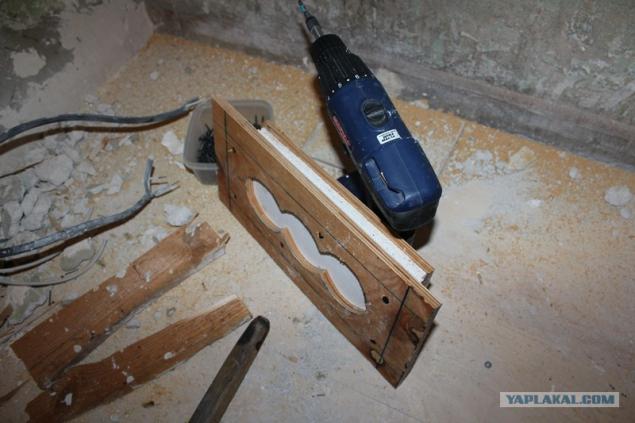
Future outlet. power socket. Grounds of plywood treated ognzaschitnoy impregnation. Between them non-combustible material. Inside this structure will be installed Escutcheon.
So
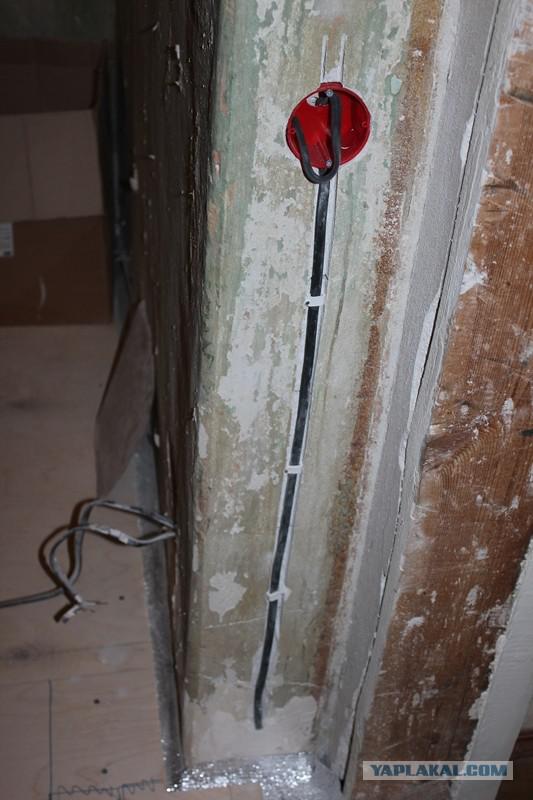
But already I installed on the wall and began to carve podrozetnik
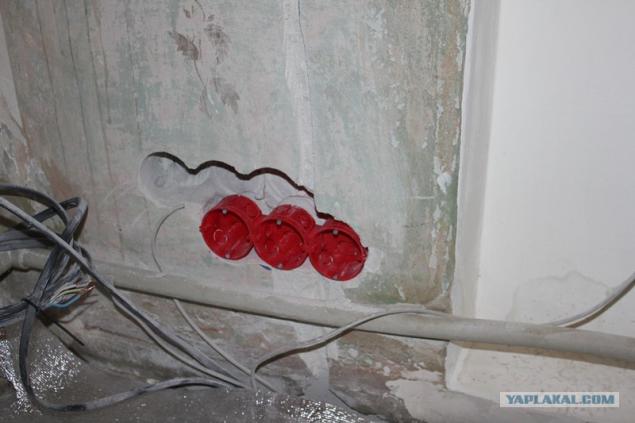
The second point on the wall, 3 outlets. Mark up the wall
Cut a hole grinder
And here you can see how the wall looks like from the inside:
The second construction. There is already taken into account the experience and the first cut a hole under the wall outlet fret, and then assembled together.
In its place. All generously poured ognepropitkoy
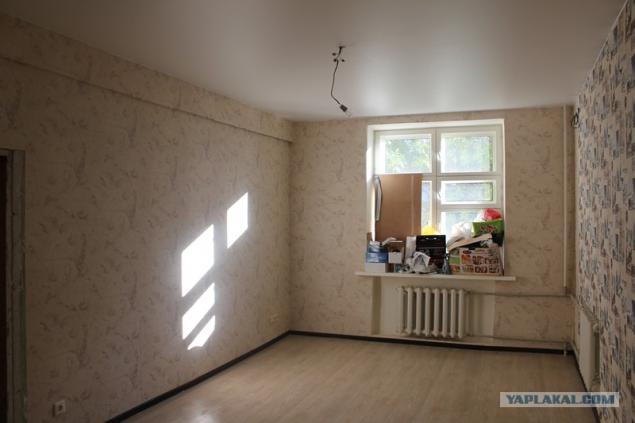
Bed linoleum. We started pasting wallpaper.
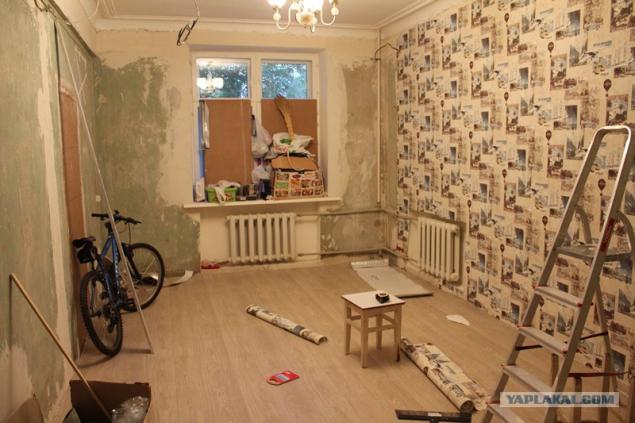
The room is in use, a holy place is never empty.
A little wallpaper
The process is ...
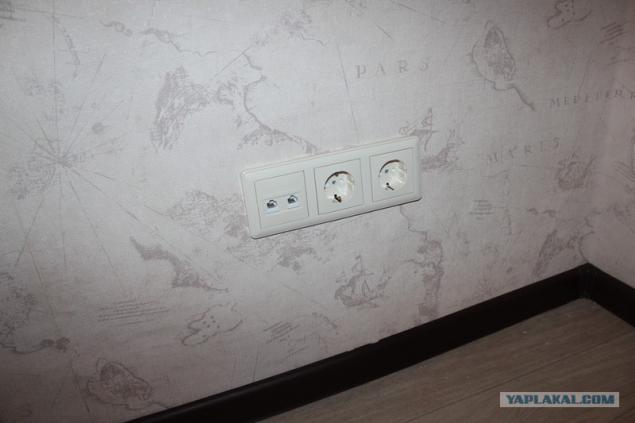
Sockets and switches. Simpotichnyh ...
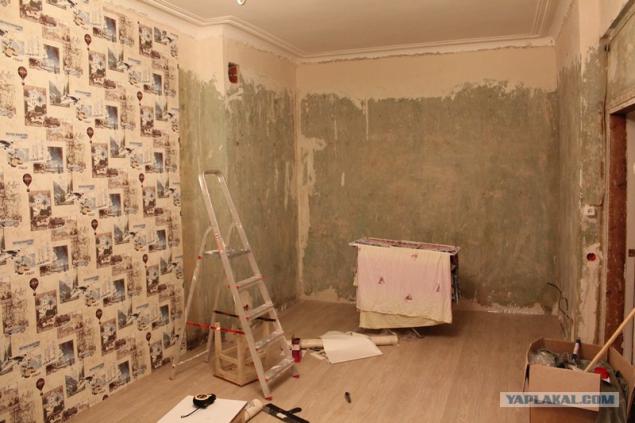
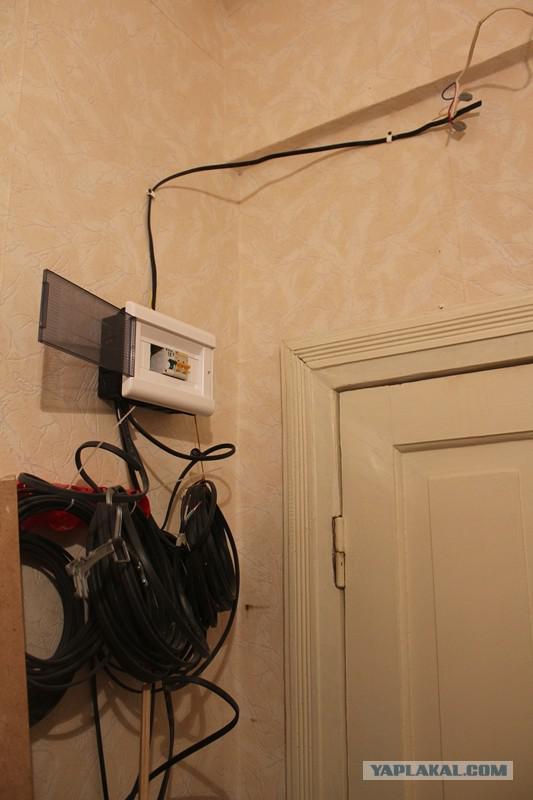
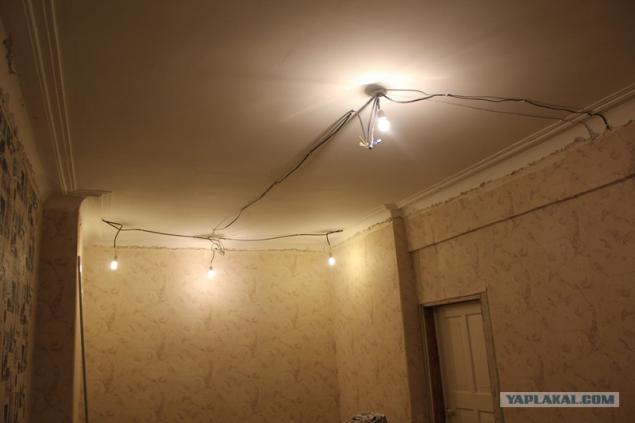
Thrown from the walls of the old wiring, connected to a temporary shield new wiring ...
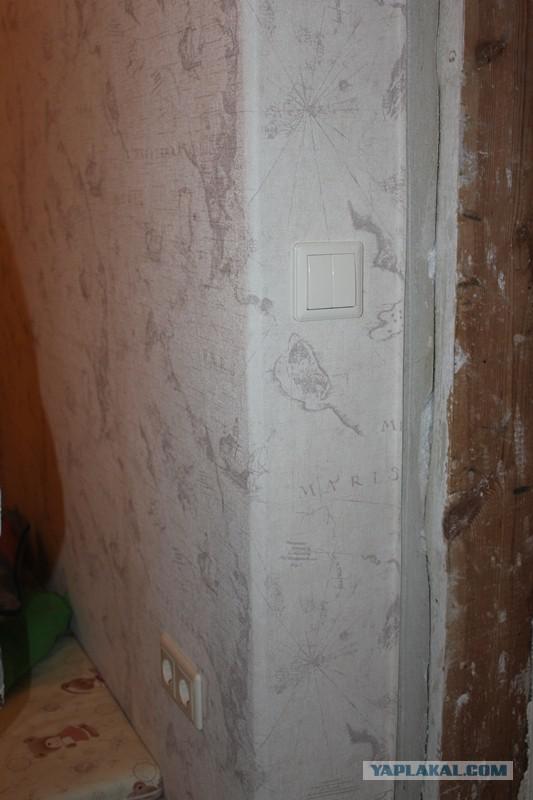
Remember the point in the wooden wall outlet under 3? Here she is ...
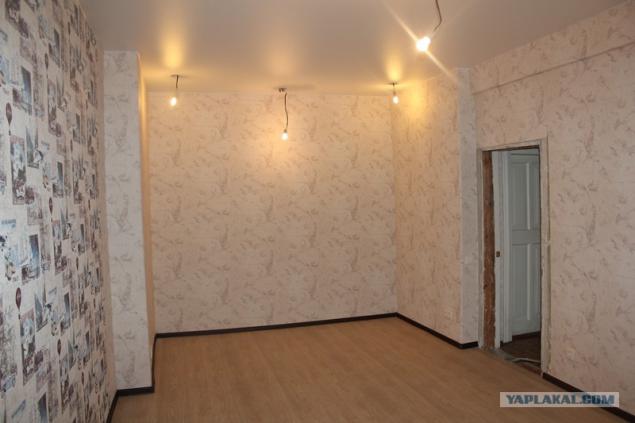
Lighting works ... make extra wiring under the spotlights
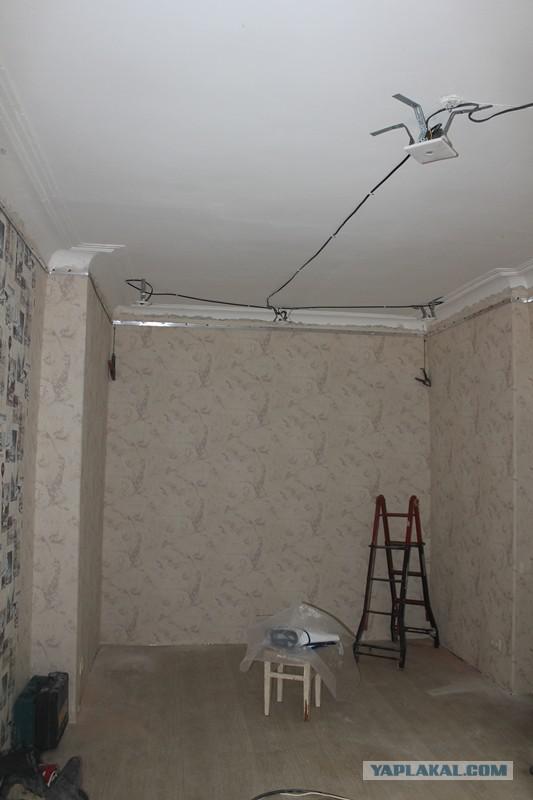
Came Installers of suspended ceilings. Nasverlili bunch of holes, tightened baguettes, made a platform under lights. In the center of the room on a stool is very ceiling.
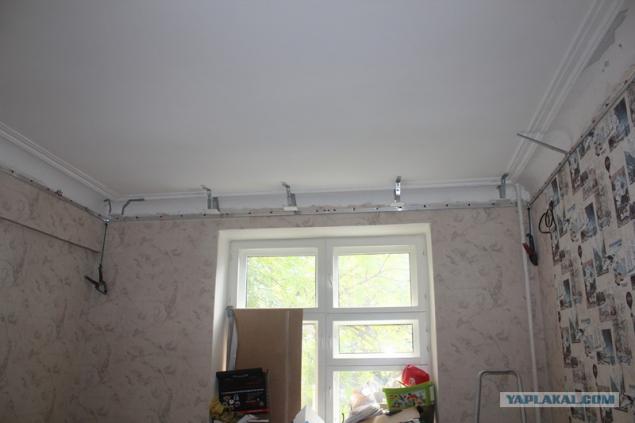
Mortgages under the ceiling curtain rail
The process of pulling the ceiling. The room - a bath temperature of about 80 degrees.
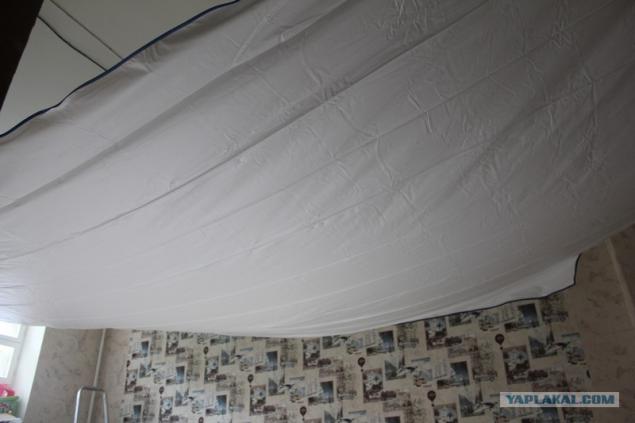
Hooray! The ceiling is stretched!
Hole under the spotlights. Wieden old ceiling. As a result, the height-to-ceiling turned 2.8m
20cm lost (((
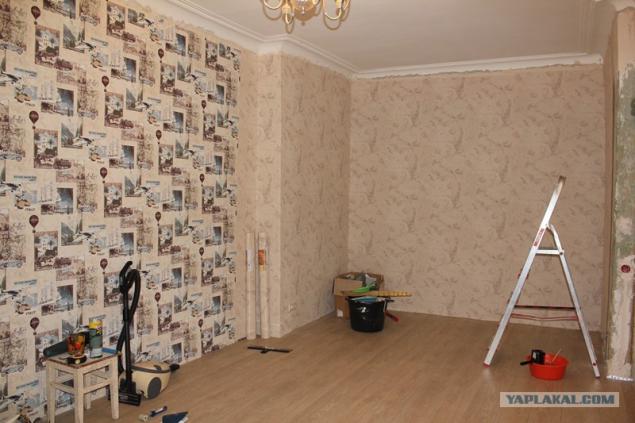
General view of the room.
From a different angle. In the evening.
Mounted spotlights. In the photo the children and me. We're sitting on the podium, which is made for the future of the castle. About him I write separately, when it is ready.
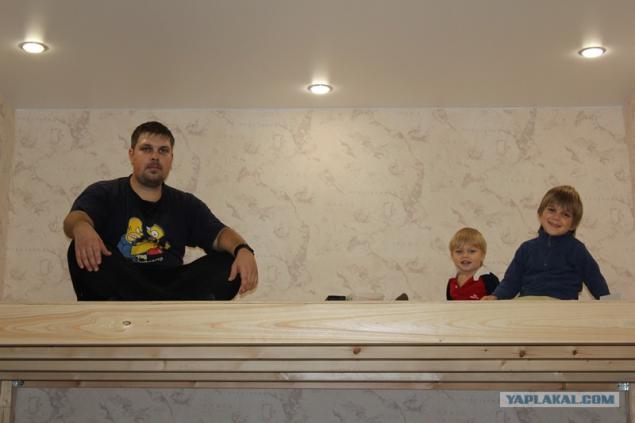
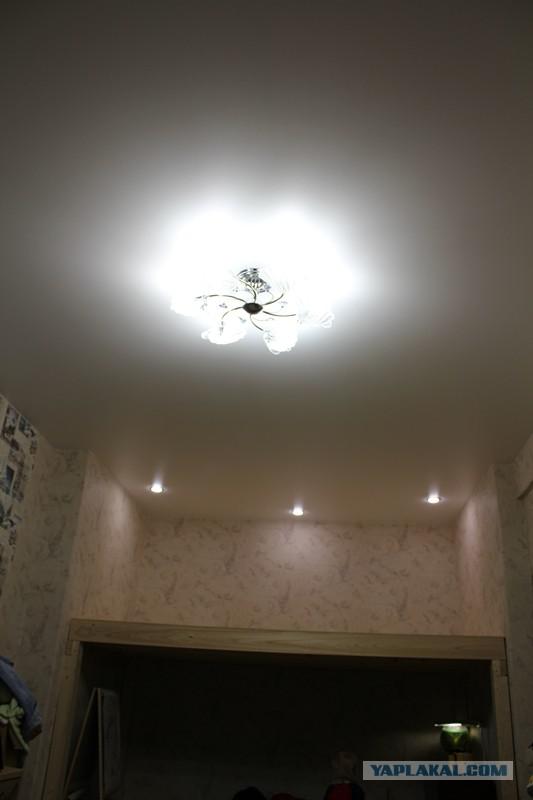
Visible chandelier and a podium. The camera can not cope with osescheniem - Chandelier 6 lights, there are energosberegayki equivalent to 600W - the room is really very bright, pure white light, very cool. Ceiling matte, scatters it across the room. Damn pleased with the chandelier.
That's all, thank you for your attention. There is still a bedroom, combined kitchen and living room, hallway, bathroom and toilet - in short, the work is still a couple of years)))
Source:
Repair decide to do on their own. Also, because of my manic obsession with the ideas of automation of everything, was painted a new wiring diagram, for living with outer aluminum twisted pair wiring and 1 machine for the 21st century - at least ashamed, as a maximum - is unsafe. Especially considering all the equipment such as dishwashers, stiralki, mikrovovolnovki etc., without which it can live, but it is better with them. The new scheme provides a compound of the star, which is located in the center of the switchboard and at the ends of the rays are the end points - sockets, switches, tips for svettilnikov, air conditioners and so on. Plus twisted throughout the apartment. Plus coaxial cable in some places. And that means not just a lot of wires, it means a lot of wires. And so, after a meeting of the new year, repairs started. Next are pictures with comments. That kind of room before renovation, no other pictures, but for this you can imagine about the state at that time. The room was originally a 2-input, 1 corridor, the second of the entrance of the room, we decided to remove this entry.
So is 78 pictures.

The first thing ripped wallpaper. Mostly departed whole stripes, sometimes had to handle metilanovskoy Remover wallpaper.
The floor was linoleum, under it - hardboard sheets. Floor - wooden planks thickness of 5 cm, the floor did not creak, so it did not begin to touch. Whoever nailed sheets of hardboard, obviously spared no nails, because I just rip them zadolbalsya. The sheets were broken, the nails are pulled "meat" that they had vykolupyvat mites.
Regarding the posting - I do not remember exactly what spodviglo me to decide to place the cables in the floor. Perhaps there was some reason that will determine in the future the amount of crap that I was raped. The idea was - to make a groove in the floorboards 3cm deep, for fire safety at the bottom of the grooves pave noncombustible substrate thickness of 1 cm, put the wires and pour it all gypsum. This result has been done, but the cost of such efforts, which is not describe. Initially, I tried to cut it out of the groove a router. Here a general view of the work environment:

Here you can see the groove made to the router does not leave aside bought the rights, I drilled 3 holes in it and screwed with screws to the floor, and the mill rests on the rule.
So:

The groove closer. Here we see that the depth of no more than 1 cm, the width of the order of 20mm - diameter of the largest mills in the kit. If we consider that in some places I will need the width and depth of 15cm 3cm everywhere, and this groove it took me 10-20 minutes - the work I was there for a week, maybe more.

Then, it was on February 2, I suddenly thundered to the hospital with appendicitis. And as much as 2 months fell out of repair, for nothing is impossible to lift, bend, then the problem is not that crawl on the floor with a router. That is the state of the room at the time:

From a different angle. In the background is a printed plan of the apartment with the wiring diagram. Along the way there are real distance between points and lines cabling, so that later in which case do not fall into the wire. One can see the plywood that will be laid on the floor. In the center you can see a roll of insulation that will lie under the plywood.

Stupid trait - to grasp all at once. I have not yet finished with the cable and already want to do Enclosures. One wall in the room wooden hollow - poles on top of the board, on top of shingles on top of the plaster. Drill the holes and how to safely accommodate podrozetnik - not come up once.

The retaining wall is simpler - the crown for concrete + drill 2 holes cut out. How would when installing sockets - not horizontally (((

Floor plan larger

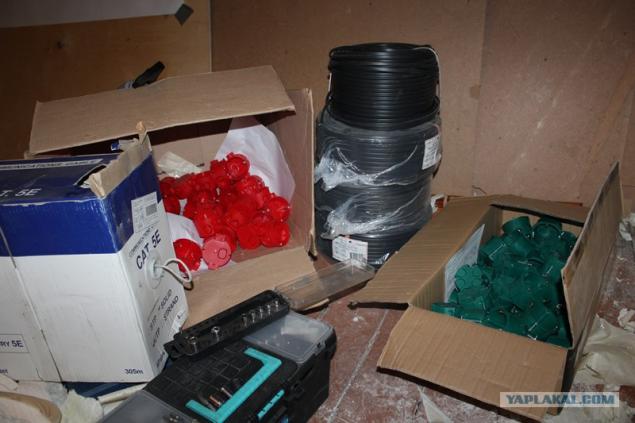
And here is the cable. He took a flat VVG-ng-LS, lighting 3 * 1.5, on the outlet - 3 * 2.5. Cable-flammable, low smoke emission from. In general, the cable is produced in different plants, some of them share the old ghosts who does something for new TS - in the end decided not to save and take the cable GOST verified plant.

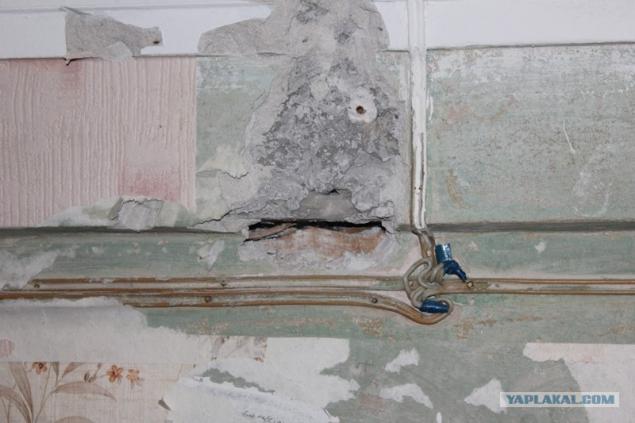
That's the old wiring was under wallpaper, seen carrying concrete beams under it begins wooden wall.

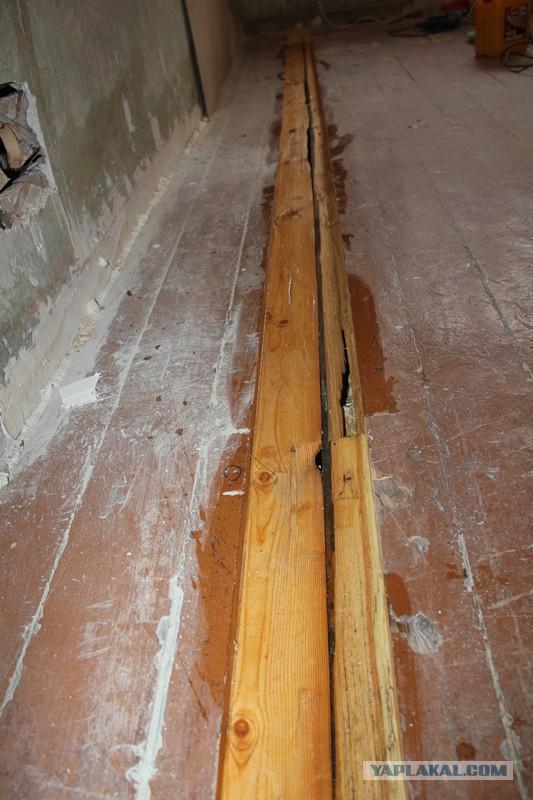
Returning to the subject of the grooves wire harness - the solution was found! It was bought by a circular saw, it was exhibited at the depth of the saw 3 cm, made two parallel saw with the correct distance between them, and then beaten out pieces of a chisel. When propyl walked across the boards - it was all just jumped on board once or twice. But when propyl walked along the boards - it was a lot harder to beat, the pieces came off the length in meters or more, however, with nail puller and such a mother it worked out. The final stage was the processing of a router, buy widest cutter, which could find - 3cm in diameter, regular mill site was not enough for the width of a piece of chipboard produced a wider area.

All wood handles impregnated fire - safety first!

Before the walls of any router or circular saw did not reach, here it was necessary to drill a drill crown of the tree, to cut sawing jigsaw with a short - well, again perversion.

Bags of wood taken out. If my memory serves me, this is only part of the collection.

There is already stacked substrate on the bottom of the grooves.

And another

Here's assistant - where the same without them. And only have to be distracted, not to stuali hammer on the walls ...

The process of laying the cable. As it turned out, the flat cable is constantly twisted, need a special rotating platform for its unwinding without twisting.

Another flat cable requires a certain turning radius ...

Somewhere cable beaten with plastic mounts, forgot the name. Somewhere glued tape - still then pour plaster.

Cable metered and rolled into the bay. Then he steps into the hallway where the front door is about a junction box. The younger generation of process controls, simultaneously wiping the dust from the floor.

Knead gypsum. It freezes instantly, first bucket had to throw together with all grabbed a stone plaster - did not manage to get to the place, and he had stood in a bucket. So then we made thinner consistency of sour cream, and kneaded in a 5L canister - because it is easiest to pick out the remnants of plaster. Nuisance screwdriver, it is convenient to control the speed, or spray in all directions.

And here is the bottle. Wieden piece drenched grooves.

A small piece of doping and the assistant - like beer and drink, and like and do repair ...

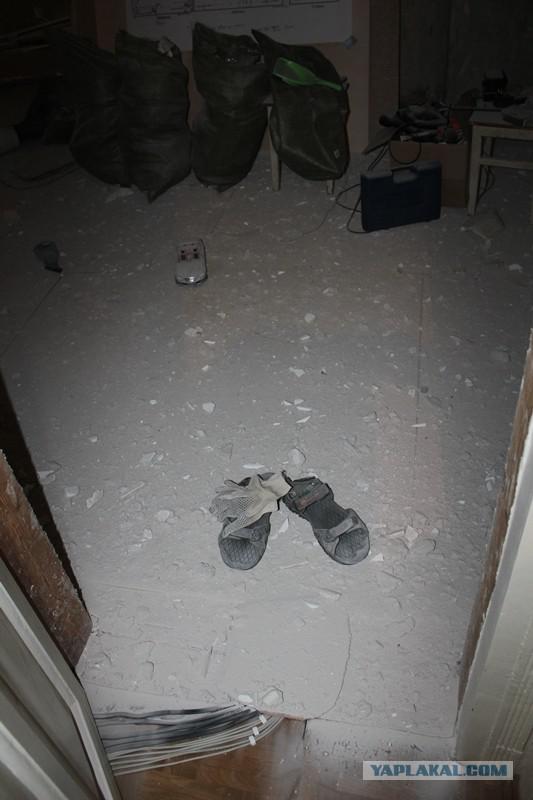
He restored order in the room. Dust is a pillar after sweeping.

Cooking utpeplitel ...

... And rolled it. Long thought which side to put in the end decided to put up a foil to all the heat reflected back into the room.

Lay the first sheet of plywood. The Extension, all as it should ...

Immediately draw the location of wiring - here you can not twist the screws!

Twist drill, screws pictured short, buy long.

The process is brought linoleum.

The cable goes into the corridor. Not all filled with plaster.

One band reached the end.

And here and cables. They settled on the wall in the hallway. Because in the hallway repairs will be done last.

Filled missing piece

Plywood laid on the entire floor

And then, when neat plywood stacked, I guess, about what I thought? And I thought about the fact that he still had to knock down the walls of stucco, to as high as possible and then pull the ceilings and walls to align. Stucco knocked down the hammer. Saying that the room was dusty - to say nothing.

Here are my once friendly plywood floors. And I did not think to cover the tools and stuff ...

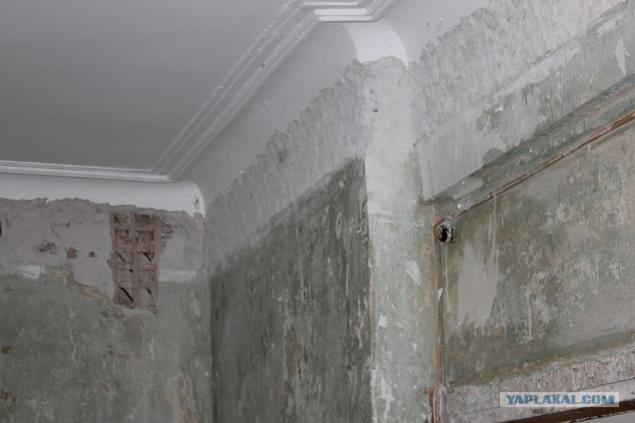
Fretwork knocked down ... all in the dust ...

Closer ... the background of wooden walls, it knocked a piece of plaster. Came neighbors complained that they Wall shakes)))

At first, I tried to collect pyd and debris with a broom. Literally 5 minutes later I realized how hopeless - very fine dust to collect on the floor unrealistic. Household vacuum cleaner worked 30 seknud and stopped sucking - filters are blocked instantly. The decision came after a couple of days - rented building cleaner. It Said - done - went and took a vacuum cleaner

At the same time I took the wall chaser

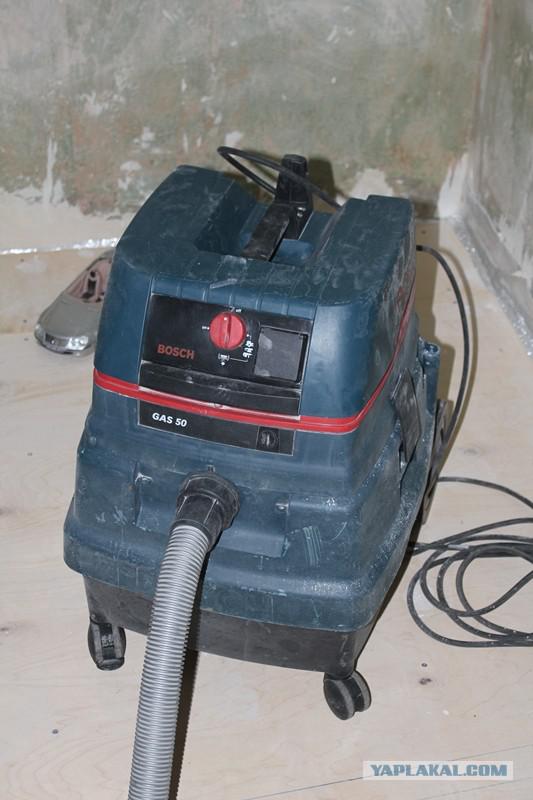
The process of garbage collection. Large pieces to collect the shovel and bag the rest collect a vacuum cleaner. In general, a vacuum cleaner - zaeryuga not expect such a suction power, if a piece of creeping into the hose - with unstoppable force, he sucked in. Inside the way no bags, the whole body is a container for disposal. When it is filled - with the engine cover is removed and the container is shaken out just garbage.

But the result of the work 30sec wall chaser. For comparison - the left attempt proshtrobit wall chisel. The difference is visible to the naked eye.

Future switch

And then a group of outlets had to be moved below - afraid that is not enough length of twisted-pair cable.

New cable for chandeliers.

General view of the already plastered walls

All vmazat - switches and sockets in the background

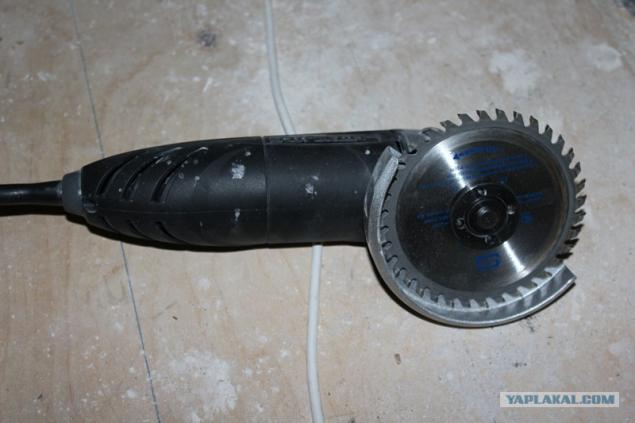
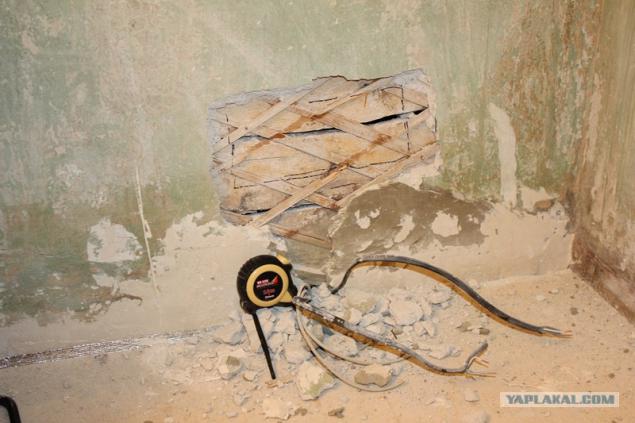
And here is the very outlet of the wooden wall - cut a big hole ...

This is just such a disk on a tree

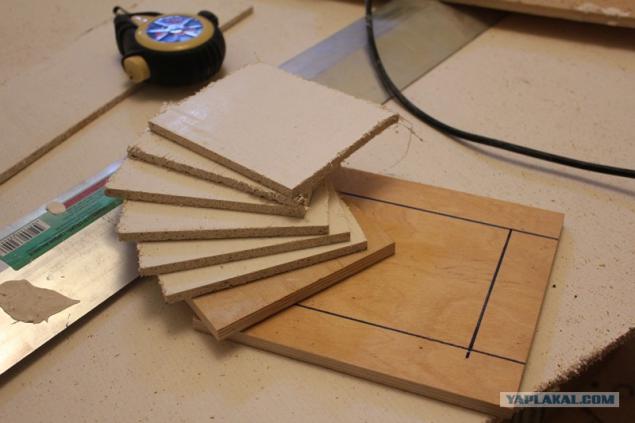
Future outlet. power socket. Grounds of plywood treated ognzaschitnoy impregnation. Between them non-combustible material. Inside this structure will be installed Escutcheon.

So

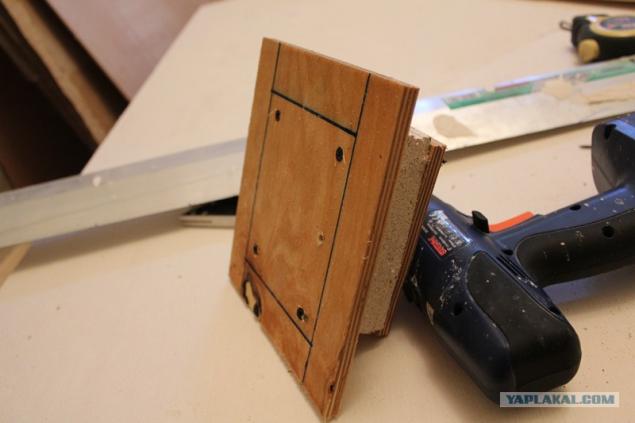
But already I installed on the wall and began to carve podrozetnik

The second point on the wall, 3 outlets. Mark up the wall

Cut a hole grinder

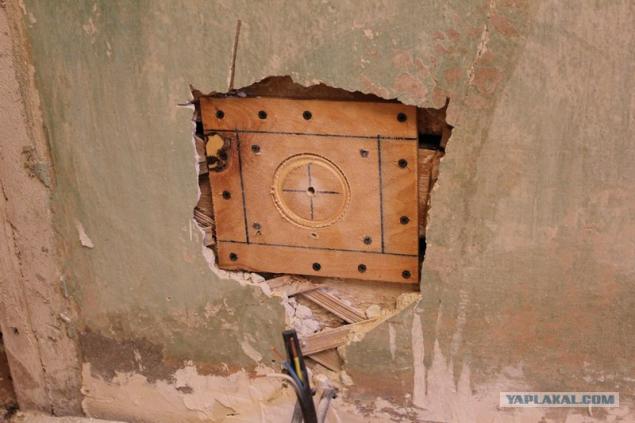
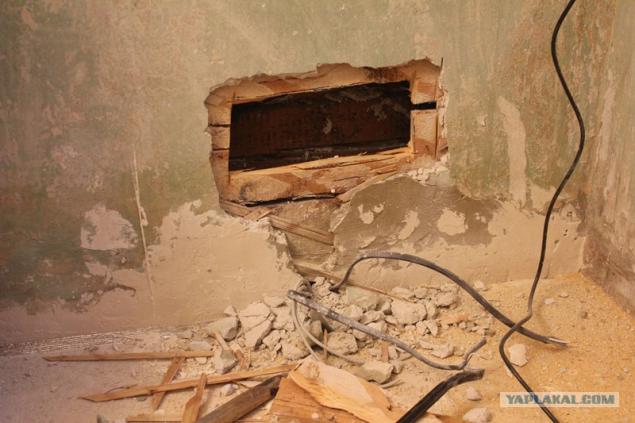
And here you can see how the wall looks like from the inside:

The second construction. There is already taken into account the experience and the first cut a hole under the wall outlet fret, and then assembled together.

In its place. All generously poured ognepropitkoy

Bed linoleum. We started pasting wallpaper.

The room is in use, a holy place is never empty.

A little wallpaper

The process is ...

Sockets and switches. Simpotichnyh ...

Thrown from the walls of the old wiring, connected to a temporary shield new wiring ...

Remember the point in the wooden wall outlet under 3? Here she is ...

Lighting works ... make extra wiring under the spotlights

Came Installers of suspended ceilings. Nasverlili bunch of holes, tightened baguettes, made a platform under lights. In the center of the room on a stool is very ceiling.

Mortgages under the ceiling curtain rail

The process of pulling the ceiling. The room - a bath temperature of about 80 degrees.

Hooray! The ceiling is stretched!

Hole under the spotlights. Wieden old ceiling. As a result, the height-to-ceiling turned 2.8m
20cm lost (((

General view of the room.

From a different angle. In the evening.

Mounted spotlights. In the photo the children and me. We're sitting on the podium, which is made for the future of the castle. About him I write separately, when it is ready.

Visible chandelier and a podium. The camera can not cope with osescheniem - Chandelier 6 lights, there are energosberegayki equivalent to 600W - the room is really very bright, pure white light, very cool. Ceiling matte, scatters it across the room. Damn pleased with the chandelier.
That's all, thank you for your attention. There is still a bedroom, combined kitchen and living room, hallway, bathroom and toilet - in short, the work is still a couple of years)))

Source:
Tags
See also
Things of fiction that became everyday reality
Modular Bracelet Bond
Supermarket laughter
Just about the complex: why everything tends to chaos and how to stop it
6 transformations of zucchini for the winter table
Repair small bathroom
Knight's Castle in the nursery.
Bike wedding long 9000km
Distant Japan
Russia is flying to the moon