3877
How to make a Dance pad for Dance Dance Revolution
Hello, dear habrovchane. Long speculated about the name of the post, but ultimately decided, albeit long, but write it in essence. Under the cut will be discussed on how to create from scratch a good game controller for the rhythm of the game, with not much to spend. And let lately periodically skips comments, saying, "Habr not" cake ", I hope my" recipe "will have your taste.
Content
- What are the post The preparatory stage The Chronicles of bark beetles (layout and routing) Payay me payay me completely (do sensors) < /
- The Holy couple (do the wiring) anyhow and production (assembly) USBseksual ('re friends with Dance pad PC) What's next? Instead the outcome.
What does the post But first, a short introduction, so that all understand what will be discussed below. Great Wikipedia article will clarify.
Dance Dance Revolution (DDR) - a series of music video games from Konami Digital Entertainment, Inc, also known as Dancing Stage. The game takes place on the dance platform with four panels: "up", "down", "left" and "right". During gameplay the screen moves a sequence of arrows, which corresponds to the rhythm of the music performed songs. The player must press their feet to the music corresponding to the panel at a time when the hands coincide with the semi-transparent stencil located usually at the top of the screen. Each time you press the right player gradually replenishes the level of "the scale of life." For each slip of the scale is taken away a certain amount of energy. The round is lost if a player at least once during the passage of the song allowed decline in "scale of life" to zero. Well, if you explain clearly, it is best to use the services of Jean Reno and the film "Wasabi».
Historically the game in Russia, Ukraine and Belarus gained popularity among fans of anime, gradually identified as a separate sport direction. Gradually instead of "nyakayuschih" girls near slot machines appeared guys, something hard to chёrkayuschie «To Do List'ah" discusses the benefits of a particular technology "dance" and desperately arguing about choosing the right shoe for "steppe". Soon on the horizon loomed the first championship.
And here there was a problem. Success in the game is directly dependent on the amount of training. Qualitatively, the train could only be on the slot machine. But since most of the players were school and college age, afford full training could only units. After all, everything costs money, and tokens are no exception.
Out of the situation was clear: find «домашнюю» version of DDR . Alas, hopes were not realized. No, homemade version existed, but were either некачественные, or не afford . In addition, delivery times increases the cost of the dance platform in 2 or more times. And it is in Russia. About Belarus even out of the question.
That this state of affairs and I were jsirex , living in the glorious city of Minsk. Not finding an adequate option for a reasonable price, we decided to build his own dance platform with Munchkin and geishas. Set ambitious goals. Dance pad \ mat \ pad should be:
- cheap; durable; is not too heavy (light) and not too bulky. At the touch accuracy and feel of the game is not should be different from the arcade.
For clarity, the assembly process was captured on video. So everyone who wants to see the final result at first, and then read the sheet of text with photos, ask here:
In the meantime, start to assemble.
Preparatory stage The time spent on the mat assembly can be divided into two periods: theoretical and practical. Under the first is meant the time that you spend on the purchase of necessary supplies and tools. Under the second - directly during assembly. If not lazy, alone mat going for 4 days.
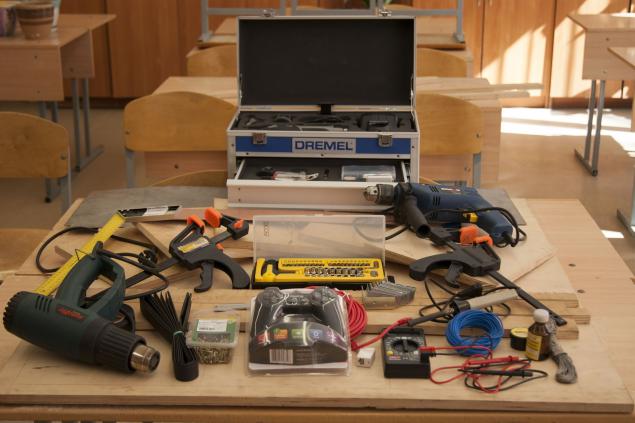
Let's go back to shopping. You will need:
- Clamps (2 pcs); screwdrivers; Wood drills; Saw; Dremel; Metal shears; The tester; Elbow; Pencil; Screwdriver;
- Soldering; Solder; Rosin; Twisted pair; Hammer Industrial hairdryer; glue gun.
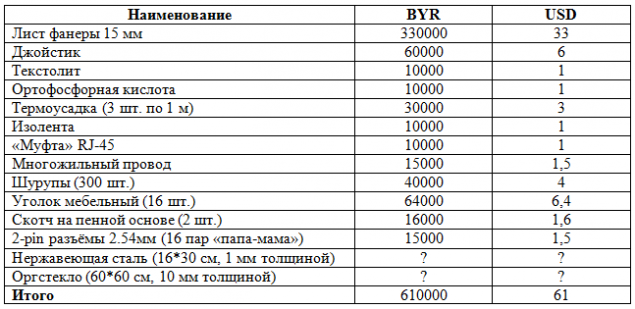
As you can see, not specified prices for steel and Plexiglas. In my case it was not necessary to buy them - helped jsirex . However, instead of stainless steel can take whatever conductive material (not necessarily metal) with shape memory. For example, the PCB.
With plexiglass complicated. Sellers usually do not want to sell small pieces. But you can go to the trick. Plexiglas we will need to make 4 buttons size 28 * 28 cm. Therefore, we can take as a "square" 60 * 60 cm, and the "rectangle" 30 * 120 cm. Take the glass abutting or with a stock? Depends on which way you cut it:
- Manually using a special knife for cutting plexiglass (like a stationery knife). Glass is taken exactly to size. The process resembles the work with cutting glass cutter. This method is quite budget, but inexperience can break off a bad harvest and negate any savings. Laser cutting. Cuts perfect in size, but is expensive. The peculiarity of the laser requires a "minimal padding" from the edge of the workpiece. That is, in order to cut out the button 28 * 28 cm, we need at least 28 blank, 5 * 28, 5 cm.
The Chronicles of bark beetles (layout and routing) You can start sawing plywood. Thickness of 15 mm is chosen by chance. One of the goals, as you recall, is the weight. Too easy mat under heavy load will slide across the floor. Too heavy to be uncomfortable to carry. For the first reason, it is not necessary to consider the plywood of 10 mm or less. According to the second - 18 mm and thicker. Moreover, the dependence of the value of its thickness of plywood, is nonlinear. Thus, it remains two "finalists" 12 mm and 15 mm. I do not know how in other cities, but in Minsk 12 mm proved rare. Looking ahead to say, collected from 15 mm plywood mat weighs 18 kg.
Having defined the thickness of plywood, sawn need this sheet to the "spare parts". From one standard sheet should happen:
- Based on the size of 90 * 90 cm; 5 buttons size 28 * 28 cm; 2 rack size 3 * 90 cm; 2 rack size 3 * 84 cm.
Also, when the cut will inevitably burrs.
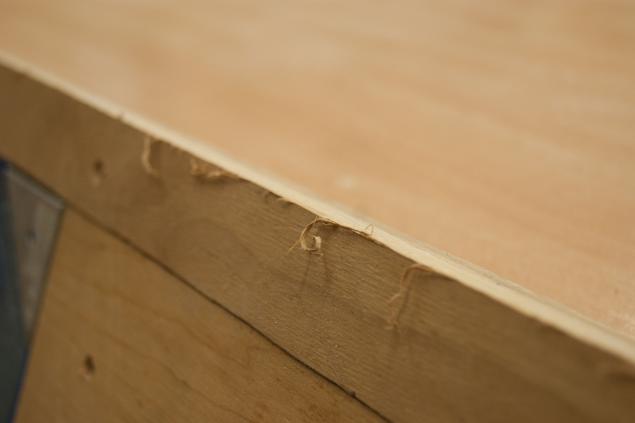
From them, you can get rid of sandpaper or with a suitable tool.
Remember, when working with wood is a lot of chips. Very much. Therefore, make sure that the family did not kick you out of the house. If all ended happily, safely proceed to the next step.
Payay me payay me completely (do sensors) Over the years we hobbies DDR jsirex not just digging in arcades.
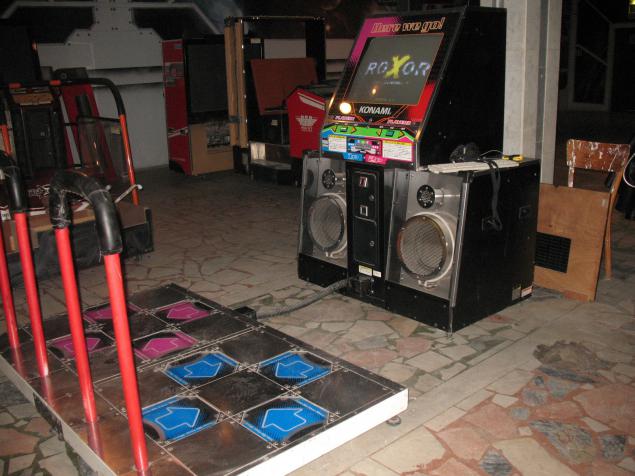
On the one hand, there was a need (automatic always tidied before the championship), on the other - it was interesting, well there these Japanese ponapridumyvali. All ingenious is known to be just.
The sensor is a simple design: two conducting plates separated by an insulator around the edges and in the center of the closing of the weight of the player. Each button has a sensor 4, one on each side. Thus, regardless of which portion of the button comes player pressing always operates.
But enough words. Start assembly.
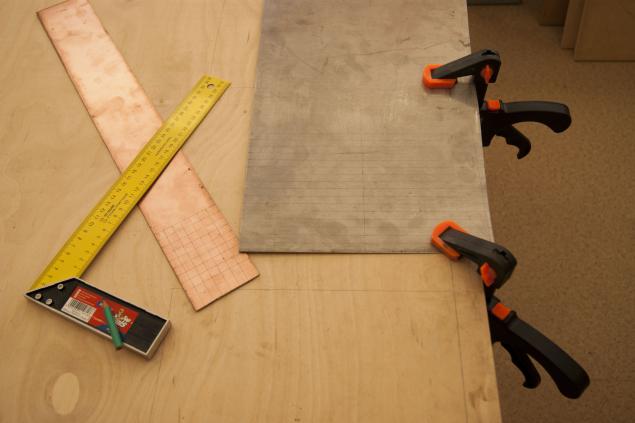
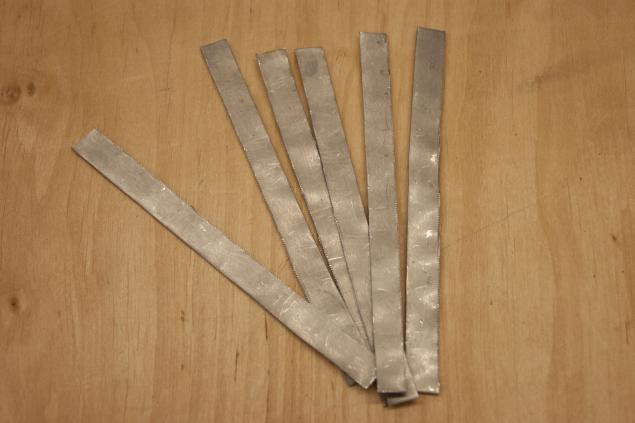
Rascherchivaem PCB squares 1 * 1 cm. Stainless Steel - Band 1 * 15 cm. The hardest part - to cut stainless steel. There is no problem if the hand is Bulgarian. The only caveat - you must adjust the size. Instead of 1 * 15 cm is 1, 1 * 15, 1 cm. The extra "eat" Bulgarian.
But if such a wonderful tool in your arsenal is not available, begin "dancing with a tambourine." First, I decided to use Dremel. In his arsenal just had a cutting disc.
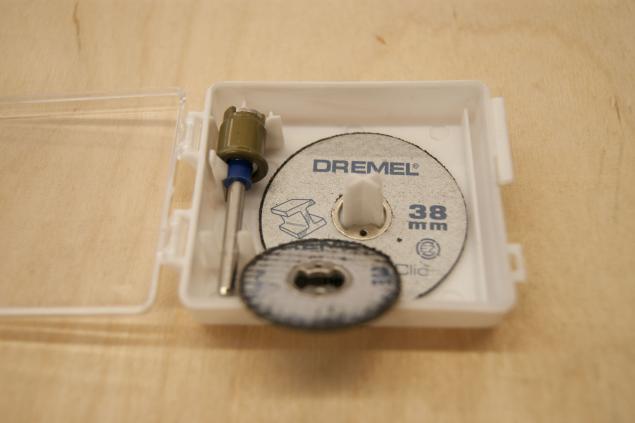
However, stainless steel 1 mm thick wanted to spit on fancy wheels and whittle it after 8 cm cut. So reluctantly had to climb over "analog" tool - metal shears.
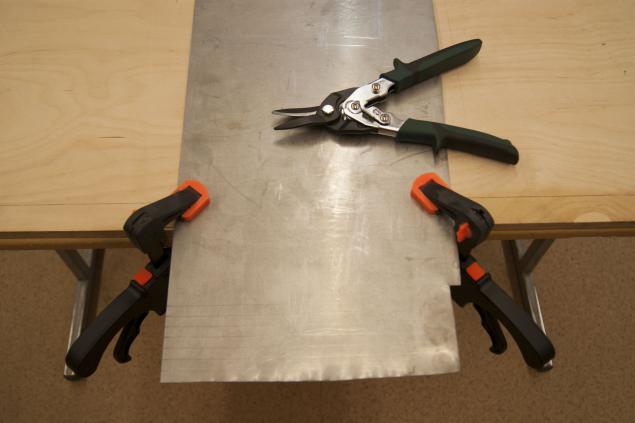
They stainless steel was quite tough. But still no ointment on my memory is not complete without a spoon of tar. And this case is no exception.
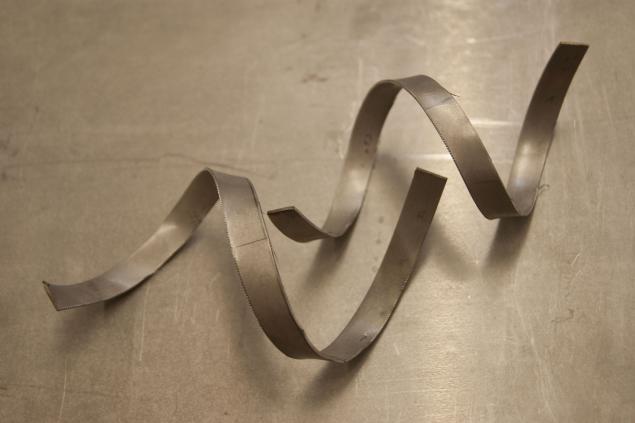
Scissors cut metal cheerful curls with burrs. Therefore, we first had to dub them with a hammer (blanks, not scissors) to a sane state.
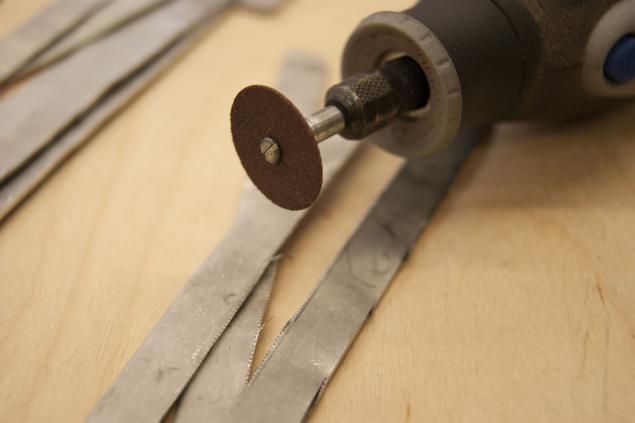
And then "shave" Dremel burrs. For this task he handled excellently and without loss of consumables.
Meanwhile, warmed up the soldering iron. No, I did not owe anyone money. Just the next phase of manufacturing the sensor.
From the standpoint of soldering no subtleties not. Ludim wires dripping phosphoric acid on the bare edge of the strip of stainless steel and solder.
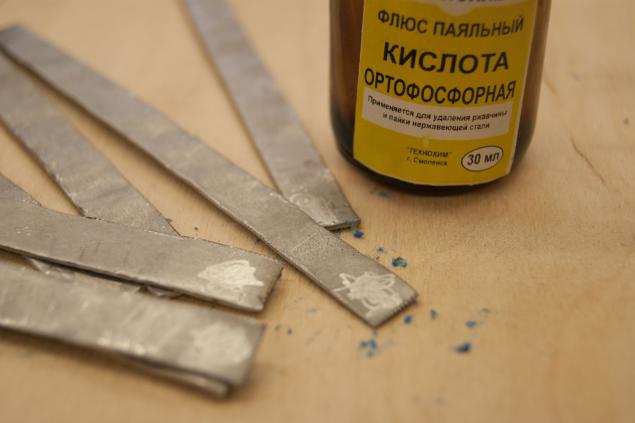
May look and not very aesthetically pleasing, but otorvёsh FIG.
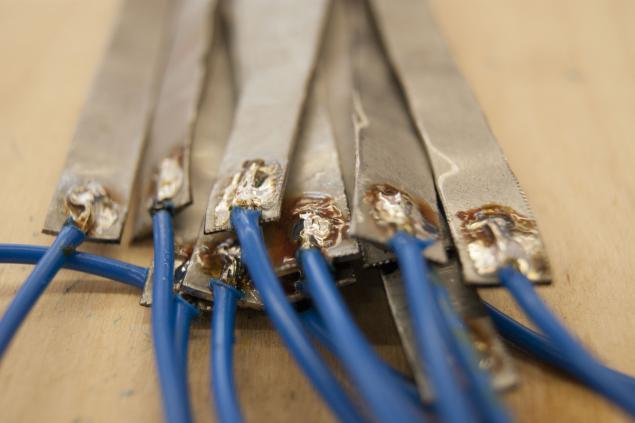
To obtain a preform with electrical tape primatyvayutsya squares PCB. It acts as a dielectric. One blank primatyvaetsya solder side to the other - from the "tail».
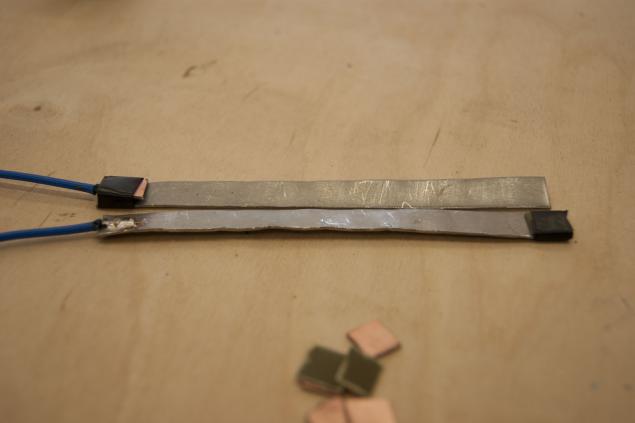
I confess, used instead of a blue black electrical tape, so the durability of the sensors can not vouch.
Then, the two are bonded at the edges of the blank tape. The final version below.
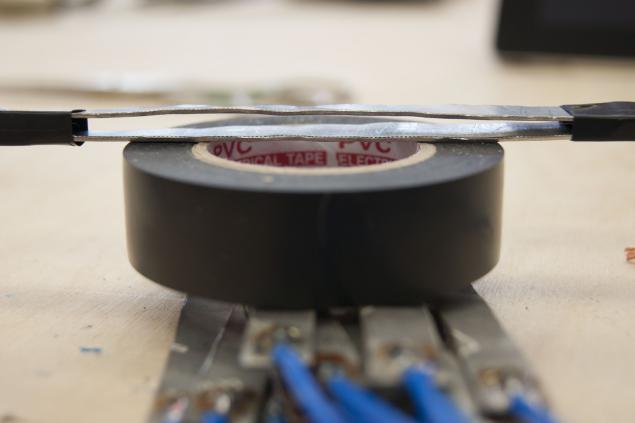
It's time to do nicely. To do this, you will need shrinking. With the size of the sensor 1 * 15 cm is perfect shrink wrapped with a diameter of 15 mm.
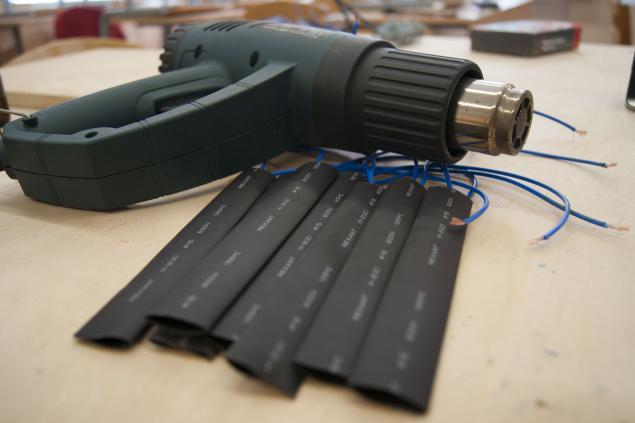
Uzhimat shrinking industrial hairdryer. If no hair dryer, and a suitable gas stove. The desired effect is achieved. Bonus is the smell of burnt hair. By the way, if a little harder to warm up the "tail" of the sensor, and then quickly clamp it with pliers or a screwdriver, turn virtually sealed enclosure. This point is in the video.
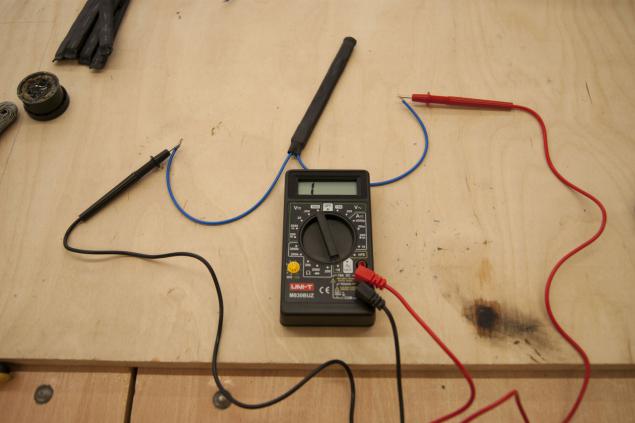
In any case, the fruit is easily verified tester. In the free state of contact, of course, should not be.
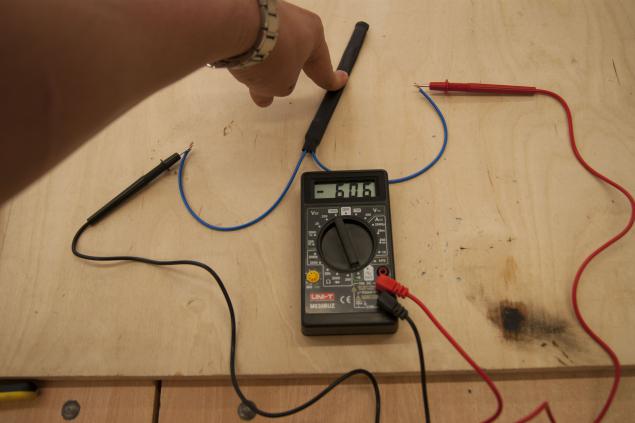
Now it was the turn of connectors "papa-mama».
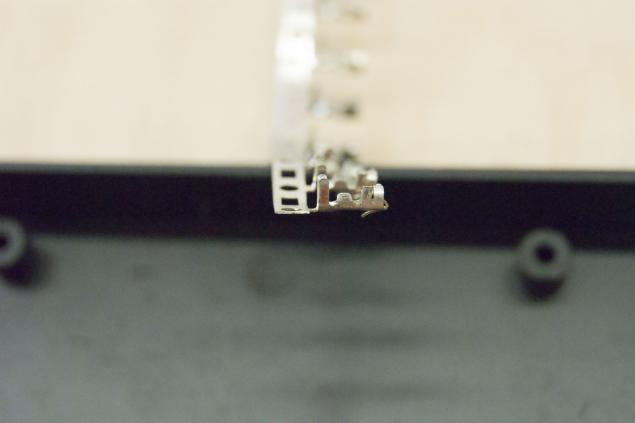
Soldered something (honestly, I do not know how it is properly called) at the free ends of the wires. Here is an important note. If you have a thick stranded wire, it makes sense to bite off part of living. In other words, do not do so, as shown in the photo below, do not leave the wires.
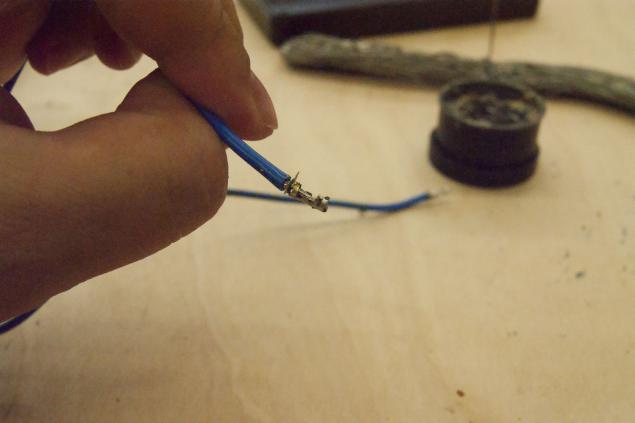
The promise is simple: you can solder, but then not be able to insert a "daddy" in the "mother" because there will be no free space.
Done right, the sensor measure is beautiful and lovely.
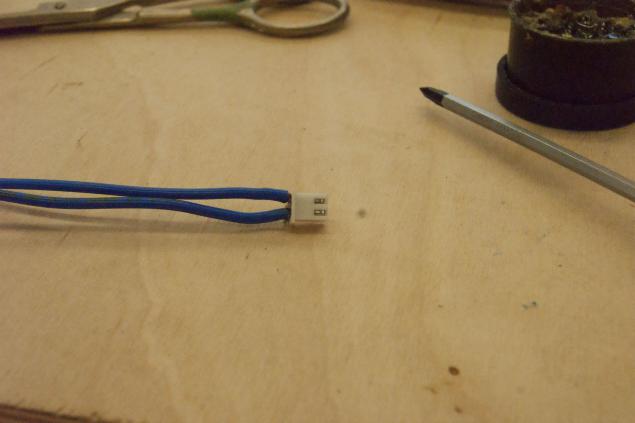
Besides has no problems when connecting board.
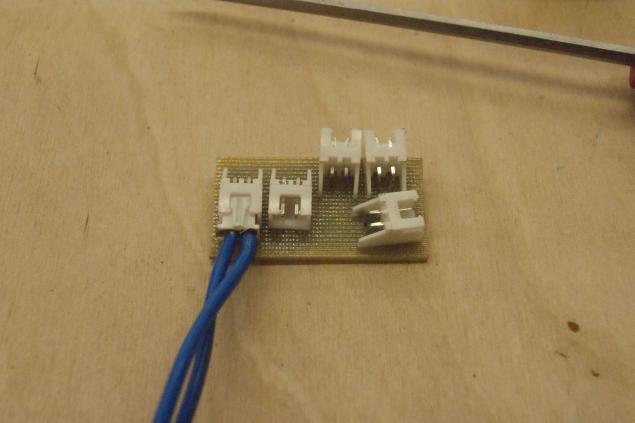
A few words about the board. Honestly, from personal experience I can say that fuss with connectors and boards are not necessary. Can all the sensors in the button to take the "twist", fill with solder, and then hot-melt. And such a design will work fine. At first samples of rugs are still working, and have passed years 6.
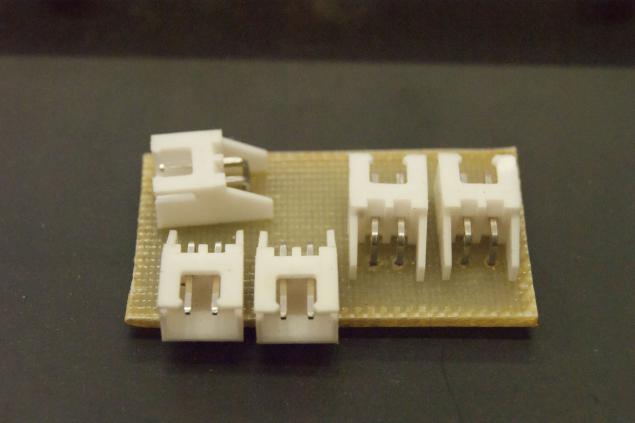
But back to the board. Herbs are all the known method of carrot and stick printer and iron. After etching, are as follows:
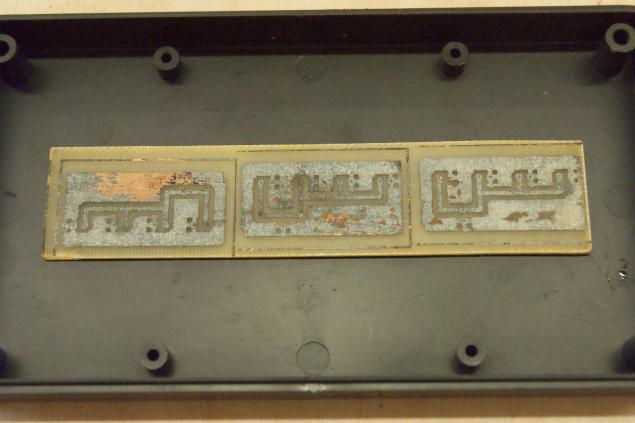
After cutting, in strategic places millimeter drill drilled holes not less strategic.
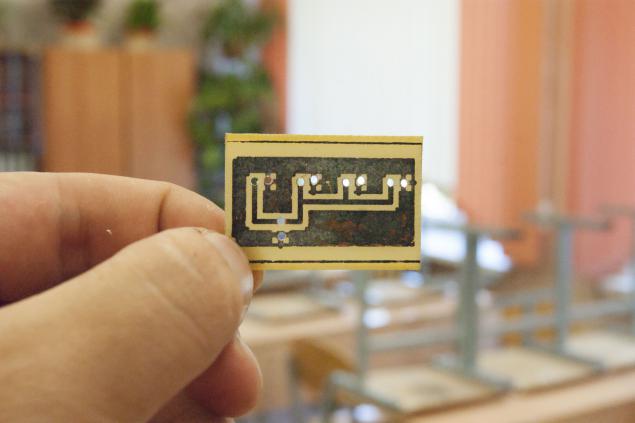
In the end, after soldering, get even beautiful. Rear view.
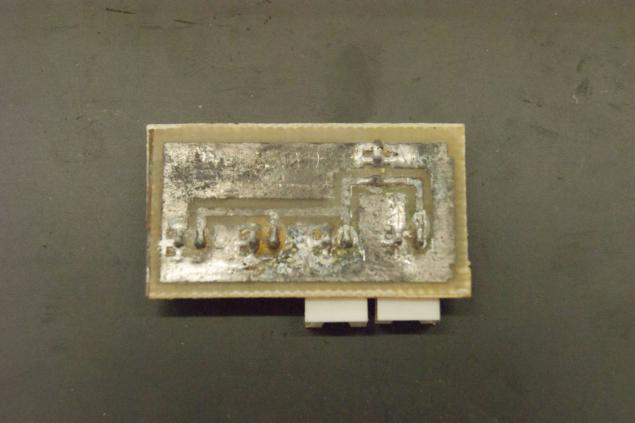
Front view:
The holy couple (do the wiring) And here we come close to the wiring.
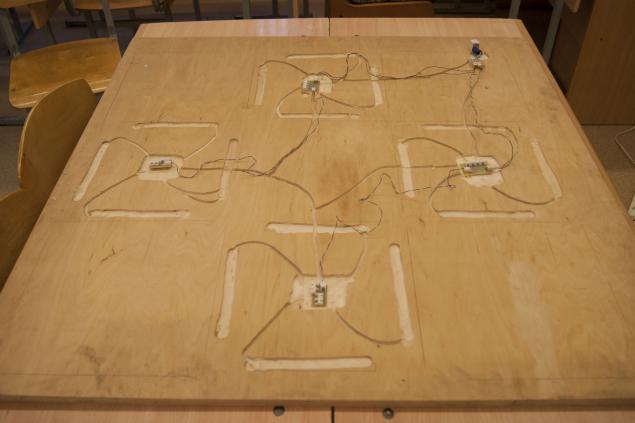
Meticulous readers consider complex version presented in the photo above. I'll tell you about a simplified version, implemented via a twisted pair.
It all starts with the "coupling" with RJ-45 connector. It has 8 outputs, so it goes to 8 wires. 4 Choose the "plus" and 4 "minus". Since the "minus" total - 4 wires are twisted into one. Believe it or not, but also contains a twisted pair of wires 8. On the "pros" and "cons" they are separated completely analogous. I, for example, all the colored appoint "minus", and all the white-colored - "plus". Ultimately, each button in the rug should come 1 "+" and 1 «-».
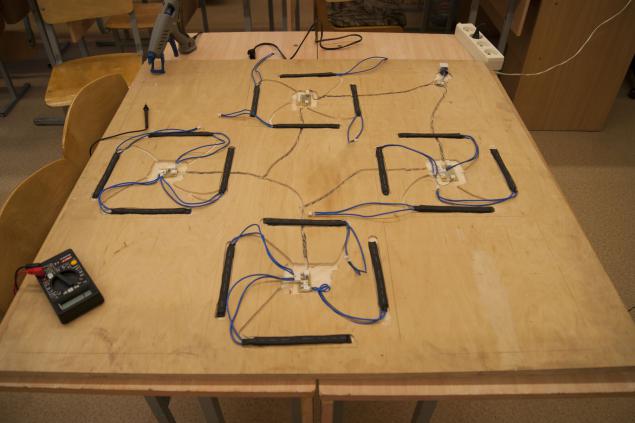
For the safety of the wiring run it should not verhuosnovaniya, and in advance that performed the grooves in it. There are 2 ways:
- Cheap. Take a chisel and hammer. Dolby groove. Obtained efficiently, but not especially beautiful. Take a milling machine and Scrollsaw everything you need in 10 minutes.
When all the grooves propylene, it is time hotmelt. Stuck very useful for small fast repair. With Melt Route wires sticking sensors. Do not forget to periodically "prozvanivatsya" design, so you do not have to disassemble the finished mat to the ground.
anyhow and production (assembly)
Well, already you can see the light at the end of the tunnel. Finishing line - assembly. Remember 5 wooden buttons, 4 orgsteklyannyh and 4 rails? Now is their time.
Curiously, no matter how you tried to cut it all exactly, whatever straight and square billets may seem to you, at the assembly stage you will pursue a general sense of curvature and unsightly. Do not worry, this is the paradox of the curvature of space-time-hands. Without additional 7 measurements to correct it still can not be so humbled.
Although there is still little tricks there. Assuming that all of the buttons and the rail a little crooked cut, there is a chance to collect them in the following sequence when everything will fall flat. In general, picks and start trying. When the final alignment is found, the sign on the back button of her position and direction. For example, IL - bottom left, C - central.
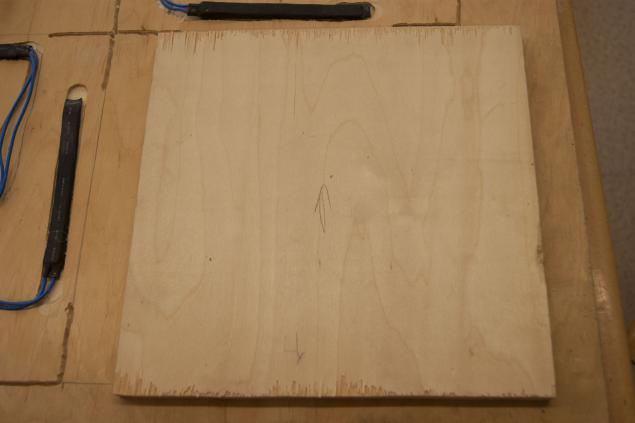
Begins to build this "ikebana" better from some angles. Once received - baits on the screws. Plexiglas baits on the screws not necessarily.
To plexiglass is not excluded that perpetuate its seating area. Nuance: Corners height more than you need. Option two:
- grind every corner. Make a recess in the base.
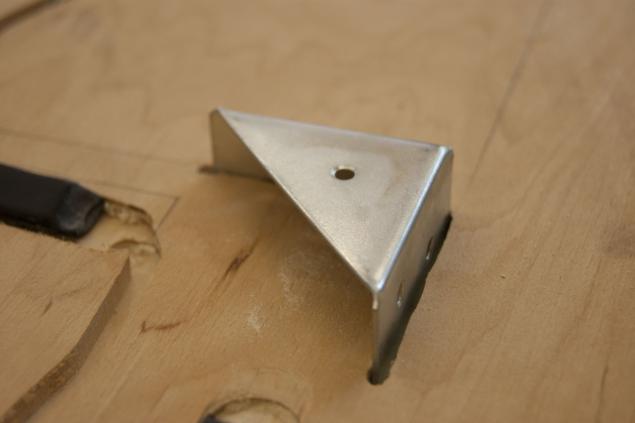
In the course of the assembly do not forget prozvanivatsya design.
Finally, the most important component, without which it will not work - Scotch on the foam base. You may laugh, but it is. Even in the original Japanese arcades we found it.
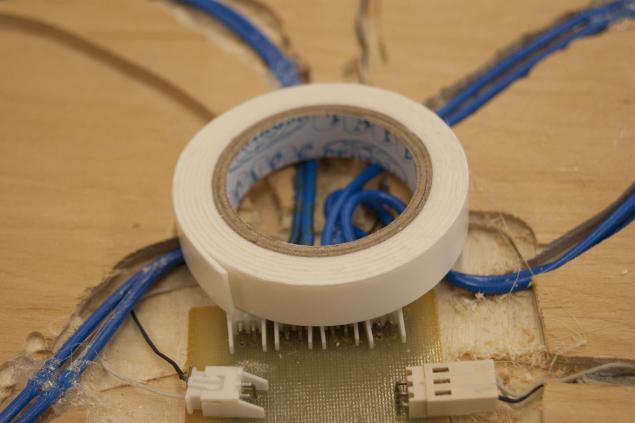
He glued small strips of 3-4 cm in length at the center of each sensor. Since the sensors are doing it yourself and not bought at the factory, you may need several layers. Usually 2-3. Ultimately, the button must be pressed for some hand pressure. Not to touch, namely the efforts! This is important!
USBseksual ('re friends with Dance pad PC)
In parallel with the assembly of the mat, and it is going to link with the computer. Because Windows does not understand the protocol Eprst \ ЁKLMN, have "friends" on the wood with a computer in the traditional way, ie via USB.
For these purposes, bought the cheapest gamepad. On his board and be soldered end of the twisted pair. Just in case recall procedure.
- The signal starts with the circuit on the sensor; is passed to the fee is fixed in the center of the button; then transferred to the "clutch»; and outputs on the RJ-45 connector.
- Insert the crimped "dad" in "Mama» RJ-45; On the twisted pair signal is transmitted to the gamepad; From the signal via USB gamepad goes into the computer.
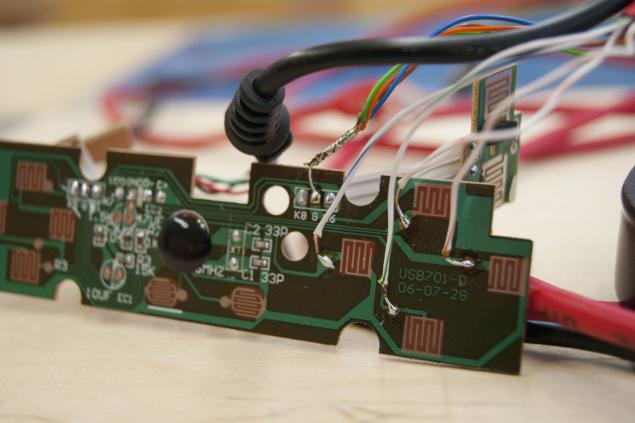
As you can see, "pluses" soldered to the operation buttons. "Minus" twisted-soldered together and soldered to the "earth».
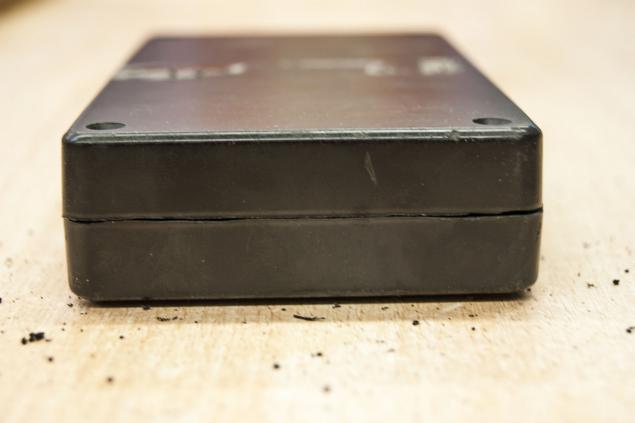
Basically, you're done. But you can bring beauty. For example, push the card in the case. I bought it on the radio market bazaars. However, later it turned out that it's just the two covers that are not intended for connection to at least semblance of something whole. Had little podshlifovat.
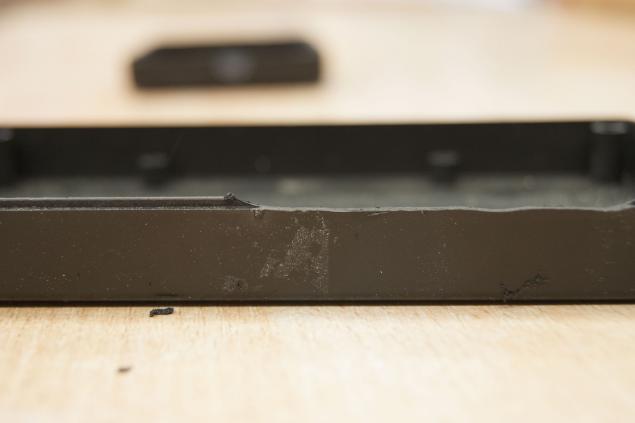
Overall, it turned sanity. With nazhdachki for Dremel took surpluses and using cutters made a recess under the wire.
What does the post But first, a short introduction, so that all understand what will be discussed below. Great Wikipedia article will clarify.
Dance Dance Revolution (DDR) - a series of music video games from Konami Digital Entertainment, Inc, also known as Dancing Stage. The game takes place on the dance platform with four panels: "up", "down", "left" and "right". During gameplay the screen moves a sequence of arrows, which corresponds to the rhythm of the music performed songs. The player must press their feet to the music corresponding to the panel at a time when the hands coincide with the semi-transparent stencil located usually at the top of the screen. Each time you press the right player gradually replenishes the level of "the scale of life." For each slip of the scale is taken away a certain amount of energy. The round is lost if a player at least once during the passage of the song allowed decline in "scale of life" to zero. Well, if you explain clearly, it is best to use the services of Jean Reno and the film "Wasabi».
Historically the game in Russia, Ukraine and Belarus gained popularity among fans of anime, gradually identified as a separate sport direction. Gradually instead of "nyakayuschih" girls near slot machines appeared guys, something hard to chёrkayuschie «To Do List'ah" discusses the benefits of a particular technology "dance" and desperately arguing about choosing the right shoe for "steppe". Soon on the horizon loomed the first championship.
And here there was a problem. Success in the game is directly dependent on the amount of training. Qualitatively, the train could only be on the slot machine. But since most of the players were school and college age, afford full training could only units. After all, everything costs money, and tokens are no exception.
Out of the situation was clear: find «домашнюю» version of DDR . Alas, hopes were not realized. No, homemade version existed, but were either некачественные, or не afford . In addition, delivery times increases the cost of the dance platform in 2 or more times. And it is in Russia. About Belarus even out of the question.
That this state of affairs and I were jsirex , living in the glorious city of Minsk. Not finding an adequate option for a reasonable price, we decided to build his own dance platform with Munchkin and geishas. Set ambitious goals. Dance pad \ mat \ pad should be:
- cheap; durable; is not too heavy (light) and not too bulky. At the touch accuracy and feel of the game is not should be different from the arcade.
For clarity, the assembly process was captured on video. So everyone who wants to see the final result at first, and then read the sheet of text with photos, ask here:
In the meantime, start to assemble.
Preparatory stage The time spent on the mat assembly can be divided into two periods: theoretical and practical. Under the first is meant the time that you spend on the purchase of necessary supplies and tools. Under the second - directly during assembly. If not lazy, alone mat going for 4 days.
Let's go back to shopping. You will need:
- Clamps (2 pcs); screwdrivers; Wood drills; Saw; Dremel; Metal shears; The tester; Elbow; Pencil; Screwdriver;
- Soldering; Solder; Rosin; Twisted pair; Hammer Industrial hairdryer; glue gun.
As you can see, not specified prices for steel and Plexiglas. In my case it was not necessary to buy them - helped jsirex . However, instead of stainless steel can take whatever conductive material (not necessarily metal) with shape memory. For example, the PCB.
With plexiglass complicated. Sellers usually do not want to sell small pieces. But you can go to the trick. Plexiglas we will need to make 4 buttons size 28 * 28 cm. Therefore, we can take as a "square" 60 * 60 cm, and the "rectangle" 30 * 120 cm. Take the glass abutting or with a stock? Depends on which way you cut it:
- Manually using a special knife for cutting plexiglass (like a stationery knife). Glass is taken exactly to size. The process resembles the work with cutting glass cutter. This method is quite budget, but inexperience can break off a bad harvest and negate any savings. Laser cutting. Cuts perfect in size, but is expensive. The peculiarity of the laser requires a "minimal padding" from the edge of the workpiece. That is, in order to cut out the button 28 * 28 cm, we need at least 28 blank, 5 * 28, 5 cm.
The Chronicles of bark beetles (layout and routing) You can start sawing plywood. Thickness of 15 mm is chosen by chance. One of the goals, as you recall, is the weight. Too easy mat under heavy load will slide across the floor. Too heavy to be uncomfortable to carry. For the first reason, it is not necessary to consider the plywood of 10 mm or less. According to the second - 18 mm and thicker. Moreover, the dependence of the value of its thickness of plywood, is nonlinear. Thus, it remains two "finalists" 12 mm and 15 mm. I do not know how in other cities, but in Minsk 12 mm proved rare. Looking ahead to say, collected from 15 mm plywood mat weighs 18 kg.
Having defined the thickness of plywood, sawn need this sheet to the "spare parts". From one standard sheet should happen:
- Based on the size of 90 * 90 cm; 5 buttons size 28 * 28 cm; 2 rack size 3 * 90 cm; 2 rack size 3 * 84 cm.
Also, when the cut will inevitably burrs.
From them, you can get rid of sandpaper or with a suitable tool.
Remember, when working with wood is a lot of chips. Very much. Therefore, make sure that the family did not kick you out of the house. If all ended happily, safely proceed to the next step.
Payay me payay me completely (do sensors) Over the years we hobbies DDR jsirex not just digging in arcades.
On the one hand, there was a need (automatic always tidied before the championship), on the other - it was interesting, well there these Japanese ponapridumyvali. All ingenious is known to be just.
The sensor is a simple design: two conducting plates separated by an insulator around the edges and in the center of the closing of the weight of the player. Each button has a sensor 4, one on each side. Thus, regardless of which portion of the button comes player pressing always operates.
But enough words. Start assembly.
Rascherchivaem PCB squares 1 * 1 cm. Stainless Steel - Band 1 * 15 cm. The hardest part - to cut stainless steel. There is no problem if the hand is Bulgarian. The only caveat - you must adjust the size. Instead of 1 * 15 cm is 1, 1 * 15, 1 cm. The extra "eat" Bulgarian.
But if such a wonderful tool in your arsenal is not available, begin "dancing with a tambourine." First, I decided to use Dremel. In his arsenal just had a cutting disc.
However, stainless steel 1 mm thick wanted to spit on fancy wheels and whittle it after 8 cm cut. So reluctantly had to climb over "analog" tool - metal shears.
They stainless steel was quite tough. But still no ointment on my memory is not complete without a spoon of tar. And this case is no exception.
Scissors cut metal cheerful curls with burrs. Therefore, we first had to dub them with a hammer (blanks, not scissors) to a sane state.
And then "shave" Dremel burrs. For this task he handled excellently and without loss of consumables.
Meanwhile, warmed up the soldering iron. No, I did not owe anyone money. Just the next phase of manufacturing the sensor.
From the standpoint of soldering no subtleties not. Ludim wires dripping phosphoric acid on the bare edge of the strip of stainless steel and solder.
May look and not very aesthetically pleasing, but otorvёsh FIG.
To obtain a preform with electrical tape primatyvayutsya squares PCB. It acts as a dielectric. One blank primatyvaetsya solder side to the other - from the "tail».
I confess, used instead of a blue black electrical tape, so the durability of the sensors can not vouch.
Then, the two are bonded at the edges of the blank tape. The final version below.
It's time to do nicely. To do this, you will need shrinking. With the size of the sensor 1 * 15 cm is perfect shrink wrapped with a diameter of 15 mm.
Uzhimat shrinking industrial hairdryer. If no hair dryer, and a suitable gas stove. The desired effect is achieved. Bonus is the smell of burnt hair. By the way, if a little harder to warm up the "tail" of the sensor, and then quickly clamp it with pliers or a screwdriver, turn virtually sealed enclosure. This point is in the video.
In any case, the fruit is easily verified tester. In the free state of contact, of course, should not be.
Now it was the turn of connectors "papa-mama».
Soldered something (honestly, I do not know how it is properly called) at the free ends of the wires. Here is an important note. If you have a thick stranded wire, it makes sense to bite off part of living. In other words, do not do so, as shown in the photo below, do not leave the wires.
The promise is simple: you can solder, but then not be able to insert a "daddy" in the "mother" because there will be no free space.
Done right, the sensor measure is beautiful and lovely.
Besides has no problems when connecting board.
A few words about the board. Honestly, from personal experience I can say that fuss with connectors and boards are not necessary. Can all the sensors in the button to take the "twist", fill with solder, and then hot-melt. And such a design will work fine. At first samples of rugs are still working, and have passed years 6.
But back to the board. Herbs are all the known method of carrot and stick printer and iron. After etching, are as follows:
After cutting, in strategic places millimeter drill drilled holes not less strategic.
In the end, after soldering, get even beautiful. Rear view.
Front view:
The holy couple (do the wiring) And here we come close to the wiring.
Meticulous readers consider complex version presented in the photo above. I'll tell you about a simplified version, implemented via a twisted pair.
It all starts with the "coupling" with RJ-45 connector. It has 8 outputs, so it goes to 8 wires. 4 Choose the "plus" and 4 "minus". Since the "minus" total - 4 wires are twisted into one. Believe it or not, but also contains a twisted pair of wires 8. On the "pros" and "cons" they are separated completely analogous. I, for example, all the colored appoint "minus", and all the white-colored - "plus". Ultimately, each button in the rug should come 1 "+" and 1 «-».
For the safety of the wiring run it should not verhuosnovaniya, and in advance that performed the grooves in it. There are 2 ways:
- Cheap. Take a chisel and hammer. Dolby groove. Obtained efficiently, but not especially beautiful. Take a milling machine and Scrollsaw everything you need in 10 minutes.
When all the grooves propylene, it is time hotmelt. Stuck very useful for small fast repair. With Melt Route wires sticking sensors. Do not forget to periodically "prozvanivatsya" design, so you do not have to disassemble the finished mat to the ground.
anyhow and production (assembly)
Well, already you can see the light at the end of the tunnel. Finishing line - assembly. Remember 5 wooden buttons, 4 orgsteklyannyh and 4 rails? Now is their time.
Curiously, no matter how you tried to cut it all exactly, whatever straight and square billets may seem to you, at the assembly stage you will pursue a general sense of curvature and unsightly. Do not worry, this is the paradox of the curvature of space-time-hands. Without additional 7 measurements to correct it still can not be so humbled.
Although there is still little tricks there. Assuming that all of the buttons and the rail a little crooked cut, there is a chance to collect them in the following sequence when everything will fall flat. In general, picks and start trying. When the final alignment is found, the sign on the back button of her position and direction. For example, IL - bottom left, C - central.
Begins to build this "ikebana" better from some angles. Once received - baits on the screws. Plexiglas baits on the screws not necessarily.
To plexiglass is not excluded that perpetuate its seating area. Nuance: Corners height more than you need. Option two:
- grind every corner. Make a recess in the base.
In the course of the assembly do not forget prozvanivatsya design.
Finally, the most important component, without which it will not work - Scotch on the foam base. You may laugh, but it is. Even in the original Japanese arcades we found it.
He glued small strips of 3-4 cm in length at the center of each sensor. Since the sensors are doing it yourself and not bought at the factory, you may need several layers. Usually 2-3. Ultimately, the button must be pressed for some hand pressure. Not to touch, namely the efforts! This is important!
USBseksual ('re friends with Dance pad PC)
In parallel with the assembly of the mat, and it is going to link with the computer. Because Windows does not understand the protocol Eprst \ ЁKLMN, have "friends" on the wood with a computer in the traditional way, ie via USB.
For these purposes, bought the cheapest gamepad. On his board and be soldered end of the twisted pair. Just in case recall procedure.
- The signal starts with the circuit on the sensor; is passed to the fee is fixed in the center of the button; then transferred to the "clutch»; and outputs on the RJ-45 connector.
- Insert the crimped "dad" in "Mama» RJ-45; On the twisted pair signal is transmitted to the gamepad; From the signal via USB gamepad goes into the computer.
As you can see, "pluses" soldered to the operation buttons. "Minus" twisted-soldered together and soldered to the "earth».
Basically, you're done. But you can bring beauty. For example, push the card in the case. I bought it on the radio market bazaars. However, later it turned out that it's just the two covers that are not intended for connection to at least semblance of something whole. Had little podshlifovat.
Overall, it turned sanity. With nazhdachki for Dremel took surpluses and using cutters made a recess under the wire.
Historically the game in Russia, Ukraine and Belarus gained popularity among fans of anime, gradually identified as a separate sport direction. Gradually instead of "nyakayuschih" girls near slot machines appeared guys, something hard to chёrkayuschie «To Do List'ah" discusses the benefits of a particular technology "dance" and desperately arguing about choosing the right shoe for "steppe". Soon on the horizon loomed the first championship.
And here there was a problem. Success in the game is directly dependent on the amount of training. Qualitatively, the train could only be on the slot machine. But since most of the players were school and college age, afford full training could only units. After all, everything costs money, and tokens are no exception.
Out of the situation was clear: find «домашнюю» version of DDR . Alas, hopes were not realized. No, homemade version existed, but were either некачественные, or не afford . In addition, delivery times increases the cost of the dance platform in 2 or more times. And it is in Russia. About Belarus even out of the question.
That this state of affairs and I were jsirex , living in the glorious city of Minsk. Not finding an adequate option for a reasonable price, we decided to build his own dance platform with Munchkin and geishas. Set ambitious goals. Dance pad \ mat \ pad should be:
- cheap; durable; is not too heavy (light) and not too bulky. At the touch accuracy and feel of the game is not should be different from the arcade.
For clarity, the assembly process was captured on video. So everyone who wants to see the final result at first, and then read the sheet of text with photos, ask here:
In the meantime, start to assemble.
Preparatory stage The time spent on the mat assembly can be divided into two periods: theoretical and practical. Under the first is meant the time that you spend on the purchase of necessary supplies and tools. Under the second - directly during assembly. If not lazy, alone mat going for 4 days.
Let's go back to shopping. You will need:
- Clamps (2 pcs); screwdrivers; Wood drills; Saw; Dremel; Metal shears; The tester; Elbow; Pencil; Screwdriver;
- Soldering; Solder; Rosin; Twisted pair; Hammer Industrial hairdryer; glue gun.
As you can see, not specified prices for steel and Plexiglas. In my case it was not necessary to buy them - helped jsirex . However, instead of stainless steel can take whatever conductive material (not necessarily metal) with shape memory. For example, the PCB.
With plexiglass complicated. Sellers usually do not want to sell small pieces. But you can go to the trick. Plexiglas we will need to make 4 buttons size 28 * 28 cm. Therefore, we can take as a "square" 60 * 60 cm, and the "rectangle" 30 * 120 cm. Take the glass abutting or with a stock? Depends on which way you cut it:
- Manually using a special knife for cutting plexiglass (like a stationery knife). Glass is taken exactly to size. The process resembles the work with cutting glass cutter. This method is quite budget, but inexperience can break off a bad harvest and negate any savings. Laser cutting. Cuts perfect in size, but is expensive. The peculiarity of the laser requires a "minimal padding" from the edge of the workpiece. That is, in order to cut out the button 28 * 28 cm, we need at least 28 blank, 5 * 28, 5 cm.
The Chronicles of bark beetles (layout and routing) You can start sawing plywood. Thickness of 15 mm is chosen by chance. One of the goals, as you recall, is the weight. Too easy mat under heavy load will slide across the floor. Too heavy to be uncomfortable to carry. For the first reason, it is not necessary to consider the plywood of 10 mm or less. According to the second - 18 mm and thicker. Moreover, the dependence of the value of its thickness of plywood, is nonlinear. Thus, it remains two "finalists" 12 mm and 15 mm. I do not know how in other cities, but in Minsk 12 mm proved rare. Looking ahead to say, collected from 15 mm plywood mat weighs 18 kg.
Having defined the thickness of plywood, sawn need this sheet to the "spare parts". From one standard sheet should happen:
- Based on the size of 90 * 90 cm; 5 buttons size 28 * 28 cm; 2 rack size 3 * 90 cm; 2 rack size 3 * 84 cm.
Also, when the cut will inevitably burrs.
From them, you can get rid of sandpaper or with a suitable tool.
Remember, when working with wood is a lot of chips. Very much. Therefore, make sure that the family did not kick you out of the house. If all ended happily, safely proceed to the next step.
Payay me payay me completely (do sensors) Over the years we hobbies DDR jsirex not just digging in arcades.
On the one hand, there was a need (automatic always tidied before the championship), on the other - it was interesting, well there these Japanese ponapridumyvali. All ingenious is known to be just.
The sensor is a simple design: two conducting plates separated by an insulator around the edges and in the center of the closing of the weight of the player. Each button has a sensor 4, one on each side. Thus, regardless of which portion of the button comes player pressing always operates.
But enough words. Start assembly.
Rascherchivaem PCB squares 1 * 1 cm. Stainless Steel - Band 1 * 15 cm. The hardest part - to cut stainless steel. There is no problem if the hand is Bulgarian. The only caveat - you must adjust the size. Instead of 1 * 15 cm is 1, 1 * 15, 1 cm. The extra "eat" Bulgarian.
But if such a wonderful tool in your arsenal is not available, begin "dancing with a tambourine." First, I decided to use Dremel. In his arsenal just had a cutting disc.
However, stainless steel 1 mm thick wanted to spit on fancy wheels and whittle it after 8 cm cut. So reluctantly had to climb over "analog" tool - metal shears.
They stainless steel was quite tough. But still no ointment on my memory is not complete without a spoon of tar. And this case is no exception.
Scissors cut metal cheerful curls with burrs. Therefore, we first had to dub them with a hammer (blanks, not scissors) to a sane state.
And then "shave" Dremel burrs. For this task he handled excellently and without loss of consumables.
Meanwhile, warmed up the soldering iron. No, I did not owe anyone money. Just the next phase of manufacturing the sensor.
From the standpoint of soldering no subtleties not. Ludim wires dripping phosphoric acid on the bare edge of the strip of stainless steel and solder.
May look and not very aesthetically pleasing, but otorvёsh FIG.
To obtain a preform with electrical tape primatyvayutsya squares PCB. It acts as a dielectric. One blank primatyvaetsya solder side to the other - from the "tail».
I confess, used instead of a blue black electrical tape, so the durability of the sensors can not vouch.
Then, the two are bonded at the edges of the blank tape. The final version below.
It's time to do nicely. To do this, you will need shrinking. With the size of the sensor 1 * 15 cm is perfect shrink wrapped with a diameter of 15 mm.
Uzhimat shrinking industrial hairdryer. If no hair dryer, and a suitable gas stove. The desired effect is achieved. Bonus is the smell of burnt hair. By the way, if a little harder to warm up the "tail" of the sensor, and then quickly clamp it with pliers or a screwdriver, turn virtually sealed enclosure. This point is in the video.
In any case, the fruit is easily verified tester. In the free state of contact, of course, should not be.
Now it was the turn of connectors "papa-mama».
Soldered something (honestly, I do not know how it is properly called) at the free ends of the wires. Here is an important note. If you have a thick stranded wire, it makes sense to bite off part of living. In other words, do not do so, as shown in the photo below, do not leave the wires.
The promise is simple: you can solder, but then not be able to insert a "daddy" in the "mother" because there will be no free space.
Done right, the sensor measure is beautiful and lovely.
Besides has no problems when connecting board.
A few words about the board. Honestly, from personal experience I can say that fuss with connectors and boards are not necessary. Can all the sensors in the button to take the "twist", fill with solder, and then hot-melt. And such a design will work fine. At first samples of rugs are still working, and have passed years 6.
But back to the board. Herbs are all the known method of carrot and stick printer and iron. After etching, are as follows:
After cutting, in strategic places millimeter drill drilled holes not less strategic.
In the end, after soldering, get even beautiful. Rear view.
Front view:
The holy couple (do the wiring) And here we come close to the wiring.
Meticulous readers consider complex version presented in the photo above. I'll tell you about a simplified version, implemented via a twisted pair.
It all starts with the "coupling" with RJ-45 connector. It has 8 outputs, so it goes to 8 wires. 4 Choose the "plus" and 4 "minus". Since the "minus" total - 4 wires are twisted into one. Believe it or not, but also contains a twisted pair of wires 8. On the "pros" and "cons" they are separated completely analogous. I, for example, all the colored appoint "minus", and all the white-colored - "plus". Ultimately, each button in the rug should come 1 "+" and 1 «-».
For the safety of the wiring run it should not verhuosnovaniya, and in advance that performed the grooves in it. There are 2 ways:
- Cheap. Take a chisel and hammer. Dolby groove. Obtained efficiently, but not especially beautiful. Take a milling machine and Scrollsaw everything you need in 10 minutes.
When all the grooves propylene, it is time hotmelt. Stuck very useful for small fast repair. With Melt Route wires sticking sensors. Do not forget to periodically "prozvanivatsya" design, so you do not have to disassemble the finished mat to the ground.
anyhow and production (assembly)
Well, already you can see the light at the end of the tunnel. Finishing line - assembly. Remember 5 wooden buttons, 4 orgsteklyannyh and 4 rails? Now is their time.
Curiously, no matter how you tried to cut it all exactly, whatever straight and square billets may seem to you, at the assembly stage you will pursue a general sense of curvature and unsightly. Do not worry, this is the paradox of the curvature of space-time-hands. Without additional 7 measurements to correct it still can not be so humbled.
Although there is still little tricks there. Assuming that all of the buttons and the rail a little crooked cut, there is a chance to collect them in the following sequence when everything will fall flat. In general, picks and start trying. When the final alignment is found, the sign on the back button of her position and direction. For example, IL - bottom left, C - central.
Begins to build this "ikebana" better from some angles. Once received - baits on the screws. Plexiglas baits on the screws not necessarily.
To plexiglass is not excluded that perpetuate its seating area. Nuance: Corners height more than you need. Option two:
- grind every corner. Make a recess in the base.
In the course of the assembly do not forget prozvanivatsya design.
Finally, the most important component, without which it will not work - Scotch on the foam base. You may laugh, but it is. Even in the original Japanese arcades we found it.
He glued small strips of 3-4 cm in length at the center of each sensor. Since the sensors are doing it yourself and not bought at the factory, you may need several layers. Usually 2-3. Ultimately, the button must be pressed for some hand pressure. Not to touch, namely the efforts! This is important!
USBseksual ('re friends with Dance pad PC)
In parallel with the assembly of the mat, and it is going to link with the computer. Because Windows does not understand the protocol Eprst \ ЁKLMN, have "friends" on the wood with a computer in the traditional way, ie via USB.
For these purposes, bought the cheapest gamepad. On his board and be soldered end of the twisted pair. Just in case recall procedure.
- The signal starts with the circuit on the sensor; is passed to the fee is fixed in the center of the button; then transferred to the "clutch»; and outputs on the RJ-45 connector.
- Insert the crimped "dad" in "Mama» RJ-45; On the twisted pair signal is transmitted to the gamepad; From the signal via USB gamepad goes into the computer.
As you can see, "pluses" soldered to the operation buttons. "Minus" twisted-soldered together and soldered to the "earth».
Basically, you're done. But you can bring beauty. For example, push the card in the case. I bought it on the radio market bazaars. However, later it turned out that it's just the two covers that are not intended for connection to at least semblance of something whole. Had little podshlifovat.
Overall, it turned sanity. With nazhdachki for Dremel took surpluses and using cutters made a recess under the wire.
- Insert the crimped "dad" in "Mama» RJ-45; On the twisted pair signal is transmitted to the gamepad; From the signal via USB gamepad goes into the computer.
- The signal starts with the circuit on the sensor; is passed to the fee is fixed in the center of the button; then transferred to the "clutch»; and outputs on the RJ-45 connector.
- grind every corner. Make a recess in the base.
- Cheap. Take a chisel and hammer. Dolby groove. Obtained efficiently, but not especially beautiful. Take a milling machine and Scrollsaw everything you need in 10 minutes.
- Based on the size of 90 * 90 cm; 5 buttons size 28 * 28 cm; 2 rack size 3 * 90 cm; 2 rack size 3 * 84 cm.
- Manually using a special knife for cutting plexiglass (like a stationery knife). Glass is taken exactly to size. The process resembles the work with cutting glass cutter. This method is quite budget, but inexperience can break off a bad harvest and negate any savings. Laser cutting. Cuts perfect in size, but is expensive. The peculiarity of the laser requires a "minimal padding" from the edge of the workpiece. That is, in order to cut out the button 28 * 28 cm, we need at least 28 blank, 5 * 28, 5 cm.
