How to make the attachment on the trimmer with your hands
 Bashny.Net
For many gardeners trimmer has long been a familiar technique and almost irreplaceable. But it is not always possible to buy a model that allows to satisfy all needs. It happens that with fresh young vegetation trimmer easily, but there is a desire to clear the space behind the fence or along the access road, and the tall ripe grass is the technique of "not too tough".

We offer the option of self-production tips for trimmer of simple, almost improvised means. You will need a metal perforated plate (100mm x 240mm), two blades for metal, 4 screws and 4 nuts M5, 4 washers and 4 fender washers. From the point of view of safety, the saw blade should not be completely hardened.
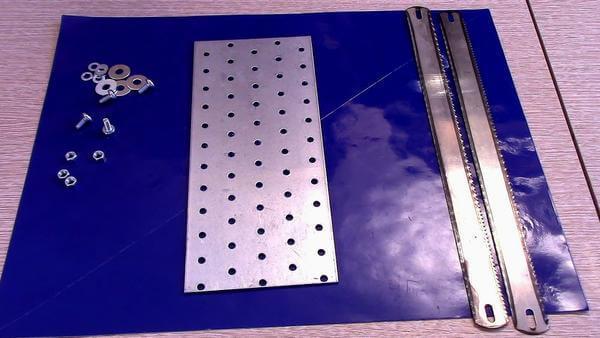
All that is required for manufacturing the nozzle
The hardest part of the manufacture of the nozzle symmetrically to mark and carry out the holes for the knives and the shaft of the trimmer. That's why select is ready perforated plate.
First, you need to make the base of the nozzle. This metal sheet grinder cut a square of side 100 mm. Mark it is necessary so that the exact center (at the intersection of the diagonals) there was a hole. To do this, from the center of the hole perpendicular to the short side of the plate measured distance 50 mm of the planned cut lines.

Mark the base of the nozzle
Cut the excess and get a square of 100 mm × 100 mm. Now you need to slightly round the corners and drilled the Central hole for the shaft of the trimmer.

Make the corners rounded and drilled the Central hole for the shaft of the trimmer
Blades for the metal to be cut, measuring from each end of the 8 see Receive the four blanks with finished bores.

Cut the fabric at the metal
These blanks must be given in the form of knives. For this proposed line of cut on the eye (special accuracy is not needed), fasten all four blanks together and grind the excess.
From blanks cut knives
The result is the same weight and size blades, they can be a bit sharpened on one side. Now all the parts are homemade tips for trimmer prepared, you can begin Assembly.

All ready for Assembly
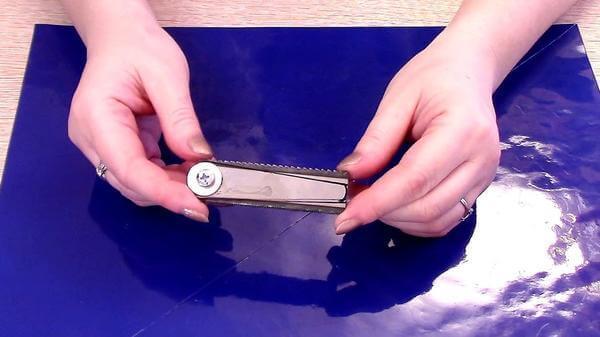
On the screw put a small washer and put it in the corner hole. On top put the knife, having sharpened side during the rotation of the shaft of the trimmer. Followed by a large washer and nut that is not tightened to the knife rotated freely. In the same way fasten the other three knives.
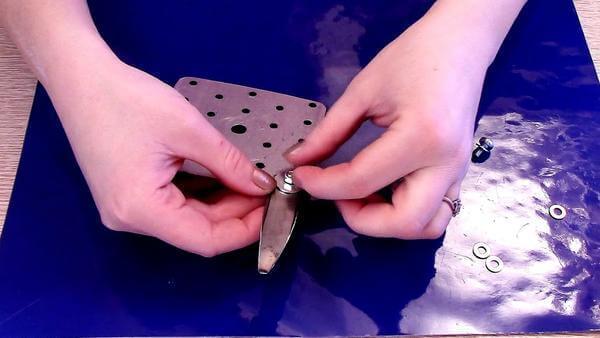
Fixed knives
The end of the screw needs to rasclaat that nut will not come loose.
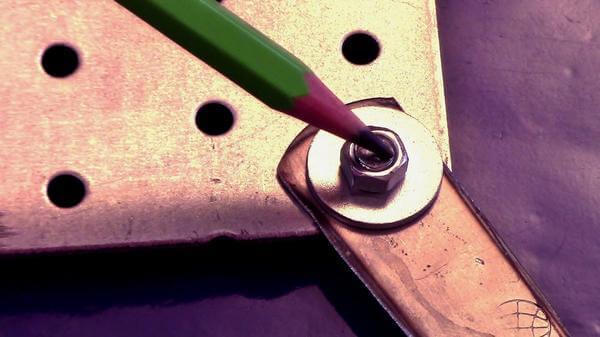
The end of the screw needs to rasclaat
Nozzle ready. It is nuts to the ground and secured in the same manner as three-bladed knife supplied with the trimmer. When confronted with the stone knives fold up and go inside a bit.
This idea was suggested to us by our regular contributor video Tatiana (Tula oblast). Learn more to see the whole process of manufacture of such attachments for the trimmer and learn some of the nuances you can, watch the video, which she prepared.
When working with the trimmer, it is important not to forget about safety, using any tips, and especially homemade. published
P. S. And remember, only by changing their consumption — together we change the world! ©
Source: //www.7dach.ru/Eleko/nasadka-na-trimmer-svoimi-rukami-106078.html

We offer the option of self-production tips for trimmer of simple, almost improvised means. You will need a metal perforated plate (100mm x 240mm), two blades for metal, 4 screws and 4 nuts M5, 4 washers and 4 fender washers. From the point of view of safety, the saw blade should not be completely hardened.

All that is required for manufacturing the nozzle
The hardest part of the manufacture of the nozzle symmetrically to mark and carry out the holes for the knives and the shaft of the trimmer. That's why select is ready perforated plate.
First, you need to make the base of the nozzle. This metal sheet grinder cut a square of side 100 mm. Mark it is necessary so that the exact center (at the intersection of the diagonals) there was a hole. To do this, from the center of the hole perpendicular to the short side of the plate measured distance 50 mm of the planned cut lines.

Mark the base of the nozzle
Cut the excess and get a square of 100 mm × 100 mm. Now you need to slightly round the corners and drilled the Central hole for the shaft of the trimmer.

Make the corners rounded and drilled the Central hole for the shaft of the trimmer
Blades for the metal to be cut, measuring from each end of the 8 see Receive the four blanks with finished bores.

Cut the fabric at the metal
These blanks must be given in the form of knives. For this proposed line of cut on the eye (special accuracy is not needed), fasten all four blanks together and grind the excess.

From blanks cut knives
The result is the same weight and size blades, they can be a bit sharpened on one side. Now all the parts are homemade tips for trimmer prepared, you can begin Assembly.

All ready for Assembly
On the screw put a small washer and put it in the corner hole. On top put the knife, having sharpened side during the rotation of the shaft of the trimmer. Followed by a large washer and nut that is not tightened to the knife rotated freely. In the same way fasten the other three knives.

Fixed knives
The end of the screw needs to rasclaat that nut will not come loose.

The end of the screw needs to rasclaat
Nozzle ready. It is nuts to the ground and secured in the same manner as three-bladed knife supplied with the trimmer. When confronted with the stone knives fold up and go inside a bit.
This idea was suggested to us by our regular contributor video Tatiana (Tula oblast). Learn more to see the whole process of manufacture of such attachments for the trimmer and learn some of the nuances you can, watch the video, which she prepared.
When working with the trimmer, it is important not to forget about safety, using any tips, and especially homemade. published
P. S. And remember, only by changing their consumption — together we change the world! ©
Source: //www.7dach.ru/Eleko/nasadka-na-trimmer-svoimi-rukami-106078.html
Tags
See also
How to make automatic highlighting of steps with their hands
How to make gutters for the house with his own hands
How to make a water pump with your hands
How to make a greenhouse in a barrel with your hands
How to make a bridge on the pond with his hands
How to make a clay floor with their hands
How to make so that the plants watered themselves
How to make oven filings on their hands for the garden and home
How to make a wooden trellis for climbing plants with your own hands