798
How to make an easy and efficient wood-burning stove for hiking

1. Making an accessory

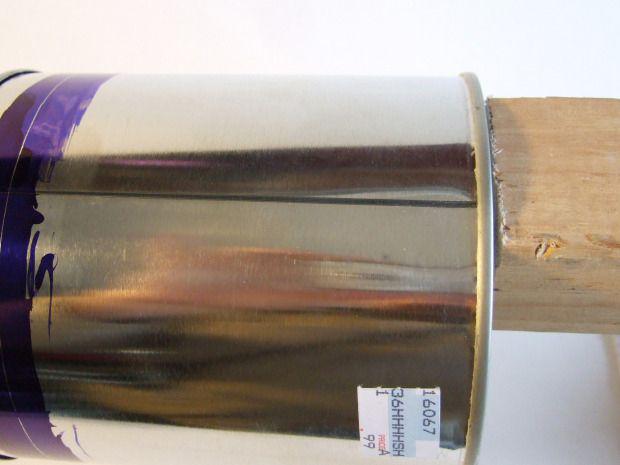
This wooden bar is not part of the stove, and it is for manufacturing. With it, you will be more convenient to drill holes and perform other operations. Insert the bar in the bank and draw a marker Two lines about the level cap.

The distance between the lines should be approximately 7-8 millimeters.

Gently Scrollsaw rectangular recess. This notch should be placed free upper edge of the banks.
We place a wooden block so that he gave reliable support for the banks. The upper edge must be at the same time comfortably in the groove made by us.
2. Make a hole in the bottom of the big banks
First, we put a line along the lower edge of the jar. This line is necessary to mark out points for vents. In this case, it uses a special dye to mark, but nothing will happen if you make it simple marker.

Along the marked our line drill holes. Their number and size are important for the stove. If they are too small, there will be no draft, if it's too much, then the wood will burn very quickly. So here it is better not to overdo it, to be able to dosverlit more holes after the test.

3. Drill a series of holes in the top of the medium-sized banks
We are doing roughly the same manipulations with the second bank (smaller in size). Note here that a series of holes located at the top, rather than near the bottom, as in the previous case.

4. The bottom of the medium-sized banks are drilled

We make a lot of holes in the bottom of the pot. Their size and quantity should be such that the wood could fall out through them. The result should have approximately the sieve.

5. Putting design
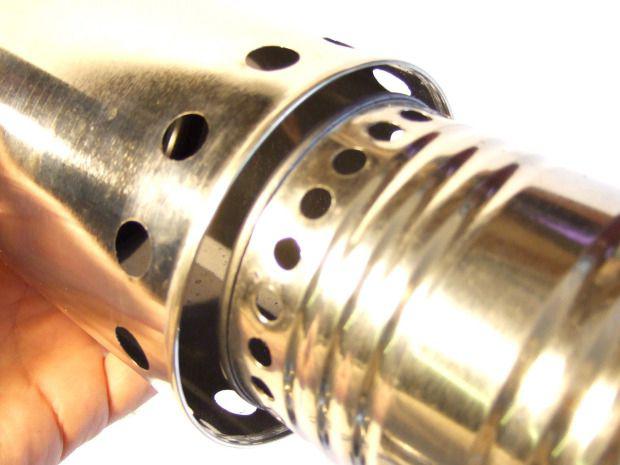
We put in a large jar average.
As a result of our stove consists of two cans tightly inserted one in another. At the same time between their walls remains a small clearance for air movement.

6. Making burners
Type of burners in different designs may slightly vary. In this case, a variant to the round holes in the sidewall. Do you have them already well learned from previous operations.

The bottom of the small banks cut with scissors for metal.

The edges can be aligned with a hammer and a file handle.

7. Carry out the test
The main part of the wood-burning stove is two cans, inserted into one another. Loaded in medium-sized banks combustible material, as which can be used wood chips, twigs, cones. It is best to use dry twigs on the trees because the branches lying on the ground may be more or less raw.

We ignite and wait until the flare. At first, it may cause some difficulties, but after a few workouts will be obtained with a single match.

When started confident intense burning, put on top of the burner, which we have made of small banks

And on top of hoisting the kettle or saucepan.

If you inspected the manufacturing process to the end and did not understand, or it seemed too complicated to you, then check out another option. The video below shows how to make a stove without any instruments other than ordinary knife. So, maybe not so neat, but no less practical.
--img20--
Source: lifehacker.ru