Helmet "Predator - Predator" with his own hands
 Bashny.Net
That's the same I finished my long lasting project. He did not hurry, on a case by case basis. Gradually, when the fall out free time. The result pleased with how that protein from the movie "Ice Age" that saw the nut. Well, you remember her face. How I hatched the idea'm not going to tell. And is it necessary?
It is better to move on to a description of the process and the illustrations. On the street heat, stifling a lot of writing is not hunting. Therefore, in short.
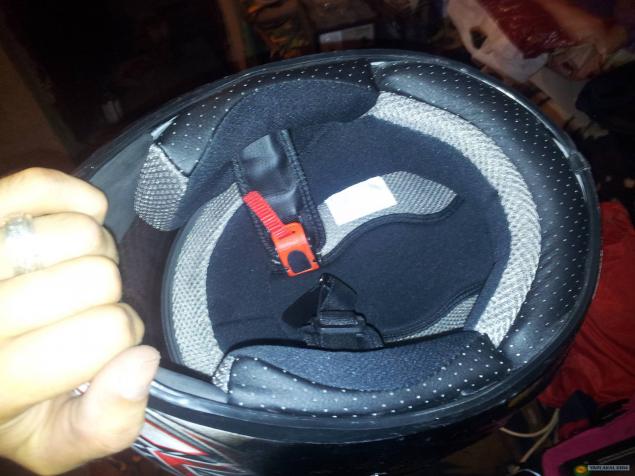
So I bought myself a helmet actually dash donor! With which it all started. Helmet normal size M, but with a mirrored visor. (Photo no helmet, but you see him in.
Further, it was thought cannibalize their favorite children's plasticine on, but they it was not so much. We go to the store, just say go more than once. As a result, I gained 8 packs of 18 color children's joy.
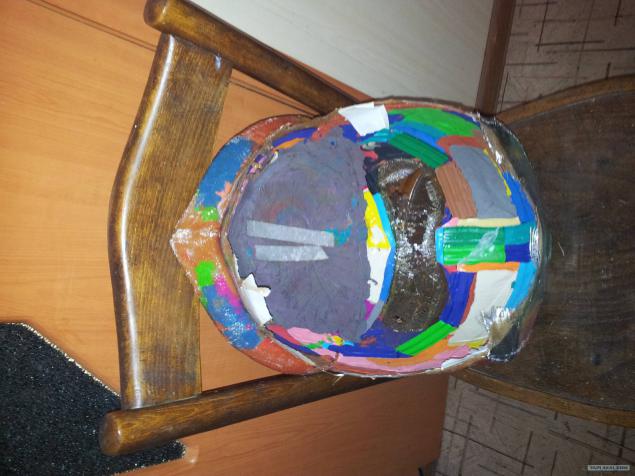
The very same helmet pre obtyanuli polyethylene. I am using regular packet. And then do not tricky, but measured movement began to put on the helmet of plasticine. That is to say to make the shape. Only in the process, I realized that plastelin not really a good idea. He's a little hardish. and knead each kusochik I was worn out. Therefore it slightly warmed in the microwave. There are special plasticine - sculpture. But it is expensive.
And so the picture of how the process oblepki.
Left

Behind

Right

Well, sort of very basic form is ready. Plastelin specifically applied around the perimeter of the helmet. In consequence, it can be removed.
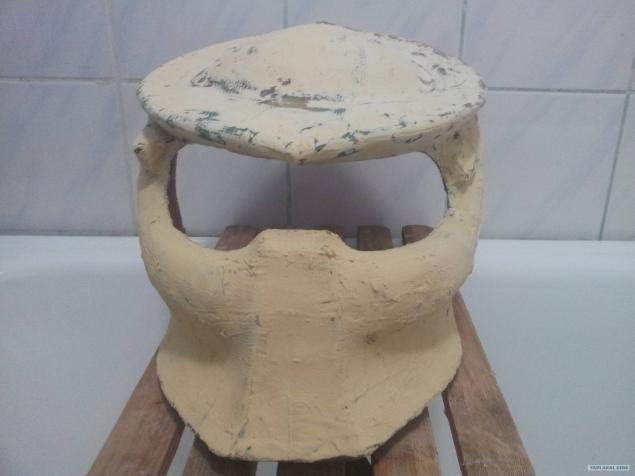
Go easy and relaxed gait, whistling his favorite song in the shop of auto paints and enamels. There I bumazhechki epoxy resin (1 liter) and two small glass cloth weaving. What is the process of mixing the resin and follow Maintenance think it is not necessary to describe. Generally called "remember childhood" or "Pope mache by an adult." Also attached kartinochki.

Left

Behind

By the way it had to be dealt a 3 layer. And in places more prone to fractures even strengthened 4m. It was my first encounter with the same kind of skill. Even when using gloves ugvazdalsya to complete. Well, never mind. The same creative process. After complete curing of the resin remove the workpiece from the helmet and a little heated by the stove to pick out her plasticine. And I gave the incomprehensible substantsyyu unknown what color the children. They were satisfied that it is just a lot!

Another shell
And

Well. We continue. There is a shtukentsiya I have not a bad machine resembles a forest in stomotoloka with all sorts of bells and whistles out there in the form sverlyshek, grinding discs. and other nonsense. How's handle on rough workpiece. clipped out of the corner. And we go back to the store for putty. I thought a little bonochki enough! Yeah, right now. You wish! 3 cans with both the bush gone! This is the most tedious process. Shpaklyuesh - clobbered! Shpaklyuesh - clobbered! And so very long and dreary.
Just a couple of angles

More

When the tired skins doing other associated items for the helmet. Drew design tips for dread.
Posted in [mergetime] 1404213016 [/ mergetime]
Originally I planned on a lathe to carve wood. But it failed. Therefore I made them of PTFE. Easy and smooth. All as one!

Originally I planned on a lathe to carve wood. But it failed. Therefore I made them of PTFE. Easy and smooth. All as one!
Of course I have them painted and varnished!

But for a long time picking themselves dreadlocks. All the hardware store in town obscharil. I was looking for something similar or appropriate. And then I came across the shop. for all climbers and outdoor activities. and I saw their rope. I think everything goes well. I took it is cut into individual pieces. Like gud work, but something is missing. I poryskat in the garage and found a copper tube from Conder. sliced small Bochenkov. I put on the cord. Fasten melting and the following

Well, of course, and the final result Total Dread took me 37 pieces

Again, skins and shpaklyuem. In between I primed to see better flaws. Well, look what is already beginning to take shape

Then again, tired skin. I decided to re-aside and gathered artless structure of three laser ukahok purchased for 100 tenge per share. I pulled giblets. soldered them Mesto. From old cars son handy mini toggle switch. For inclusion. Later, of course block the battery was transformed into a kind of small. But most importantly it works!

And when the state

Then again break. You know all do do do ...
But that's finished in the end the nasty process shkuroterki;)
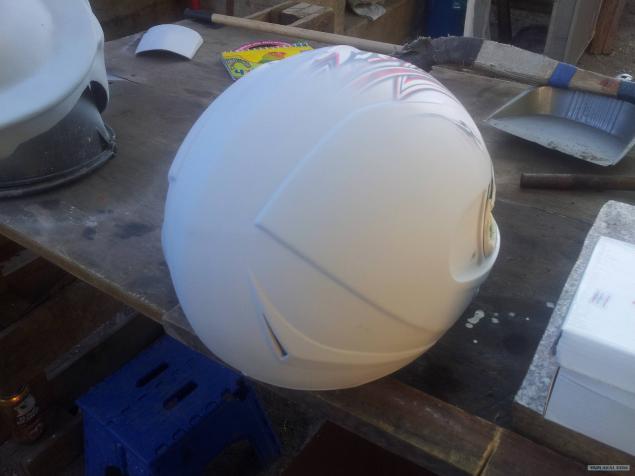
Helmet workpiece also lost. He took off and prepared to nail primer. Primed parts before painting.

More

And he actually helmet

More
But do not forget that the helmet from Hishnika was not easy but with different characters and scratches. First rascherchivaem top of the helmet into squares and draw the characters there. Just inflict scratches Allegedly from "Alien."
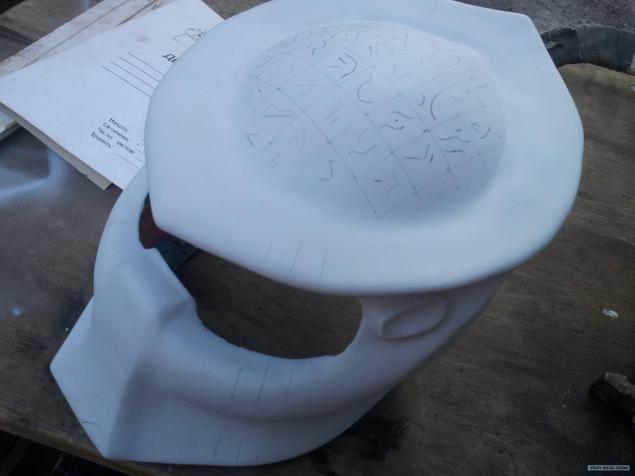
And tested dremmelem (as suggested mmne Predator) by sketches drawn to whittle a little and create volume.

All the same dremmelem using different nozzles cut out window for lasers and for themselves dreadlocks

These holes have turned

Try on as a part of the laser.

And as the light also check

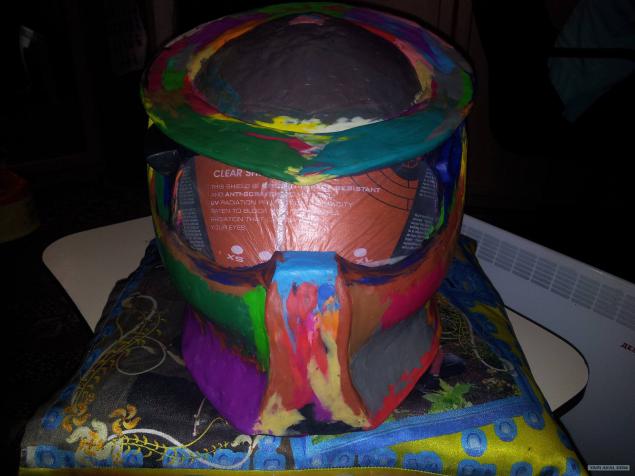
Next is the process of painting in black hat. The blue dye used kseral and a little green. No description. Just show.

More

Helmet

Given that there are some problems with his hands, after the previous work, stress and focusing on small details shaking hands and do not allow to perform perfectly all had to ask his wife draw the characters of scarlet paint and scratches

Lacquered blank and helmet

Harvesting

Helmet

A couple of days after the varnish has dried assembled helmet donor. Inserted back all guts. Screw the visor.
Still needed workpiece itself. From the beginning we set the laser in your seat. We fix it there hot melt. Block battery is put in front of the workpiece. So that was accessed from the helmet to replace the batteries.
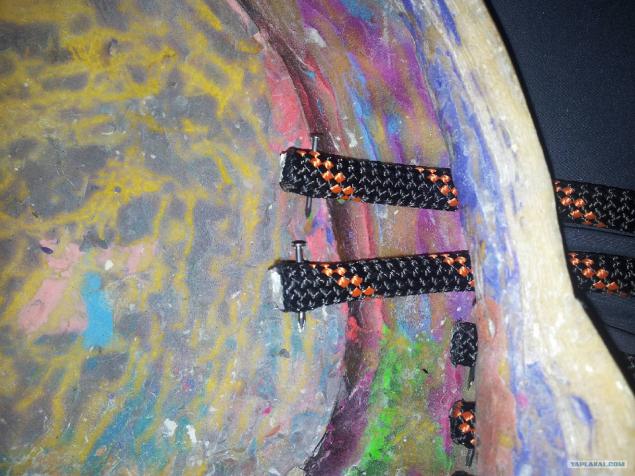
Then started the installation dreadlocks
Slips and recorded their young studs. After all, too filled with hot melt. With a good dash of course they can snatch. Well, it's good to say so in safety.
More

Something like

Of course do not forget about the seals in the form of a U-shaped rezinochki for a place of contact with the visor in the bottom of the helmet
Inside that missed the glue factory. Very good to sit down. And hold.

More

After that, the actual workpiece is put on the helmet and fixed firmly in the ground 4 small studs. Two and a rear side and one on each side.

That's it! We are on the home straight. The helmet will be polished weeks so through 3. In the meantime, see what happens. To express an opinion. Thank you for your attention.
From myself all I wish to bring follow through.
The last 9 photos
1

2 photo

3 photo

It is better to move on to a description of the process and the illustrations. On the street heat, stifling a lot of writing is not hunting. Therefore, in short.
So I bought myself a helmet actually dash donor! With which it all started. Helmet normal size M, but with a mirrored visor. (Photo no helmet, but you see him in.
Further, it was thought cannibalize their favorite children's plasticine on, but they it was not so much. We go to the store, just say go more than once. As a result, I gained 8 packs of 18 color children's joy.
The very same helmet pre obtyanuli polyethylene. I am using regular packet. And then do not tricky, but measured movement began to put on the helmet of plasticine. That is to say to make the shape. Only in the process, I realized that plastelin not really a good idea. He's a little hardish. and knead each kusochik I was worn out. Therefore it slightly warmed in the microwave. There are special plasticine - sculpture. But it is expensive.
And so the picture of how the process oblepki.

Left

Behind

Right

Well, sort of very basic form is ready. Plastelin specifically applied around the perimeter of the helmet. In consequence, it can be removed.
Go easy and relaxed gait, whistling his favorite song in the shop of auto paints and enamels. There I bumazhechki epoxy resin (1 liter) and two small glass cloth weaving. What is the process of mixing the resin and follow Maintenance think it is not necessary to describe. Generally called "remember childhood" or "Pope mache by an adult." Also attached kartinochki.

Left

Behind

By the way it had to be dealt a 3 layer. And in places more prone to fractures even strengthened 4m. It was my first encounter with the same kind of skill. Even when using gloves ugvazdalsya to complete. Well, never mind. The same creative process. After complete curing of the resin remove the workpiece from the helmet and a little heated by the stove to pick out her plasticine. And I gave the incomprehensible substantsyyu unknown what color the children. They were satisfied that it is just a lot!

Another shell

And

Well. We continue. There is a shtukentsiya I have not a bad machine resembles a forest in stomotoloka with all sorts of bells and whistles out there in the form sverlyshek, grinding discs. and other nonsense. How's handle on rough workpiece. clipped out of the corner. And we go back to the store for putty. I thought a little bonochki enough! Yeah, right now. You wish! 3 cans with both the bush gone! This is the most tedious process. Shpaklyuesh - clobbered! Shpaklyuesh - clobbered! And so very long and dreary.

Just a couple of angles

More

When the tired skins doing other associated items for the helmet. Drew design tips for dread.
Posted in [mergetime] 1404213016 [/ mergetime]
Originally I planned on a lathe to carve wood. But it failed. Therefore I made them of PTFE. Easy and smooth. All as one!

Originally I planned on a lathe to carve wood. But it failed. Therefore I made them of PTFE. Easy and smooth. All as one!
Of course I have them painted and varnished!

But for a long time picking themselves dreadlocks. All the hardware store in town obscharil. I was looking for something similar or appropriate. And then I came across the shop. for all climbers and outdoor activities. and I saw their rope. I think everything goes well. I took it is cut into individual pieces. Like gud work, but something is missing. I poryskat in the garage and found a copper tube from Conder. sliced small Bochenkov. I put on the cord. Fasten melting and the following

Well, of course, and the final result Total Dread took me 37 pieces

Again, skins and shpaklyuem. In between I primed to see better flaws. Well, look what is already beginning to take shape

Then again, tired skin. I decided to re-aside and gathered artless structure of three laser ukahok purchased for 100 tenge per share. I pulled giblets. soldered them Mesto. From old cars son handy mini toggle switch. For inclusion. Later, of course block the battery was transformed into a kind of small. But most importantly it works!

And when the state

Then again break. You know all do do do ...
But that's finished in the end the nasty process shkuroterki;)
Helmet workpiece also lost. He took off and prepared to nail primer. Primed parts before painting.

More

And he actually helmet

More

But do not forget that the helmet from Hishnika was not easy but with different characters and scratches. First rascherchivaem top of the helmet into squares and draw the characters there. Just inflict scratches Allegedly from "Alien."

And tested dremmelem (as suggested mmne Predator) by sketches drawn to whittle a little and create volume.

All the same dremmelem using different nozzles cut out window for lasers and for themselves dreadlocks

These holes have turned

Try on as a part of the laser.

And as the light also check

Next is the process of painting in black hat. The blue dye used kseral and a little green. No description. Just show.

More

Helmet

Given that there are some problems with his hands, after the previous work, stress and focusing on small details shaking hands and do not allow to perform perfectly all had to ask his wife draw the characters of scarlet paint and scratches

Lacquered blank and helmet

Harvesting

Helmet

A couple of days after the varnish has dried assembled helmet donor. Inserted back all guts. Screw the visor.

Still needed workpiece itself. From the beginning we set the laser in your seat. We fix it there hot melt. Block battery is put in front of the workpiece. So that was accessed from the helmet to replace the batteries.
Then started the installation dreadlocks
Slips and recorded their young studs. After all, too filled with hot melt. With a good dash of course they can snatch. Well, it's good to say so in safety.

More

Something like

Of course do not forget about the seals in the form of a U-shaped rezinochki for a place of contact with the visor in the bottom of the helmet
Inside that missed the glue factory. Very good to sit down. And hold.

More

After that, the actual workpiece is put on the helmet and fixed firmly in the ground 4 small studs. Two and a rear side and one on each side.

That's it! We are on the home straight. The helmet will be polished weeks so through 3. In the meantime, see what happens. To express an opinion. Thank you for your attention.
From myself all I wish to bring follow through.
The last 9 photos
1

2 photo

3 photo

Tags
See also
How to make a home theater with your own hands
Their hands: Cellar glacier —dry freezer all year round
Brick oven with his own hands
How to build a henhouse with your own hands
A Russian stove for the eco house with his own hands
New features rustic construction: making the Windows with their hands
How to make 3D floors with their hands
Doing their own hands iguana (21 photos)
Watches made with his own hands (21 photos)
With his own hands: the robot Bender from Futurama (51 photos)