Amplifier for home theater
 Bashny.Net
Inspired by the theme of the distinguished zubexkir
the creation of a subwoofer, decided to repeat this wonderful box.
Komplektuhe to ask the price, recalculate the amount of a commercially available MDF, and then the question arose - who will rock the sub?
I went on the internet to look for a suitable scheme. Here I learned about the existence of Class-D, which attracted its efficiency (90-95%) and the original circuit design using FETs mode key. He stopped at 300W scheme Alexei Korol'kova. You can see it here.
There are other schemes and a link to the developer forum. By the way, a very smart guy)).
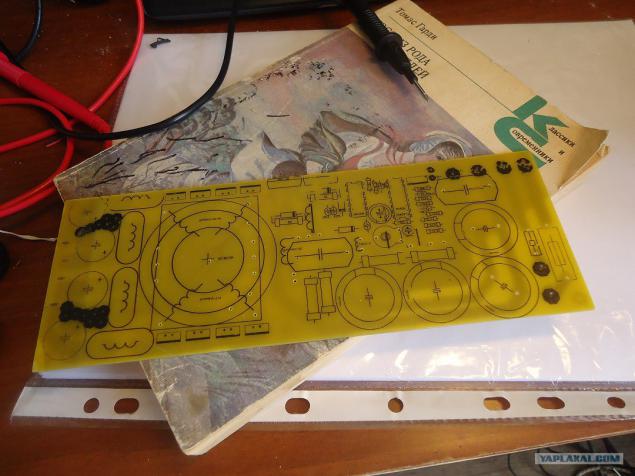
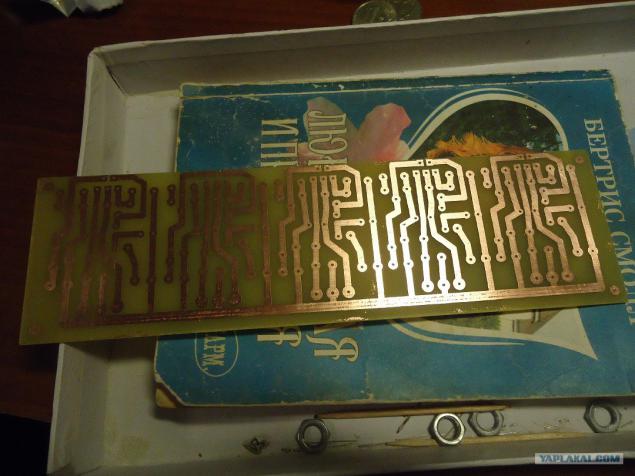
All the boards are made by LUT technology, which has repeatedly described on this resource, and the network of information in bulk. Print the template, like the most of the self-adhesive backing paper. Someone manages to do it on the covers of glossy magazines, but I did not go. By the way, seals in a similar way did the first time.
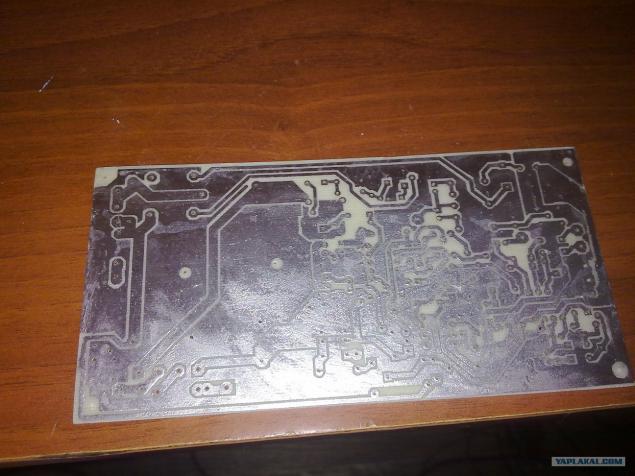
Etch signet amplifier. Copper tracks tinned alloy Rose melting point ~ 96 degrees. Tinning technology is simple: Throw printing in a bowl with water, add a pinch of citric acid, throw a few pellets of the alloy, and boil. When boiled, the alloy becomes a liquid remains only smudge it along the paths with a piece of cotton wool wrapped in a bandage (at least, I adapt himself). For drilling had to buy a mini-drill.
The first attempt stamped image and tsekolevku elements on the outer side of the board. It was very crooked.

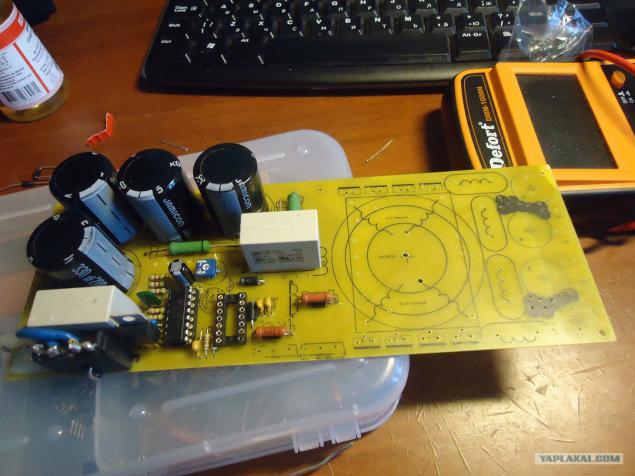
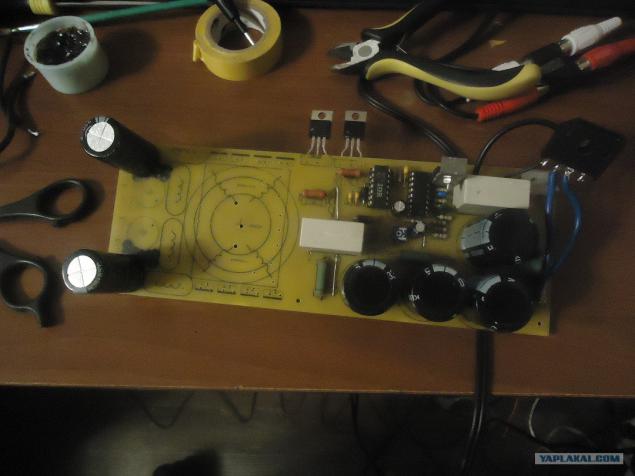
Sealed parts. Not enough throttle and output transistors.
More
Power is almost ready, and then a new problem - what to feed it?
Requires bipolar power + \ - 50 volts and power of about 400 watts. Mota is not a normal trans grateful and buy ready-made would lead to the ruin of the family)).
At the forum the same Korol'kova stumbled circuit switching power supply with appropriate parameters. Under the scheme of 600W, but the trans shook based on 800W.
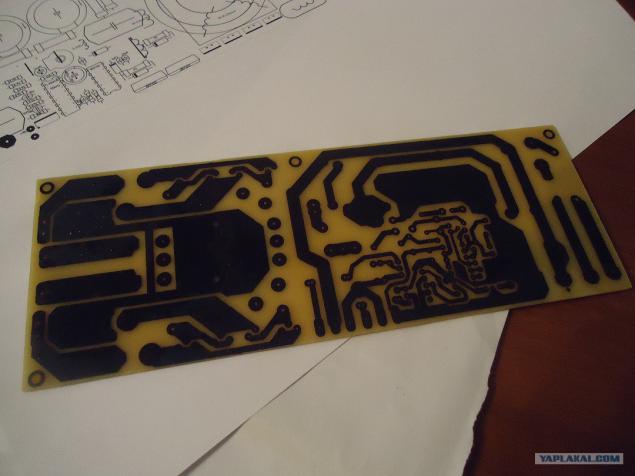
We transfer the stencil to the PCB

After etching in ferric chloride
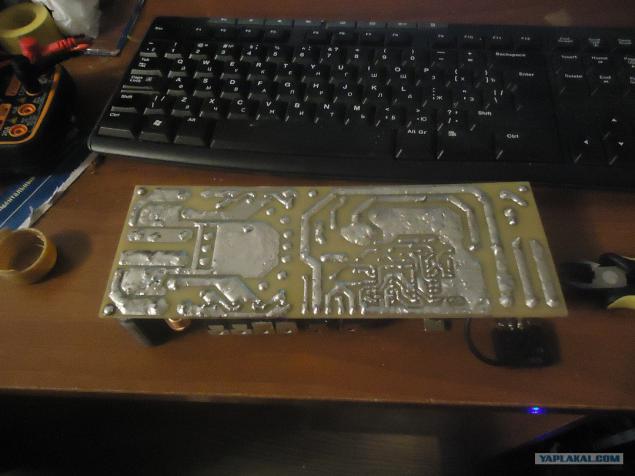
Zaludit

We print top. Even prettier.
We begin to gather. A pile of used parts from singed kompovyh BP, which in the building bulk.
More
All is well soldered since currents will not run comic.
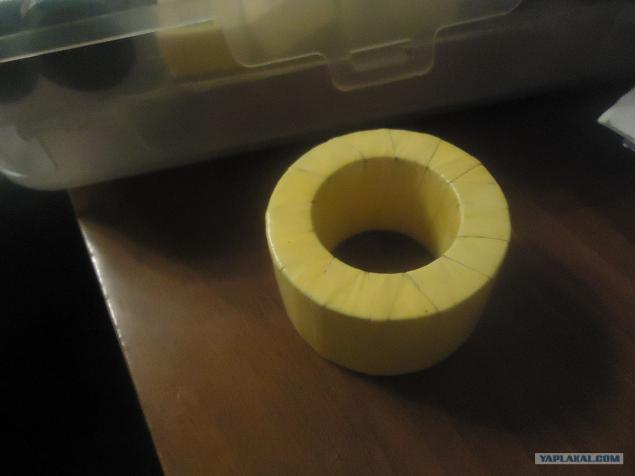
It's time to wind the transformer. Two ferrite rings glued super-glue and wrapped with electrical tape. Magic blue tape is not found, I had to use yellow.
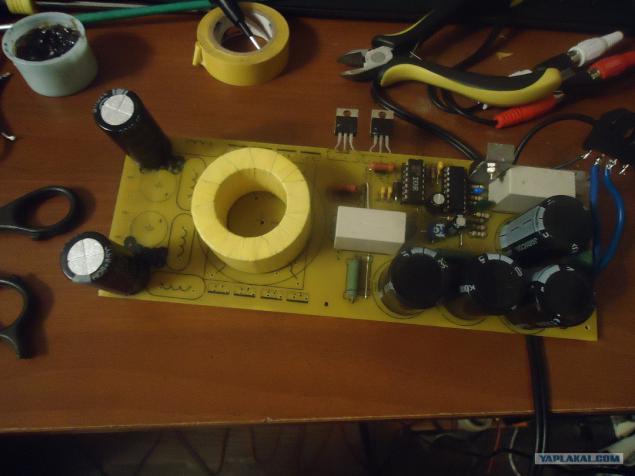
Figured
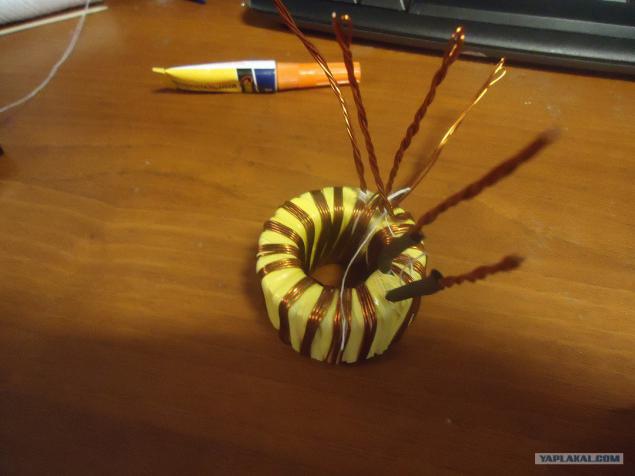
Mota primary winding. 24 turns, 4 wire ribbon of 0.6mm each.

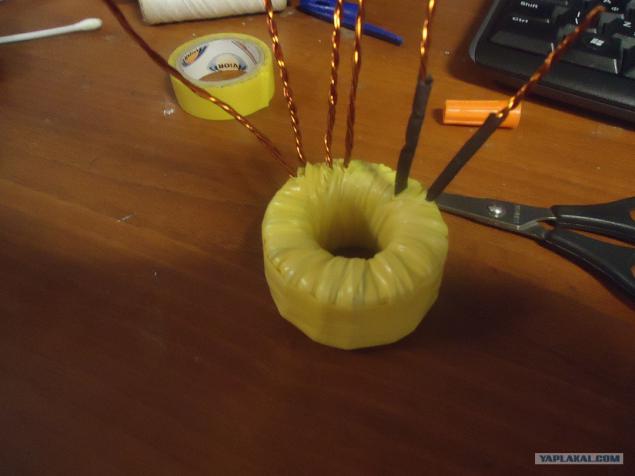
Resale.
Here's a turned Paukaa.
Is soldered in place.

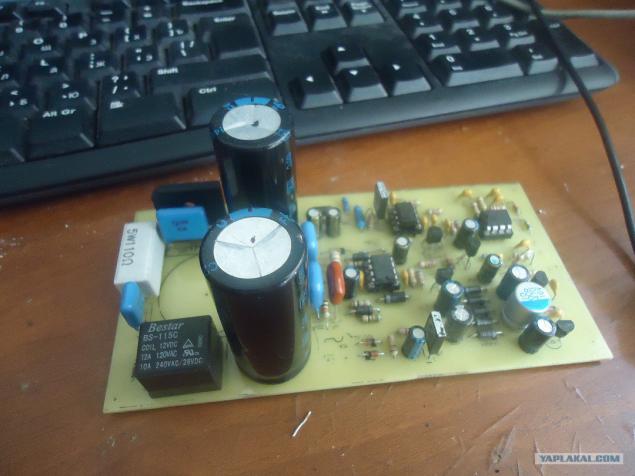
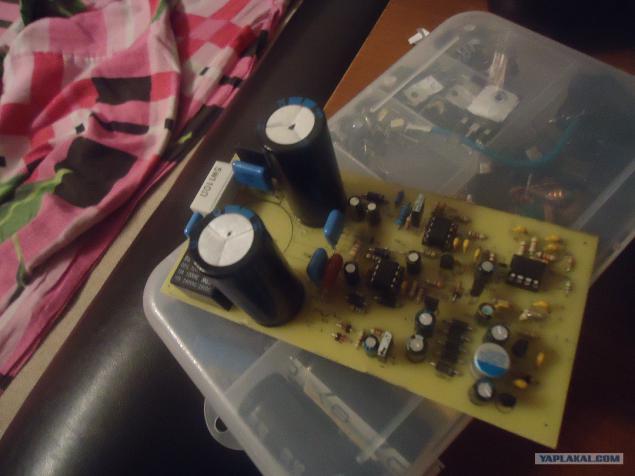
Photos of this process have been lost. Here the board low-pass filter (LPF) and a stabilizer for its food. LPF cuts all frequencies & gt; 200Hz, there are adjustment phase, slice volume. Stabilizer ± 50V ± 15V makes. Subsequently, the stabilizer will be thrown out, as I remind below.

Cooking testbed)).
More
Burned a couple of chips / transistors, then it worked and sang. It's time to think about the body. I bought a 3-meter corner, in exactly enough.
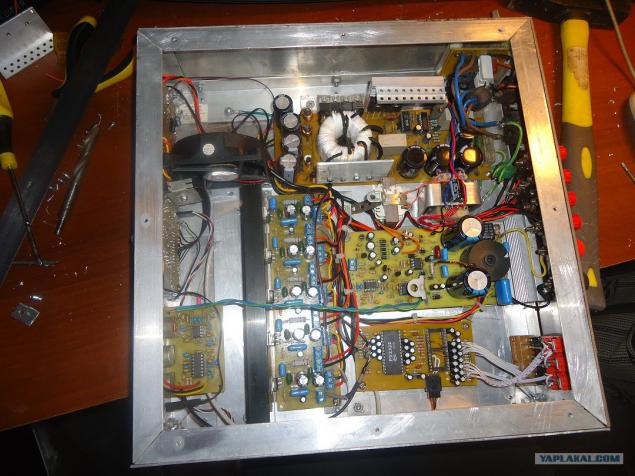
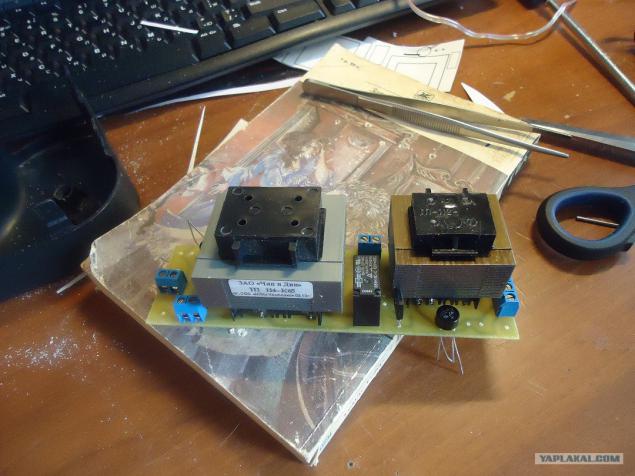
Crepe. Here you can see a little trance, which feeds low-voltage power supply of the (logic).

Fasten the amplifier with the heatsink.
This is nothing like the soft-start, which prevents the surge current during switching power supply when charging capacitors.
Here you can see a set fee LPF, as well as a new board that is responsible for switching inputs, the tone controls and any effects such as surround.
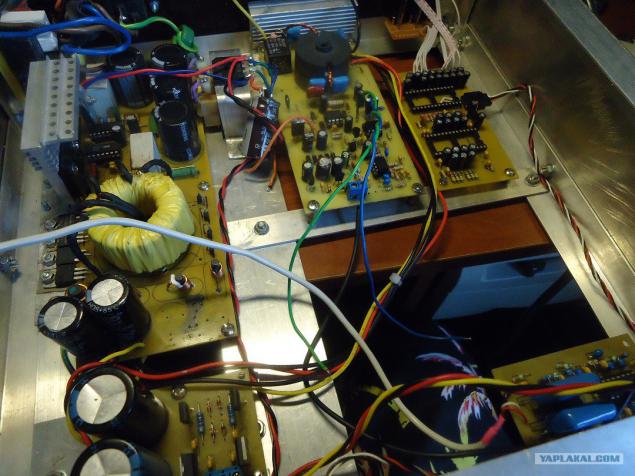
These control boards are taken from the original article. Fees and switching inputs can be seen in the photo above. Left fee - microcontroller that all taxis, as well as displays the current state regulations. It can be controlled with the remote control or the buttons directly.

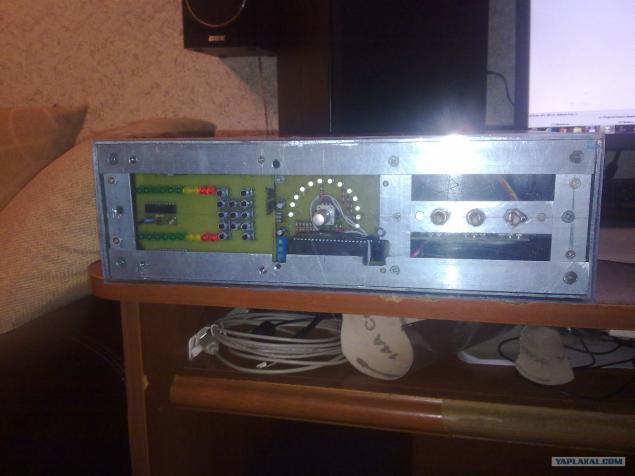
This arrangement did not work for me, and it was decided to redraw the circuit board to fit your Wishlist. The buttons have been removed, and the LEDs are placed around the handle incremental controller.
By clicking on "krutilki" amplifier switched on / off, with rotation - sets the level of the selected mode with the display level in a semi-circle of glowing LEDs.

Separately on a microcontroller. To program the microcontroller is known to need a programmer. According to acquaintances could not be found, so we had to do everything myself. Any COM cheap options immediately dismissed because of their instability. It was decided to collect the USB-programmer «PICit2», but here's the problem, it is also used by the microcontroller. This is about how the driver of the stick are written on the flash drive, and Windows 98 (anyone remembers, he will understand))))). Having learned that my computer did have a COM port for a program put together on his knee this device. After dancing with a tambourine, still managed to pour firmware chip.
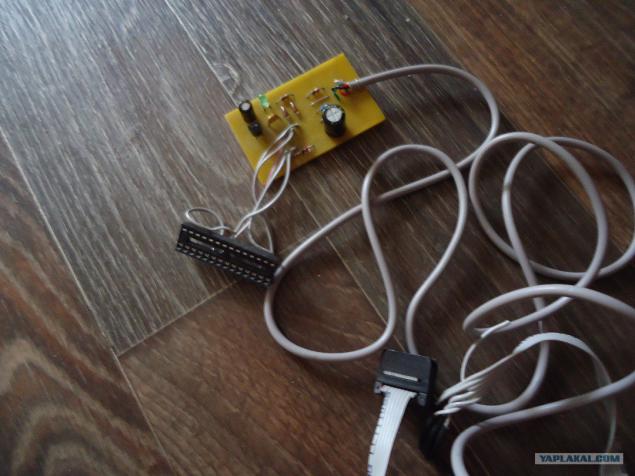
Assembled USB programmer wound up immediately. The microcontroller for the control board was flashed a couple of clicks. By the way, this is probably the only board, which after assembly I never climbed a soldering iron.

Bottom

That's kind of all up and running. Sab channel there, but also the amplifier for home theater! There was a question on what to collect 5 more channels. Since in housing is limited, immediately decided to make chips. After reviewing a variety of options to octanovilsya TDA2050. Attracted price level settings and Hi-Fi, with a power of 32W. Post decided on a single board.
More
Assembled
Bottom
Installed in the cabinet and radiator. Here you can see the empty socket on the chip circuit switching, which I could not find in the city. When found, it was worth 240r., And after the wild basking and not working. I bought a second - the story repeated. As a result, ordered in Moscow, put in and all earned. Total 500r. the river (thanks to Chinese accomplices a).
Transformer PSU turned white because I had to shake the additional winding to supply added 5 channels (± mikruhi need 20volt), and yellow electrical tape petered out.

There appeared charge level display output, and control buttons on the microcontroller it is (photo not preserved). It just moved a couple of details of the stabilizer (mikrushki ROLL lowering ± 20V to ± 15V). Left and right of the LPF handles - LED indicating clipping sub-channel and two-color LED on / off (green / red), respectively.
Since no longer need to drop from 50V to 15V (there are winding 20c) became the stabilizer is not needed and was removed. Added "Carlson". Single wiring from the amplifier to the output chips on the back. Installed "radiator" in the 5-channel power diodes.
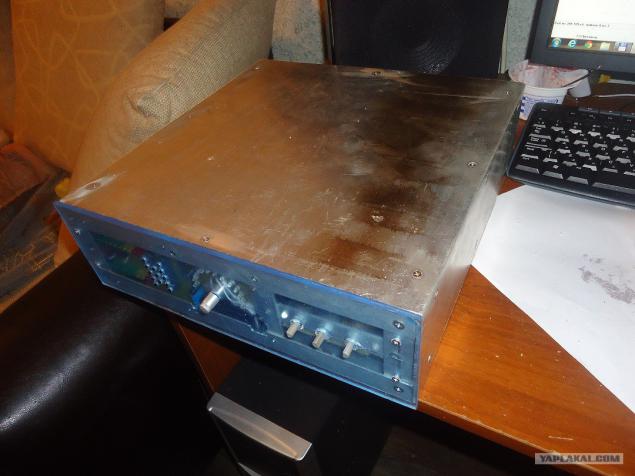
Sheathed skeleton and cut face. Aluminium was very soft, so the idea of putty it immediately left.
Rear. 3 stereo inputs + 1 input for 5.1 (a total of 12 connectors). The yield on the five sub and "sang".

Painted enamel and auto-toned toning the face Chinese deaf. LEDs shine wonderful film.
Here we see

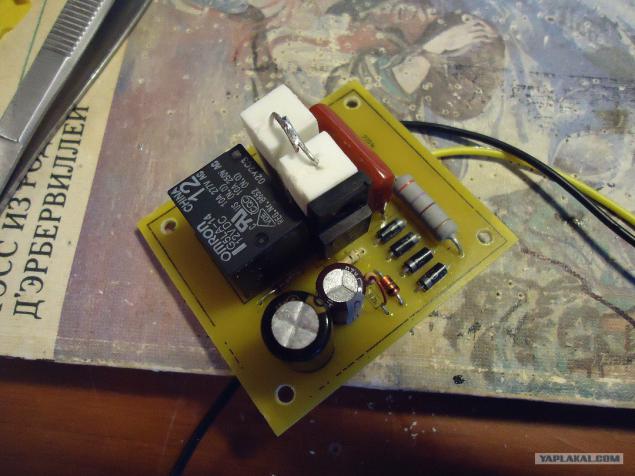
I decided to remove the collective farm of the two additional transformers (found on pred.fotah by strips of children's designer))), which realized a fee. The board also placed a simple control scheme, consisting of relay and transistor. When you push the knob on the muzzle, the relay turns on / off the main power supply, and with him the entire amplifier. Photo card is not installed, and too lazy to disassemble.
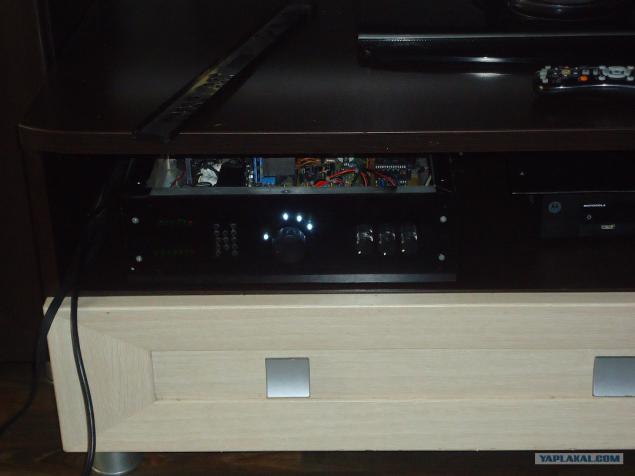
Set in the seat.
There is no cover. Apparently the heat gauge.
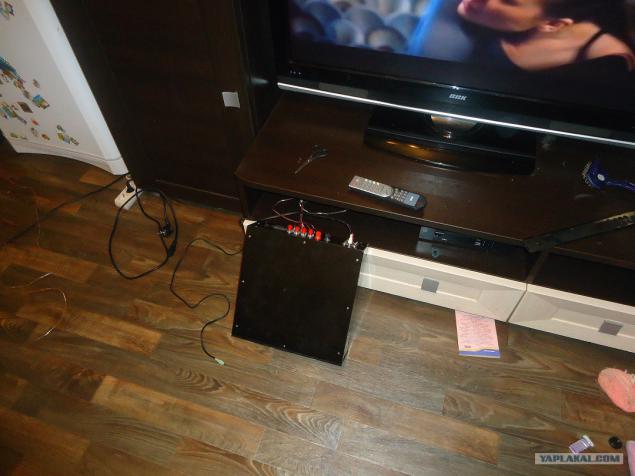
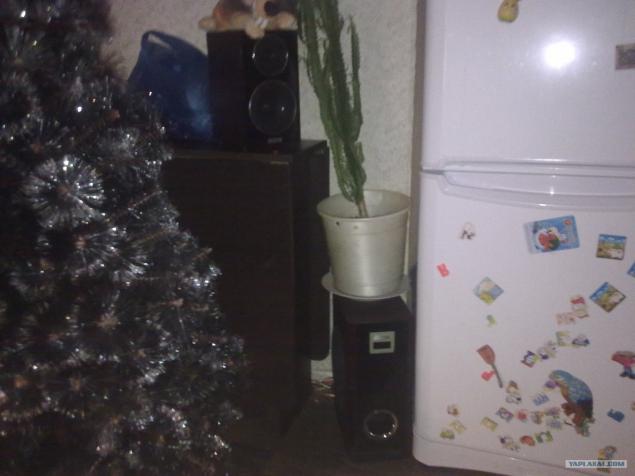
In the end, connected to a cheap acoustic 5.1 from the Chinese dom.kinoteatra (manufacturer the same as on TV. Not advertising). Chinese active subwoofer, gutted all active and stupidly put the wire (amp saba was tan, do not mind). The sound quality is very pleased. With an increase in volume, distortion contributes only cheap speakers, and of the neighbors, knock on the battery (just kidding). That sub and one of the fronts. Sorry for the quality.
Incredibly expensive, complicated, but invaluable useful device, which saved me a lot of money and time.

Managed all with the "lazy", so take your ass is necessary only to adjust the level of the subwoofer in the general panorama.
On the construction it took six months for a pair of triple evenings a week. On the budget - do not tell, because not considered. I buy small things a little, but often. I bought a lot of tools, even an oscilloscope to e-bay ordered. And Circuits because sometimes trembling probe is still exploding.
Now let's think about the good acoustics.
Perhaps this will end. Thank you for your attention.
Ciao!

Source:
the creation of a subwoofer, decided to repeat this wonderful box.
Komplektuhe to ask the price, recalculate the amount of a commercially available MDF, and then the question arose - who will rock the sub?
I went on the internet to look for a suitable scheme. Here I learned about the existence of Class-D, which attracted its efficiency (90-95%) and the original circuit design using FETs mode key. He stopped at 300W scheme Alexei Korol'kova. You can see it here.
There are other schemes and a link to the developer forum. By the way, a very smart guy)).
All the boards are made by LUT technology, which has repeatedly described on this resource, and the network of information in bulk. Print the template, like the most of the self-adhesive backing paper. Someone manages to do it on the covers of glossy magazines, but I did not go. By the way, seals in a similar way did the first time.

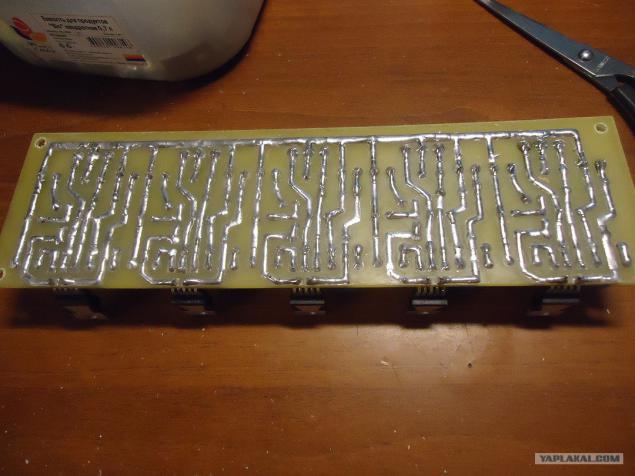
Etch signet amplifier. Copper tracks tinned alloy Rose melting point ~ 96 degrees. Tinning technology is simple: Throw printing in a bowl with water, add a pinch of citric acid, throw a few pellets of the alloy, and boil. When boiled, the alloy becomes a liquid remains only smudge it along the paths with a piece of cotton wool wrapped in a bandage (at least, I adapt himself). For drilling had to buy a mini-drill.

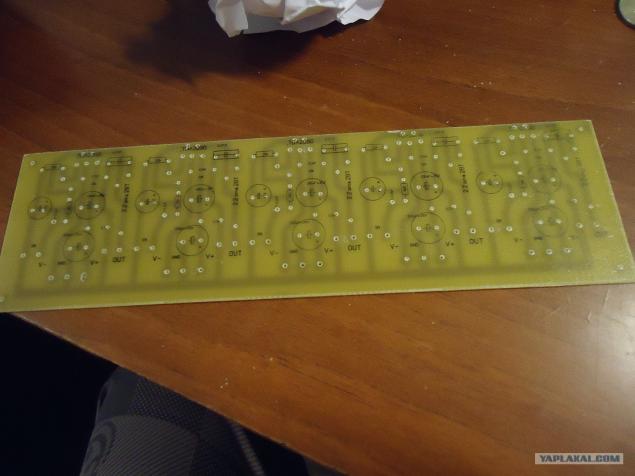
The first attempt stamped image and tsekolevku elements on the outer side of the board. It was very crooked.

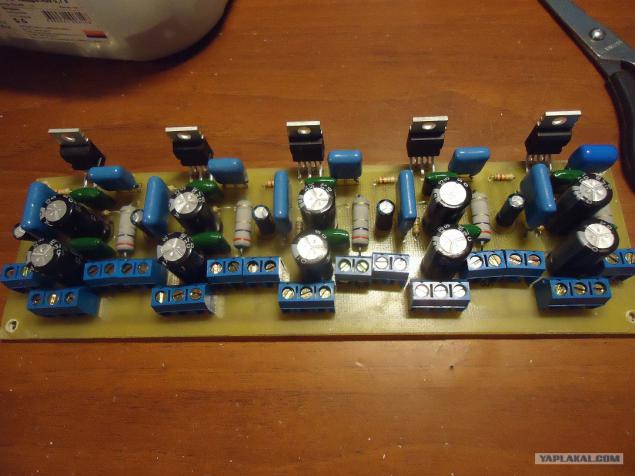
Sealed parts. Not enough throttle and output transistors.

More

Power is almost ready, and then a new problem - what to feed it?
Requires bipolar power + \ - 50 volts and power of about 400 watts. Mota is not a normal trans grateful and buy ready-made would lead to the ruin of the family)).
At the forum the same Korol'kova stumbled circuit switching power supply with appropriate parameters. Under the scheme of 600W, but the trans shook based on 800W.
We transfer the stencil to the PCB

After etching in ferric chloride

Zaludit

We print top. Even prettier.

We begin to gather. A pile of used parts from singed kompovyh BP, which in the building bulk.

More

All is well soldered since currents will not run comic.

It's time to wind the transformer. Two ferrite rings glued super-glue and wrapped with electrical tape. Magic blue tape is not found, I had to use yellow.

Figured

Mota primary winding. 24 turns, 4 wire ribbon of 0.6mm each.

Resale.

Here's a turned Paukaa.

Is soldered in place.

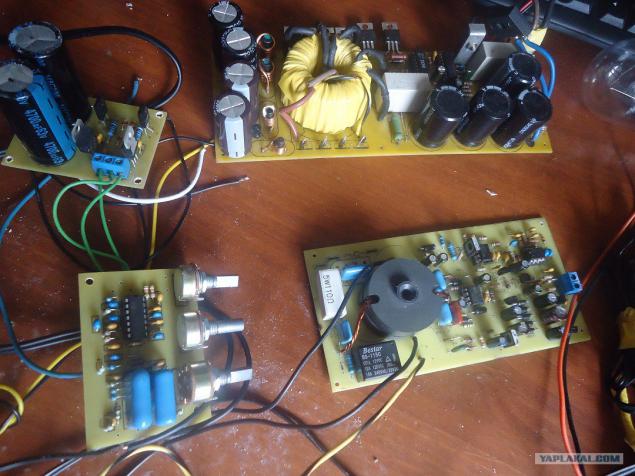
Photos of this process have been lost. Here the board low-pass filter (LPF) and a stabilizer for its food. LPF cuts all frequencies & gt; 200Hz, there are adjustment phase, slice volume. Stabilizer ± 50V ± 15V makes. Subsequently, the stabilizer will be thrown out, as I remind below.

Cooking testbed)).

More

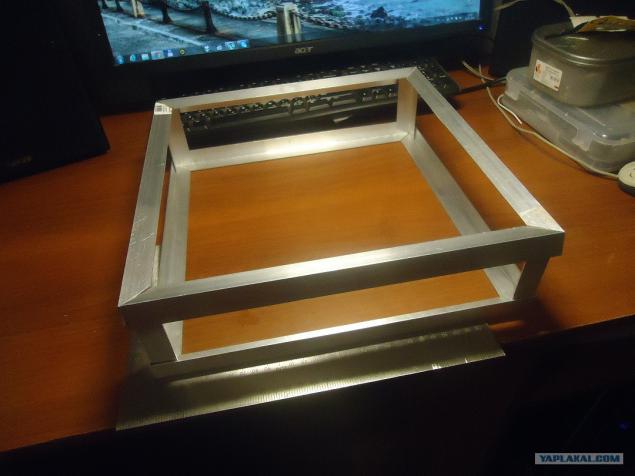
Burned a couple of chips / transistors, then it worked and sang. It's time to think about the body. I bought a 3-meter corner, in exactly enough.

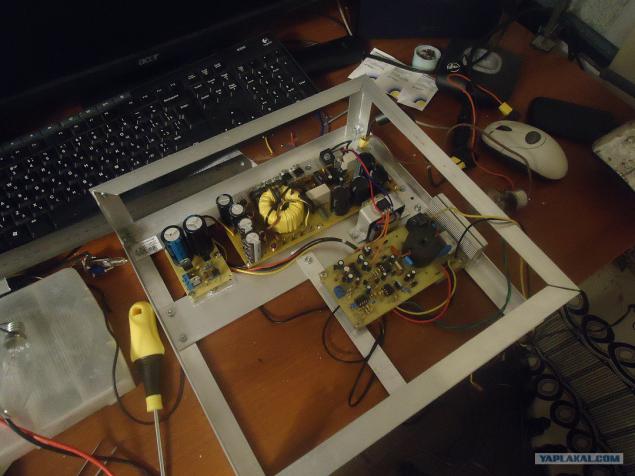
Crepe. Here you can see a little trance, which feeds low-voltage power supply of the (logic).

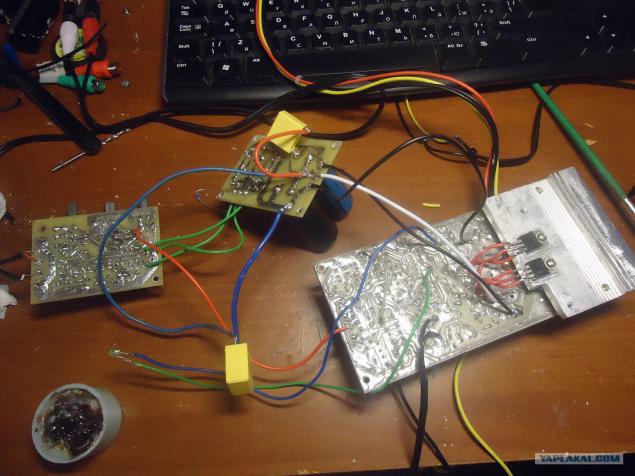
Fasten the amplifier with the heatsink.

This is nothing like the soft-start, which prevents the surge current during switching power supply when charging capacitors.

Here you can see a set fee LPF, as well as a new board that is responsible for switching inputs, the tone controls and any effects such as surround.

These control boards are taken from the original article. Fees and switching inputs can be seen in the photo above. Left fee - microcontroller that all taxis, as well as displays the current state regulations. It can be controlled with the remote control or the buttons directly.

This arrangement did not work for me, and it was decided to redraw the circuit board to fit your Wishlist. The buttons have been removed, and the LEDs are placed around the handle incremental controller.
By clicking on "krutilki" amplifier switched on / off, with rotation - sets the level of the selected mode with the display level in a semi-circle of glowing LEDs.

Separately on a microcontroller. To program the microcontroller is known to need a programmer. According to acquaintances could not be found, so we had to do everything myself. Any COM cheap options immediately dismissed because of their instability. It was decided to collect the USB-programmer «PICit2», but here's the problem, it is also used by the microcontroller. This is about how the driver of the stick are written on the flash drive, and Windows 98 (anyone remembers, he will understand))))). Having learned that my computer did have a COM port for a program put together on his knee this device. After dancing with a tambourine, still managed to pour firmware chip.

Assembled USB programmer wound up immediately. The microcontroller for the control board was flashed a couple of clicks. By the way, this is probably the only board, which after assembly I never climbed a soldering iron.

Bottom

That's kind of all up and running. Sab channel there, but also the amplifier for home theater! There was a question on what to collect 5 more channels. Since in housing is limited, immediately decided to make chips. After reviewing a variety of options to octanovilsya TDA2050. Attracted price level settings and Hi-Fi, with a power of 32W. Post decided on a single board.

More

Assembled

Bottom

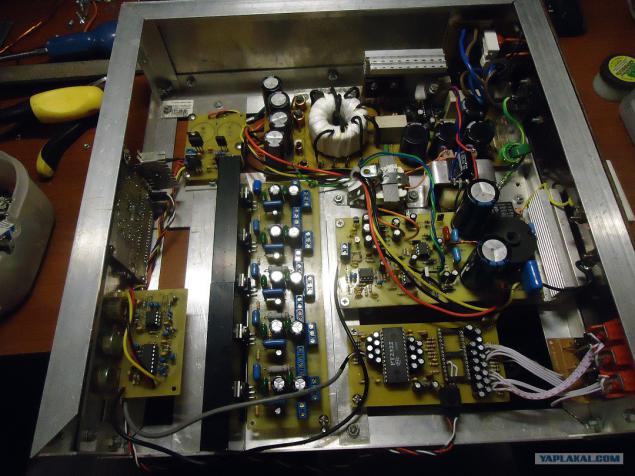
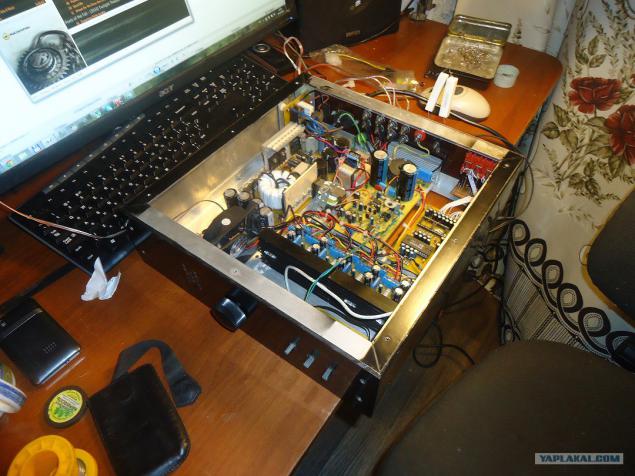
Installed in the cabinet and radiator. Here you can see the empty socket on the chip circuit switching, which I could not find in the city. When found, it was worth 240r., And after the wild basking and not working. I bought a second - the story repeated. As a result, ordered in Moscow, put in and all earned. Total 500r. the river (thanks to Chinese accomplices a).

Transformer PSU turned white because I had to shake the additional winding to supply added 5 channels (± mikruhi need 20volt), and yellow electrical tape petered out.

There appeared charge level display output, and control buttons on the microcontroller it is (photo not preserved). It just moved a couple of details of the stabilizer (mikrushki ROLL lowering ± 20V to ± 15V). Left and right of the LPF handles - LED indicating clipping sub-channel and two-color LED on / off (green / red), respectively.

Since no longer need to drop from 50V to 15V (there are winding 20c) became the stabilizer is not needed and was removed. Added "Carlson". Single wiring from the amplifier to the output chips on the back. Installed "radiator" in the 5-channel power diodes.

Sheathed skeleton and cut face. Aluminium was very soft, so the idea of putty it immediately left.

Rear. 3 stereo inputs + 1 input for 5.1 (a total of 12 connectors). The yield on the five sub and "sang".

Painted enamel and auto-toned toning the face Chinese deaf. LEDs shine wonderful film.

Here we see

I decided to remove the collective farm of the two additional transformers (found on pred.fotah by strips of children's designer))), which realized a fee. The board also placed a simple control scheme, consisting of relay and transistor. When you push the knob on the muzzle, the relay turns on / off the main power supply, and with him the entire amplifier. Photo card is not installed, and too lazy to disassemble.

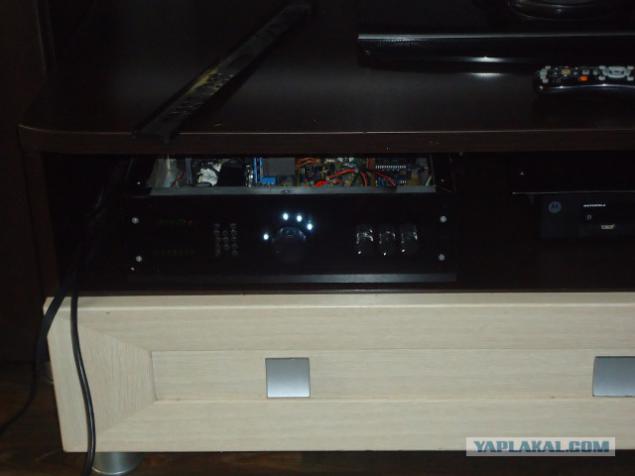
Set in the seat.

There is no cover. Apparently the heat gauge.

In the end, connected to a cheap acoustic 5.1 from the Chinese dom.kinoteatra (manufacturer the same as on TV. Not advertising). Chinese active subwoofer, gutted all active and stupidly put the wire (amp saba was tan, do not mind). The sound quality is very pleased. With an increase in volume, distortion contributes only cheap speakers, and of the neighbors, knock on the battery (just kidding). That sub and one of the fronts. Sorry for the quality.

Incredibly expensive, complicated, but invaluable useful device, which saved me a lot of money and time.

Managed all with the "lazy", so take your ass is necessary only to adjust the level of the subwoofer in the general panorama.
On the construction it took six months for a pair of triple evenings a week. On the budget - do not tell, because not considered. I buy small things a little, but often. I bought a lot of tools, even an oscilloscope to e-bay ordered. And Circuits because sometimes trembling probe is still exploding.
Now let's think about the good acoustics.
Perhaps this will end. Thank you for your attention.
Ciao!

Source:
Tags
See also
Subwoofer with their hands (51 photos)
From the comfort of home. TOP 3 most unusual in the world of home theater
Smart feeder for Pets - Pintofeed
House-dryer for Pets
The most expensive home theater (22 photos)
Gym and a cinema.
Portable audio: Myths and Reality
The Swiss have created a car with a home cinema
Home theater-style Star Wars
Videophone for pets