How to make a flat floor on adjustable lags with their hands
 Bashny.Net
Adjustable floor installation — quick, economical and relatively simple process of creating a rough flooring with a perfectly flat plane.
This article will introduce you to new technology, will talk about the different types of adjustable floors, fields of application and installation process.
What problems are solved with adjustable floor,Adjustable lag — technology to create exceptionally light floor dry according to the methodology of repair, so the main field of application — high-rise buildings and old buildings, where the increased load on the floor is fraught with troubles. The technology is particularly relevant if you need to raise the floor level at 120 mm or more, than the dry screed can't do anymore.
Sustainability and practicality of properly installed floor meets the characteristics of the system fixed the lag. Soundproofing of the floor good enough, the radiant heat to the lower floors a minimum by reducing cold bridges. The space between the joists has solid ventilation, so in the litter of the floor is not infested with mold and fungus.
Another feature of the floor is a perfectly smooth surface under the tiles or screeds as soon as possible — 7-8 m2 for one hour work of two people and up to 3 m2 at working alone.
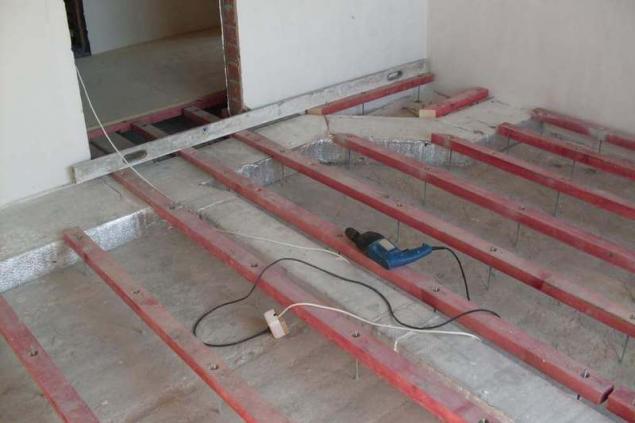
Installation of the system the lag on metal bracketsIf you need to lay the floor in a small room, the original technology should be avoided. First, it is unnecessarily long search components, and secondly, on adjustable floor joists to lay on the area over 6 m2, in smaller spaces, saving time and money is not so significant. Instead, you can use the installation log on the metal bracket.
Styling the necessary timber, 60x60 mm humidity not more than 10% without any signs of defects and warpage. Also need to buy or fabricate a metal U-shaped brackets with wall thickness not less than 2.5 mm and the distance between the flanges corresponding to the thickness of the rod. In each shelf at a distance of 30 mm from the end should be a hole with a diameter of 11 mm.
On the floor mark the lines on which you plan to install lag. The first log lay along the long wall with a space of 20 cm, and the rest in increments of 40 cm To splice a lag of one row, use two brackets, installed in a row. Install all brackets on the lines and secure each to the concrete with two anchors quick installation 6x60 with a side of "fungus".
When all brackets are installed, set the horizontal level of extreme from the wall a number of the Arab League, placing them under cutting boards and chips. On the highest portion of the ceiling beam should act on the bracket of 3-5 mm. Through the perforations in the shelves of the bracket, secure the rail with two screws on both sides.
Using lacing or laser level, transfer the level of the first row to the last, align the rails and temporarily secure the brackets with screws. Pull the lacing or use the adjustment of the laser on the target to align all other lags. After temporary fixing lag drill them with a drill 12 mm through the holes in the brackets, insert bolts and tighten self-locking nut.
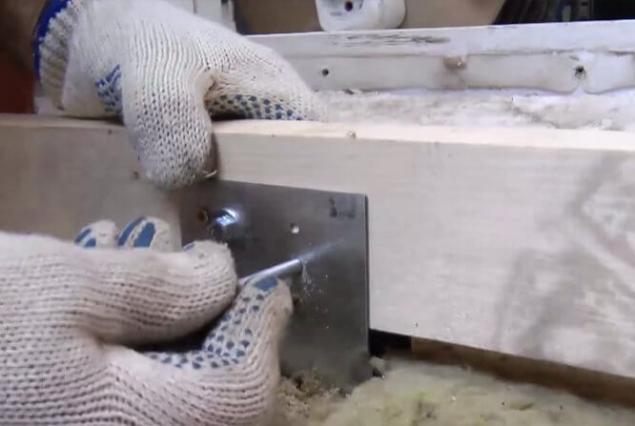
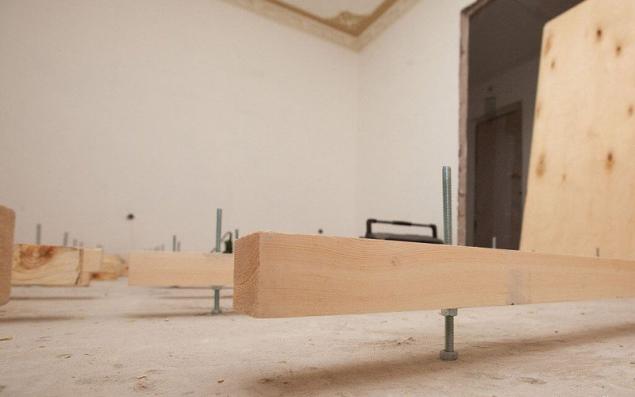
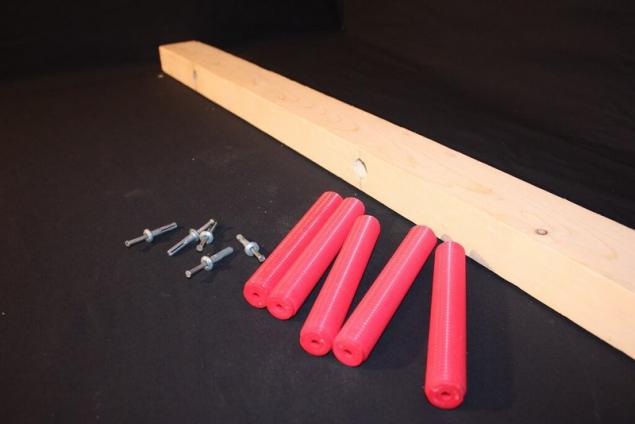
Installation of an adjustable floor to bolt racksTo the floor using original technology it is necessary to buy plastic bolt-front length of 100 or 150 mm with metal dowel-nails 6х40 mm in an amount of about 5-6 items per one m2 of the floor. Special joists with holes and threads can be replaced by ordinary timber 50x50 mm humidity to 10%, but will require a drill on wood and machine screw tap with a diameter of 24 mm with a step of 3 mm.
The markup for the install log starts with the baseline that is the distance from the wall equal to the length of the plywood sheet. In rooms with normal traffic extreme lag should defend from a wall on 15 cm, the spacing of the other joists is 40-45 cm If floor load is above normal, the distance from walls is less than 10 cm, and the step of installation — up to 30 cm.
Prepare the boards: drill holes in them perpendicular to the surface of 10 cm from the edges, then evenly distribute the remaining holes along the length to the distance between them was not more than 40-50 cm Tap holes cut a thread and screw them into the bolt-rack. When mounting racks pre-adjust their length in accordance with the lifting height. For screwing the bolt racks use a hex key.
Install the boards along the lines of markup, orienting strut hexagon holes up. The ends of the Arab League should defend from a wall 10 cm. Make a preliminary adjustment with an allowable error of 1 cm, bringing logs to the design height. Through a hole inside bolt-long stand mark drill locations drilling, then slide the joists and make a hole of 6 mm in the concrete floor to a depth of 50 mm.
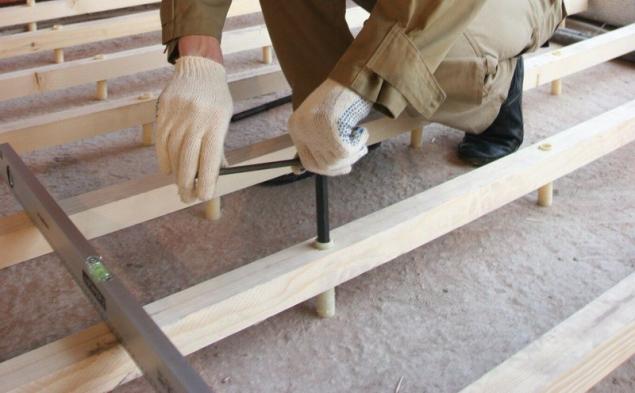
First, fasten the last stand the lag: down in the hole the dowel-nail and rackline it using a hammer and a metal rod or auger from perforator. Rotating fixed pillar, just set the joists are level, using the laces or laser marking. Tighten center column, until they are resting on the floor and secure them to the dowel-nails. Make final adjustments of the floor, using the building level, covering at least three of the Arab League. The joists are allowed to splice in the end with the undercut in a half-tree length up to 5 cm and with subsequent bonding of the junction of the M10.
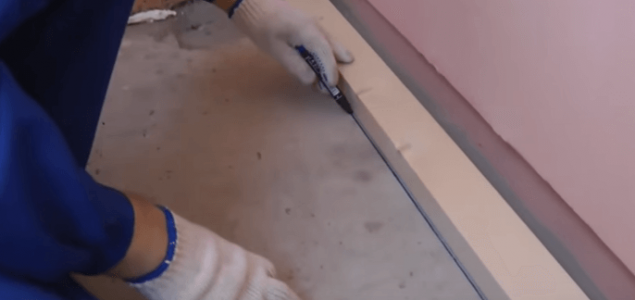
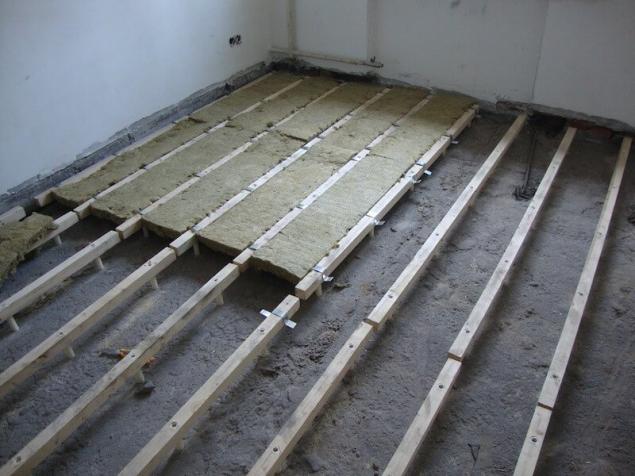
Device draft coverageWhen the joists are installed, and the space between them filled with insulation, is the flooring. To create a strong and smooth surface must be laid on the joists two layers of waterproof plywood with thickness of 12 mm or more.
The first layer is laid with the long side across the joists and fixed to joists with screws 55 mm. pitch mounting screws — 15-17 cm at the edges and 20-25 cm in the center of the sheet. Screw fasteners no closer than 15 mm from the end of the plywood and utaplivaja of the cap is flush.
The second row of the first layer begins with the pruning of half of the sheet to provide extension between the joints at half the length. The thickness of joints should not exceed 2-3 mm and the distance from the wall — no more than 15 mm. When the first layer of plywood is laid mark on the surface of the place the lag.
Lay the leaves of the second layer perpendicular to the first leaves. If necessary, cut the floor elements to the distance between the joints in the first and second layer was not less than 20 cm Bind the sheets together with screws 35 mm, at least 30 pieces on 1 m2 of the step is set on the edge 30 cm Attach the second layer to the joists with screws 65mm no less than 15 areas per 1 m2. Allowable joint gap in the second layer is 4 mm, the distance from the wall not more than 6 mm.
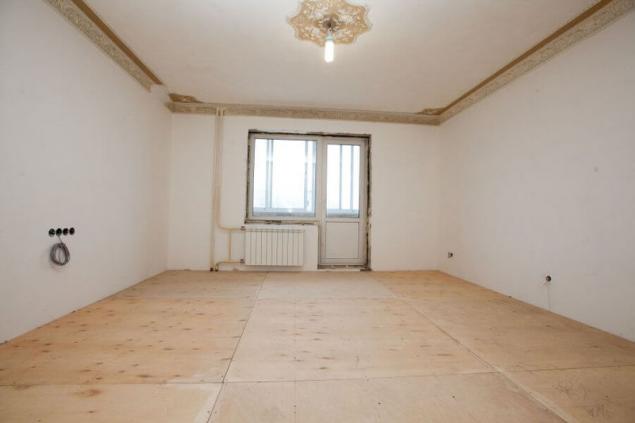
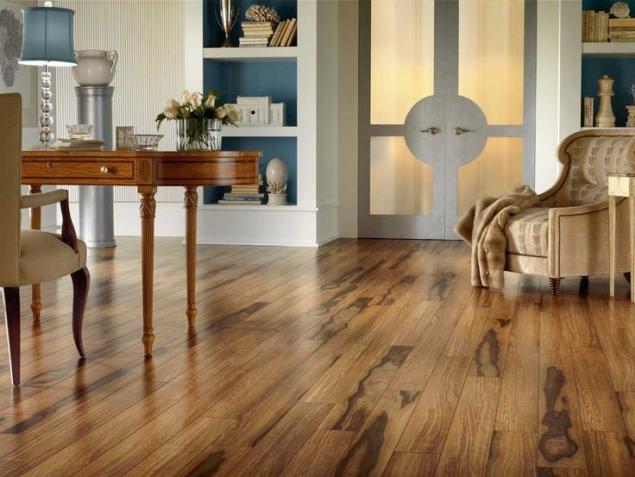
Once the second layer of plywood from the surface of leaves to remove dust and sawdust, then apply two coats of adhesive primer, regardless of what kind of floor covering. The gaps between the slabs and walls should be filled with polyurethane foam, but preferably with silicone sealant. On top of the floor joists on adjustable it is possible to lay any type of flooring and even to do some preparatory screed.
published
P. S. And remember, only by changing their consumption — together we change the world! ©
Source: //www.rmnt.ru/story/service_renovation/1022966.htm

This article will introduce you to new technology, will talk about the different types of adjustable floors, fields of application and installation process.

What problems are solved with adjustable floor,Adjustable lag — technology to create exceptionally light floor dry according to the methodology of repair, so the main field of application — high-rise buildings and old buildings, where the increased load on the floor is fraught with troubles. The technology is particularly relevant if you need to raise the floor level at 120 mm or more, than the dry screed can't do anymore.
Sustainability and practicality of properly installed floor meets the characteristics of the system fixed the lag. Soundproofing of the floor good enough, the radiant heat to the lower floors a minimum by reducing cold bridges. The space between the joists has solid ventilation, so in the litter of the floor is not infested with mold and fungus.

Another feature of the floor is a perfectly smooth surface under the tiles or screeds as soon as possible — 7-8 m2 for one hour work of two people and up to 3 m2 at working alone.
Installation of the system the lag on metal bracketsIf you need to lay the floor in a small room, the original technology should be avoided. First, it is unnecessarily long search components, and secondly, on adjustable floor joists to lay on the area over 6 m2, in smaller spaces, saving time and money is not so significant. Instead, you can use the installation log on the metal bracket.
Styling the necessary timber, 60x60 mm humidity not more than 10% without any signs of defects and warpage. Also need to buy or fabricate a metal U-shaped brackets with wall thickness not less than 2.5 mm and the distance between the flanges corresponding to the thickness of the rod. In each shelf at a distance of 30 mm from the end should be a hole with a diameter of 11 mm.

On the floor mark the lines on which you plan to install lag. The first log lay along the long wall with a space of 20 cm, and the rest in increments of 40 cm To splice a lag of one row, use two brackets, installed in a row. Install all brackets on the lines and secure each to the concrete with two anchors quick installation 6x60 with a side of "fungus".
When all brackets are installed, set the horizontal level of extreme from the wall a number of the Arab League, placing them under cutting boards and chips. On the highest portion of the ceiling beam should act on the bracket of 3-5 mm. Through the perforations in the shelves of the bracket, secure the rail with two screws on both sides.
Using lacing or laser level, transfer the level of the first row to the last, align the rails and temporarily secure the brackets with screws. Pull the lacing or use the adjustment of the laser on the target to align all other lags. After temporary fixing lag drill them with a drill 12 mm through the holes in the brackets, insert bolts and tighten self-locking nut.

Installation of an adjustable floor to bolt racksTo the floor using original technology it is necessary to buy plastic bolt-front length of 100 or 150 mm with metal dowel-nails 6х40 mm in an amount of about 5-6 items per one m2 of the floor. Special joists with holes and threads can be replaced by ordinary timber 50x50 mm humidity to 10%, but will require a drill on wood and machine screw tap with a diameter of 24 mm with a step of 3 mm.

The markup for the install log starts with the baseline that is the distance from the wall equal to the length of the plywood sheet. In rooms with normal traffic extreme lag should defend from a wall on 15 cm, the spacing of the other joists is 40-45 cm If floor load is above normal, the distance from walls is less than 10 cm, and the step of installation — up to 30 cm.
Prepare the boards: drill holes in them perpendicular to the surface of 10 cm from the edges, then evenly distribute the remaining holes along the length to the distance between them was not more than 40-50 cm Tap holes cut a thread and screw them into the bolt-rack. When mounting racks pre-adjust their length in accordance with the lifting height. For screwing the bolt racks use a hex key.
Install the boards along the lines of markup, orienting strut hexagon holes up. The ends of the Arab League should defend from a wall 10 cm. Make a preliminary adjustment with an allowable error of 1 cm, bringing logs to the design height. Through a hole inside bolt-long stand mark drill locations drilling, then slide the joists and make a hole of 6 mm in the concrete floor to a depth of 50 mm.

First, fasten the last stand the lag: down in the hole the dowel-nail and rackline it using a hammer and a metal rod or auger from perforator. Rotating fixed pillar, just set the joists are level, using the laces or laser marking. Tighten center column, until they are resting on the floor and secure them to the dowel-nails. Make final adjustments of the floor, using the building level, covering at least three of the Arab League. The joists are allowed to splice in the end with the undercut in a half-tree length up to 5 cm and with subsequent bonding of the junction of the M10.
Device draft coverageWhen the joists are installed, and the space between them filled with insulation, is the flooring. To create a strong and smooth surface must be laid on the joists two layers of waterproof plywood with thickness of 12 mm or more.

The first layer is laid with the long side across the joists and fixed to joists with screws 55 mm. pitch mounting screws — 15-17 cm at the edges and 20-25 cm in the center of the sheet. Screw fasteners no closer than 15 mm from the end of the plywood and utaplivaja of the cap is flush.
The second row of the first layer begins with the pruning of half of the sheet to provide extension between the joints at half the length. The thickness of joints should not exceed 2-3 mm and the distance from the wall — no more than 15 mm. When the first layer of plywood is laid mark on the surface of the place the lag.
Lay the leaves of the second layer perpendicular to the first leaves. If necessary, cut the floor elements to the distance between the joints in the first and second layer was not less than 20 cm Bind the sheets together with screws 35 mm, at least 30 pieces on 1 m2 of the step is set on the edge 30 cm Attach the second layer to the joists with screws 65mm no less than 15 areas per 1 m2. Allowable joint gap in the second layer is 4 mm, the distance from the wall not more than 6 mm.

Once the second layer of plywood from the surface of leaves to remove dust and sawdust, then apply two coats of adhesive primer, regardless of what kind of floor covering. The gaps between the slabs and walls should be filled with polyurethane foam, but preferably with silicone sealant. On top of the floor joists on adjustable it is possible to lay any type of flooring and even to do some preparatory screed.
published
P. S. And remember, only by changing their consumption — together we change the world! ©
Source: //www.rmnt.ru/story/service_renovation/1022966.htm
Tags
See also
How to make a fondant cake with their hands
How to make outdoor fireplace with his hands
How to make a watering system for greenhouses
How to make an octagonal gazebo with a summer kitchen with your own hands
How to make oven filings on their hands for the garden and home
How to make a wooden trellis for climbing plants with your own hands
How to make hand cream at home
How to make wireless headphones