How to make a custom bench around a tree
 Bashny.Net
As a rule, benches are made of wood made in the shape of a hexagon. They can be with or without backrest. It is better that the trunk diameter has reached more than 500 millimeters. If the tree is still growing, it is worth considering what the diameter it will be in the future. Make the bench around the oak trees need a larger size. The product can be made in the form 8-gon.
Tools and materialsto make a bench with your hands, you need the following materials:
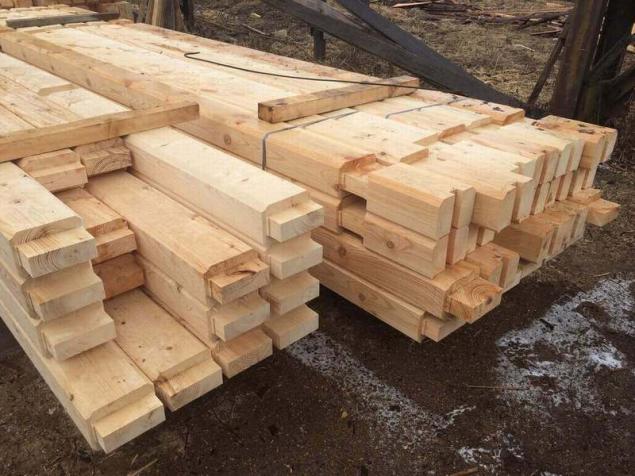
Planed lumber will it take to make bench around the tree
To wood and special requirements. To make the bench, will have to find a tree, characterized by high resistance to weathering. It may be different types of tropical wood. If breeds are not as hardy will have to spend for their treatment with a special impregnation.
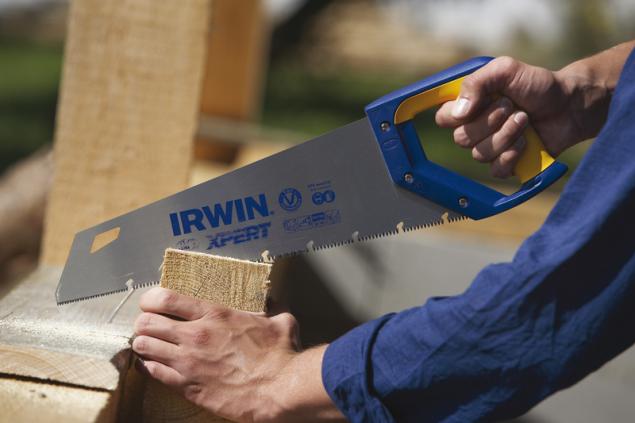
For the manufacture of the bench with your hands frequently used pine, made under pressure. If the breed is a bitch, a barrier to treatment it is not. Any additional processing is required.Step by step instructionsMake drawings of theBench is usually made of 6 pieces of equal size, in the photo it looks very original. You need to determine the diameter of a tree trunk. If it is young, you should add 30 inches, if adult – 15. To identify the length of the short section of the individual item, divide the amount by 4. Mark the length on the measuring rod and cut the edges at an angle of 30 degrees.
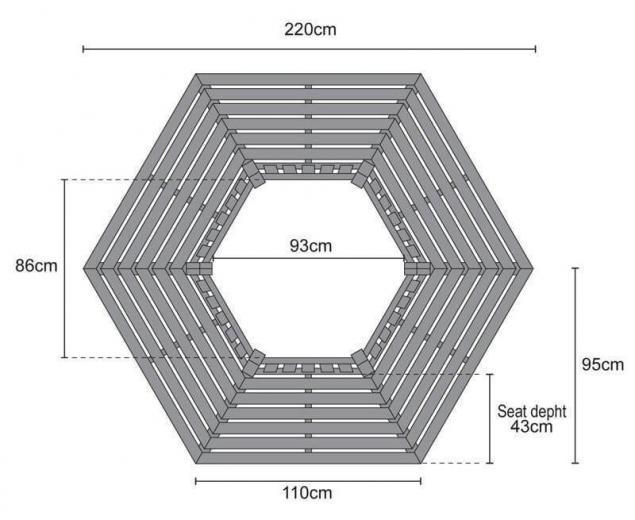
Drawing benches around the tree
The size of the productto make the bench, follow the pattern of the initial Board, based on the identified size with the corners sawn off below 30 degrees. Next, you should lay parallel to the Board 3 boards and share them inch strips. Reiki is applied to the wooden elements (considering the angle of 30 degrees, the initial Board). Apply mark.
To make the bench, you need to execute the template initial boards based on the identified size with the corners
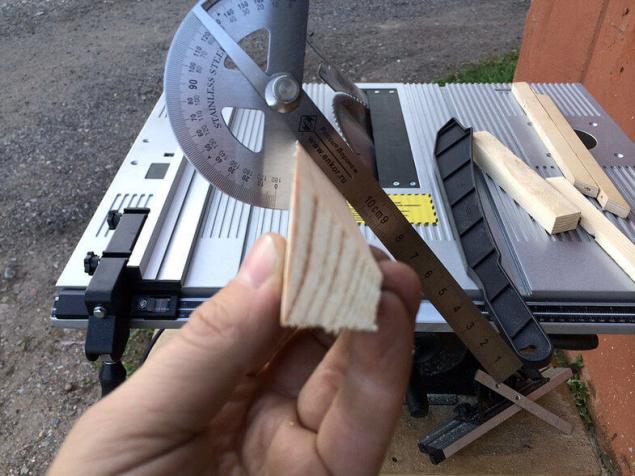
Cut the boardsto Make the cut should be so. Put the saw at 30 degrees. Cut 3 boards out previously, the length with opposite corners at both ends.
It is necessary to saw boards by tags
AssemblyNow you need to collect with their hands the hexagon. This is done on a flat surface, don't forget to add the centimeter strip. We must start with the inner side of the seat. It is important to clarify whether corners.
Legsto Make legs simply. They include the inner and outer foot located between the 2 supports. You will need 12 elements for the Assembly of 6 frames. Fabricate the supports 12. The end of each of them should be cut off at an angle of 30 degrees.
Bolt holesThough in the photo they can not be seen, holes for bolts should be prepared in advance. Take the drill and do the holes offset from the front edge of the outer foot should be 5 inches. In the specified location, run the mark on the vertical flat side. Repeat the procedure on the other side of the support.
Anchoring legsSecure the supports with his hands and feet. In the holes, place the bolts. Use for twisting bolts with nut and washer adjustable wrench.
Assembly sectionPut their hands feet on a flat surface vertically. Secure using the clamps. In the upper part of the leg assemblies between the boards, install the gaskets. The edge of the Board should be on the half of the leg assemblies. The feet Board is fixed on the screws. Fasten legs to 4 sections. In the end it should come out 2 groups, each with 2 sections. Refit the last section. From opposite sides of the trunk, place 2 groups. Fasten them with the remaining 2 sections.
The end of the workLine item. For this purpose, using a spatula, scopate feet into the ground. If necessary, cut and put back, that's all, you are almost ready bench that well it will look on a photo in the family album. Just have to make the apron.
To do this, measure the distance between the long points of support in the sections. Make 6 bars at an angle of 30 degrees. Fasten the bar using the clamp. Next is to drill holes to mount them to the outside of the leg. Similarly it is necessary to process all partitions. The final step is to Polish the rough edges. In the end, leave a very comfortable bench.

The final stage in the construction of benches around wood – sanding rough edges
We also recommend you to read the previously published article on our website in which we have been told how to make wood furniture for the garden.
Sound advice
Put LIKES and share with your FRIENDS!
www.youtube.com/channel/UCXd71u0w04qcwk32c8kY2BA/videos
Subscribe -https://www.facebook.com//
The bench around the tree, as pictured in this article, you can perform almost every thing to do it one by one, following the instructions. It is important to choose wood, it should be durable and not afraid of sunlight and weather. The option of the bench and each can have its own. Most often used a 6-carbon form, but if the tree is impressive, then better to stay on the 8-gon. The backrests are optional. published
P. S. And remember, only by changing their consumption — together we change the world! ©
Source: dachadecor.ru/sooruzheniya/delaem-samostoyatelno-originalnuiu-i-udobnuiu-skameyku-vokrug-dereva
Tools and materialsto make a bench with your hands, you need the following materials:
- screws;
- softwood lumber (section is 70x70 mm) – 4 pieces of 2 meters, length – 480 mm;
- planed material with a cross section of 45х70 mm – 9 meters;
- the decking cross-section 22х95 mm – 30 meters
- corners – 8 pieces.

Planed lumber will it take to make bench around the tree
To wood and special requirements. To make the bench, will have to find a tree, characterized by high resistance to weathering. It may be different types of tropical wood. If breeds are not as hardy will have to spend for their treatment with a special impregnation.
For the manufacture of the bench with your hands frequently used pine, made under pressure. If the breed is a bitch, a barrier to treatment it is not. Any additional processing is required.Step by step instructionsMake drawings of theBench is usually made of 6 pieces of equal size, in the photo it looks very original. You need to determine the diameter of a tree trunk. If it is young, you should add 30 inches, if adult – 15. To identify the length of the short section of the individual item, divide the amount by 4. Mark the length on the measuring rod and cut the edges at an angle of 30 degrees.

Drawing benches around the tree
The size of the productto make the bench, follow the pattern of the initial Board, based on the identified size with the corners sawn off below 30 degrees. Next, you should lay parallel to the Board 3 boards and share them inch strips. Reiki is applied to the wooden elements (considering the angle of 30 degrees, the initial Board). Apply mark.

To make the bench, you need to execute the template initial boards based on the identified size with the corners
Cut the boardsto Make the cut should be so. Put the saw at 30 degrees. Cut 3 boards out previously, the length with opposite corners at both ends.

It is necessary to saw boards by tags
AssemblyNow you need to collect with their hands the hexagon. This is done on a flat surface, don't forget to add the centimeter strip. We must start with the inner side of the seat. It is important to clarify whether corners.
Legsto Make legs simply. They include the inner and outer foot located between the 2 supports. You will need 12 elements for the Assembly of 6 frames. Fabricate the supports 12. The end of each of them should be cut off at an angle of 30 degrees.
Bolt holesThough in the photo they can not be seen, holes for bolts should be prepared in advance. Take the drill and do the holes offset from the front edge of the outer foot should be 5 inches. In the specified location, run the mark on the vertical flat side. Repeat the procedure on the other side of the support.
Anchoring legsSecure the supports with his hands and feet. In the holes, place the bolts. Use for twisting bolts with nut and washer adjustable wrench.
Assembly sectionPut their hands feet on a flat surface vertically. Secure using the clamps. In the upper part of the leg assemblies between the boards, install the gaskets. The edge of the Board should be on the half of the leg assemblies. The feet Board is fixed on the screws. Fasten legs to 4 sections. In the end it should come out 2 groups, each with 2 sections. Refit the last section. From opposite sides of the trunk, place 2 groups. Fasten them with the remaining 2 sections.
The end of the workLine item. For this purpose, using a spatula, scopate feet into the ground. If necessary, cut and put back, that's all, you are almost ready bench that well it will look on a photo in the family album. Just have to make the apron.
To do this, measure the distance between the long points of support in the sections. Make 6 bars at an angle of 30 degrees. Fasten the bar using the clamp. Next is to drill holes to mount them to the outside of the leg. Similarly it is necessary to process all partitions. The final step is to Polish the rough edges. In the end, leave a very comfortable bench.

The final stage in the construction of benches around wood – sanding rough edges
We also recommend you to read the previously published article on our website in which we have been told how to make wood furniture for the garden.
Sound advice
- If you slightly depart from the dimensions of the bars and supporting boards, there is nothing to worry, simple design of the bench will change slightly, in the photo it will still look spectacular. However, the frame should still be in the form of a square. Dimensions of short sides defining long and it is necessary to add the thickness of the timber, multiplied by 2.
- Water is able to penetrate the tree through the lower part of the legs, so they recommended to process the oil or special oil. Good effect gives a composition similar to a wax, the photo of the bench, soaked in the tool, it will look great.
- If you are going to do the back, you should foresee 4 component parts 4 of the backrest and loose seat. In the end, once assembled, turn the octagon.
- The load capacity of the finished product is sufficient. If you think that the load is great, install in the inner square for more support. But if the soil is uneven installation can cause problems.
- If the members of benches have been pressure treated, the product will be resistant to sunlight and adverse weather conditions. To paint the tree in this case should not be, the cuts are further processed.
- Recommended to slightly tilt your seat back. Foot design with two support points on the seat allows you to give the bench stability.
- It is important to determine in advance where you will be placing the bench. On the ground before installation, the layout in the form of a regular 6-pointed star or octagon. The star draw is very simple – overlap each other 2 an equilateral triangle.
Put LIKES and share with your FRIENDS!
www.youtube.com/channel/UCXd71u0w04qcwk32c8kY2BA/videos
Subscribe -https://www.facebook.com//
The bench around the tree, as pictured in this article, you can perform almost every thing to do it one by one, following the instructions. It is important to choose wood, it should be durable and not afraid of sunlight and weather. The option of the bench and each can have its own. Most often used a 6-carbon form, but if the tree is impressive, then better to stay on the 8-gon. The backrests are optional. published
P. S. And remember, only by changing their consumption — together we change the world! ©
Source: dachadecor.ru/sooruzheniya/delaem-samostoyatelno-originalnuiu-i-udobnuiu-skameyku-vokrug-dereva
Tags
See also
How to build a winter garden with his own hands
How to make a TREE of HAPPINESS with his own hands
How to insulate the dacha with his hands
Ideas for the garden: how to make the grill with your hands
How to build a firewood tower at the dacha with his hands
How to make outdoor fireplace with his hands
Patio at the cottage: how to make your own hands
How to make a wooden countertop for the kitchen with their hands: step by step instructions