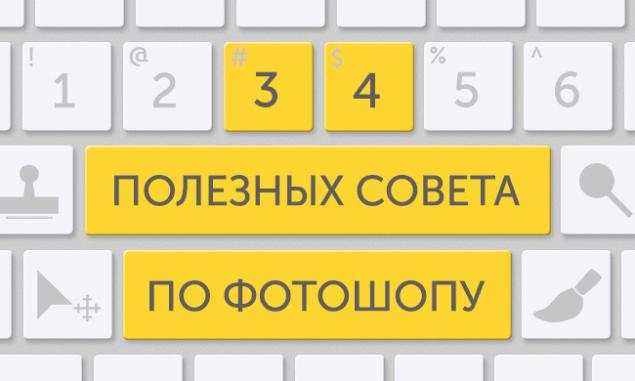
34 useful tips for Photoshop
 Bashny.Net
Photoshop allows designers and artists to create real miracles. To make this job easier, the developers have come up with a lot of different combinations on the keyboard. They include additional functions image editor.
Website has collected 34 useful tips for Photoshop that will facilitate and expedite the work. It is worth remembering.
You can easily add text to the path or shape. Make your way or form, and select Type tool (T) Adobe Camera Raw ( ACR ), and you just want to open this file in the Photoshop in bypassing ACR , you can do so: in the Bridge hold Shift and double-click on RAW -file . It will be opened in Photoshop with the current setting ACR Files & gt; Scripts & gt; Load Files Into Stack.
Excellent help to create a composition of several images. If you need to reset all settings Photoshop to the position in which they were immediately after the installation program, then press and hold the button Ctrl + Alt + Shift Free Transform and want to apply exactly the same transformation to another layer, click on this layer and press Shift + Ctrl + < T PSD File, with all its internal tricks, when you open a file, hold down Alt + Shift, and opens the file as JPG with information layers. When you save a file to be published on the website, the ability to use Photoshop to save the file of a given size. This option is a pull-down menu window Save For Web. Most of the people making the selection, move the selection to a new layer, to see how it will look. Instead, try to move into a new document the entire image, and by selecting the dialog box Refine Edge mode On Layers ( L ), you will see how the selection will appear on the source layer to complete the selection. You are not limited by direct cloning, if with the help of the Clone Source ( Clone Source ), you can select the vertical and horizontal axis (just click on the circular arrow next to the width ( W ) and height ( H ), or change the angle of the field of rotation). If you frequently use adjustment layers, it is convenient to assign them keyboard shortcuts. Go to the Edit & gt; Keyboard , select Application Menus and open the option Layer New Adjustment Layer and click on any point of the adjustment layer, for example, Curve Accept , to accept the changes. Now, just press this key combination to quickly call an adjustment layer Curve Image Processor ( File & gt; Script & gt; Image Processor ) for fast creation of file types, such as TIFF and JPEG Image Processor , select your images, destination folder, the desired file type, quality and size, and click Run. The panel Paragraph , click on the icon top right and select Hyphenation - In the dialog box, you can configure the transport. After selecting an object and placing it in a new layer, go over the edges tool Blur Tool , - as a rule, highlight the edges are too sharp, to merge with the main image. Control of the degree of blur by changing the parameter Strength D , to reset the colors for the foreground and background in the default colors: black and white. To display the palette settings Brushes , click F5 Hue / Saturation ( Layer & gt; New Adjustment Layer & gt; Hue Saturation ) at the top of the layer set. This allows you to, or slightly discolored picture, or add a color cast to the entire image. Ctrl + click on the layer thumbnail in the layers palette will create a selection layer contents. If you want to see the contents of the layer mask, then hold down the Alt and make a click on the layer mask. Alt + click icon create a mask to create a black layer mask. When using Polygonal Lasso Tool , hold down the Shift , to create a straight angle in increments of 45 degrees. For better organization, group of layers selected by pressing Ctrl + G Ctrl + Shift + N will create a new file, with the withdrawal of the dialog box; Ctrl + Shift + Alt + N will create a new layer in the working file. If you are constantly changing blend modes, remember keyboard shortcuts for them is not difficult. They are always linked: Alt + Shift and the letter - usually the first letter of the regime. For example, Alt + Shift + M - Multiply , O - Overlay , S - Screen , and so on.. Some differ ( F - Soft Light ) but not much, and by using them, you will work much faster. Click Alt , to Burning Tool began to perform the function Dodge Tool , and vice versa. Two simple ways to do edging figure:
* Select all of the image Ctrl + A Edit & gt; Stroke , and set the location of the box, its width and color.
* Unlock the layer (usually it is not blocked, but if this is the background layer, double-click on it), go to the Layer & gt; Layer Style & gt; Stroke , and set the location of the box, its width and color. Ctrl + click on the layer thumbnail create a dedicated object on that layer. If you want to select more than one object on multiple layers, hold an additional and Shift Enter creates a new line; to finish writing, press Ctrl + Enter or Enter on the numeric keypad. You can move a layer on any other open image in Photoshop, so will create a copy of the layer. Hold down while dragging Shift, and the content layer is inserted precisely in the middle. Using the tool Polygonal Lasso Tool , click Backspace , to undo the last step. To select a group of layers, without using the Layers palette? To select a single layer, we know from paragraph 81, and add another layer to the group you can, hold Ctrl + Shift and click on the making of the object located on a different layer. To delete multiple layers, you can simply drag and drop groups of layers on the basket icon in the Layers palette; how to choose a group - know from 82. To save all of the layers in different files, you need an incredible amount of time. You can automate this process. Go to the File & gt; Scripts & gt; Export layers to files ( File & gt; Scripts & gt; Export Layers To Files ). You can also select the File & gt; Scripts & gt; Image Processor ( File & gt; Scripts & gt; Image Processor ) for more options. Photoshop Extended version has the ability to work with video. You can use almost the same effects that you use when working with images. To convert videos to a smart object, right-click on the layer and select the video « Convert to Smart Object » ( Convert To Smart Object). The filters become smart filters will work throughout the video.
See also 88 tips for Photoshop
15 simple and effective lessons on Photoshop
60 sites for designers
via www.adme.ru/tvorchestvo-dizajn/60-sajtov-dlya-dizajnerov-712610/
Tags
See also
Useful tips
A collection of useful tips for the kitchen — save for sure!
Tips on Photoshop graphics editor (11 images)
88 tips for Photoshop
Planning the kitchen of your dreams: tips
Useful tips for each day (13 photos)
Useful Tips
A few useful tips
Useful tips for the home
These tips is rarely seen! 28 everyday tricks for every day.