What can "squeeze" from usb-microscope
 Bashny.Net

Left - "raw" footage from the device. Right - processing. I>
In this article I will try to achieve the maximum quality close-up shot of a typical usb-microscope. Such devices - are not intended for artistic photographs. Their mission - to quickly and easily view the details of the subject. However, I will try to capture the special conditions, post-processing or some other means partly offset these disadvantages.
Article written «Just for Fun» and is essentially a story about the way of finding the best result. You should not consider it as a recommendation. If you need a good closeup - best to use for this special equipment.
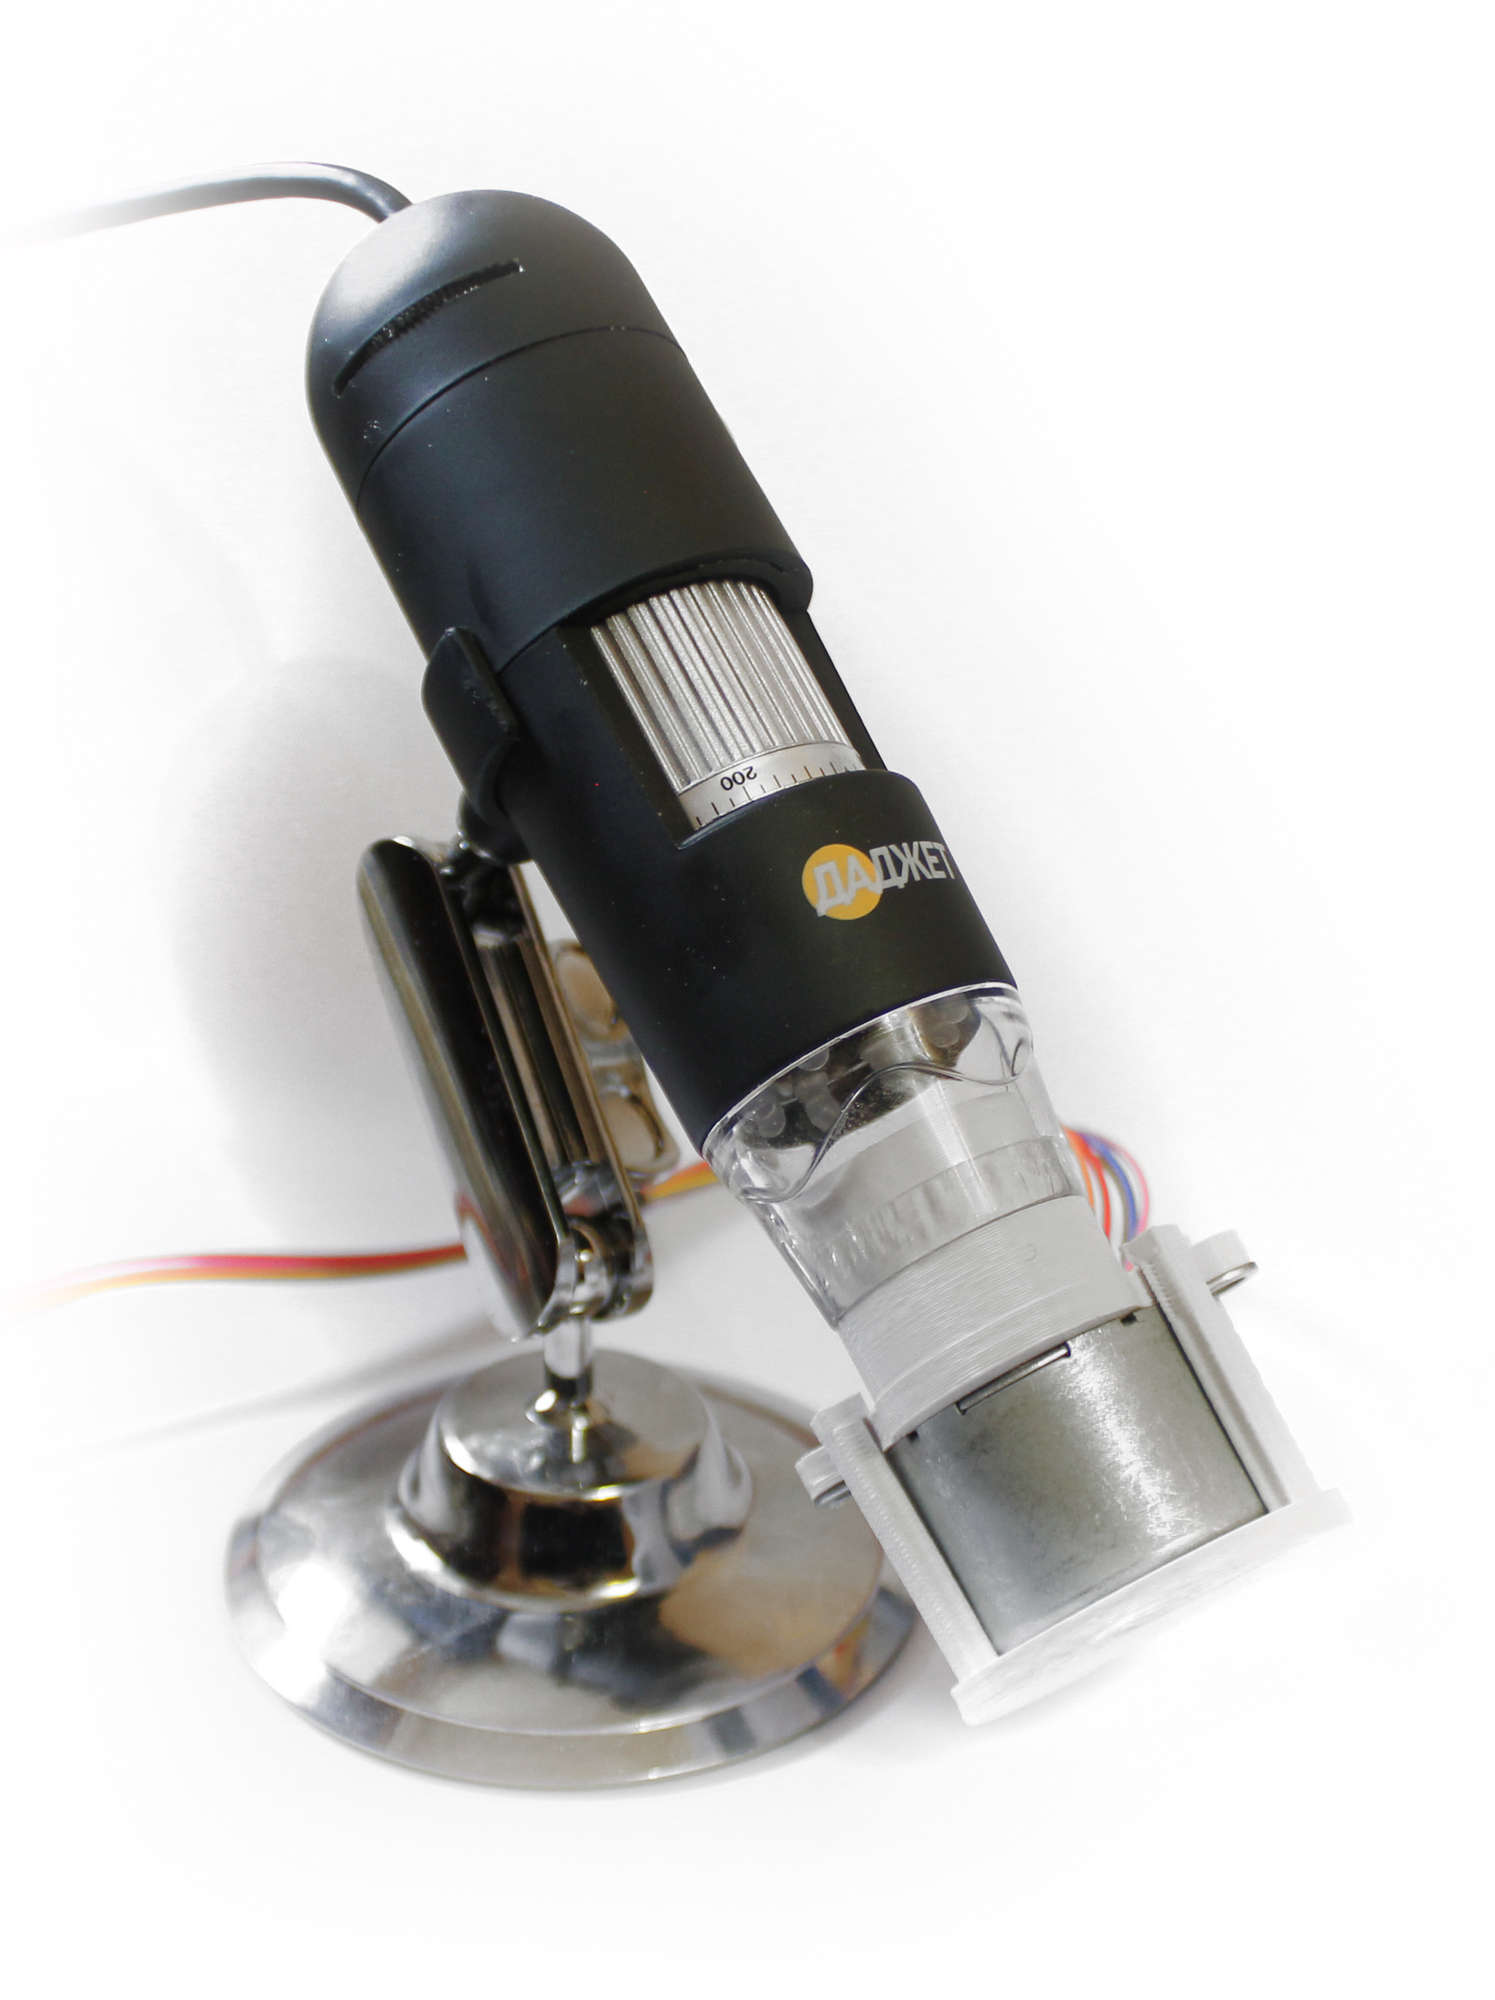
USB-microscope
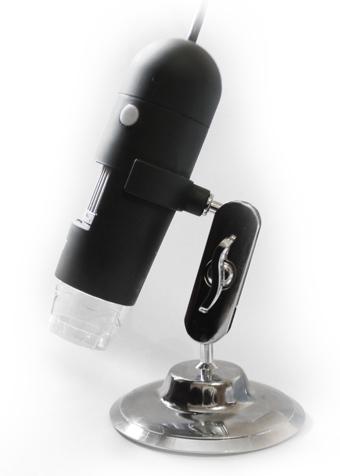
All macro shots in the article made using a USB-microscope, provided by Dadzhet (for which they thank you!).
The device itself is very typical for microscope devices of this class. Web-camera mounted on a stand equipped with a set of 8 LEDs to illuminate the subject, and two rotary dial to adjust the focus and the degree of illumination.
The microscope is mounted on the table, turn on lights, and the lens is placed under the investigated object. Then you must set the focus, and using the supplied - take a picture or record a video. Photos are saved in jpg, and the video format avi (uncompressed).
Since the article about this device is already published on geektimes.ru (I recommend to read in the article a lot of cool pictures and comparisons ) I will not be repeated more than describing the device and its functionality.
For the purposes of this article, it suffices to know what is inside the device is a web-camera with an optional module lights and adjust the focus. Allows real-time viewing on the computer image with a magnification of 20-200 times, and has a resolution of 1600 * 1280 matrix of pixels.
The rest of the specifications are not of critical importance, but I have to say a few words about it at the end of the article.
Part 0: Snapshot
So, the first step is to get the image to be processed. You can use standard application «MicroCapture» included in the package. Or any other, allows you to capture images with a web-camera.

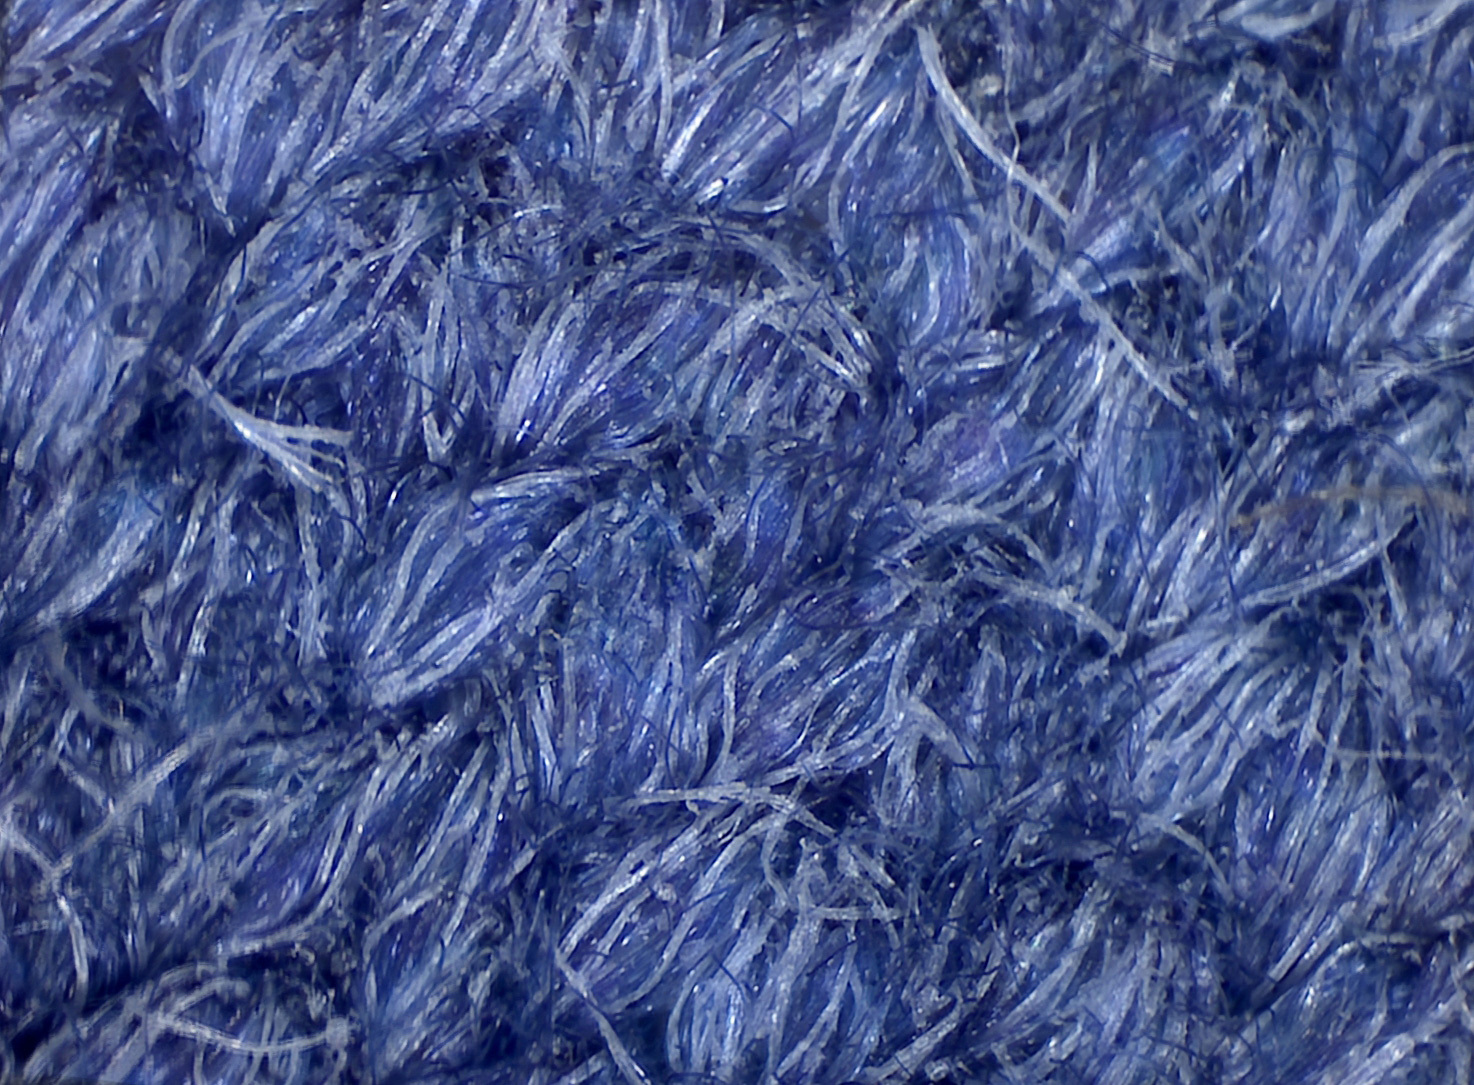
As a test image I used a piece of cloth, it clearly visible all types of artifacts.
All the frames in the article, I'll save with a resolution of 1600 * 1280 pixels, as it is "native" resolution of the camera. Use a different resolution does not make sense if we want to get the highest quality photos, as interpolation algorithms will destroy the information and make it difficult to work with the noise.
Let's see the image in 100% scale.
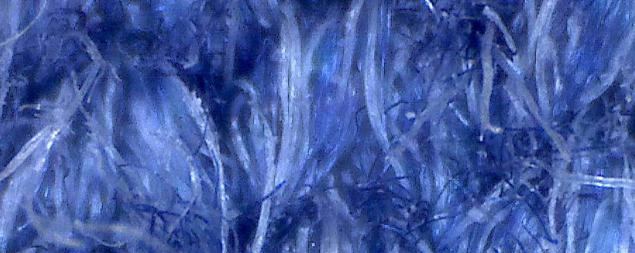
It can be seen that picture a lot of noise. Let's start.
Part one. Dynamic noise
How can I remove noise from photos?
A small digression for people far from the pictures. B> The whole picture is essentially based on the relationship between the three main parameters: sensitivity matrix i> (ISO = 100, 200, 400, etc ... .), Shutter i> (sets the time that the light hits the matrix) and Aperture i> (the size of the "window" through which the light incident on the array). These three numbers determine how much light hits the matrix, and with what accuracy of this light will be "digitized».
Noises occur due to a lack of sensitivity matrices. You can imagine (though this is not entirely true) that the sensitivity, it is simply the coefficient that multiplies all the data came from the matrix. It is clear that the smaller the light came on an array of behind the closed aperture or short excerpts - the greater the need to multiply the number of data matrix in order to maintain an acceptable final brightness of the image, and the more work will be visible error matrix - ie noise.
To reduce the noise - you need to lower the ISO (sensitivity), and for this purpose - or more open aperture or increase the shutter speed.
But here we encounter and technical constraints - in this web-camera, like most others - sensitivity matrix does not change. Aperture - unregulated and shutter speed - just regulates the amount of light. And that it changes the program adjusting to the light level.
You can enhance the exterior lighting - but then have to reduce exposure. You can reduce the backlight - then increase the shutter speed. In any event, the actual amount of light will be equal to the matrix and thus noise will always be the same (in the dark and light enough to the camera signal is simply multiplied by a gain, which leads to more noise).
So. We can not increase the shutter speed means the camera, then left to do is to bypass it. For example, you can save a few shots, and then glue them into one, finding the arithmetic mean for each pixel. Better yet, record video from hundreds of shots ... try:
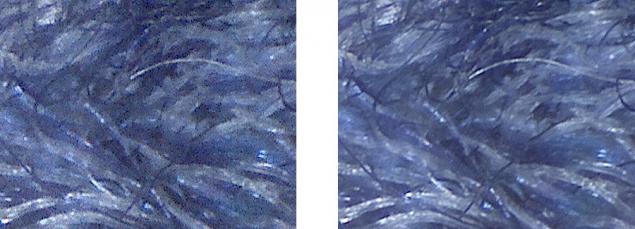
Image was definitely better, virtually disappeared "small" noise. But the quality is still poor, were bright points (3 of them are highlighted in Figure yellow stripes).
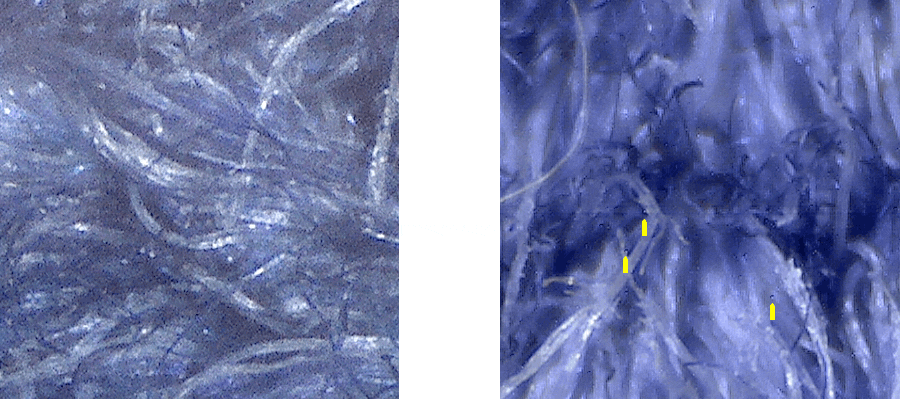
The fact that the noise generated random deviations from the color matrix that considers the "right". But cheap matrices that put in the web-camera - this is the "right" value may be a mistake. In other words, the expectation of deviations not tend to zero.
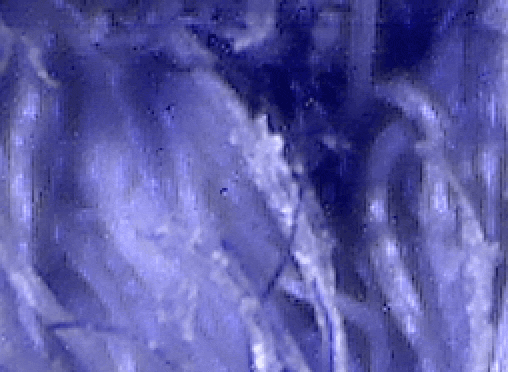
It is easy to see if the "glue" flat image, for example, completely defocused image, so as not to interfere with unnecessary details.

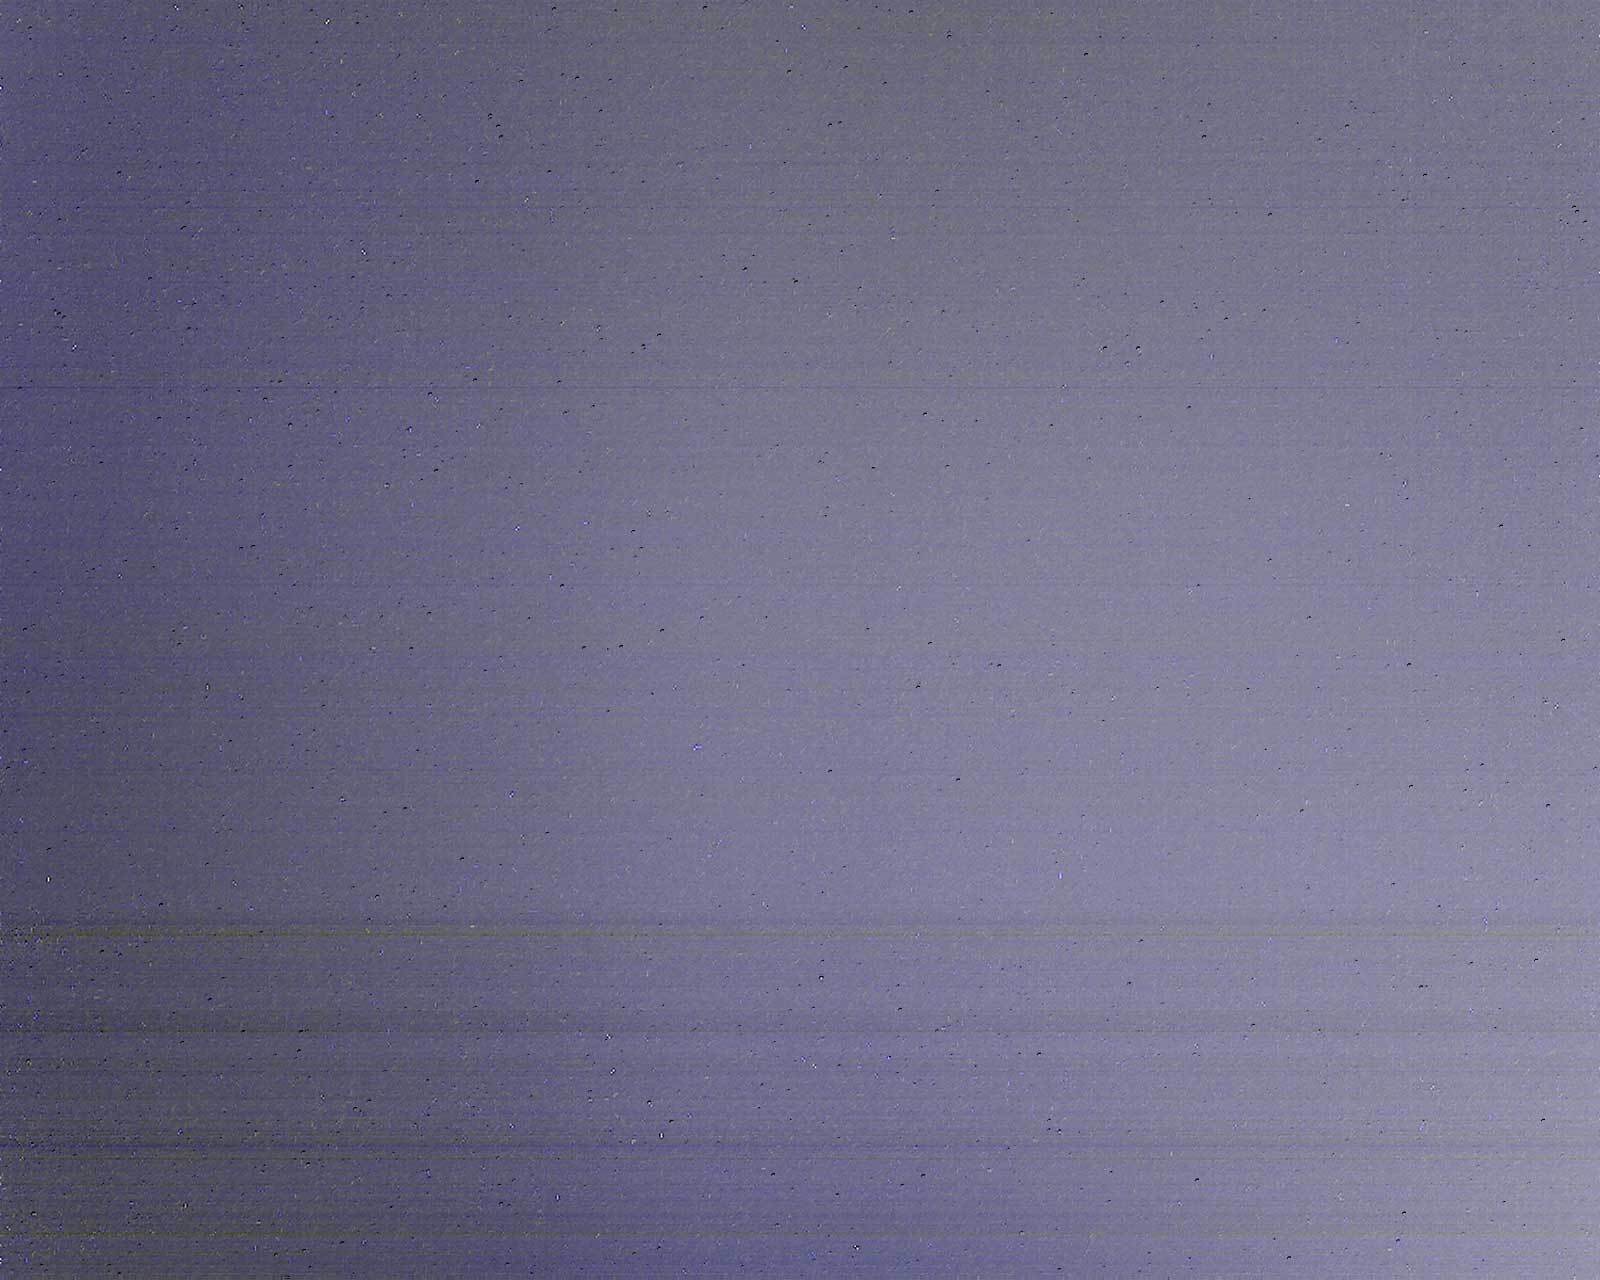
Один frame. By clicking - the original i>

Среднее of 200 frames. The brightness is increased by 2 times, for clarity. I>
As you can see very significant noise. Some pixels are generally broken, others form bands and zones of discoloration. If the remote noise can be called dynamic, this - a permanent, or static. Try to remove his.
Static noise
My first thought - you can use the resulting image above for the correction frame. Just subtract from the average color of the image and add gray and increase contrast in 2 times. As a result, we obtain an image, which put it on any frame - we kind will reduce interference.
A similar principle is used in post-processing in some cells, but in general - is a bad decision. Defective pixels - is the lack of information, and that we did not impose on them - does not take information out of nowhere.
Partially effective pixels - cause at best, reducing the dynamic range of colors, and at worst - a full color distortion.
Another solution - "spread" the impact of each pixel matrix of several pixels of the final image. This can be achieved if displace the subject within a small range, and then "glue" the image given displacement. So that each point of the object has been represented in one pixel of the combined image.
Moving piece of tissue hands I got a picture:

To glue these pictures - you need first to "stabilize" the image to achieve complete immobility. This can be done by analyzing the movement, for example, using OpenCV, but I went for a simpler way - by running a third-party tracking program.
After tracking in AE, and "gluing" frame my utility - get this result.

Noticeable that there is no noise, but there was an unpleasant blur caused by the fact that the image shift and blur trembled.
Try to determine the degree of blur to exclude bonding oiled frames. To do this, I went the easiest way - Computes the sum of the difference between all adjacent pixels of the image. The more blurred image - the closer the color of the neighboring pixels, and thus the total sum of absolute difference - give some estimate of blur frame. Schedule blur on a test set will look like this:
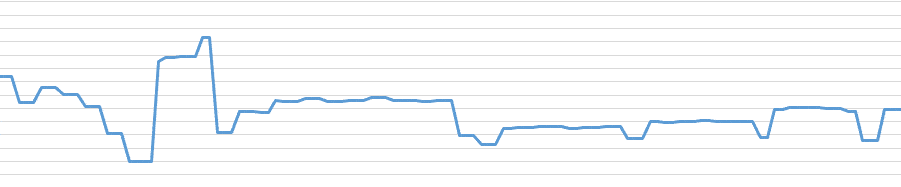
Clearly visible zone where I slid Image and it smeared (schedule in these places a few frames goes down). Cutting off blurred images can be a little better picture, but significant changes will not be too sharp movement. I would like to further improve the result, so went on.
Automation
A prerequisite for further was the fact that I happened to be a stepping motor 28BYJ-48. Better to let it moves an object in front of a microscope. For the dough is enough to make a simple rotating desktop.
Advantages in the absence of lubrication, and messing around with jitter outgoing focus, etc. Of course it's best to fix the motor directly to the microscope, which had to print the attachment, consisting of three pieces:

But even in such circumstances, the tracking is not perfect. If you increase becomes significant rolling shutter and perspective distortion, which leads to distortion of the image that can not be solved tracking (had to switch to tracking in Mocha, but all this does not solve the problems). Part of the problem is leveled when compared to all of the frames sequentially from the first, and when there are significant deviations - just do not take into account the frame.
For a typical sequence chart looks exceptions:
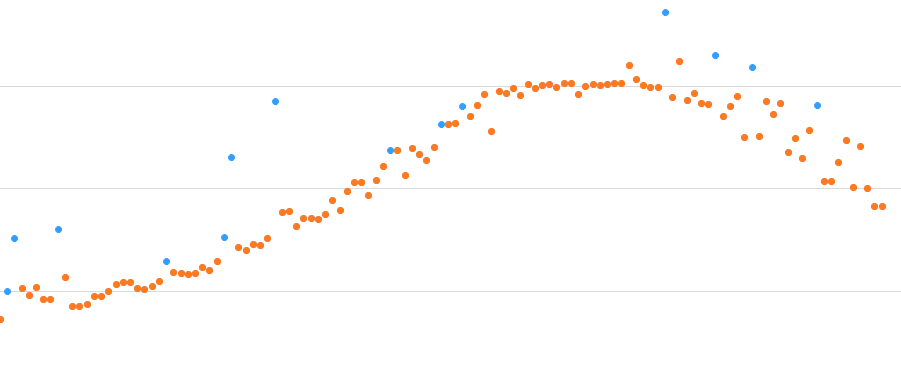
It can be seen that the variation with time accumulates since each frame is compared with the first. Also noticeable surges, these points correspond to the tracking error.
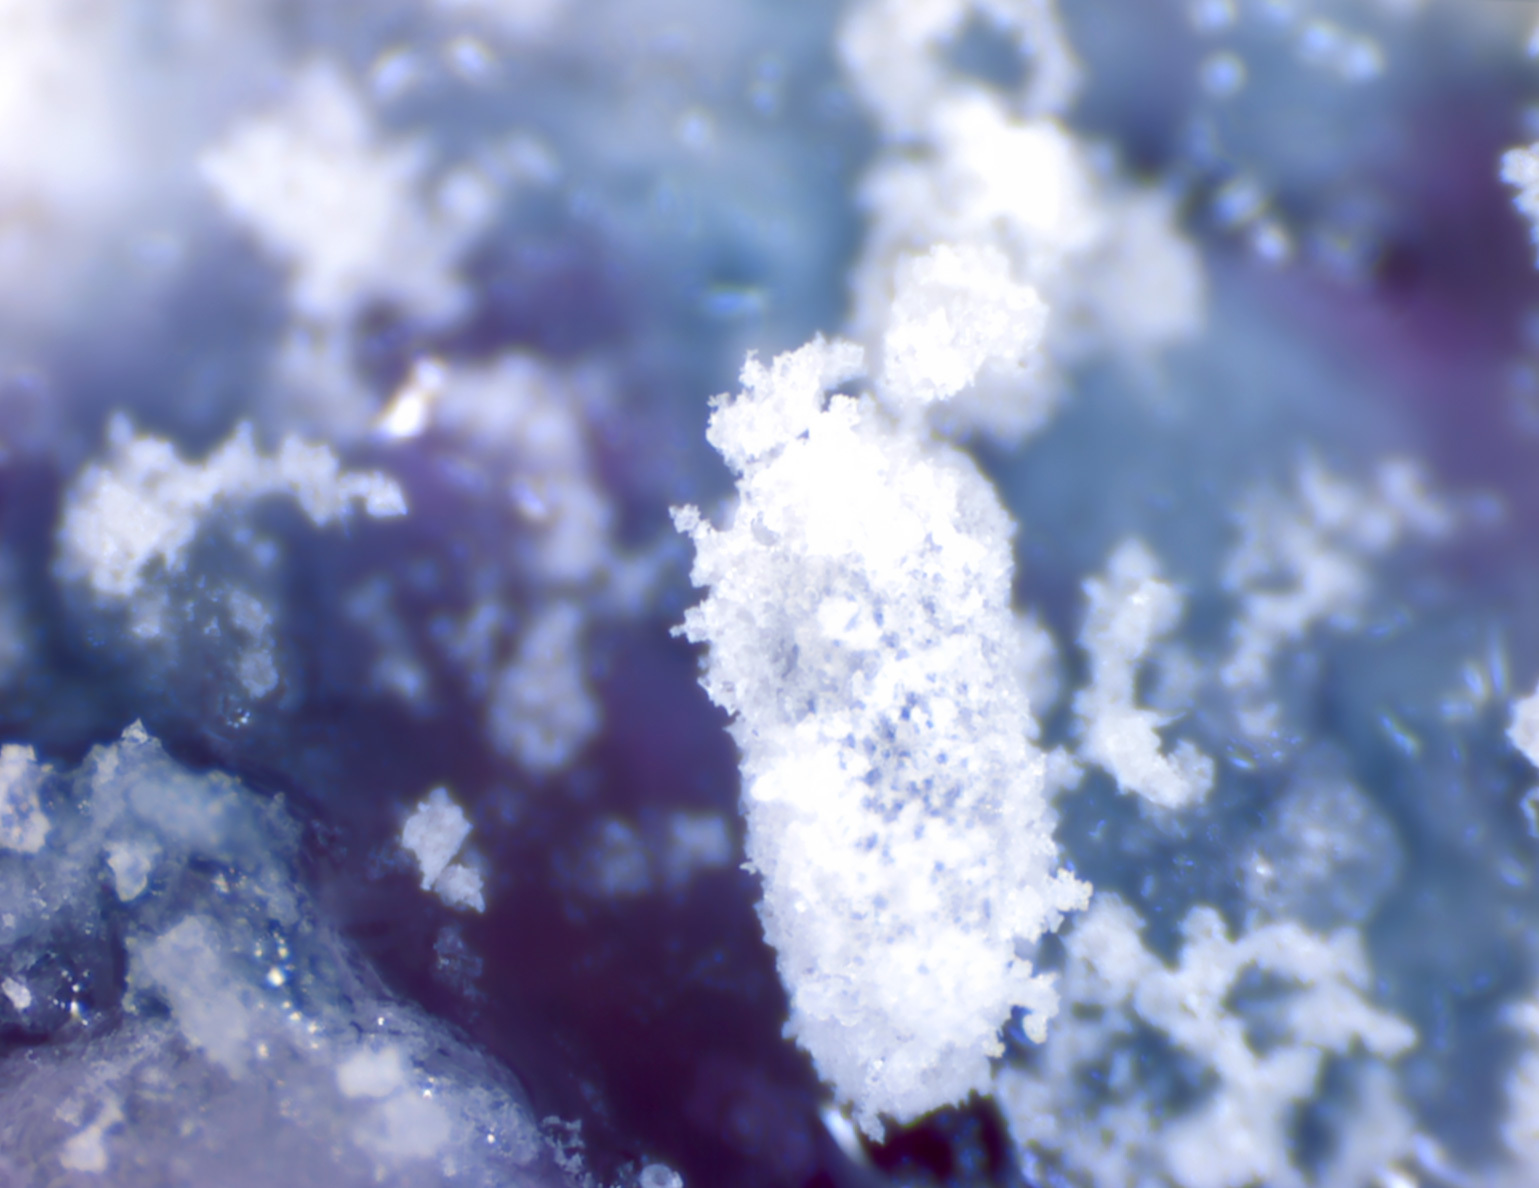
The work was the image:
fabric

sugar and a drop of jam

Disappointing shallow depth of field, but it's fixable. Albeit with reservations, but glued together from multiple images with different focal point, the one with the greater depth of field is possible.
Result:


All images are clickable. I>
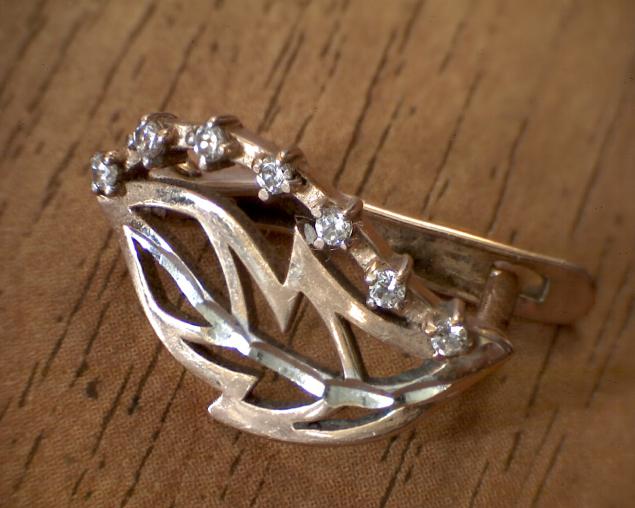
Here is an example of work on a normal object (gold earrings).
Removed the only background noise + 2 images stitched with different depth of focus, «crude» frame.

Processing.
Conclusion
In the experiment, we used «Цифроскоп» provided by Dadzhet.
Source: geektimes.ru/company/dadget/blog/249662/
Tags
See also
What can I add in a morning coffee to Wake up faster
Intuition or logic: what saves you better in critical situations?
Did you know that you can improve your character by eating certain food!
We would not survive if we do not get together a little bit crazy.
Found an autograph Shakespeare
What can you buy for 150 000 euros in Greece? (26 photos)
What can be done from the rock
What can you buy in the world for the price of 1-room apartment in Moscow


