As I was doing wardrobe
 Bashny.Net
Hello! Want to share your photo report on the construction of the closet.
42 photos and a lot of text
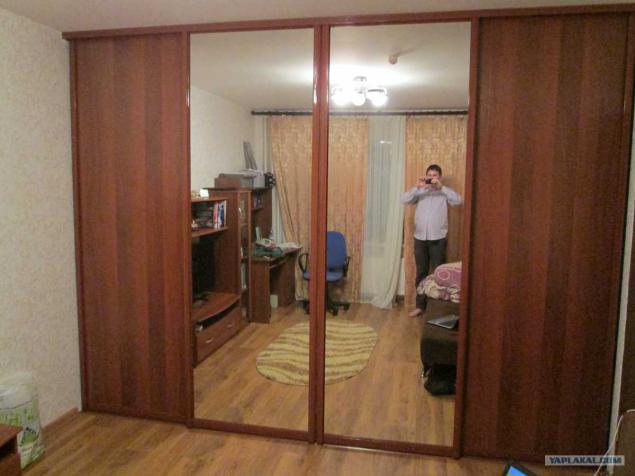
My wife and I entered into a new apartment, a studio. Naturally furniture from nothing. For the first time parents have given the old Soviet wall. At some point we realized that the wall is full, and the appearance of it left much to be desired. We had to do something.
An idea to buy a wardrobe for the whole width of the room. After a brief analysis of suitable furniture offices, I was horrified. The price of the cabinet with 4 doors was of the order of 50,000 rubles. This is without unit. At that time, and now, that kind of money was not. Therefore, it was decided to do it himself. Was "smoking" forums to learn the nuances of technology and construction.
So a preliminary description of wardrobe:
The total length of the cabinet (wall to wall) - 3420 mm
Cabinet depth: - 500 mm
Height from floor to ceiling - 2500 mm
Color: Wenge (as it turned out, my wife did not get a color computer desk)
Chipboard thickness - 16 mm.
The overall result of the money will report at the end of the post.
The first step, wardrobe was designed in the program Compass-3D. I designed it for a long time, about a month. All measured the house, my wife and I picked up the necessary content and arrangement of shelves and rods.
After a brief search, found the firm, which according to my size will make the cut and edging details of a future cabinet compartment. For the price you are: 8920 rubles. On the appointed day, I was with a friend (Andryukha hello!) Arrived to pick up the items. Only began to be loaded, then of course, as an evil, it began to rain. Stsuko! The most fun was found that two long element (2500 mm) in length do not climb into the car. About 600 mm protruding from the trunk. Well, nothing to do, I had to get out and ride well.
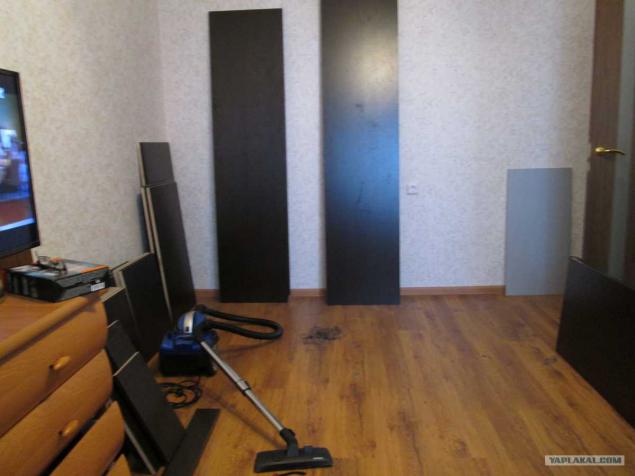
After the arrival and unloading of pieces of wood, I decided not to bathe and to begin construction of a new day. By the way, the time I had a lot, since I was at that time the unemployed. Photo 1. On the morning of wood were laid. And then I truhanul and realized that I should not have it all started. He walked with them, I thought, what is there to do. And away!
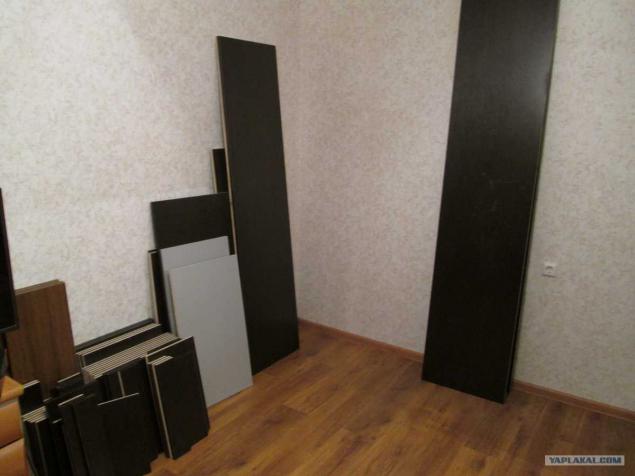
Photo 2. For convenience, all the elements were arranged and sorted.
To work were purchased:
- Mallet
- Konfirmatnoe drill
- Drill wood
- Evrovinty (Confirmates)
- Screw caps
- Gon
- The level of 400 mm
- 2 corner clamps
- Dowels
- Roller guides for drawers
- Wood saw
- Metal furniture corners
- Decorative furniture corners
- Template for drilling perpendicular
Since cable internet I have hidden in the plinth, had to be cut from the lower uprights recess under the plinth.
In the production of I originally ordered edging only one strony bearing elements (front side plastic edge 2mm), because it is not a cheap pleasure. Having read messages from the Internet that stands out from chipboard with time formaldehyde, bought in hardware store black melamine edge. Looked at a couple of spots obuschayuschego video and began to glue itself. Sometimes it turns out good, sometimes lousy. In any case, this will be to the side wall, will not be visible. In the photo 3, the process of gluing edges on the rear end.
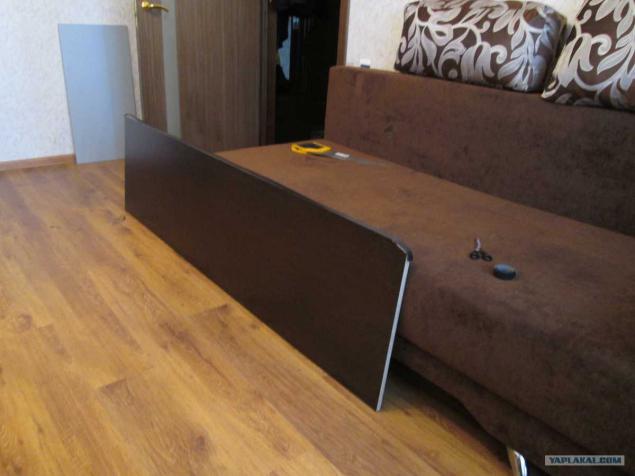
Photo 4. Painstakingly Measure out the hole locations.

Photo 5. Attach elements decided not only by means of SCREW, but shkantami for strength. In the photo the process of drilling holes for dowels and Confirmates. Bought advance guard was not useful. With an eye estimation everything I normally so bored chipboard on the eye. By the way, do not ever drill does not go away.
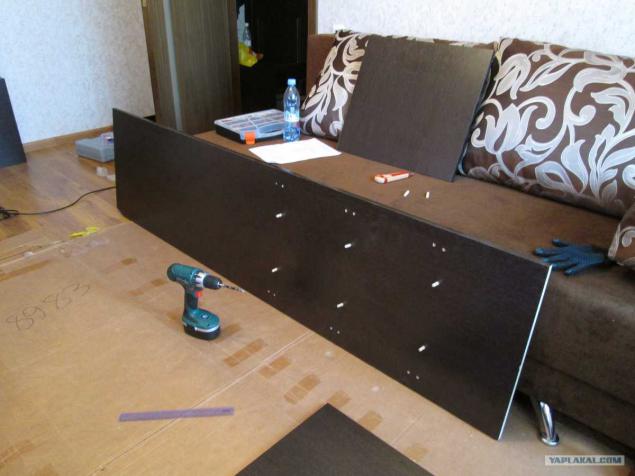
Photo 6. Try on, insert the dowels into the holes and fasten SCREW future shelves.
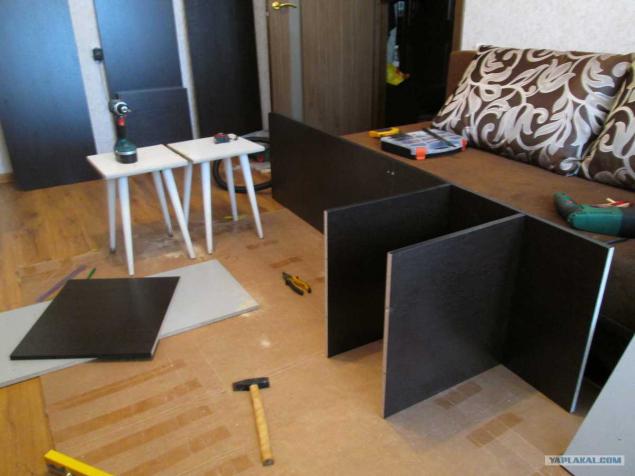
Photo 7. The second stand ready.
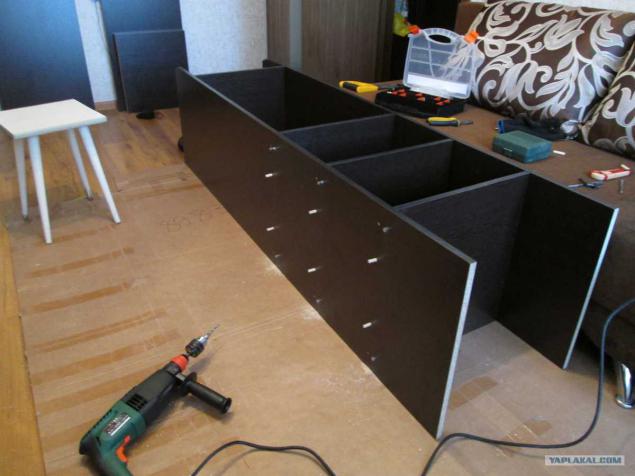
Photo 8. Put our future middle of the cabinet. Try on the wall, like doing great! :)
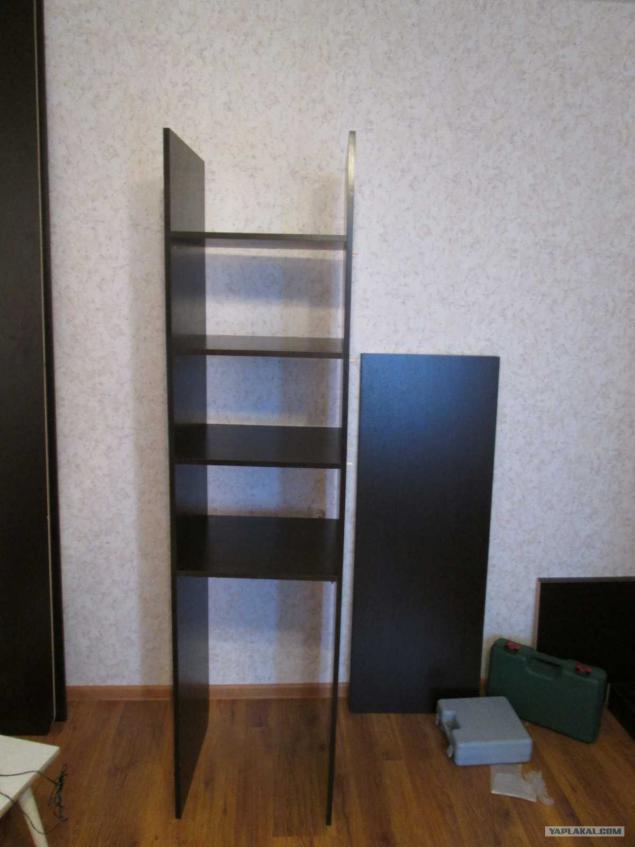
Photo 9. Mount the cover (top shelf). It is important that everything was on the drawing and smoothly.
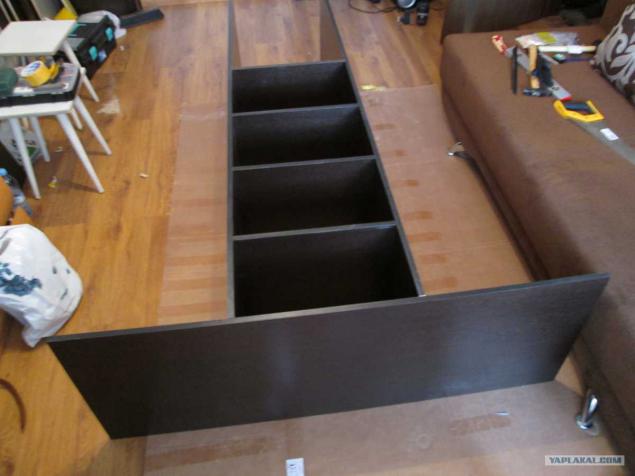
Photo 10. In order to smoothly attach attaches the corner clamp.
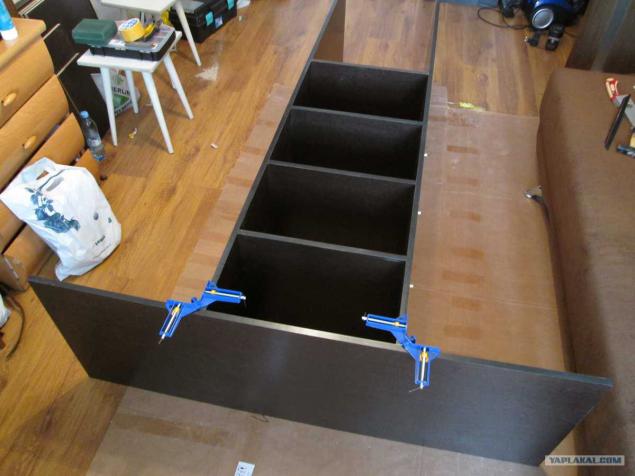
Photo 11. Screwing Confirmates. The main thing they do not win.
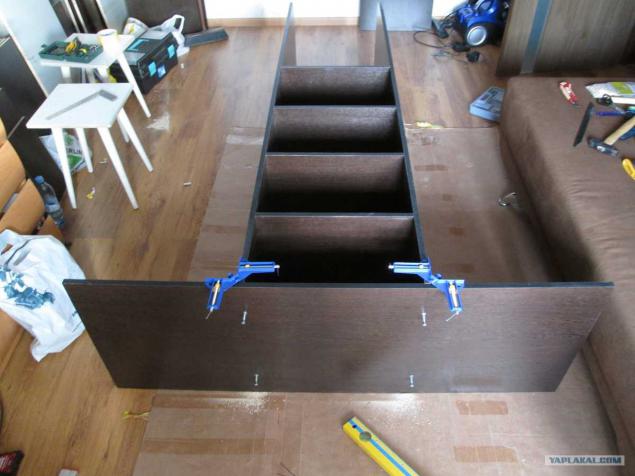
Photo 12. Again, try on))
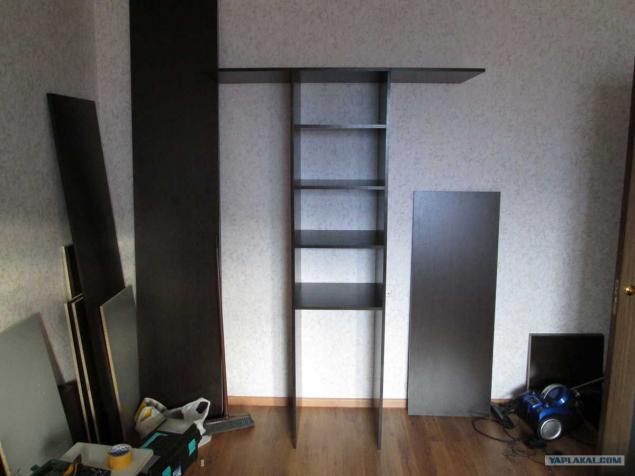
Photo 13. On the way to the other member of the cabinet installation (right-hand side section with shelves)
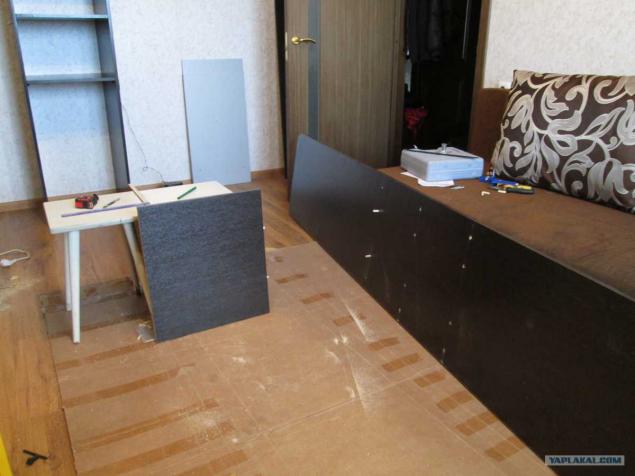
Photo 14. For future began to pick out the outline of the closet :)
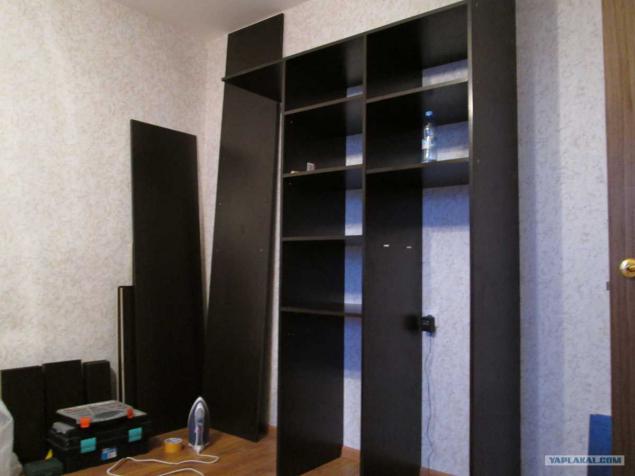
Photo 15. On the other hand the photo center and right sections.
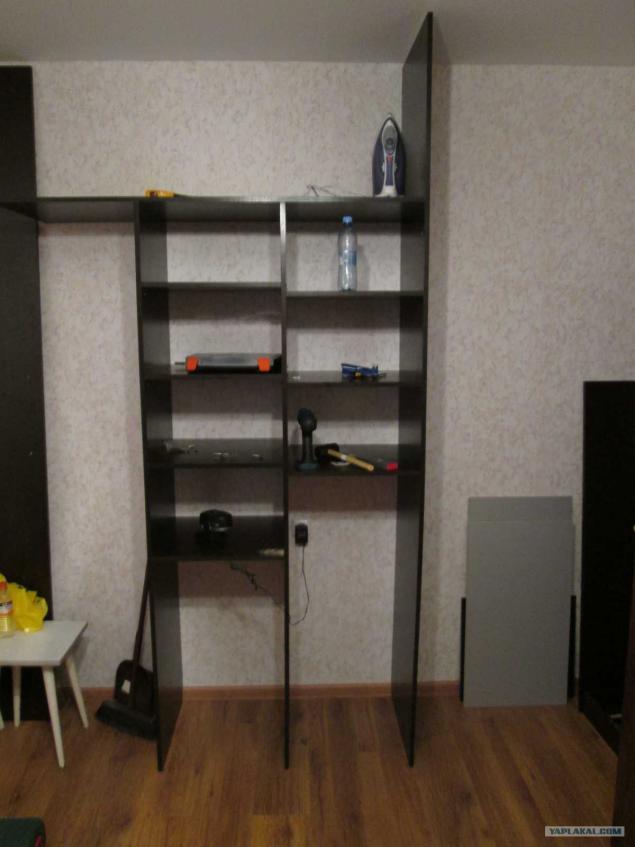
Photo 16. Now it is the turn section under the stairs and ironing board.
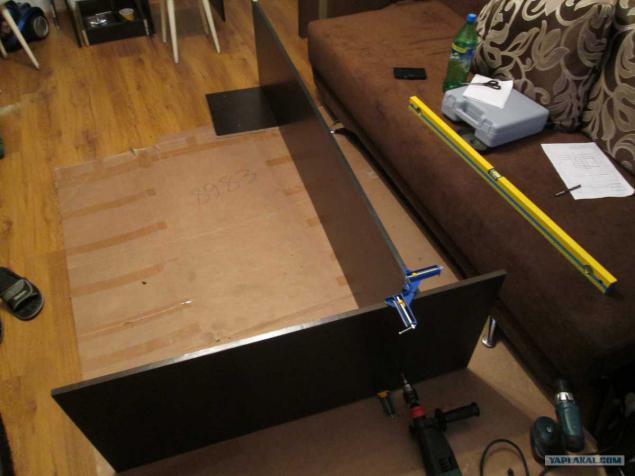
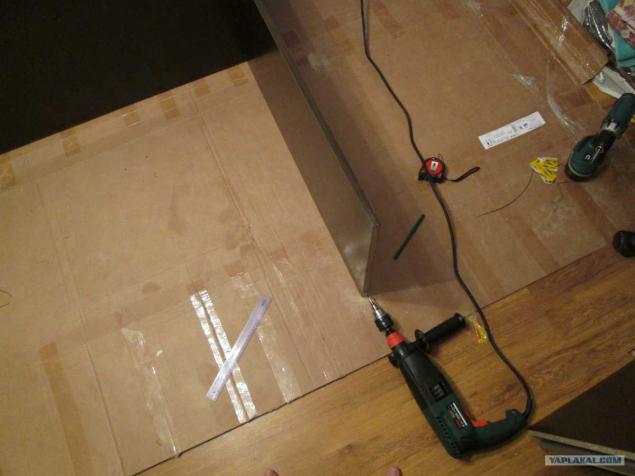
Photo 17. The process of drill holes konfirmat. It is important that the drill was exactly at 90 (plus I do not have enough attention from others. Embrace me, and sundry. 5) degrees.
18. Screw the photo. We put the entire structure. Beauty!
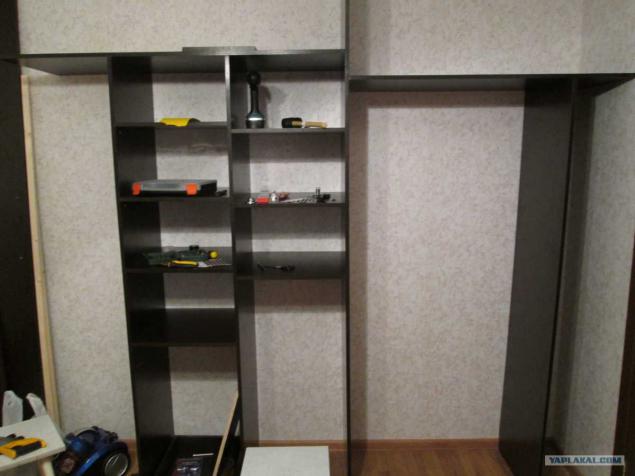
Photo 19. The lower shelves are at the same level. So for them it was purchased specifically for 4 decorative corner furniture. Corners will not be visible because they will close facades boxes. In this photo captures the process of fixing these parts.
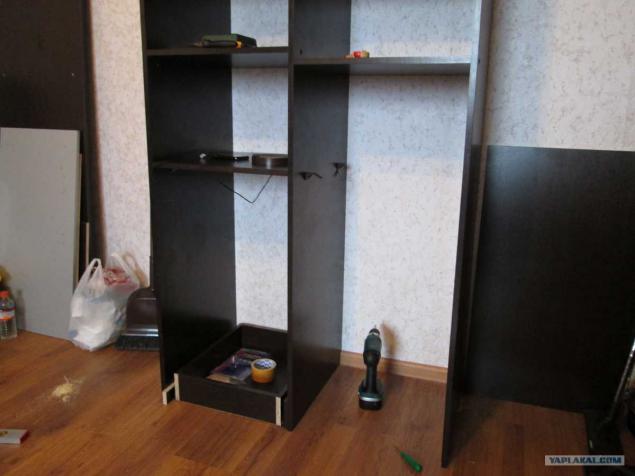
Photo 20. Installing shelves. Stood perfectly flush with the left shelf!

Photo 21. General view of the partially assembled cabinet))
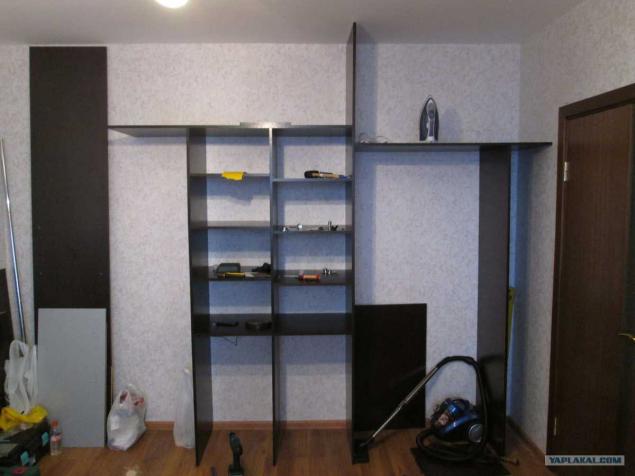
Photo 22. Since clothes, lying in the kitchen, already rather tired, it's time to set the bar for clothes. In this niche will be stored jackets and long dresses wife.
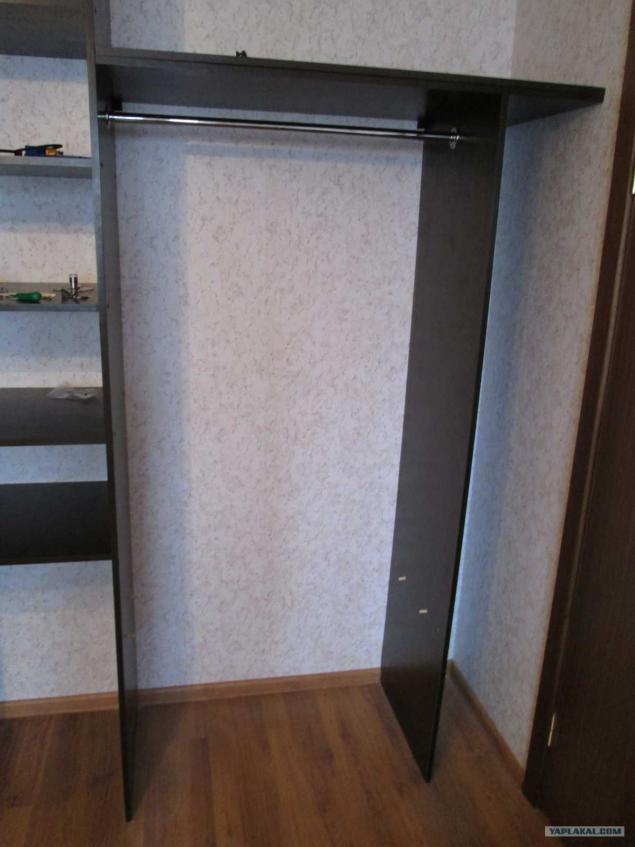
Photo 23. At the same time and place directly under the bottom shelf of the bar. Under this "bulkhead" will place the vacuum cleaner and other bulky good.
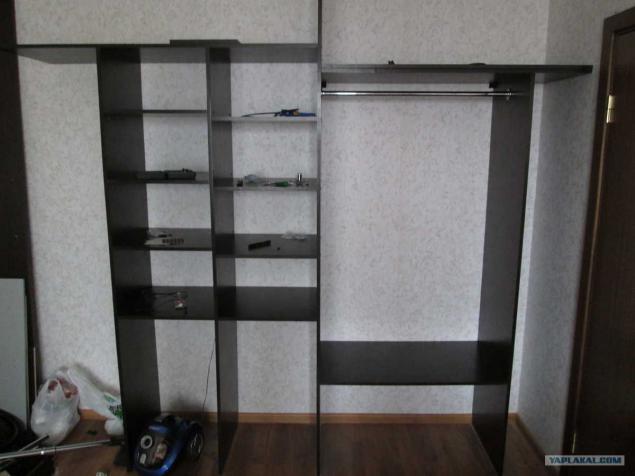
Photo 24. As you can see I did not have time to finish the right side of the cabinet, as immediately wife hung things)) In the center of the top set of wood to stiffen the top shelf.
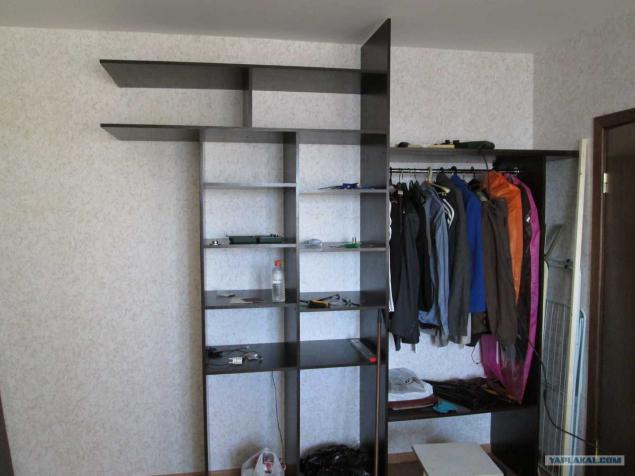
Photo 25. One of the most difficult installation - left carrier rack. One of her was very "fun" to fix.
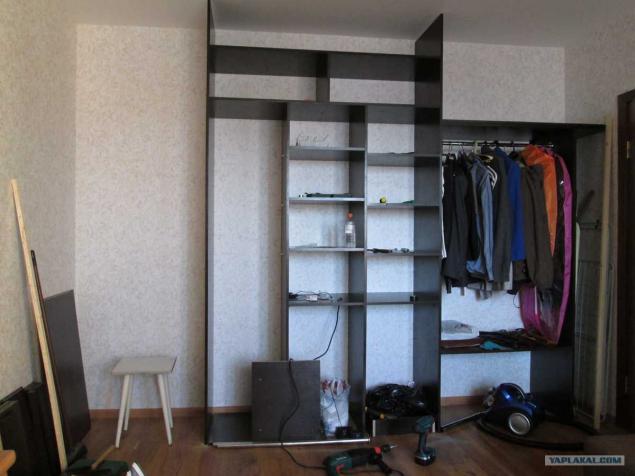
Photo 26. uncollected until the end of the cabinet slowly began to fill! Part of the kitchen from the rubble dismantled.
27. Shirts Photo myatsya have already begun. Attached to them left the bar. The top bar is mine (that is, all sorts of pants and shirts will hang out there :)), the bottom bar - wife.
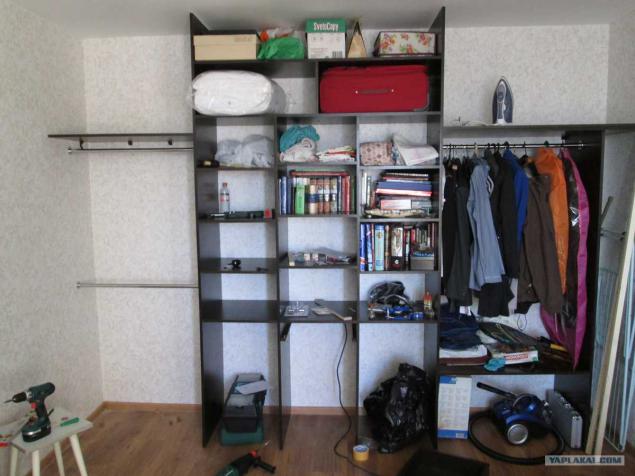
Photo 28. Fasten the last shelf. Here we see the same corners, attach them around the perimeter with a pitch of 200-250 mm.
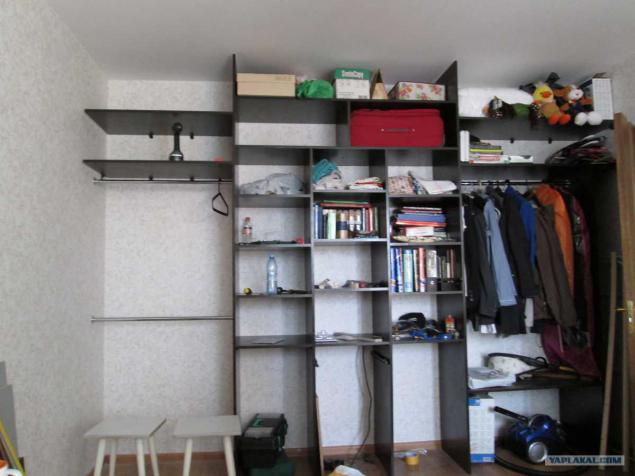
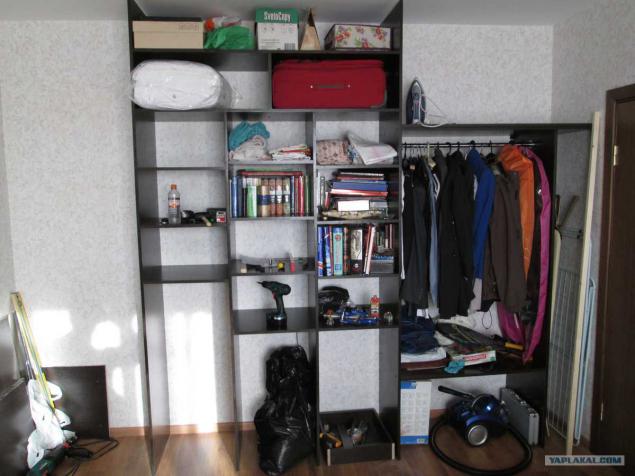
Photo 29. Fill the closet!
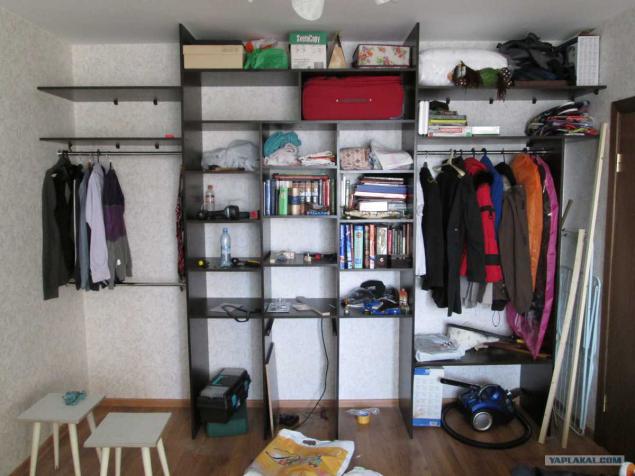
Photo 30. Start making boxes. First, twisted two SCREW not angle. After the first box, I realized that enough for one.
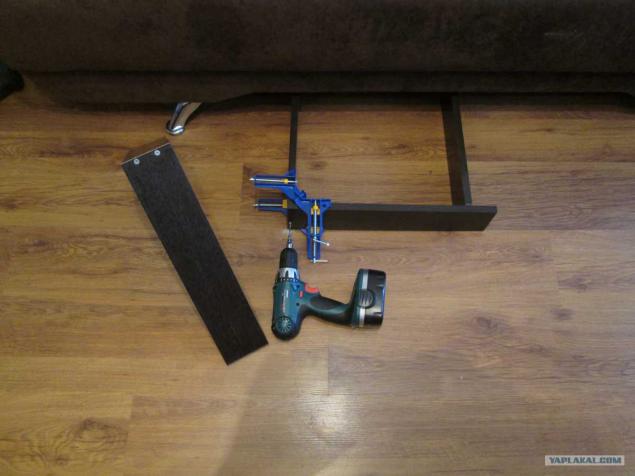
Photo 31. Assembled box №1
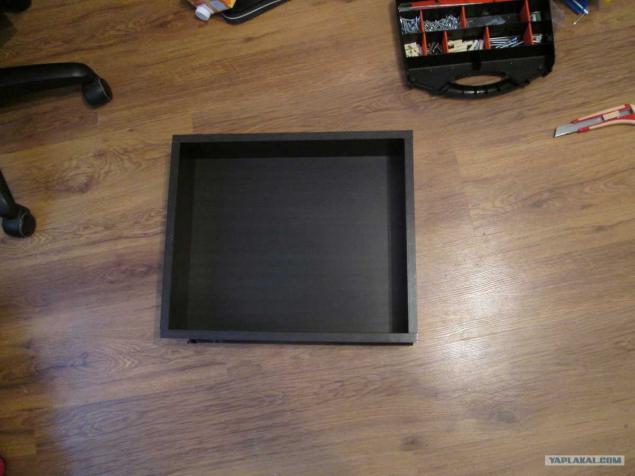
Photo 32. At the bottom of the first box installed, as you can see, self-tapping screws. Tiring it! As a result, the bottom posleduschego boxes are mounted on the nails))
Posted in [mergetime] 1413901518 [/ mergetime]
Proschitalsya I terribly. Boxes will get less than a niche for them (photo 19). The gap was about 10 mm on each side. So I made a mistake in the calculations as much as 20 mm. Stsuko! E * I alsya the problem of the day 2. I thought, how best to proceed. As a result, had to barbaric methods:
a) Bought slats in Leroy, just the thickness of about 10 mm.
b) cut at the depth of the cabinet.
c) nailed to the studs (screws can not be, breaks)
d) set the roller guides
d) Metodok spear adjust the position of the height guides.
e) set the box and hung facade.
It turned nasty. Benefit facade closed boxes exactly the fruit of my shame!
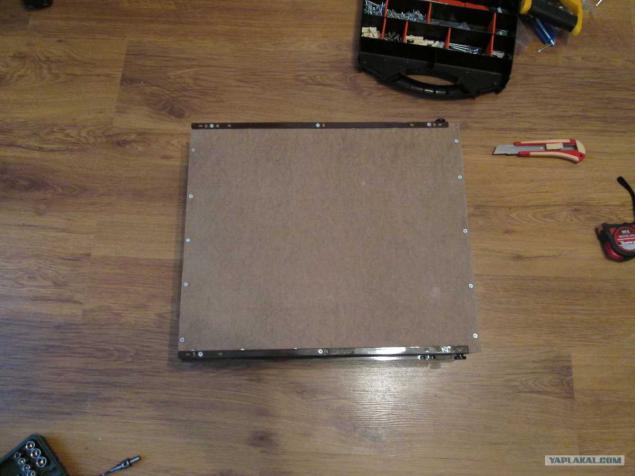
Photo 33. In so look before you install the cabinet doors.
Posted in [mergetime] 1413901563 [/ mergetime]
Up to this point, the time I spent about 10 days. Worked mostly from 10:00 to 16:00. Tell me, what took so long? I explain: I had to drill each hole, vymeryat, glued edge to go to the store for the missing tools, etc.
With doors fared miserably. I myself did not dare to do them (after a puncture with drawers), decided to order a special. office. But the money vanished quickly and on a large amount of time on the doors had to forget.
4 months cupboard was no door, I went to work, and like something to earn)) Well, my wife and I decided to finally finish this case. The company ordered gager door (to see if that they blame lay down), with delivery and lift on the 24th floor (the good freight elevator available). Doors come at a cost ... as promised at the end of the review will tell you about the price.
Color Select another, because, as I wrote at the beginning of Lent, the color of the cabinet did not come to the other furniture.
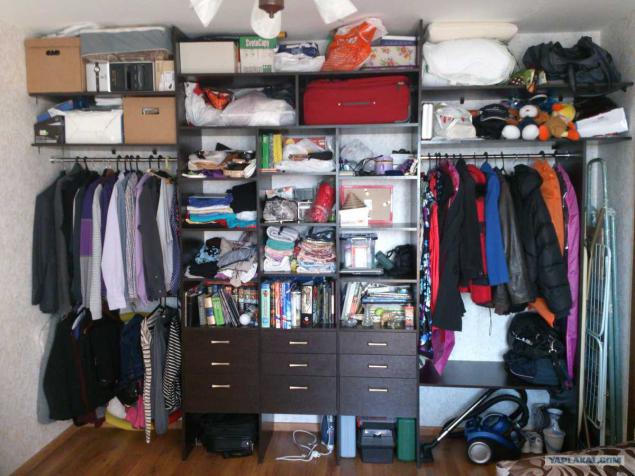
Photo 34. Arrived bought door. Total 4 doors: 2 chipboard, 2 mirrors.
Dude briefly explained how to install them. Yes, and I'll read the information in the internet, in general there are no difficulty.
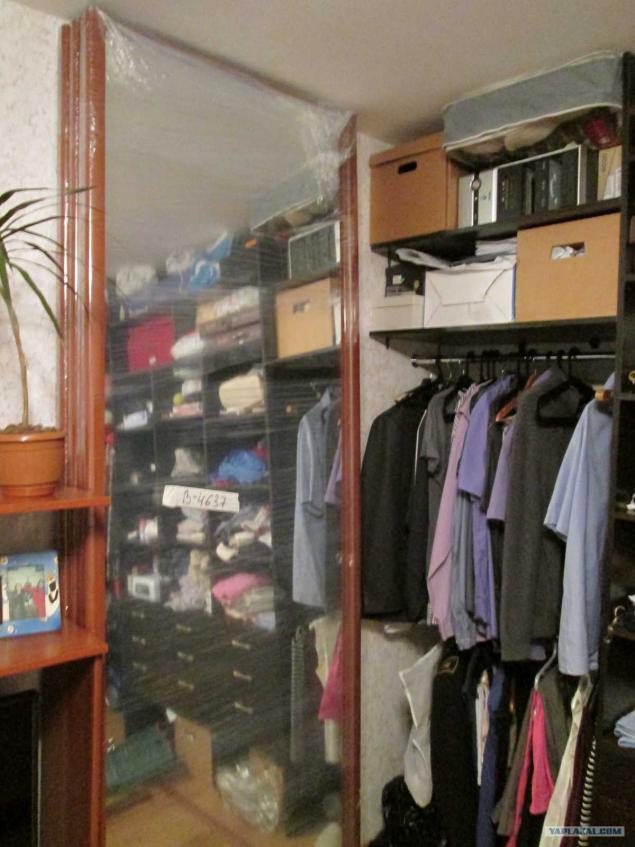
Photo 35. Mark up top rail.
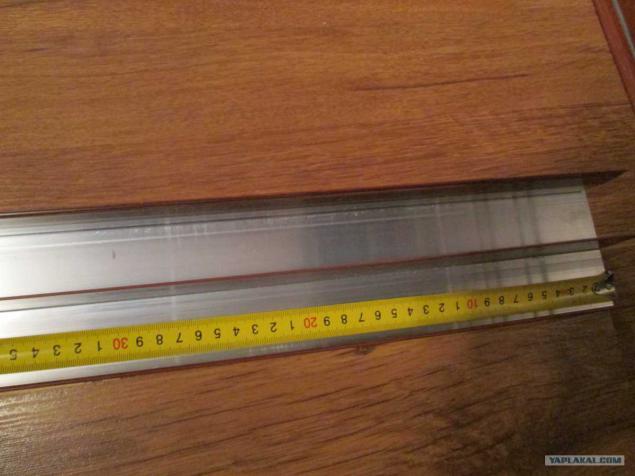
Photo 36. Make a hole in the ceiling. I'll tell you, I was "lucky". Two holes occurred right in the armature. There is no comment, but I swore a long time)) I had to drill elsewhere.
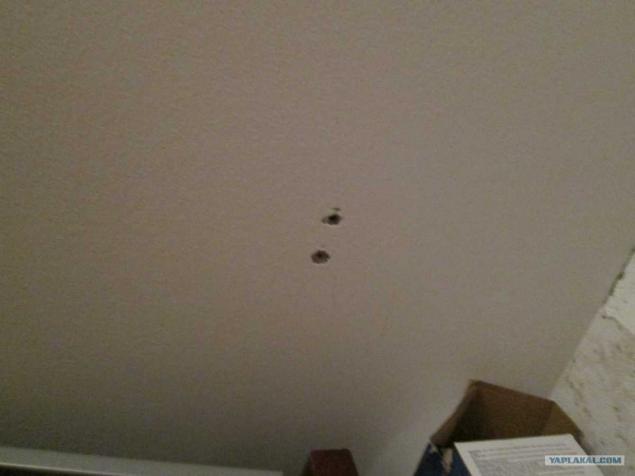
Photo 37. Establish directing. One to hang hemorrhoids. Better together.
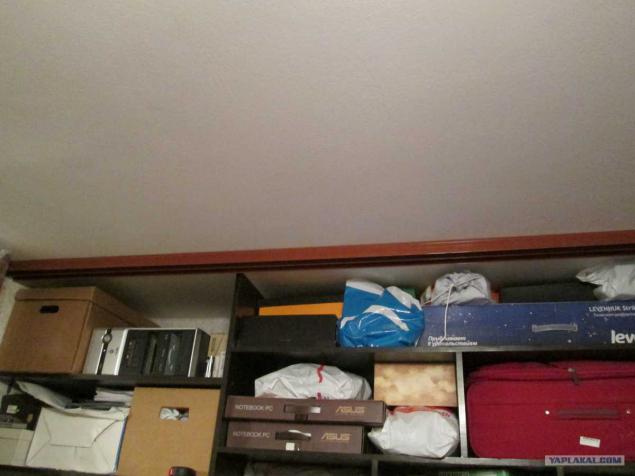
Photo 38. Dude, that brought the door said that it is better to install the bottom rail on the double sided tape. Firstly first easier handling, easier to mount and then (tearing upper layer). Well, we did.
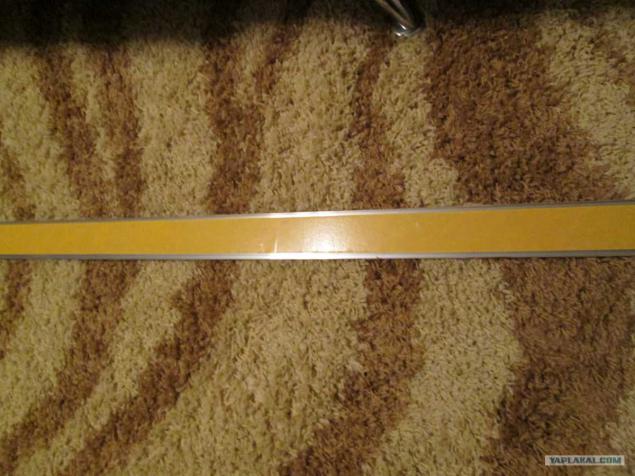
Photo 39. With the installation of the door no problem. The main thing is to work dvoem. One can not cope.
One person insert top rollers into the upper napravlyayuschuyuyu and the other draws in the lower rollers and inserts in the lower guide. Nothing complicated. Thanks to my beloved wife Julia, I would not cope without it))
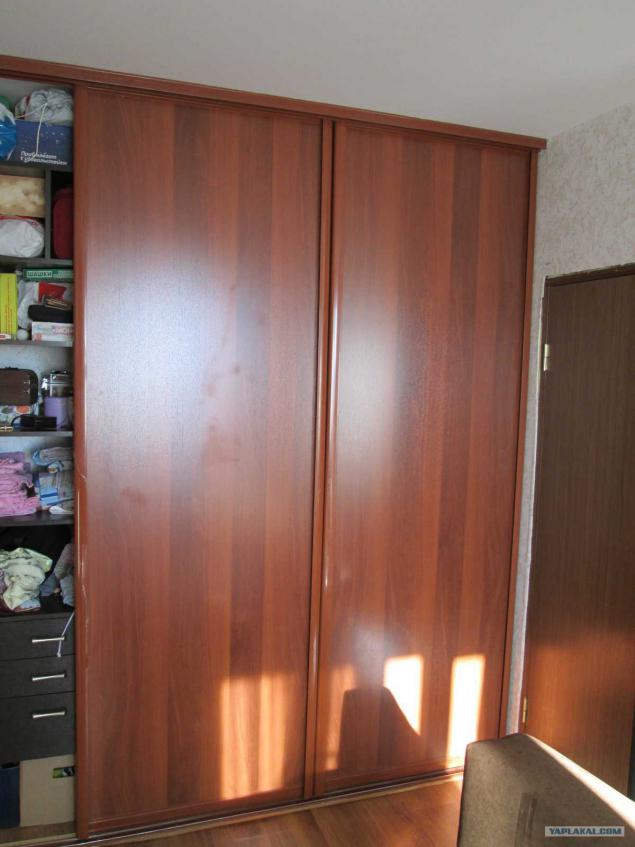
Photo 40. The final stage - adjustment of doors with the help of the hexagon and then gluing brush.
41. All photos wardrobe ready!

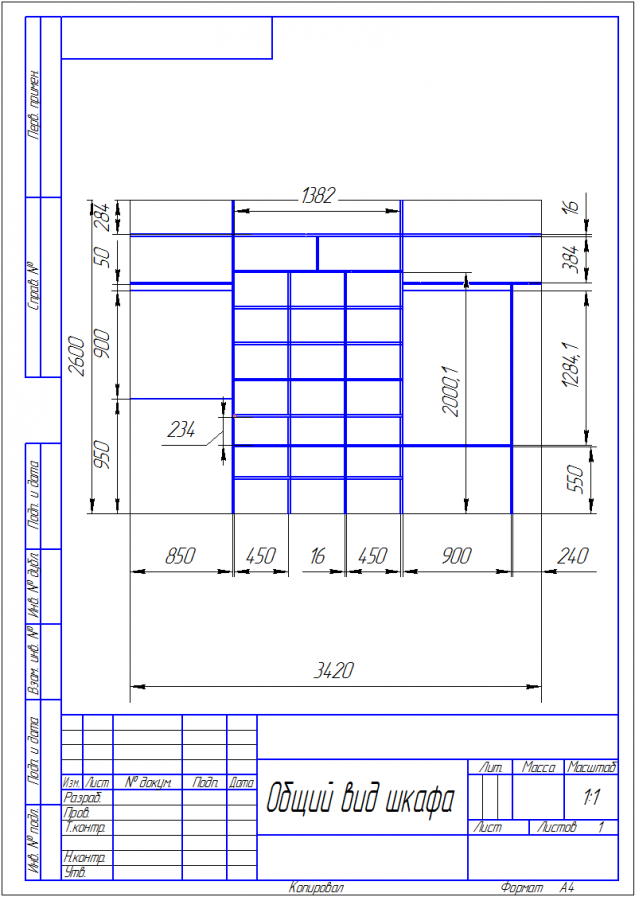
Photo 42. Forgot about drawing in the beginning of the post to add. Corrected.
Posted in [mergetime] 1413901844 [/ mergetime]
As promised the cost of building the cabinet:
Cutting and edging - 8920 rubles
Manufacturing of doors + shipping + Growth - 18337 rubles
Tools: 2500 rubles
Total: about 30,000 rubles. What exactly 1, 5 times less than the average price that we were offered for the wardrobe.
During construction I preobrel invaluable experience.
Thank you for your attention. We are glad to answer your questions.
42 photos and a lot of text

My wife and I entered into a new apartment, a studio. Naturally furniture from nothing. For the first time parents have given the old Soviet wall. At some point we realized that the wall is full, and the appearance of it left much to be desired. We had to do something.
An idea to buy a wardrobe for the whole width of the room. After a brief analysis of suitable furniture offices, I was horrified. The price of the cabinet with 4 doors was of the order of 50,000 rubles. This is without unit. At that time, and now, that kind of money was not. Therefore, it was decided to do it himself. Was "smoking" forums to learn the nuances of technology and construction.
So a preliminary description of wardrobe:
The total length of the cabinet (wall to wall) - 3420 mm
Cabinet depth: - 500 mm
Height from floor to ceiling - 2500 mm
Color: Wenge (as it turned out, my wife did not get a color computer desk)
Chipboard thickness - 16 mm.
The overall result of the money will report at the end of the post.
The first step, wardrobe was designed in the program Compass-3D. I designed it for a long time, about a month. All measured the house, my wife and I picked up the necessary content and arrangement of shelves and rods.
After a brief search, found the firm, which according to my size will make the cut and edging details of a future cabinet compartment. For the price you are: 8920 rubles. On the appointed day, I was with a friend (Andryukha hello!) Arrived to pick up the items. Only began to be loaded, then of course, as an evil, it began to rain. Stsuko! The most fun was found that two long element (2500 mm) in length do not climb into the car. About 600 mm protruding from the trunk. Well, nothing to do, I had to get out and ride well.
After the arrival and unloading of pieces of wood, I decided not to bathe and to begin construction of a new day. By the way, the time I had a lot, since I was at that time the unemployed. Photo 1. On the morning of wood were laid. And then I truhanul and realized that I should not have it all started. He walked with them, I thought, what is there to do. And away!

Photo 2. For convenience, all the elements were arranged and sorted.

To work were purchased:
- Mallet
- Konfirmatnoe drill
- Drill wood
- Evrovinty (Confirmates)
- Screw caps
- Gon
- The level of 400 mm
- 2 corner clamps
- Dowels
- Roller guides for drawers
- Wood saw
- Metal furniture corners
- Decorative furniture corners
- Template for drilling perpendicular
Since cable internet I have hidden in the plinth, had to be cut from the lower uprights recess under the plinth.
In the production of I originally ordered edging only one strony bearing elements (front side plastic edge 2mm), because it is not a cheap pleasure. Having read messages from the Internet that stands out from chipboard with time formaldehyde, bought in hardware store black melamine edge. Looked at a couple of spots obuschayuschego video and began to glue itself. Sometimes it turns out good, sometimes lousy. In any case, this will be to the side wall, will not be visible. In the photo 3, the process of gluing edges on the rear end.

Photo 4. Painstakingly Measure out the hole locations.

Photo 5. Attach elements decided not only by means of SCREW, but shkantami for strength. In the photo the process of drilling holes for dowels and Confirmates. Bought advance guard was not useful. With an eye estimation everything I normally so bored chipboard on the eye. By the way, do not ever drill does not go away.

Photo 6. Try on, insert the dowels into the holes and fasten SCREW future shelves.

Photo 7. The second stand ready.

Photo 8. Put our future middle of the cabinet. Try on the wall, like doing great! :)

Photo 9. Mount the cover (top shelf). It is important that everything was on the drawing and smoothly.

Photo 10. In order to smoothly attach attaches the corner clamp.

Photo 11. Screwing Confirmates. The main thing they do not win.

Photo 12. Again, try on))

Photo 13. On the way to the other member of the cabinet installation (right-hand side section with shelves)

Photo 14. For future began to pick out the outline of the closet :)

Photo 15. On the other hand the photo center and right sections.

Photo 16. Now it is the turn section under the stairs and ironing board.

Photo 17. The process of drill holes konfirmat. It is important that the drill was exactly at 90 (plus I do not have enough attention from others. Embrace me, and sundry. 5) degrees.

18. Screw the photo. We put the entire structure. Beauty!

Photo 19. The lower shelves are at the same level. So for them it was purchased specifically for 4 decorative corner furniture. Corners will not be visible because they will close facades boxes. In this photo captures the process of fixing these parts.

Photo 20. Installing shelves. Stood perfectly flush with the left shelf!

Photo 21. General view of the partially assembled cabinet))

Photo 22. Since clothes, lying in the kitchen, already rather tired, it's time to set the bar for clothes. In this niche will be stored jackets and long dresses wife.

Photo 23. At the same time and place directly under the bottom shelf of the bar. Under this "bulkhead" will place the vacuum cleaner and other bulky good.

Photo 24. As you can see I did not have time to finish the right side of the cabinet, as immediately wife hung things)) In the center of the top set of wood to stiffen the top shelf.

Photo 25. One of the most difficult installation - left carrier rack. One of her was very "fun" to fix.

Photo 26. uncollected until the end of the cabinet slowly began to fill! Part of the kitchen from the rubble dismantled.

27. Shirts Photo myatsya have already begun. Attached to them left the bar. The top bar is mine (that is, all sorts of pants and shirts will hang out there :)), the bottom bar - wife.

Photo 28. Fasten the last shelf. Here we see the same corners, attach them around the perimeter with a pitch of 200-250 mm.

Photo 29. Fill the closet!

Photo 30. Start making boxes. First, twisted two SCREW not angle. After the first box, I realized that enough for one.

Photo 31. Assembled box №1

Photo 32. At the bottom of the first box installed, as you can see, self-tapping screws. Tiring it! As a result, the bottom posleduschego boxes are mounted on the nails))
Posted in [mergetime] 1413901518 [/ mergetime]
Proschitalsya I terribly. Boxes will get less than a niche for them (photo 19). The gap was about 10 mm on each side. So I made a mistake in the calculations as much as 20 mm. Stsuko! E * I alsya the problem of the day 2. I thought, how best to proceed. As a result, had to barbaric methods:
a) Bought slats in Leroy, just the thickness of about 10 mm.
b) cut at the depth of the cabinet.
c) nailed to the studs (screws can not be, breaks)
d) set the roller guides
d) Metodok spear adjust the position of the height guides.
e) set the box and hung facade.
It turned nasty. Benefit facade closed boxes exactly the fruit of my shame!

Photo 33. In so look before you install the cabinet doors.
Posted in [mergetime] 1413901563 [/ mergetime]
Up to this point, the time I spent about 10 days. Worked mostly from 10:00 to 16:00. Tell me, what took so long? I explain: I had to drill each hole, vymeryat, glued edge to go to the store for the missing tools, etc.
With doors fared miserably. I myself did not dare to do them (after a puncture with drawers), decided to order a special. office. But the money vanished quickly and on a large amount of time on the doors had to forget.
4 months cupboard was no door, I went to work, and like something to earn)) Well, my wife and I decided to finally finish this case. The company ordered gager door (to see if that they blame lay down), with delivery and lift on the 24th floor (the good freight elevator available). Doors come at a cost ... as promised at the end of the review will tell you about the price.
Color Select another, because, as I wrote at the beginning of Lent, the color of the cabinet did not come to the other furniture.

Photo 34. Arrived bought door. Total 4 doors: 2 chipboard, 2 mirrors.
Dude briefly explained how to install them. Yes, and I'll read the information in the internet, in general there are no difficulty.

Photo 35. Mark up top rail.

Photo 36. Make a hole in the ceiling. I'll tell you, I was "lucky". Two holes occurred right in the armature. There is no comment, but I swore a long time)) I had to drill elsewhere.

Photo 37. Establish directing. One to hang hemorrhoids. Better together.

Photo 38. Dude, that brought the door said that it is better to install the bottom rail on the double sided tape. Firstly first easier handling, easier to mount and then (tearing upper layer). Well, we did.

Photo 39. With the installation of the door no problem. The main thing is to work dvoem. One can not cope.
One person insert top rollers into the upper napravlyayuschuyuyu and the other draws in the lower rollers and inserts in the lower guide. Nothing complicated. Thanks to my beloved wife Julia, I would not cope without it))

Photo 40. The final stage - adjustment of doors with the help of the hexagon and then gluing brush.

41. All photos wardrobe ready!

Photo 42. Forgot about drawing in the beginning of the post to add. Corrected.
Posted in [mergetime] 1413901844 [/ mergetime]
As promised the cost of building the cabinet:
Cutting and edging - 8920 rubles
Manufacturing of doors + shipping + Growth - 18337 rubles
Tools: 2500 rubles
Total: about 30,000 rubles. What exactly 1, 5 times less than the average price that we were offered for the wardrobe.
During construction I preobrel invaluable experience.
Thank you for your attention. We are glad to answer your questions.

Tags
See also
The manipulation of emotion: How not to do what you want
Let's get married: how celebrities make an offer
As I was doing the sled snowmobile
How to do it: President's visit to the exhibition
Madagascar. How are things pan
As I was doing repairs in the bathroom.
To the Pacific Ocean on a motorbike - 2012
As I was doing repairs in the room
How do I make furniture
My repair. At this time the bedroom.