Introducing the new 3D-printer MakerBot Replicator 5th generation
 Bashny.Net
As everyone already knows, the company released a new generation MakerBot 3d printers .
And came to us from our friends brand new MakerBot Replicator 5th generation for testing.
Company all a bit confusing with their names, but this is the new model of their printers.
A little bit about this printer is already told .
Just specify in our center Youth Innovation creativity there are many 3d printers: two MakerBot Replicator 2, two UP! Plus, BFB 3D Touch 2 head and CubeX trio.
With all the printers we have worked very closely, and we know all the advantages and disadvantages, and we compare it with the new device available equipment. I'll tell you a lot of small moments which stumbled in the first week.
Boxes get hefty. More than 16 kg.

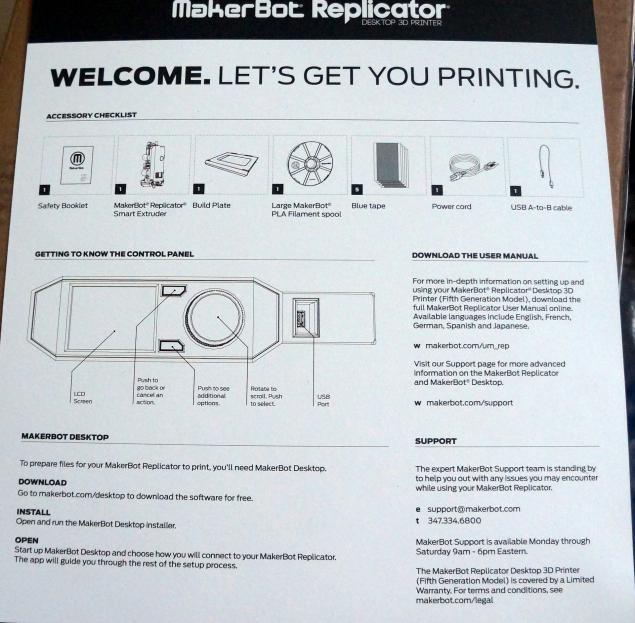
Inside awaits us very little instruction. These steps do not quite correspond to reality, but first things first.
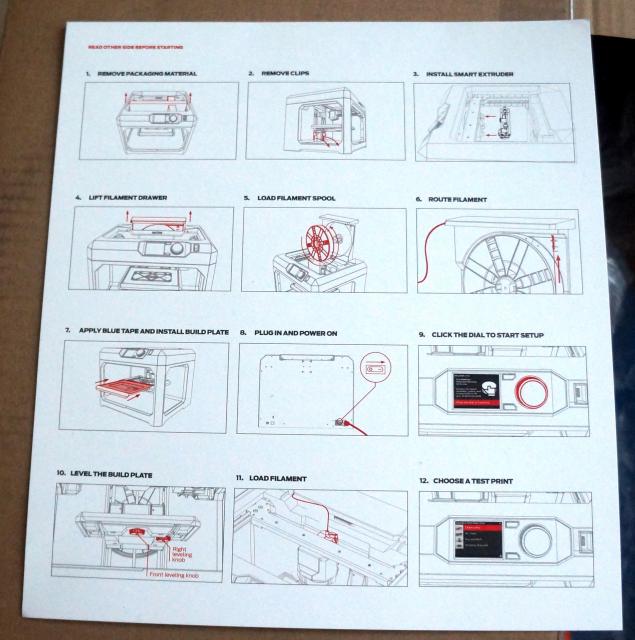
In the second step we expect notable clips for securing the platform. They are made to meykerbote and very high quality.

Next there is a magnetic connection «smart extruder». More precisely it should be called & quot; Not so smart extruder & quot ;.
There is one axiom: "A simple mechanisms break down less." Here the company has decided not to listen to anyone and did extraordinarily complex mechanism. It was a mysterious inscription MK11 V5. I really hope that this test sample. The extruder itself is assembled by snap (thanks to that external). Plastic latches break easily, so be extremely careful!
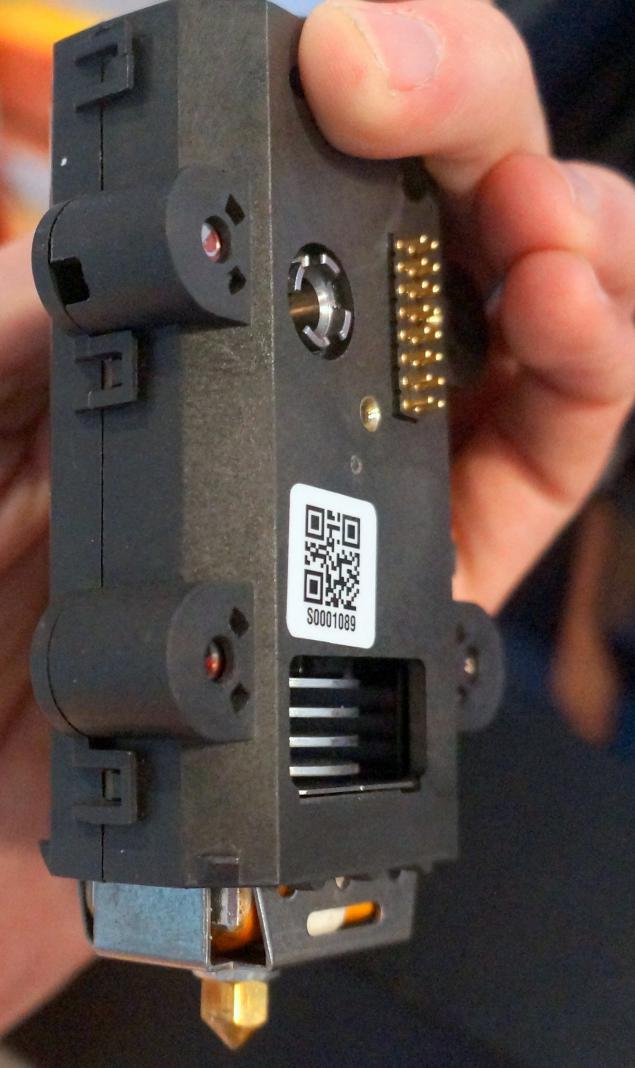
I will begin the description of the mechanism of top-down.
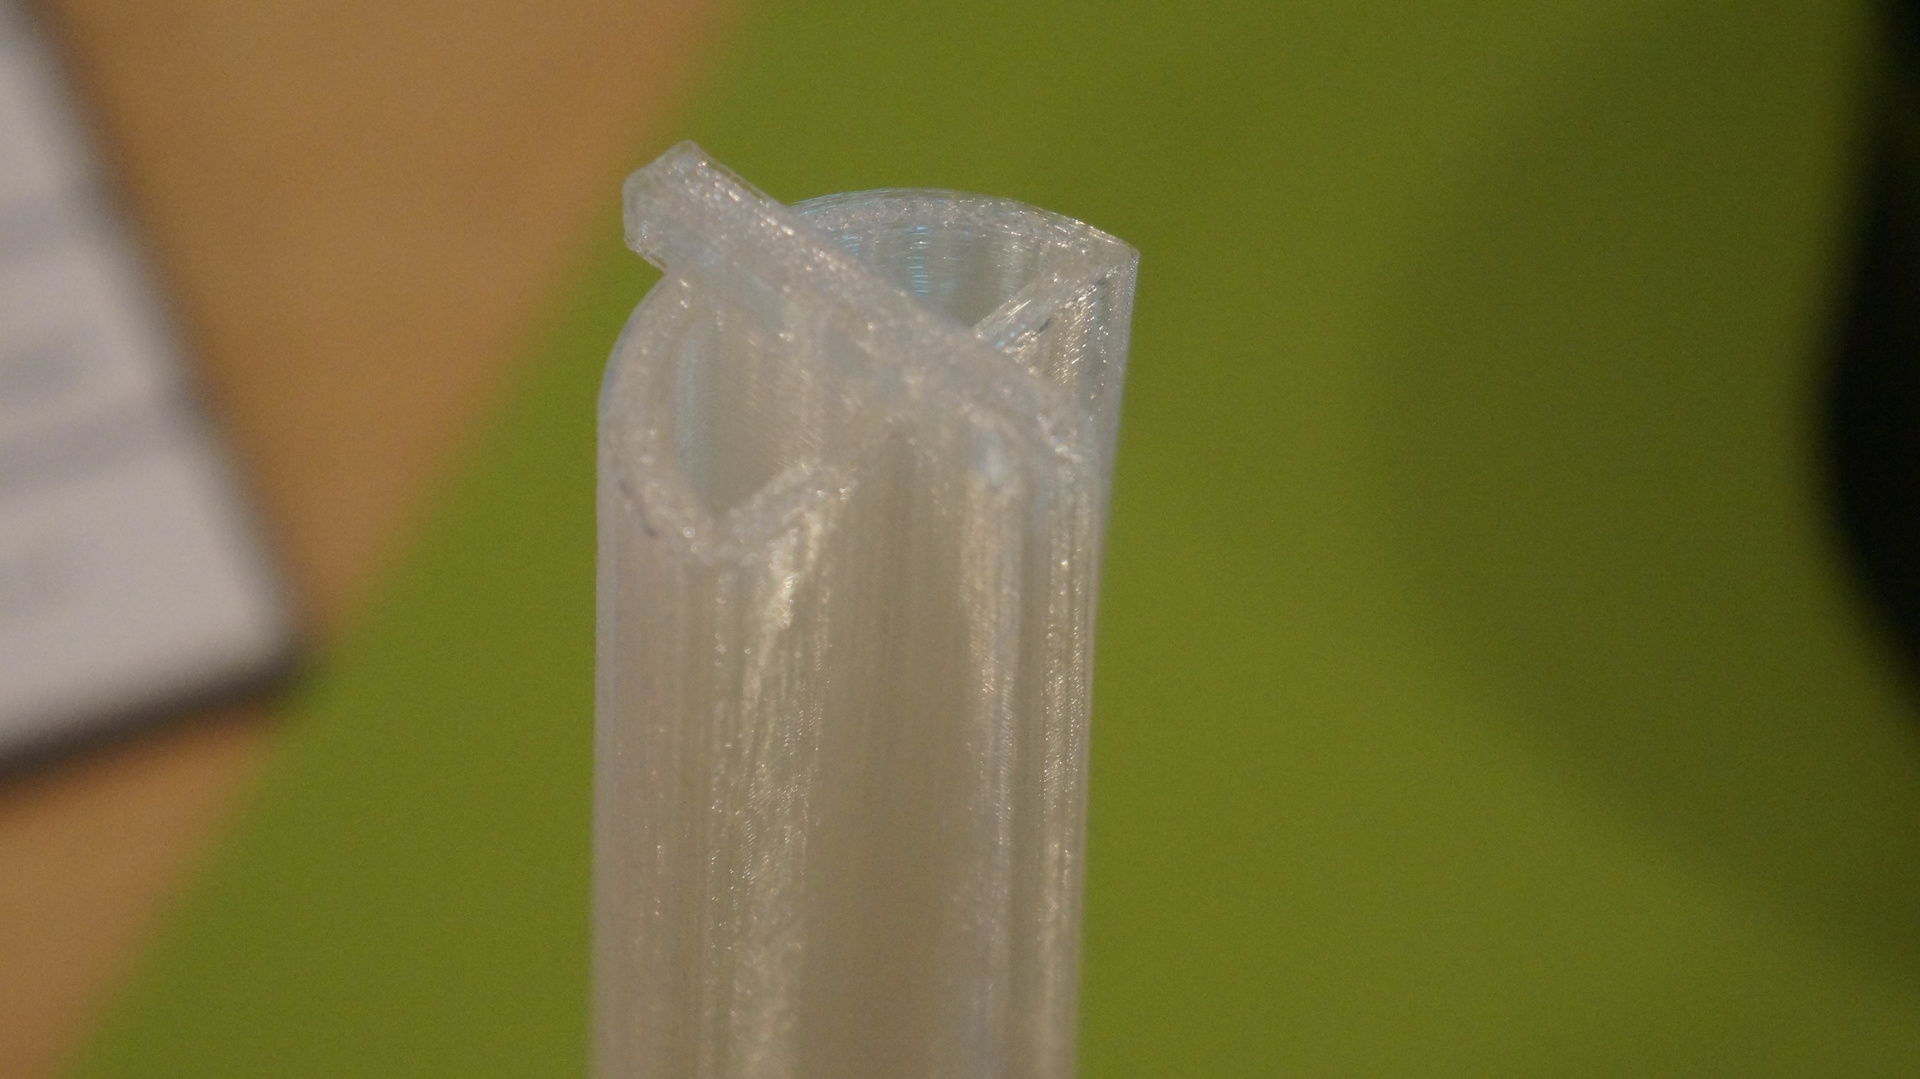
The first thing I vizhu- hole is inclined to enter. But it does not work. In the assembled state, the plug in and it redirects to the vertical input. After ingestion we get a large wheel, which apparently serves to detect the presence of plastic in the extruder. This is a very nice feature that is lacking in other printers. And this wheel is sticking out and you can visually see whether or not the plastic.

Then we get to the heart of any ekstrudera- it pushes mechanism. It is made of solid shaft with two bearings and additional clamping bearing. They realized that such a mechanism is better than what was used in the first revision Replicator 2. But for some strange reason, this mechanism is very poorly drawn plastic. Spring is very powerful and there apparently affects not optimal geometry deepen the shaft.
On the rear side of the brains are attached extruder with multiple external pins. These pins are spring loaded and should be tightly in contact with the printer itself. This helps 4 very powerful magnet. But here's the rub, when docking smart extruder motor battlements battlements and broaching mechanism often do not coincide. For a normal person will not be difficult to check whether all signed up, the more he writes about the absence of a printer print head.
Then the engineers have tried their best and did the heating head, which is able to sit up during operation. This greatly improves the accuracy of printing due to lack of use axis Z. This is done by reversing the motion of plastic. Plastic as it pulls the heating element. Immediately they built the touch sensor. Here all the simplicity when moving head, opens the metal contacts.
We now turn to plastic:
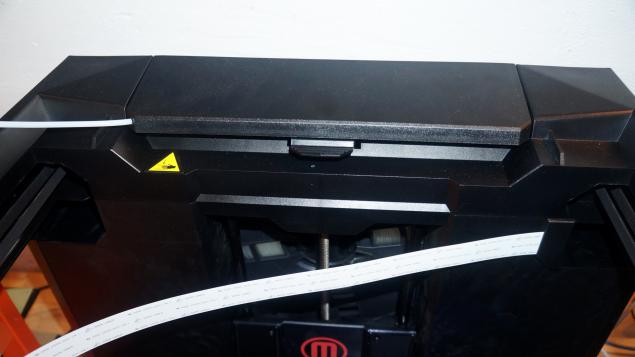
Loading now he's in a nice vertical slide-out drawer. Make a small lever to lock.

Very nice and quietly looks when closed.
Attention! Now coil become narrower and greater in diameter. Old Reels do not fit!
The photo is not visible, but the wider coils do not fit into this compartment. Released two, buy only original plastic from the official site, or use external devices for holding plastic. The diameter of the rod remained prezhnim- 1.75mm.

This plastic is pulled through a narrow and long tube. Noticeably heavier than him go.
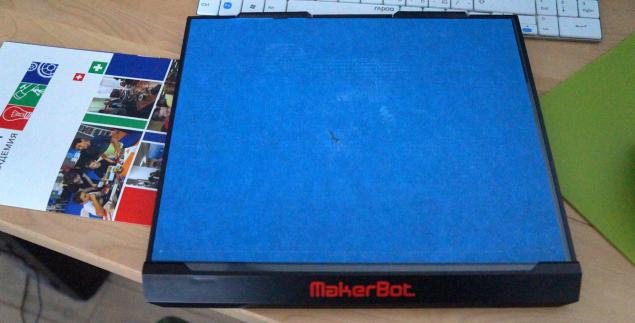
Further references platform. There is only one happiness! She is now in a glass and comes complete a full five stickers BlueTape. Has increased by 11% compared to the previous generation. Now secured on the sled. Tightly and securely. A fine plastic sticks to the platform.
Like with all the mechanical part. You're all run.
Included was no power cord with European plug, but it was decided by a simple adapter.
Another very good uluchshenie- now besides connecting to a computer via USB there is a cable connection Ethernet!
Further instructions little lies.
We hooked up a computer via USB, turn on power. And after a long download printer issues a message that the firmware is required and nothing else. Now for the printer is not responsible MakerWare, and MakerBot Desktop .

The program is not directly connected to the printer and have not the first time been able to find the firmware for it. Again helps tambourine with reboot. The very process of downloading the firmware is pretty tedious and takes minutes 15.
After that, the printer booted. By the way, each time the printer is loaded very long, more than 3 minutes.
Beginning of the initial installation. The first thing he checks the level of the platform with the help of his clever extruder (he does this every time before printing). Then it checks the two control points and forgive tweak two knobs. The calibration process is very simple and intuitive.
Then he offers to print a test pattern. For some reason, the model did not want to print, and the printer to skip this step did not give. I had to reboot.
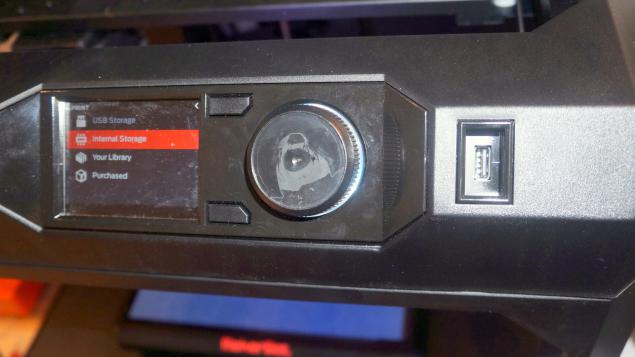
All actions are accompanied by clear instructions on the large color display. Although the printer slows down a bit more on the menu and no one yumorkom droplets as in the second version, the management much easier and friendlier. The printer now supports common USB drives (no included).
Slightly amused falling off metal sticker central button.
The printer has a camera. Resolution and quality is very mediocre, but to understand what is happening there can be.
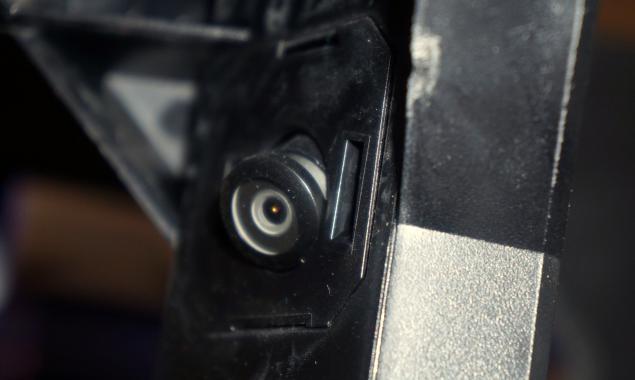
The camera is not able to shoot video and take photos for long enough. Example photo below.

Get a photo with the printer directly to your computer if you can only connect via Ethernet.
Through it can also connect an account at thingiverse.com . Yes, without account program will not work.
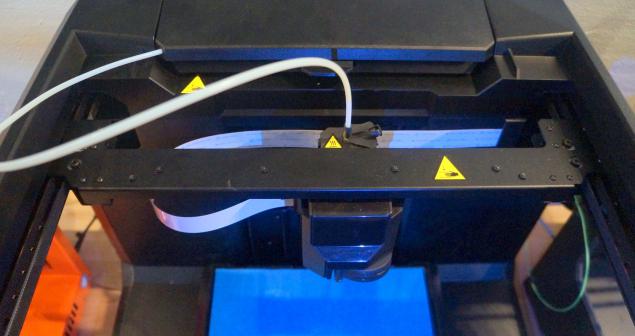
Still a little bit about the structure. Huge big block in the middle contains the motor for axis X. There's only motor for plastic, two fans and LED (which never shone never). Control of this axis through the difference of the left and right belt. Solution for non-standard 3D-printers, but in the industry it is quite common.
Summary of findings:
+ To increase and improve the platform
+ A bit more precisely
+ Convenient operation and excellent display
+ There is a camera
+ Connecting via Ethernet
+ The printer does not print lose connection when connection is broken
+ Improved extruder
+ Automated calibration
+ More friendly for ordinary layman
- Lost in speed to a second replicator
- Many bugs related to software
- Very expensive model
- Much louder than the other printers
- Long and often auto-calibration
- Stopped normally tighten the plastic in a week
- Extruder has serious flaws
I really hope that all correct in the new samples and it will be the best 3D-printer.
Thank you all!
Waiting questions and reviews of other owners of this novelty.
UPDATED!
Video sample started Makerbot
Photos printed models (standard fast mode)
Photo №1
photo №2
photo №3
Source: habrahabr.ru/post/220535/
And came to us from our friends brand new MakerBot Replicator 5th generation for testing.
Company all a bit confusing with their names, but this is the new model of their printers.
A little bit about this printer is already told .
Just specify in our center Youth Innovation creativity there are many 3d printers: two MakerBot Replicator 2, two UP! Plus, BFB 3D Touch 2 head and CubeX trio.
With all the printers we have worked very closely, and we know all the advantages and disadvantages, and we compare it with the new device available equipment. I'll tell you a lot of small moments which stumbled in the first week.
Boxes get hefty. More than 16 kg.

Inside awaits us very little instruction. These steps do not quite correspond to reality, but first things first.


In the second step we expect notable clips for securing the platform. They are made to meykerbote and very high quality.

Next there is a magnetic connection «smart extruder». More precisely it should be called & quot; Not so smart extruder & quot ;.
There is one axiom: "A simple mechanisms break down less." Here the company has decided not to listen to anyone and did extraordinarily complex mechanism. It was a mysterious inscription MK11 V5. I really hope that this test sample. The extruder itself is assembled by snap (thanks to that external). Plastic latches break easily, so be extremely careful!

I will begin the description of the mechanism of top-down.
The first thing I vizhu- hole is inclined to enter. But it does not work. In the assembled state, the plug in and it redirects to the vertical input. After ingestion we get a large wheel, which apparently serves to detect the presence of plastic in the extruder. This is a very nice feature that is lacking in other printers. And this wheel is sticking out and you can visually see whether or not the plastic.

Then we get to the heart of any ekstrudera- it pushes mechanism. It is made of solid shaft with two bearings and additional clamping bearing. They realized that such a mechanism is better than what was used in the first revision Replicator 2. But for some strange reason, this mechanism is very poorly drawn plastic. Spring is very powerful and there apparently affects not optimal geometry deepen the shaft.
On the rear side of the brains are attached extruder with multiple external pins. These pins are spring loaded and should be tightly in contact with the printer itself. This helps 4 very powerful magnet. But here's the rub, when docking smart extruder motor battlements battlements and broaching mechanism often do not coincide. For a normal person will not be difficult to check whether all signed up, the more he writes about the absence of a printer print head.
Then the engineers have tried their best and did the heating head, which is able to sit up during operation. This greatly improves the accuracy of printing due to lack of use axis Z. This is done by reversing the motion of plastic. Plastic as it pulls the heating element. Immediately they built the touch sensor. Here all the simplicity when moving head, opens the metal contacts.
We now turn to plastic:
Loading now he's in a nice vertical slide-out drawer. Make a small lever to lock.

Very nice and quietly looks when closed.

Attention! Now coil become narrower and greater in diameter. Old Reels do not fit!
The photo is not visible, but the wider coils do not fit into this compartment. Released two, buy only original plastic from the official site, or use external devices for holding plastic. The diameter of the rod remained prezhnim- 1.75mm.

This plastic is pulled through a narrow and long tube. Noticeably heavier than him go.
Further references platform. There is only one happiness! She is now in a glass and comes complete a full five stickers BlueTape. Has increased by 11% compared to the previous generation. Now secured on the sled. Tightly and securely. A fine plastic sticks to the platform.

Like with all the mechanical part. You're all run.
Included was no power cord with European plug, but it was decided by a simple adapter.
Another very good uluchshenie- now besides connecting to a computer via USB there is a cable connection Ethernet!
Further instructions little lies.
We hooked up a computer via USB, turn on power. And after a long download printer issues a message that the firmware is required and nothing else. Now for the printer is not responsible MakerWare, and MakerBot Desktop .

The program is not directly connected to the printer and have not the first time been able to find the firmware for it. Again helps tambourine with reboot. The very process of downloading the firmware is pretty tedious and takes minutes 15.
After that, the printer booted. By the way, each time the printer is loaded very long, more than 3 minutes.
Beginning of the initial installation. The first thing he checks the level of the platform with the help of his clever extruder (he does this every time before printing). Then it checks the two control points and forgive tweak two knobs. The calibration process is very simple and intuitive.
Then he offers to print a test pattern. For some reason, the model did not want to print, and the printer to skip this step did not give. I had to reboot.
All actions are accompanied by clear instructions on the large color display. Although the printer slows down a bit more on the menu and no one yumorkom droplets as in the second version, the management much easier and friendlier. The printer now supports common USB drives (no included).

Slightly amused falling off metal sticker central button.
The printer has a camera. Resolution and quality is very mediocre, but to understand what is happening there can be.

The camera is not able to shoot video and take photos for long enough. Example photo below.

Get a photo with the printer directly to your computer if you can only connect via Ethernet.
Through it can also connect an account at thingiverse.com . Yes, without account program will not work.
Still a little bit about the structure. Huge big block in the middle contains the motor for axis X. There's only motor for plastic, two fans and LED (which never shone never). Control of this axis through the difference of the left and right belt. Solution for non-standard 3D-printers, but in the industry it is quite common.

Summary of findings:
+ To increase and improve the platform
+ A bit more precisely
+ Convenient operation and excellent display
+ There is a camera
+ Connecting via Ethernet
+ The printer does not print lose connection when connection is broken
+ Improved extruder
+ Automated calibration
+ More friendly for ordinary layman
- Lost in speed to a second replicator
- Many bugs related to software
- Very expensive model
- Much louder than the other printers
- Long and often auto-calibration
- Stopped normally tighten the plastic in a week
- Extruder has serious flaws
I really hope that all correct in the new samples and it will be the best 3D-printer.
Thank you all!
Waiting questions and reviews of other owners of this novelty.
UPDATED!
Video sample started Makerbot
Photos printed models (standard fast mode)
Photo №1
photo №2
photo №3
Source: habrahabr.ru/post/220535/
Tags
3D printer
3D printing
innovation
TSMIT
TSMIT Academy
makerbot
makerbot industries
3d-print
3d-printing
3d-printer
replicator
See also
The secret of friendship from the poet and prose writer Bakhyt Kenzheeva Peter Obraztsova. A win-win formula!
Martin Heidegger: what it really means to "think"
10 inventions invented by women
Unexpected things that can be printed with the help of 3D-printer
On the 3D-printer printed the most high-tech bike in the world
Home 3D-printer
Laser printers and consumables: a reminder of choice and life extension
RAR Print - homemade 3D printer from CD ROMs
Only four of your friends on Facebook are "real"
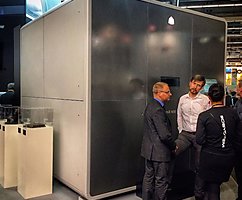
What will the business 3D-printing: 3DPrintshow exhibition in London


