What is infrared photography.
 Bashny.Net
I offer you a selection of so-called infrared photography. Given that perhaps someone will be interested in how this is done in addition to photons and some of the letters. Text certainly reduced and slightly edited, since this post is not so much teaching how familiarize. Personally, I found out about it only today
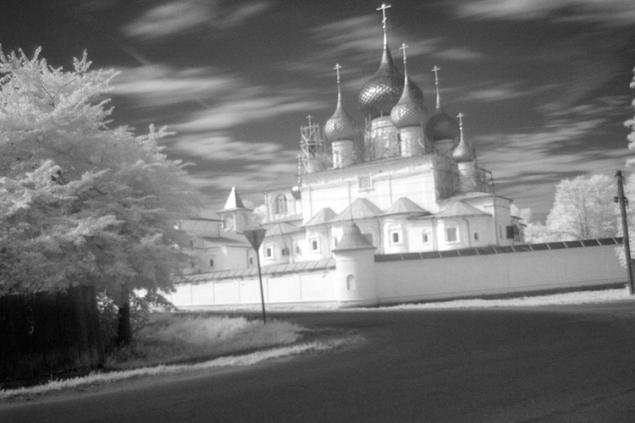
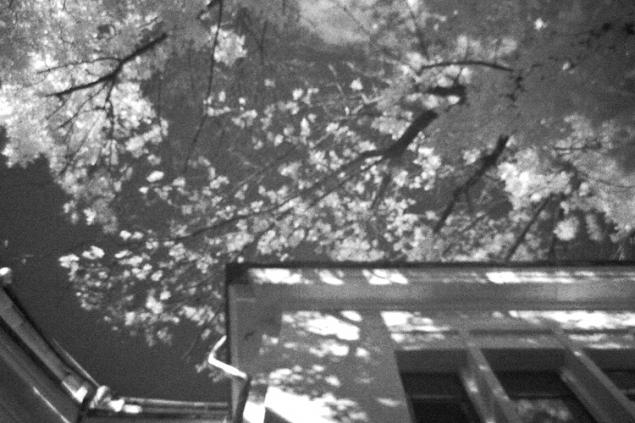
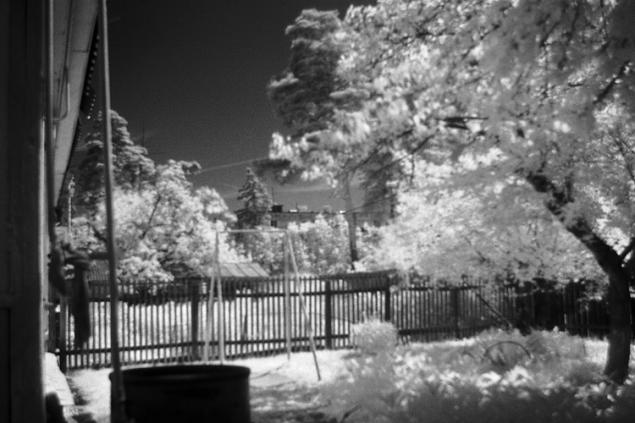
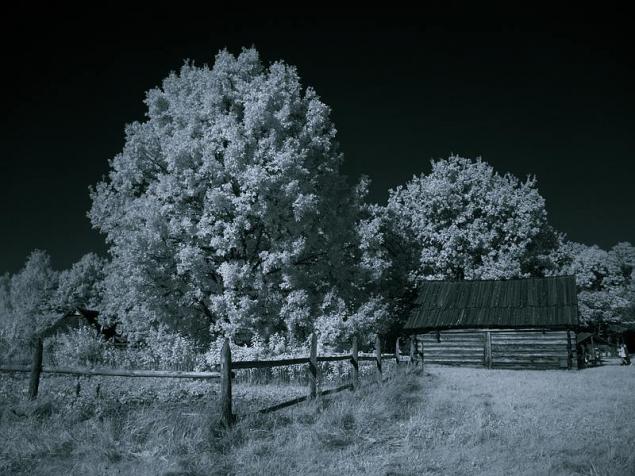
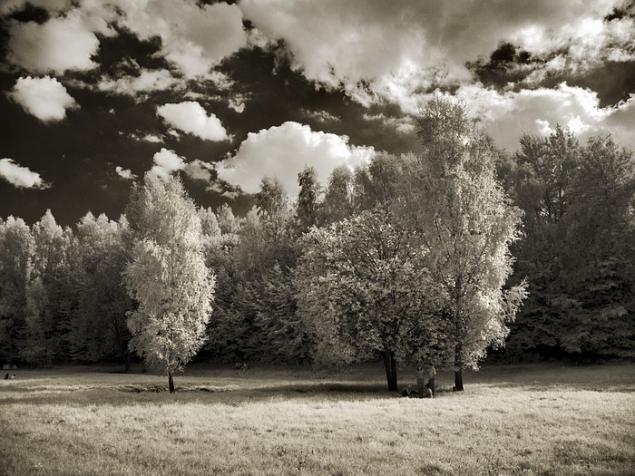
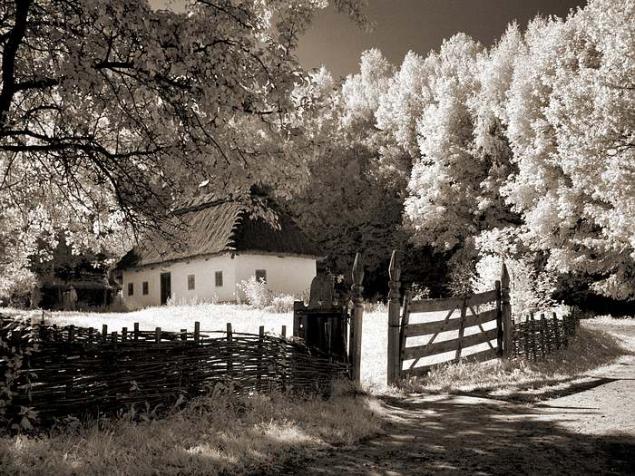
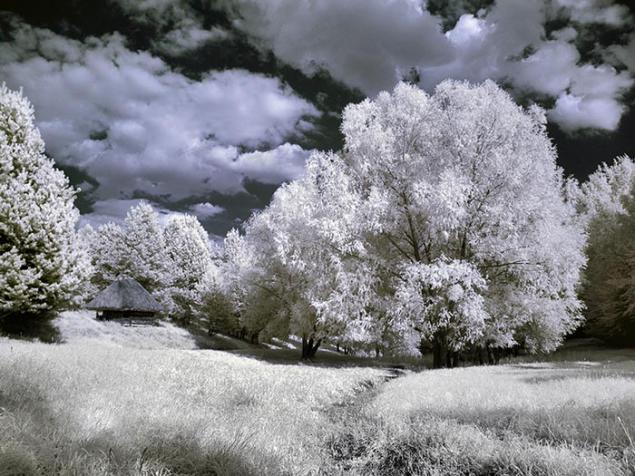
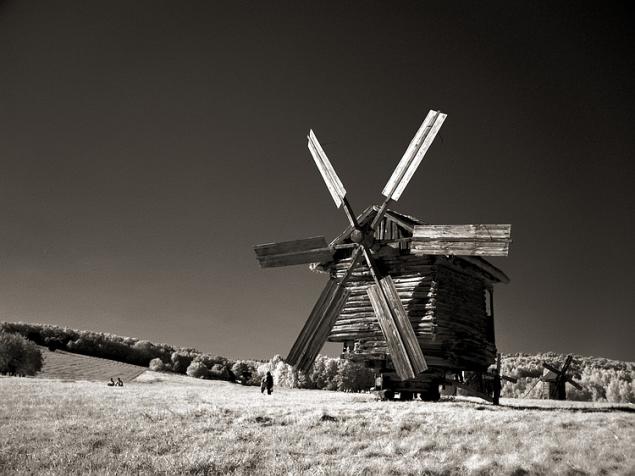
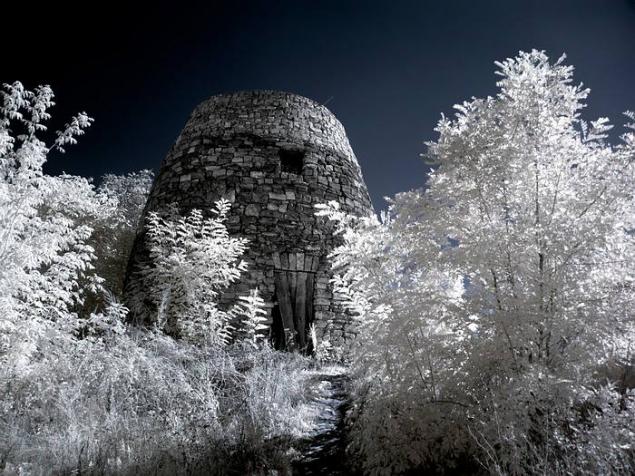
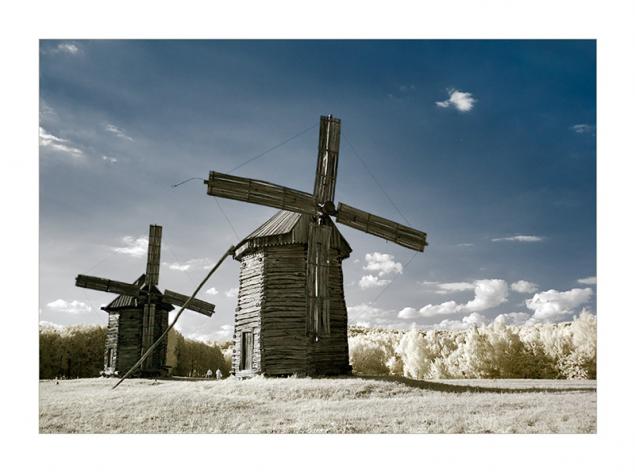
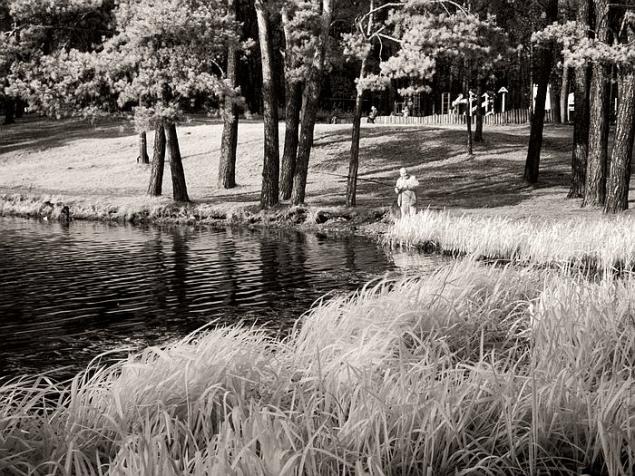
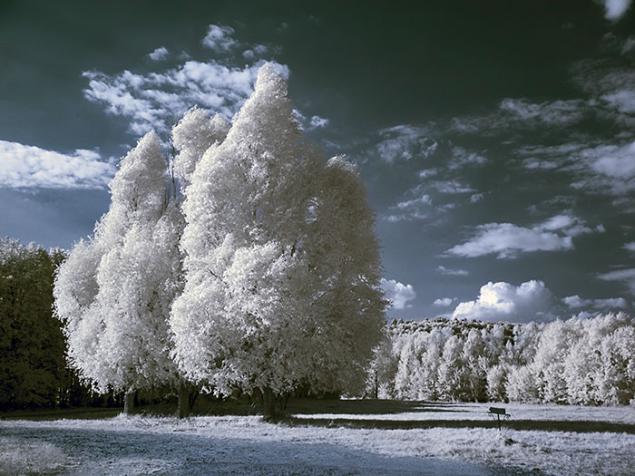
The most attractive in infrared photography is that in it we see the world, which is not visible to the eye. It's another dimension, another reality. She at first glance may seem dead, frozen, but if you look and listen, then it can be seen life. Several other, but life. Try to scrutinize and listen, but do not be alarmed. © Evgeny Lyulyukin first 3 of his likely.
13 ph and enough letters
When talk about the art of photography is often said that the skill of the photographer is not to take pictures beautifully and without that beautiful and to show something beautiful that others do not notice passing by.
D. Katkov
While it is impossible to capture infrared eyes to see the alleged plot. It can only be felt - the soul. Actually, this picture is the same shaky and barely perceptible, as our dreams and fantasies.
Luis Castañeda
Have you noticed how many various fotoresursah landscape photographs? Indeed, the landscape of the genre, in which each holder of the camera can try their hand. Someone get better, someone worse, but there comes a time when you want to do something unusual, to allocate their work from the total mass of photos. Sooner or later, any writer who wants to expand his creative range, begins to search for something new, not previously shown by others.
Today we all know that visible light - is only a small part of the broad electromagnetic spectrum, which includes radio waves and gamma rays. Nearby spectrum - ultraviolet and infrared - may be used in photography as they refract objective lens, and the image may be focused onto the film. For infrared photography uses near infrared region - up to 1350 nm
Infrared radiation is outside the visible range, and therefore imperceptible to the human eye. He first discovered the Englishman William Herschel in 1800, the year. At first, astronomers used infrared photography, used in agriculture for aerial photography, the military (where without them), still used by restorers at work with paintings of great artists, and finally a photo. The first film sensitive to infrared (IR) rays, appeared in 1931. Who infrared film manufactured by Agfa, Ilford, Konica Minolta, Kodak, but these films are not only inaccessible, but also require special handling. Not only that, due to increased sensitivity they need to charge and store the full (absolute) dark, so even if you are waiting for film development issues, transportation and storage, as infrared films have a much shorter shelf life and use, unlike conventional and partly to light they may even infrared frame counter in your camera.
Fortunately for us, the matrix of a digital camera copes with the task of producing an infrared image is not worse than the special, and this film is whimsical.
Filters
Almost all manufacturers have filters in its line of infrared models.
After the market monitoring of these filters has developed the following opinion - buy IR filter in our photo shops is almost impossible. There are several reasons. This is quite high price (87 TIFFEN filter diameter 77mm costs about 200-250 USD), and low demand for such products, and the need for procurement of filter Party (and who of the sellers want to build their additional trade balances?)
For those who like the filter is not found or is not willing to spend a considerable amount on the infrared experiments have quite a simple way. Go to any photo lab, where they work with a "slide" film and ask for a piece of non-illuminated, but manifested reversible (ie, the "slide") photographic film, its you and will be used as a low-pass filter at the beginning (manifested emulsion retards the radiation of the range of the spectrum to which the sensitive photographic film (ie, the entire visible range), skipping everything else (ie ultraviolet and infrared).
Technique
To determine whether your camera is suitable for shooting in the infrared range is very simple, taking any remote control (as we know it emits infrared rays) and in total darkness by sending it to the lens of the digital device. If you see a point of light on the display, the device is sensitive to infrared rays, and you can continue the experiment.
However, some cameras have a so-called filters Hot Mirror primary function - to prevent occurrence of moire, avoiding matrix sensors to infrared rays with a wavelength greater than 800nm.
There is also the option of just too extreme - the point is that the cut-off filter is removed from the chamber and instead, put the infrared. For normal shooting, this camera is not suitable, but the IR gives a great result.
Some devices also have a special mode Night Shoot - «Night Scene". In this mode, a filter that cuts infrared region of the spectrum, is mechanically removed from the optical system.
The result is big enough sensor sensitivity in the infrared range, which allows you to shoot at shutter speed and receive low noise in the final image. It should be noted that the shooting in this mode is possible with shutter speeds of 1/30 not shorter, not longer question why it is necessary to use the neutral gray filter. I use ND8 or ND4, depending on the lighting, as well as using the exposure compensation and controls the brightness of the picture on the histogram.
Equipment Shooting
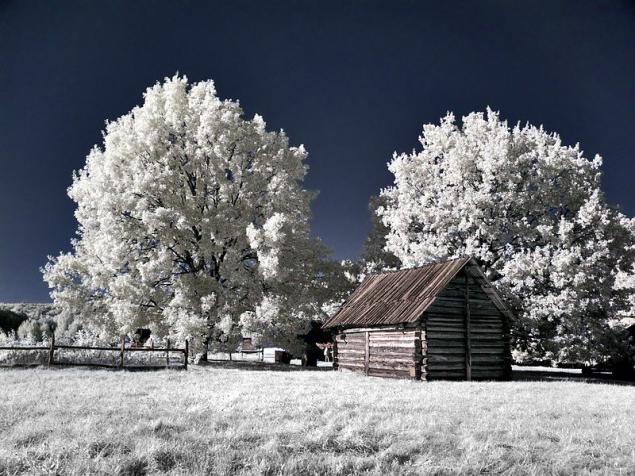
What does an ordinary photographer pezazhist at noon? That's right, is forced to relax, because shoot at midday sun landscape - enjoy very questionable. Sharp, deep shadows, brightness big swings - all this is not conducive to creating a good landscape shot. It is quite another thing, if your camera bag has a low-pass filter. Bright sunshine turn to your friend, because it is the main source of infrared radiation, the sky is not necessary pritemnyat gradientnikom (and so it is almost black), infrared photography allows great show texture and effectively emphasize the bright illuminated leaves.
SLR cameras for shooting.
Unlike normal digicam, there are certain problems with sight and sharpness, as infrared filters and implement a transparent focus on the subject with a stranded filter is problematic. Only one way out - the camera on a tripod, sight and framing is done without the filter, the filter and then cheat to make the frame. At the same time, you can not rely on the autofocus. Automation allows for the characteristics of refraction in the visible range, while infrared light is refracted differently. So better to direct the focus of the distance scale, while placing it a little closer to the actual distance to the object. In addition, it is useful to increase the depth of field using a diaphragm until f18-22. Some lenses have a label to focus when infra-red photography, use it by combining with it the distance scale on the lens. Be sure to close the viewfinder window flap to prevent further exposure and do not forget to do some shots with AEB in increments of 1 - 2 EV control histogram (focus light). Pay attention to the white balance when shooting is not RAW. Ideally, it is necessary to set the W / B on the illuminated leaves, while in the post-processing, it will be much easier to get an acceptable result.
Postprocessing
For final finishing have to use editing as the resulting image is far from optimal and those beautiful infrared photos that you see on websites and in magazines, your footage is a little similar.
1. First, open your photo editor and carefully read the channels. As a rule, all the brightness contained in the red channel, the sharpness of the green, blue noise, but can also be options.
2. Next, go to the menu "Image" and open levels (screenshot), which move the histogram sliders, leading to an acceptable image tonal range by controlling the readings of the histogram.
3. After that, applied to the image command "Auto Levels»
4. The next step - the mixer channels, carefully read their contents. In the red channel produce a replacement for the blue and blue, to red.
5. Then apply the "filter shadows / light" to equalize the tonal range of the frame around with these settings (screenshot) Do not overdo it, and then the image will appear unnatural.
Satisfied with the results?
If not, move the sliders in the mixer is endless, achieving the desired color.
There are also more simple way, if your goal is to get a black and white photo. After the operation with the "Auto Levels", you go to a mixer channel and move the sliders, do not forget to put a tick in the checkbox "shades of gray." Thereafter, the image can be toned to taste, by any known method.
The second method is a little more complicated and more suitable for shots taken in RAW.
1. convert photos, do not forget to click white balance pipette on any green in the picture.
2. Next, go to the menu "Image" and open levels (screenshot), which move the histogram sliders, leading to an acceptable image tonal range by controlling the readings of the histogram.
3. Translate the photo in LAB space, and the team Apply Image (screenshot) combine channels to your liking. And you can not translating into LAB, try to "knead" channels at its discretion
4. The frame is then converted back to RGB and carry out the final fine-tuning levels and instrument shade / light
5 Tips:
1. Do not be lazy! Look for a frame, think before you pull the trigger. If you find an interesting place, do multiple takes from different angles, look closely at the coverage may make sense to come to this place later, when the light will be more interesting.
2. If there is a possibility - shoot in RAW. Quality, convenience and variety of processing more than offset during the conversion, and file size. This is especially important when shooting in infrared because It will yield interesting results at different white balance settings.
3. States - the best friend of the landscape, and for the landscape, to shoot in IR - he has become almost a relative. If there is a heavy and steady tripod (or too lazy to drag along) Use the remote control or timer of your camera, to reduce camera shake.
4. Study program postprocessing. The digital infrared photography without further processing in the editor, you will hardly acceptable results get. It is not necessary to learn Photoshop is sufficiently lighter editor, such as Photoshop Elements or the like.
5. Thoroughly get your hands on your technique, know its strengths and weaknesses. Sometimes, time is to make a good picture is very little, do not waste it "talks" with his camera, talk to her in advance. For example, not all cameras reliably reflect the information in the histogram, taking as a basis only the green channel. The result - you run the risk of overexposure, which can not be corrected in any editor.
...
I almost forgot: the date of the first 3 ph - July 2010.
Article Date: 25.06.2010 at 11:47
everything!
Source:
The most attractive in infrared photography is that in it we see the world, which is not visible to the eye. It's another dimension, another reality. She at first glance may seem dead, frozen, but if you look and listen, then it can be seen life. Several other, but life. Try to scrutinize and listen, but do not be alarmed. © Evgeny Lyulyukin first 3 of his likely.
13 ph and enough letters

When talk about the art of photography is often said that the skill of the photographer is not to take pictures beautifully and without that beautiful and to show something beautiful that others do not notice passing by.
D. Katkov

While it is impossible to capture infrared eyes to see the alleged plot. It can only be felt - the soul. Actually, this picture is the same shaky and barely perceptible, as our dreams and fantasies.
Luis Castañeda

Have you noticed how many various fotoresursah landscape photographs? Indeed, the landscape of the genre, in which each holder of the camera can try their hand. Someone get better, someone worse, but there comes a time when you want to do something unusual, to allocate their work from the total mass of photos. Sooner or later, any writer who wants to expand his creative range, begins to search for something new, not previously shown by others.

Today we all know that visible light - is only a small part of the broad electromagnetic spectrum, which includes radio waves and gamma rays. Nearby spectrum - ultraviolet and infrared - may be used in photography as they refract objective lens, and the image may be focused onto the film. For infrared photography uses near infrared region - up to 1350 nm

Infrared radiation is outside the visible range, and therefore imperceptible to the human eye. He first discovered the Englishman William Herschel in 1800, the year. At first, astronomers used infrared photography, used in agriculture for aerial photography, the military (where without them), still used by restorers at work with paintings of great artists, and finally a photo. The first film sensitive to infrared (IR) rays, appeared in 1931. Who infrared film manufactured by Agfa, Ilford, Konica Minolta, Kodak, but these films are not only inaccessible, but also require special handling. Not only that, due to increased sensitivity they need to charge and store the full (absolute) dark, so even if you are waiting for film development issues, transportation and storage, as infrared films have a much shorter shelf life and use, unlike conventional and partly to light they may even infrared frame counter in your camera.
Fortunately for us, the matrix of a digital camera copes with the task of producing an infrared image is not worse than the special, and this film is whimsical.

Filters
Almost all manufacturers have filters in its line of infrared models.
After the market monitoring of these filters has developed the following opinion - buy IR filter in our photo shops is almost impossible. There are several reasons. This is quite high price (87 TIFFEN filter diameter 77mm costs about 200-250 USD), and low demand for such products, and the need for procurement of filter Party (and who of the sellers want to build their additional trade balances?)
For those who like the filter is not found or is not willing to spend a considerable amount on the infrared experiments have quite a simple way. Go to any photo lab, where they work with a "slide" film and ask for a piece of non-illuminated, but manifested reversible (ie, the "slide") photographic film, its you and will be used as a low-pass filter at the beginning (manifested emulsion retards the radiation of the range of the spectrum to which the sensitive photographic film (ie, the entire visible range), skipping everything else (ie ultraviolet and infrared).

Technique
To determine whether your camera is suitable for shooting in the infrared range is very simple, taking any remote control (as we know it emits infrared rays) and in total darkness by sending it to the lens of the digital device. If you see a point of light on the display, the device is sensitive to infrared rays, and you can continue the experiment.
However, some cameras have a so-called filters Hot Mirror primary function - to prevent occurrence of moire, avoiding matrix sensors to infrared rays with a wavelength greater than 800nm.
There is also the option of just too extreme - the point is that the cut-off filter is removed from the chamber and instead, put the infrared. For normal shooting, this camera is not suitable, but the IR gives a great result.
Some devices also have a special mode Night Shoot - «Night Scene". In this mode, a filter that cuts infrared region of the spectrum, is mechanically removed from the optical system.
The result is big enough sensor sensitivity in the infrared range, which allows you to shoot at shutter speed and receive low noise in the final image. It should be noted that the shooting in this mode is possible with shutter speeds of 1/30 not shorter, not longer question why it is necessary to use the neutral gray filter. I use ND8 or ND4, depending on the lighting, as well as using the exposure compensation and controls the brightness of the picture on the histogram.

Equipment Shooting
What does an ordinary photographer pezazhist at noon? That's right, is forced to relax, because shoot at midday sun landscape - enjoy very questionable. Sharp, deep shadows, brightness big swings - all this is not conducive to creating a good landscape shot. It is quite another thing, if your camera bag has a low-pass filter. Bright sunshine turn to your friend, because it is the main source of infrared radiation, the sky is not necessary pritemnyat gradientnikom (and so it is almost black), infrared photography allows great show texture and effectively emphasize the bright illuminated leaves.
SLR cameras for shooting.
Unlike normal digicam, there are certain problems with sight and sharpness, as infrared filters and implement a transparent focus on the subject with a stranded filter is problematic. Only one way out - the camera on a tripod, sight and framing is done without the filter, the filter and then cheat to make the frame. At the same time, you can not rely on the autofocus. Automation allows for the characteristics of refraction in the visible range, while infrared light is refracted differently. So better to direct the focus of the distance scale, while placing it a little closer to the actual distance to the object. In addition, it is useful to increase the depth of field using a diaphragm until f18-22. Some lenses have a label to focus when infra-red photography, use it by combining with it the distance scale on the lens. Be sure to close the viewfinder window flap to prevent further exposure and do not forget to do some shots with AEB in increments of 1 - 2 EV control histogram (focus light). Pay attention to the white balance when shooting is not RAW. Ideally, it is necessary to set the W / B on the illuminated leaves, while in the post-processing, it will be much easier to get an acceptable result.

Postprocessing
For final finishing have to use editing as the resulting image is far from optimal and those beautiful infrared photos that you see on websites and in magazines, your footage is a little similar.
1. First, open your photo editor and carefully read the channels. As a rule, all the brightness contained in the red channel, the sharpness of the green, blue noise, but can also be options.
2. Next, go to the menu "Image" and open levels (screenshot), which move the histogram sliders, leading to an acceptable image tonal range by controlling the readings of the histogram.
3. After that, applied to the image command "Auto Levels»
4. The next step - the mixer channels, carefully read their contents. In the red channel produce a replacement for the blue and blue, to red.
5. Then apply the "filter shadows / light" to equalize the tonal range of the frame around with these settings (screenshot) Do not overdo it, and then the image will appear unnatural.
Satisfied with the results?
If not, move the sliders in the mixer is endless, achieving the desired color.

There are also more simple way, if your goal is to get a black and white photo. After the operation with the "Auto Levels", you go to a mixer channel and move the sliders, do not forget to put a tick in the checkbox "shades of gray." Thereafter, the image can be toned to taste, by any known method.

The second method is a little more complicated and more suitable for shots taken in RAW.
1. convert photos, do not forget to click white balance pipette on any green in the picture.
2. Next, go to the menu "Image" and open levels (screenshot), which move the histogram sliders, leading to an acceptable image tonal range by controlling the readings of the histogram.
3. Translate the photo in LAB space, and the team Apply Image (screenshot) combine channels to your liking. And you can not translating into LAB, try to "knead" channels at its discretion
4. The frame is then converted back to RGB and carry out the final fine-tuning levels and instrument shade / light

5 Tips:
1. Do not be lazy! Look for a frame, think before you pull the trigger. If you find an interesting place, do multiple takes from different angles, look closely at the coverage may make sense to come to this place later, when the light will be more interesting.
2. If there is a possibility - shoot in RAW. Quality, convenience and variety of processing more than offset during the conversion, and file size. This is especially important when shooting in infrared because It will yield interesting results at different white balance settings.
3. States - the best friend of the landscape, and for the landscape, to shoot in IR - he has become almost a relative. If there is a heavy and steady tripod (or too lazy to drag along) Use the remote control or timer of your camera, to reduce camera shake.
4. Study program postprocessing. The digital infrared photography without further processing in the editor, you will hardly acceptable results get. It is not necessary to learn Photoshop is sufficiently lighter editor, such as Photoshop Elements or the like.
5. Thoroughly get your hands on your technique, know its strengths and weaknesses. Sometimes, time is to make a good picture is very little, do not waste it "talks" with his camera, talk to her in advance. For example, not all cameras reliably reflect the information in the histogram, taking as a basis only the green channel. The result - you run the risk of overexposure, which can not be corrected in any editor.
...
I almost forgot: the date of the first 3 ph - July 2010.
Article Date: 25.06.2010 at 11:47
everything!

Source:
Tags
See also
What is a women's prison (20 photos)
Traveling together on one moped at sea. 40foto
What is the real tea? (9 photos)
"What is the proof?": Insights from theoretical computer science
What is an IPO and why it is needed
25 fruit which can not watch without a smile. I can not believe that this can grow!
Do you know what a real style? But he
Victor Frankl: What is the whole person
30 incredible cakes, which impressed us deeply
THAT the smell in perfume: the truth about the spirits and perfumes