Air Filter Housing with their hands
 Bashny.Net
Writes blogger paaladin:
Here I sit here, I read LJ, and I feel sorry for the Muscovites, who with his business completely forgotten that the hands have to work. And indeed it seems that povymirali technicians in the country ... and who is not dead, has bought the decadent West. In general, I decided out of scrap materials to make portable portable air humidifier. There is still written in the news that the fires in Bryansk, the forests are burning radioactive soil and dirtiest isolated. So this filter is a working prototype for the filter system of my vault'a.
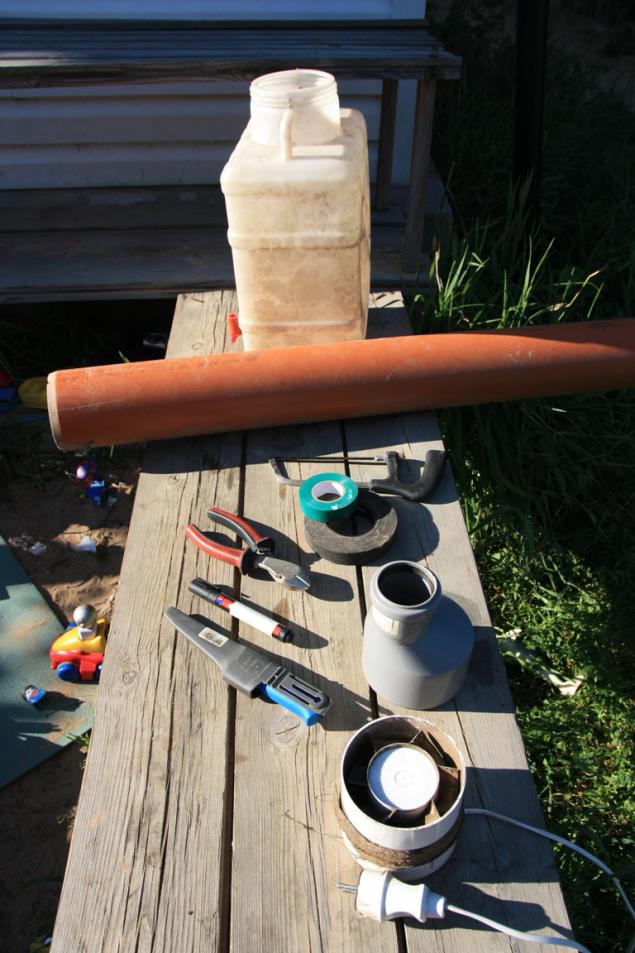
So what we need for the production of:
1) Capacity for water with the width of the side wall of 10 cm., And a suitable orifice for mounting the fan.
2) A set of sewage plastic pipes. I used an adapter 5 to 10 cm., As it is more convenient to attach the hose to the air intake from outside the room.
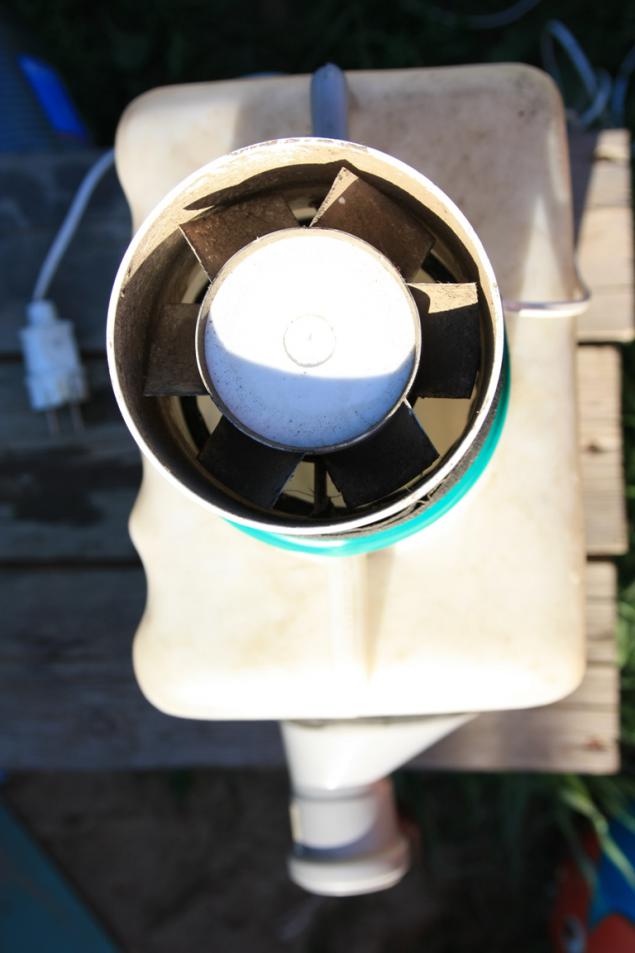
3) The fan for bathrooms with hose water protected IP44. I used to 220V., But an autonomous seekers can try and 12c., With power supply and battery backup. Power will certainly be less.
4) with a bandage or gauze.
5) Duct tape and plastic fabric.
6) The knife handle, clippers.
20 detailed picture of the manufacturing process
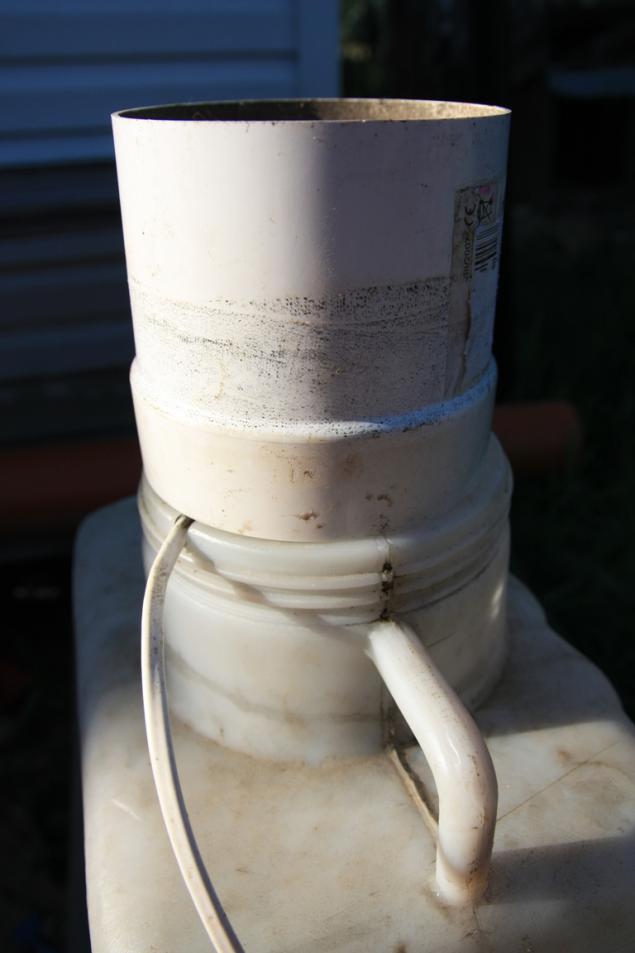
Step One. Housing.
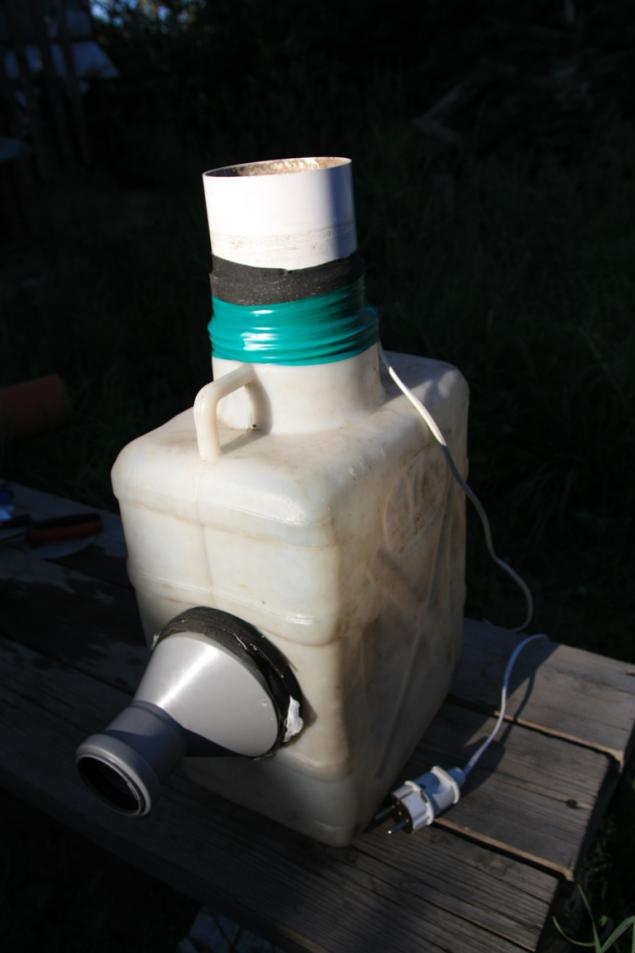
We determine where we will conclude air is entering. I used a canister of 17 liters, once the former dacha washbasin. Her neck just 10 cm.
Entering air taken from the side, right in the middle of the tank. Below remains a place for a stock liquid. If we plan to put the canister in the sun and use it as a moisturizer on top of the space will play to our advantage, because the air from the filter will not pass directly to the output and will have time to take with a little water. In general - the golden mean.
Set on the proposed location introductory tube and note the boundary marker holes. Do not forget that marked on the outside diameter, including knife carefully cut through the inside layout. Canister cut easy thing to have a good knife. I recommend to place the canister on his knees, carefully and firmly holding it with his left hand. Right knife pierce a hole, and took the knife reverse grip (blade to her, down the little finger closest to the blade, thumb covers the end of the knife) to cut a hole carefully pulling the knife on himself strictly perpendicular to the plane of the canister. In no case do pilyuschih or oscillating motion to knife broke.
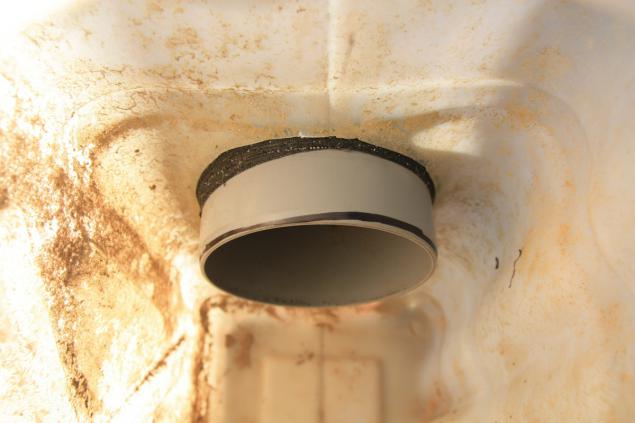
Step Two. Entering.
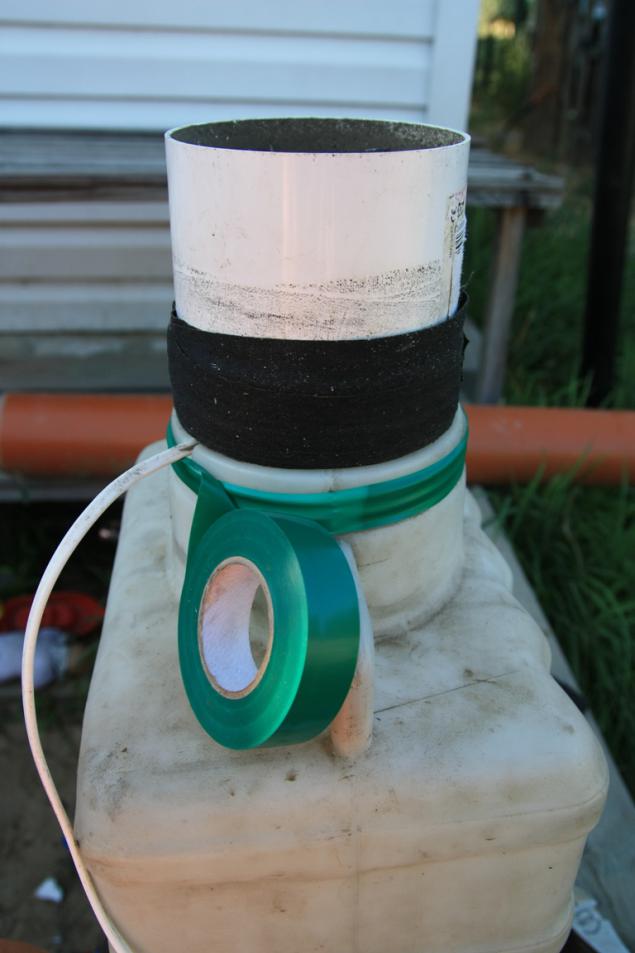
Take an introductory tube is pushed into the resulting hole, so that the inside turned santrimetra four pipes. Then, centered, take cloth duct tape and wound two or three turns through the pipe. We take out the pipe and do a few more turns of the spiral to the inner end. As a result, we get a pipe conical thickening that lets you install it firmly in the canister.
05
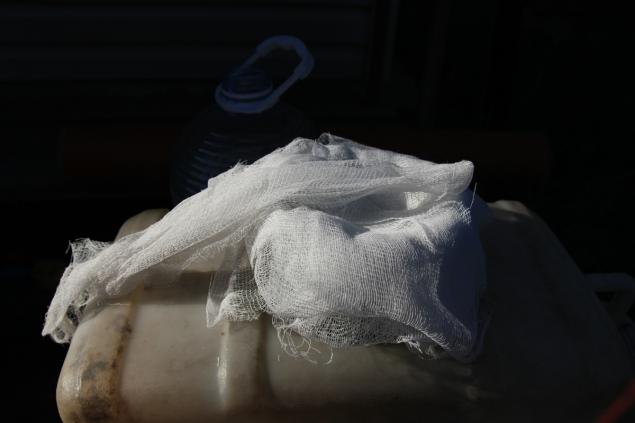
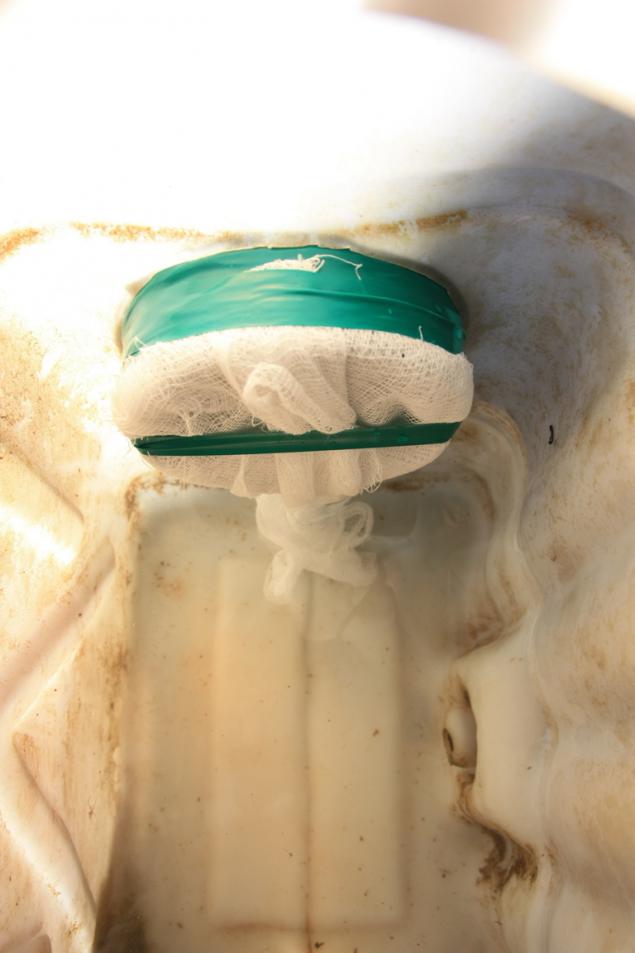
Step Three. Filter.
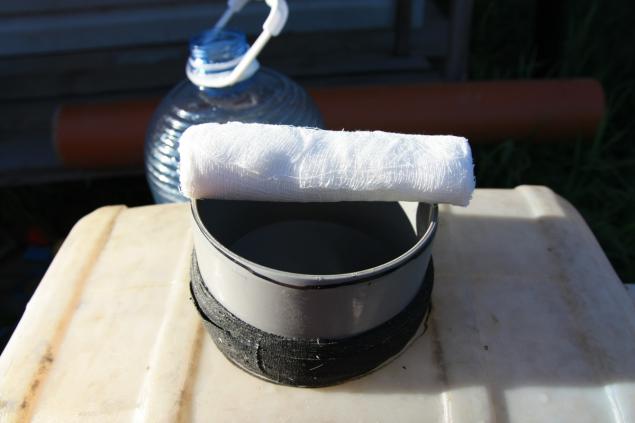
Take the gauze or a bandage. I used non-sterile medetsinsky bandage with a width of 14 cm. Bandage Puts in several layers to the inner socket input. Bandage with a reserve should cover the edges of the input, so it can be fixed on the perimeter.
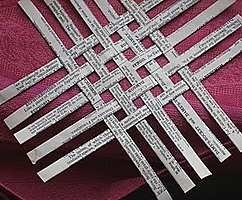
We try to avoid laying a parallel strips, I made a V-shaped styling, each pass slightly changing the angle of the overlay (Imagine that draw a star without lifting the pencil from the paper). The idea is optimal styling - 15-20 layers. If more, then the fan will be difficult to cope with the retraction of the air. Less - will be gone the entire effect of the filter.
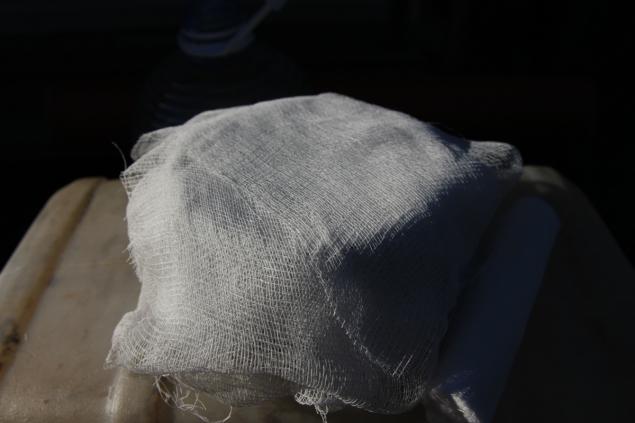
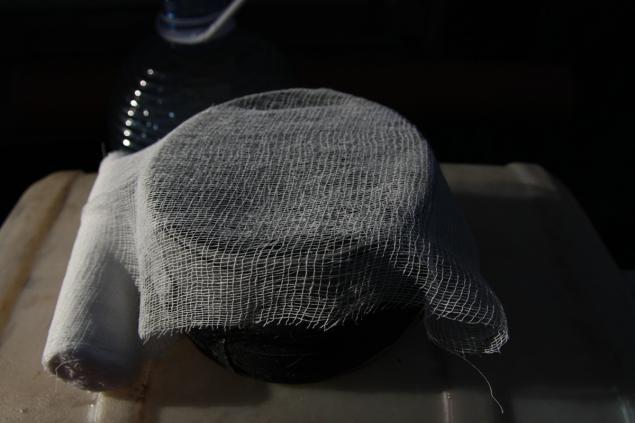
At the end of the tail styling reserve equal to five times the distance from the top of the opening of the pipe to the bottom of the canister.
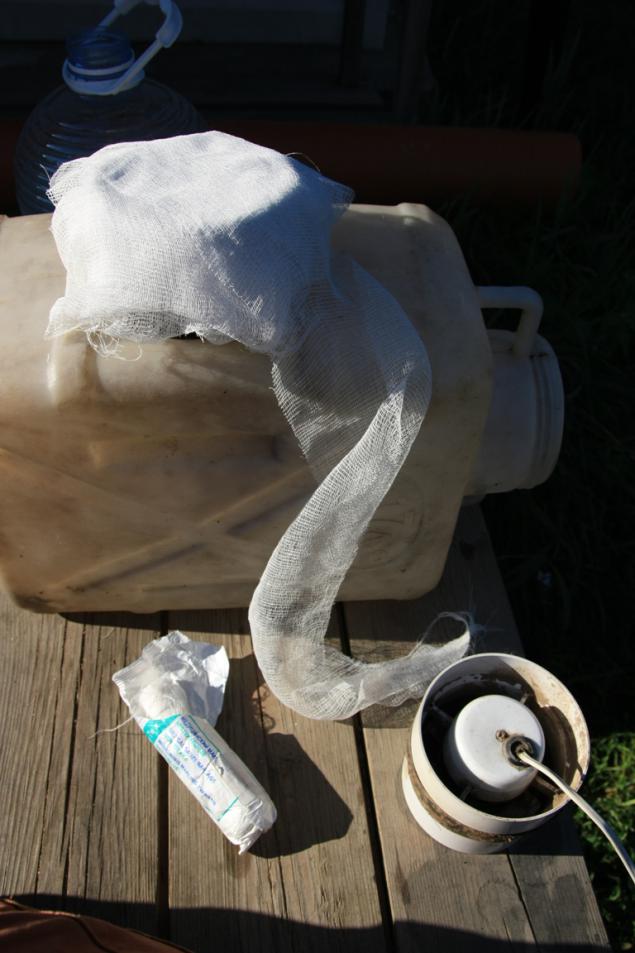
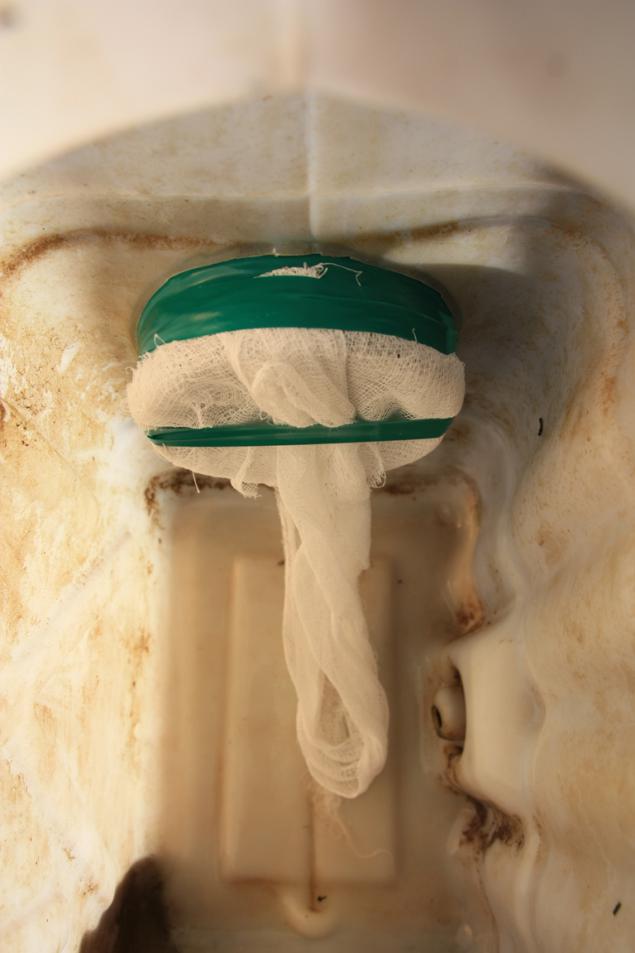
Fold the tail four times. It will be a "cord" of our filter.
We fix the filter tape. The tail should go through the entire diameter of the filter, in an ideal - between the layers.
Firmly set into the filter canister. We fill the canister with water to the bottom of the introductory pipe.
13
If the sealant is available, it is recommended to lubricate their place joint introductory pipes and canisters.
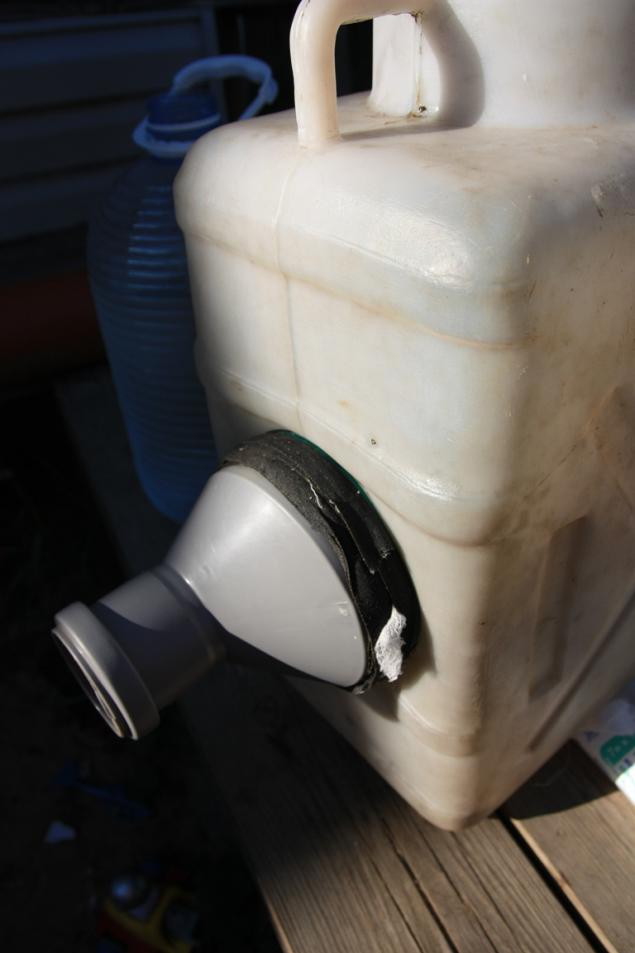
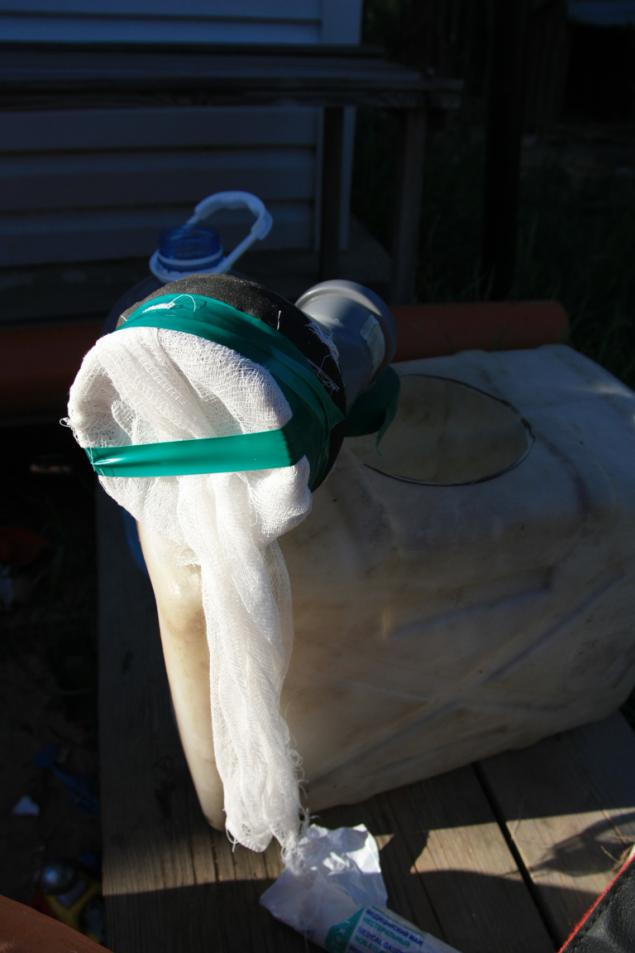
Fourth Stage. Conclusion.
Try on the fan on the neck of the cans. If you have a container neck without the right size, for example conventional canister liquid, then just do it in the top of the other input required by the diameter of the hole. In my case the power cord of the fan approached from the air intake, so I had to cut out a portion of the neck to output cord.
Take the fan. If it is smaller in diameter than the neck \ hole, then proceed as with an introduction pipe - do wedge and winding tightly fastened. In my case, the diameter is almost the same, so I did some kind of "skirt", wrapping the fan casing fabric tape with a small allowance. This "skirt" is the seal between the neck and a fan.
Set design on the canister, tucking edges inside the skirt.

Carefully make a few turns of a conventional tape first on the housing canister, and then turn on the fan. Several times we pass under the wire and over it, thus sealing the hole.
That is, we end up with a product. In normal mode, it serves as the home filter dust and humectant. Importantly do not forget to add water, and sometimes change is dirty bandage. In case of Emergency Situations, it can help reduce air pollution in the home. It is possible to connect the air intake corrugated hose \ pipe cleaner and bring it out into the street. As a result, the house will be supplied filtered air, and due to an overpressure, through the gap \ ventilation holes \ loosely closed doors will be the outflow of air, instead of the usual influx of unfiltered.
Naturally for the best effect, it is necessary to calculate the cubic content of air in the room, the size of the ventilation outlets and others. But I think people have graduated from secondary school is not working. I recall only one simple rule - for the proper functioning of air-ventilation ottochnoy size entry \ exit air is to be 1 to 2, provided that the air outlet passive.
I hope my style hack 'Och.umelyh handles "is useful to people.
Source:
Here I sit here, I read LJ, and I feel sorry for the Muscovites, who with his business completely forgotten that the hands have to work. And indeed it seems that povymirali technicians in the country ... and who is not dead, has bought the decadent West. In general, I decided out of scrap materials to make portable portable air humidifier. There is still written in the news that the fires in Bryansk, the forests are burning radioactive soil and dirtiest isolated. So this filter is a working prototype for the filter system of my vault'a.
So what we need for the production of:
1) Capacity for water with the width of the side wall of 10 cm., And a suitable orifice for mounting the fan.
2) A set of sewage plastic pipes. I used an adapter 5 to 10 cm., As it is more convenient to attach the hose to the air intake from outside the room.
3) The fan for bathrooms with hose water protected IP44. I used to 220V., But an autonomous seekers can try and 12c., With power supply and battery backup. Power will certainly be less.
4) with a bandage or gauze.
5) Duct tape and plastic fabric.
6) The knife handle, clippers.
20 detailed picture of the manufacturing process

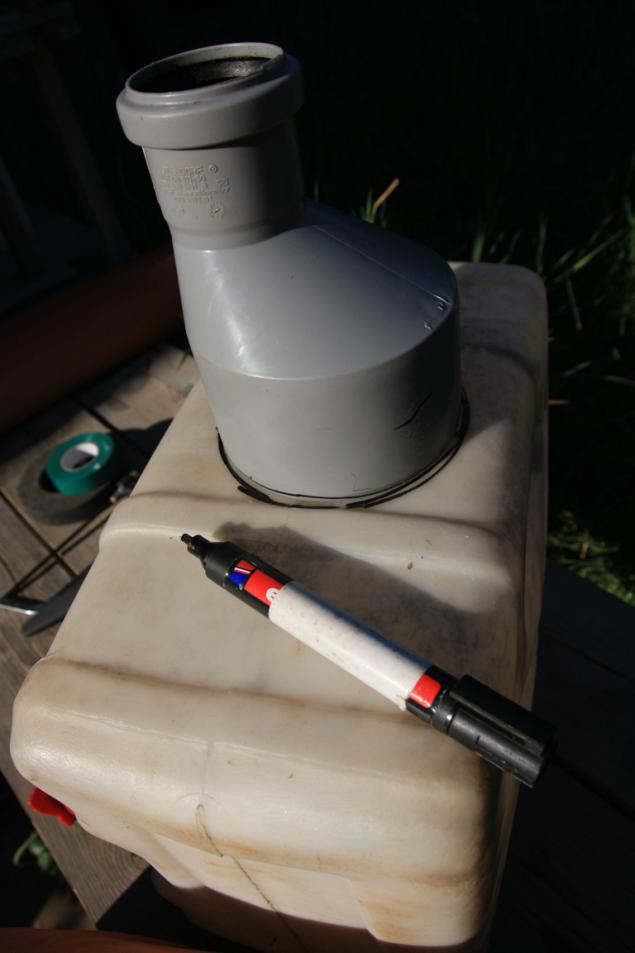
Step One. Housing.
We determine where we will conclude air is entering. I used a canister of 17 liters, once the former dacha washbasin. Her neck just 10 cm.
Entering air taken from the side, right in the middle of the tank. Below remains a place for a stock liquid. If we plan to put the canister in the sun and use it as a moisturizer on top of the space will play to our advantage, because the air from the filter will not pass directly to the output and will have time to take with a little water. In general - the golden mean.

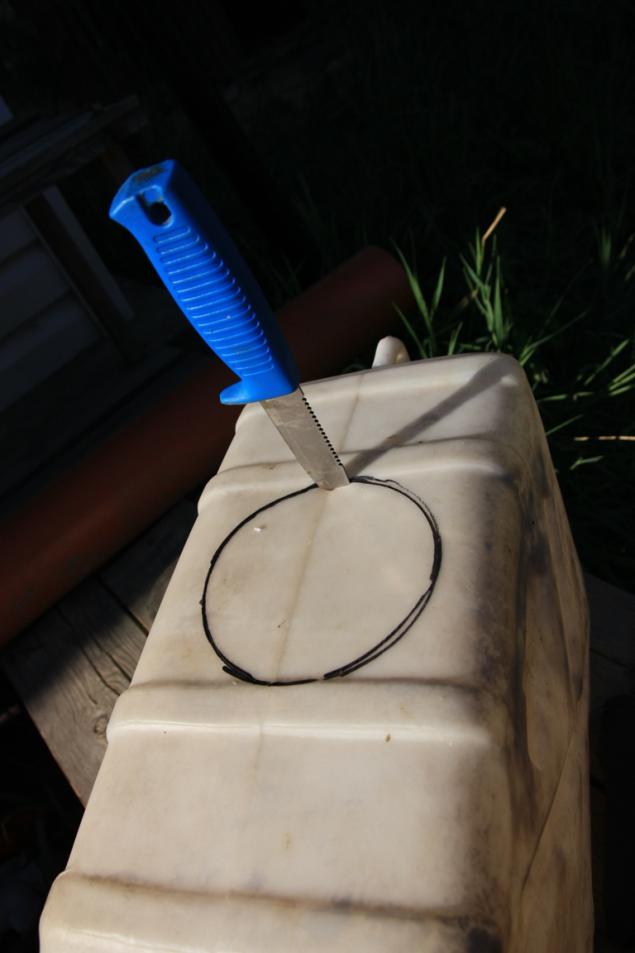
Set on the proposed location introductory tube and note the boundary marker holes. Do not forget that marked on the outside diameter, including knife carefully cut through the inside layout. Canister cut easy thing to have a good knife. I recommend to place the canister on his knees, carefully and firmly holding it with his left hand. Right knife pierce a hole, and took the knife reverse grip (blade to her, down the little finger closest to the blade, thumb covers the end of the knife) to cut a hole carefully pulling the knife on himself strictly perpendicular to the plane of the canister. In no case do pilyuschih or oscillating motion to knife broke.

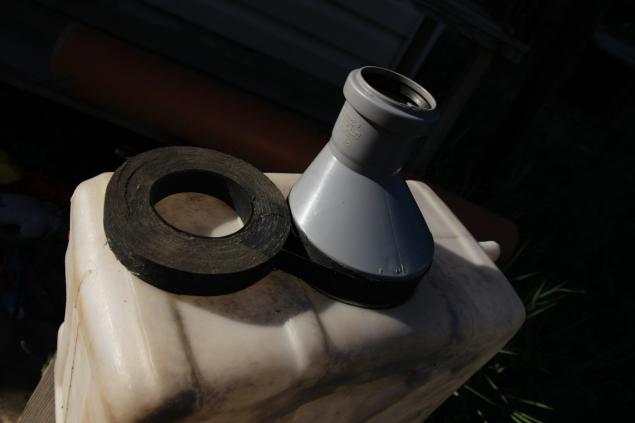
Step Two. Entering.
Take an introductory tube is pushed into the resulting hole, so that the inside turned santrimetra four pipes. Then, centered, take cloth duct tape and wound two or three turns through the pipe. We take out the pipe and do a few more turns of the spiral to the inner end. As a result, we get a pipe conical thickening that lets you install it firmly in the canister.

05

Step Three. Filter.

Take the gauze or a bandage. I used non-sterile medetsinsky bandage with a width of 14 cm. Bandage Puts in several layers to the inner socket input. Bandage with a reserve should cover the edges of the input, so it can be fixed on the perimeter.

We try to avoid laying a parallel strips, I made a V-shaped styling, each pass slightly changing the angle of the overlay (Imagine that draw a star without lifting the pencil from the paper). The idea is optimal styling - 15-20 layers. If more, then the fan will be difficult to cope with the retraction of the air. Less - will be gone the entire effect of the filter.

At the end of the tail styling reserve equal to five times the distance from the top of the opening of the pipe to the bottom of the canister.

Fold the tail four times. It will be a "cord" of our filter.

We fix the filter tape. The tail should go through the entire diameter of the filter, in an ideal - between the layers.

Firmly set into the filter canister. We fill the canister with water to the bottom of the introductory pipe.

13

If the sealant is available, it is recommended to lubricate their place joint introductory pipes and canisters.

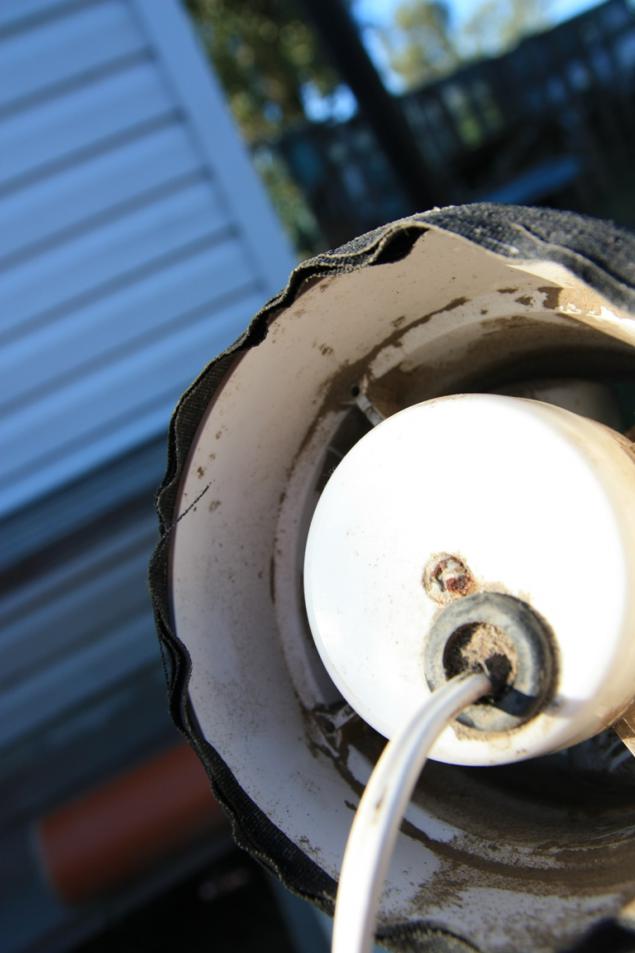
Fourth Stage. Conclusion.
Try on the fan on the neck of the cans. If you have a container neck without the right size, for example conventional canister liquid, then just do it in the top of the other input required by the diameter of the hole. In my case the power cord of the fan approached from the air intake, so I had to cut out a portion of the neck to output cord.

Take the fan. If it is smaller in diameter than the neck \ hole, then proceed as with an introduction pipe - do wedge and winding tightly fastened. In my case, the diameter is almost the same, so I did some kind of "skirt", wrapping the fan casing fabric tape with a small allowance. This "skirt" is the seal between the neck and a fan.

Set design on the canister, tucking edges inside the skirt.

Carefully make a few turns of a conventional tape first on the housing canister, and then turn on the fan. Several times we pass under the wire and over it, thus sealing the hole.

That is, we end up with a product. In normal mode, it serves as the home filter dust and humectant. Importantly do not forget to add water, and sometimes change is dirty bandage. In case of Emergency Situations, it can help reduce air pollution in the home. It is possible to connect the air intake corrugated hose \ pipe cleaner and bring it out into the street. As a result, the house will be supplied filtered air, and due to an overpressure, through the gap \ ventilation holes \ loosely closed doors will be the outflow of air, instead of the usual influx of unfiltered.

Naturally for the best effect, it is necessary to calculate the cubic content of air in the room, the size of the ventilation outlets and others. But I think people have graduated from secondary school is not working. I recall only one simple rule - for the proper functioning of air-ventilation ottochnoy size entry \ exit air is to be 1 to 2, provided that the air outlet passive.
I hope my style hack 'Och.umelyh handles "is useful to people.

Source:
Tags
See also
How to make a pool vacuum with their hands
The loft above the eco house with his own hands
The eco-friendly solar drying for products with their hands
The benefits of using a filter for pond
Building a house with his own hands
Safe a trap for mosquitoes with their hands
How to make a small brick oven to give their hands
Pizza oven their hands
Heat pumps for heating houses with their own hands
How to make the annexe to the wooden house with their hands and not to spoil appearance