Fan with their hands
 Bashny.Net
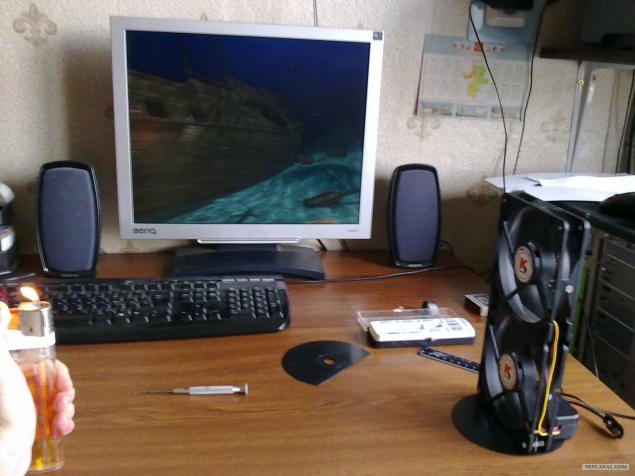
I work in the office. Conder not. Operating temperature in the summer of 36 ... +38. Breathe. That this decision has given my "violent fantasy" and "sick imagination". Now, no heat transcend
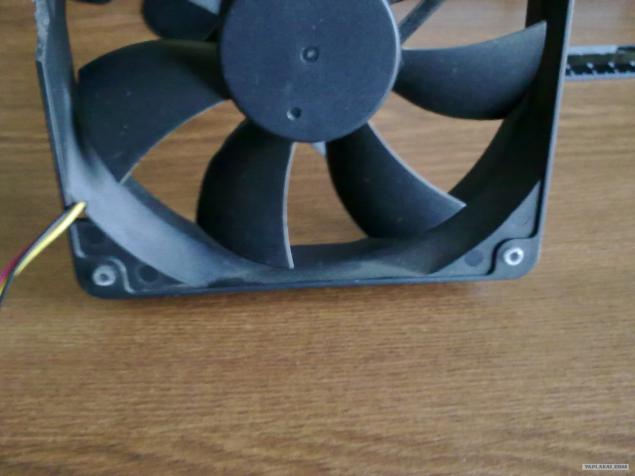
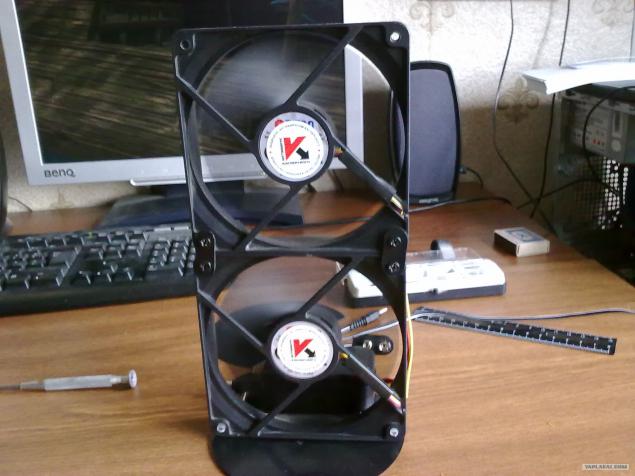
Take two 120 mm fan. Let them be powered by two black wires & quot; - & quot; and red & quot; + & quot ;.
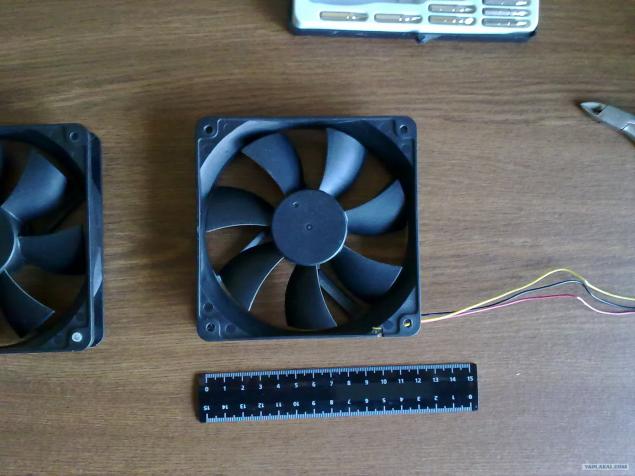
Take two 120 mm fan. Let them be powered by two black wires & quot; - & quot; and red & quot; + & quot ;.

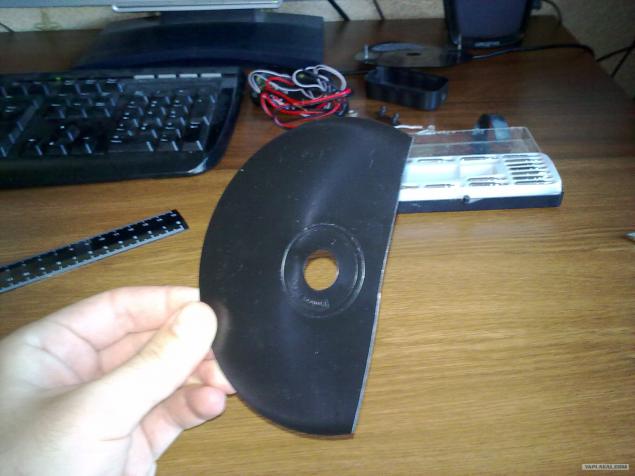
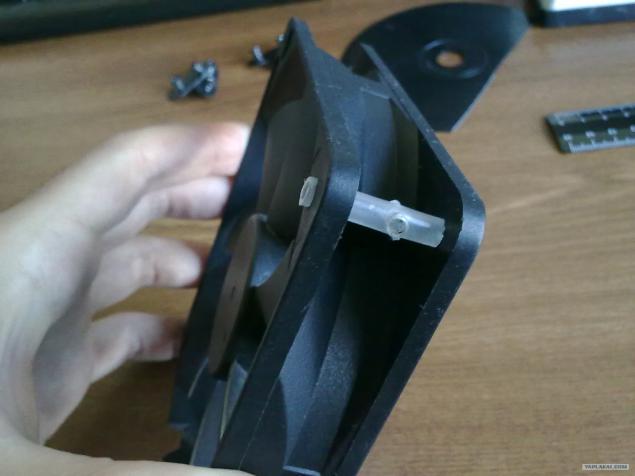
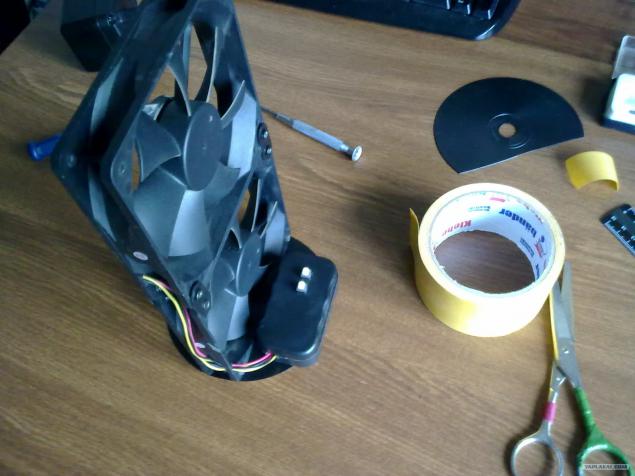
From the disc packaging removed the black protective disk from which the connectors are made
Total Items 26. Please do not break down, I newly Yapovets. And agree about the beer)

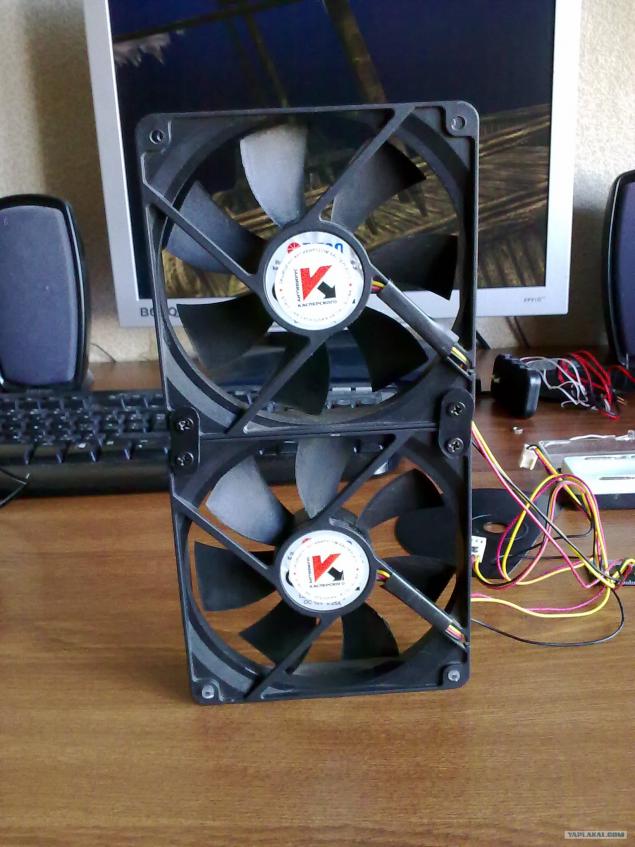
Now fasten fans like that.
I spread the fall, because almost all summer I felt it in the office. And now offer a functioning and reliable circuit.
Then, from the other protective disc make the base.
First on the "equator" we note the two points corresponding to the mounting holes on the fan
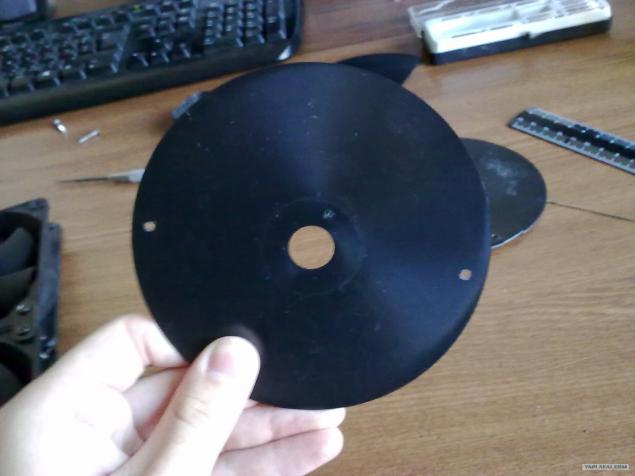
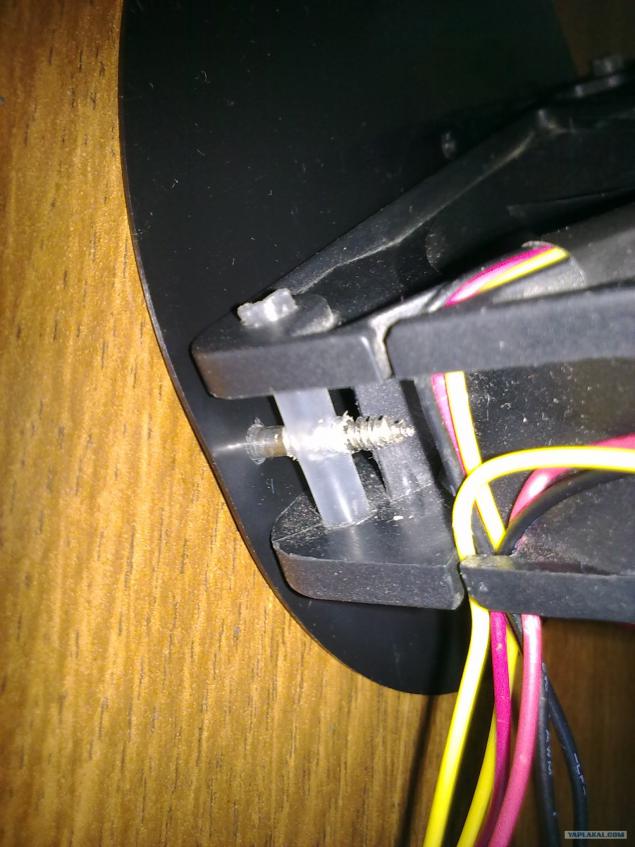
To push through the holes on the fan rod from the gel pen and make a hole in it in the middle, which then need to screw in a small screw that would enlarge the hole
you should get about it
Checking of conformity of holes on the base and the fan. Like normal

Fasten screws. Strong tightening is not necessary. The base may burst
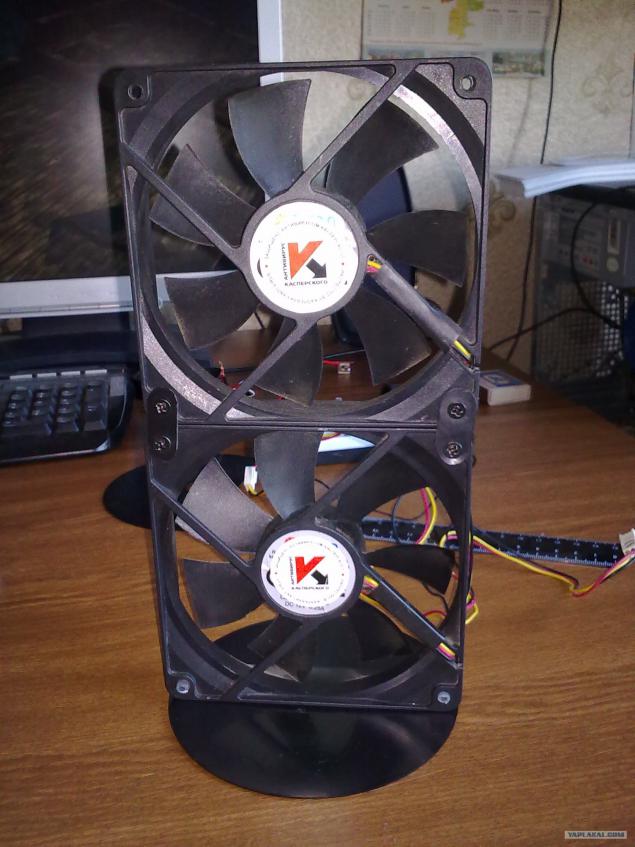
We get the fan rack that is sufficiently robust and flexible base can extinguish small vibration
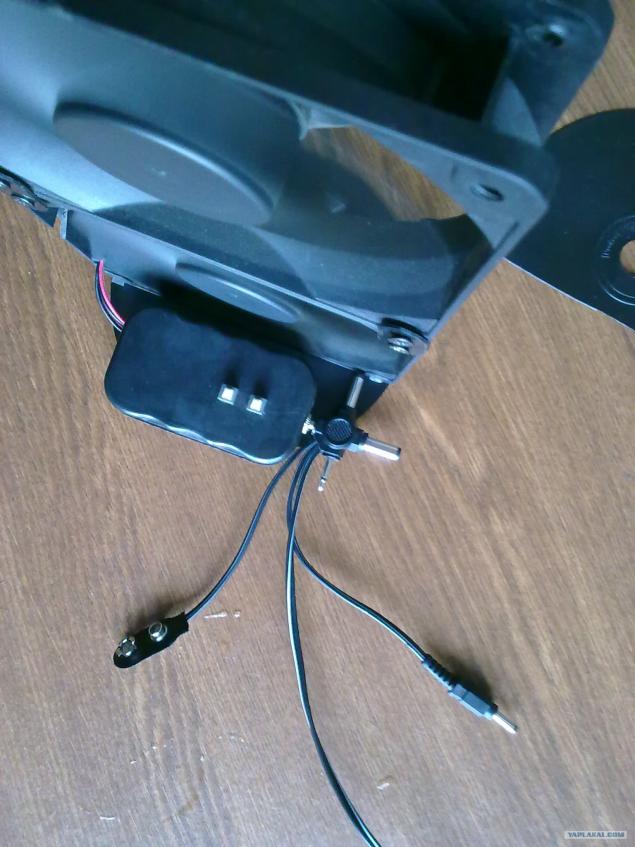
Take the box out of a sponge for shoes. Rip foam. Wipe the solvent (I used solvent), which would remove the adhesive residue and adhesive base. Make a hole in the end of a audio jack 3, 5 mm. in the opposite end just eat through the slot under the wires from the fan
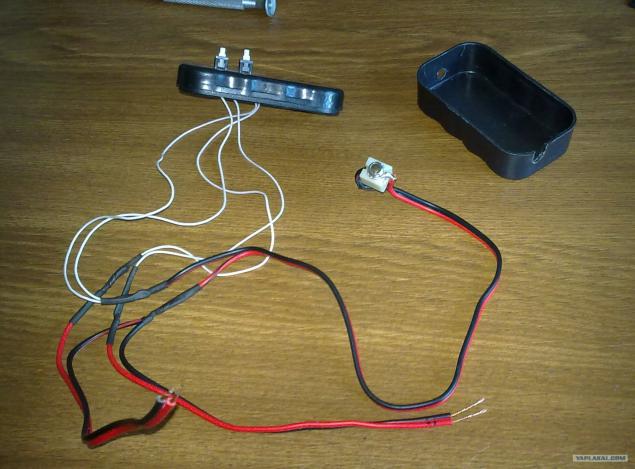
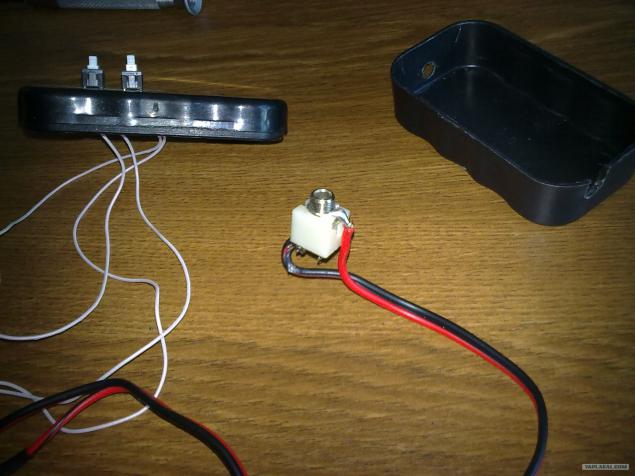
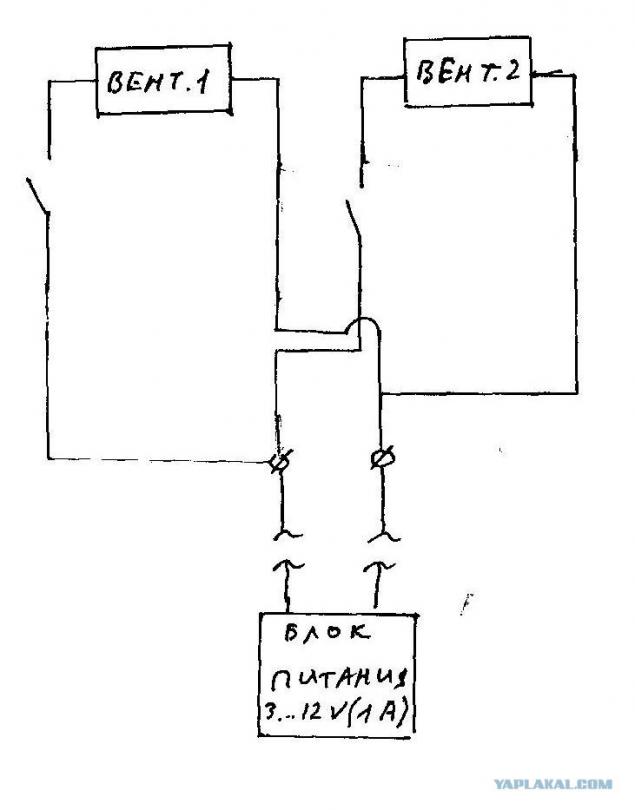
Pre-install the box into the cover 2 buttons with soldered wires. Here I am already collected by the scheme because the device has been in operation. Schematic diagram lay out later.
All wires and solder isolate shrinking.
Posted in [mergetime] 1347795273 [/ mergetime]
I'm on the strength of Yap week. By Search Search similar - not found. Can certainly and accordion but suddenly someone come in handy.
Well, if something like this is already going to be brief, I will lay out a few photos and everything.
Karoche speaking time such posts were, it would not pose as a super smart people and divert their crafts.
Ok
1. Putting the system in a box
2. Glue it on the basis
3. Connect the power supply
4. Check job
5. Thank you for your attention.
...

...
Screwdriver getting on like normal, for loosening "difficult" shkrupov have old Soviet screwdriver.
...
Power supply adjustable 3 ... 12 V
1000mA
Power enough to stick two fan.
I did not use any fuses, resistors, etc.
Fire lighters blows entirely on third stage - 4, 5B.
12V fire blows out five feet from ventilyatrov.
Testing time for 2 months, 5 days a week within 12 hours.
Today everything is working exc.
P.S. jack 3, 5 mm had to take the more expensive it is lax.
That's all I wanted to say.
Source:
Take two 120 mm fan. Let them be powered by two black wires & quot; - & quot; and red & quot; + & quot ;.

Take two 120 mm fan. Let them be powered by two black wires & quot; - & quot; and red & quot; + & quot ;.

From the disc packaging removed the black protective disk from which the connectors are made

Total Items 26. Please do not break down, I newly Yapovets. And agree about the beer)

Now fasten fans like that.

I spread the fall, because almost all summer I felt it in the office. And now offer a functioning and reliable circuit.
Then, from the other protective disc make the base.
First on the "equator" we note the two points corresponding to the mounting holes on the fan

To push through the holes on the fan rod from the gel pen and make a hole in it in the middle, which then need to screw in a small screw that would enlarge the hole

you should get about it

Checking of conformity of holes on the base and the fan. Like normal

Fasten screws. Strong tightening is not necessary. The base may burst

We get the fan rack that is sufficiently robust and flexible base can extinguish small vibration

Take the box out of a sponge for shoes. Rip foam. Wipe the solvent (I used solvent), which would remove the adhesive residue and adhesive base. Make a hole in the end of a audio jack 3, 5 mm. in the opposite end just eat through the slot under the wires from the fan

Pre-install the box into the cover 2 buttons with soldered wires. Here I am already collected by the scheme because the device has been in operation. Schematic diagram lay out later.
All wires and solder isolate shrinking.
Posted in [mergetime] 1347795273 [/ mergetime]
I'm on the strength of Yap week. By Search Search similar - not found. Can certainly and accordion but suddenly someone come in handy.
Well, if something like this is already going to be brief, I will lay out a few photos and everything.

Karoche speaking time such posts were, it would not pose as a super smart people and divert their crafts.
Ok
1. Putting the system in a box
2. Glue it on the basis
3. Connect the power supply
4. Check job
5. Thank you for your attention.

...

...

Screwdriver getting on like normal, for loosening "difficult" shkrupov have old Soviet screwdriver.

...

Power supply adjustable 3 ... 12 V
1000mA
Power enough to stick two fan.
I did not use any fuses, resistors, etc.
Fire lighters blows entirely on third stage - 4, 5B.
12V fire blows out five feet from ventilyatrov.
Testing time for 2 months, 5 days a week within 12 hours.
Today everything is working exc.
P.S. jack 3, 5 mm had to take the more expensive it is lax.
That's all I wanted to say.

Source:
Tags
See also
Table for 20,000 rubles with his own hands
Frying pan with your own hands
Ventilation in the kitchen with their hands: what you need to know
How to make roller blinds with their hands
How to make a swing with their hands: step by step instructions
How to make a bike with my own hands and not much to spend in this
How to make a hammock with your own hands
Heat pumps for heating houses with their own hands
Rocket stove with their hands