As I washed down with a bed ...
 Bashny.Net
Hello! Today, I give a little photo report on manufacturing double bed.
There will be 30 pictures, I will inform you at the end, so please do not post rack.
Background. Once there was a question about buying a new bed as the family grows and we have the usual couch would not fit. Immediately identified with his wife in understanding what kind of beds we need. I wanted dvuspalku 180x200 cm with a lifting mechanism for the mattress, which will be kept under slow-moving items and bedding.
Initially, it was decided to buy a bed, but beating a number of furniture stores and comparing the proposed product with its cost, this idea seemed to me less and less interesting. And more and more there is a desire to make the bed, that I need to. Partly because of what they wanted in the shops, lomili, as for me, inadequate price. Moreover, some tools available on the farm, and they do not like the hands of the fifth point grow ...
Calculation and choice of material. For framing of the selected sheets of plain sanding chipboard 3500h1750h16 mm. For lameley- plywood 1525x1525mm 8mm FC. For tamping storage compartment -2 fiberboard sheet brushed 2440x1220x2.5 mm. Bruce 40h50mm. Upholstery foam sheet spinki- 3000h1000h30mm. To trim the outside of the carcass -porolon 3000h1000h10mm. And 5 p m. Shenila Facing 1500mm wide and 5 m f. Nonwoven fabric width 1600 mm for rough rapping. Reinforced lifting mechanism with gas shock absorbers, 8mm bolts with washers and nuts. Box Staples for stapler -6mm i10mm.
So as we minimize costs and fit into one sheet of particle board, I had to make the back of two parts, connected by a shield of the same particle board, but a bit smaller, which, however, had a positive effect on its rigidity.
01. That sheet cutting chipboard

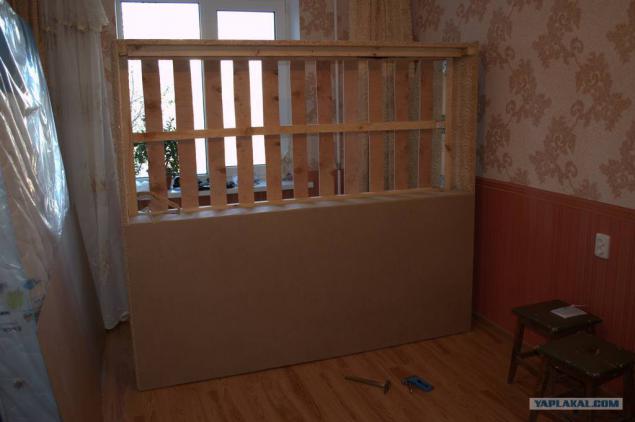
02. The back side of the team back. Sticking her grandmother came to the rescue in time :)

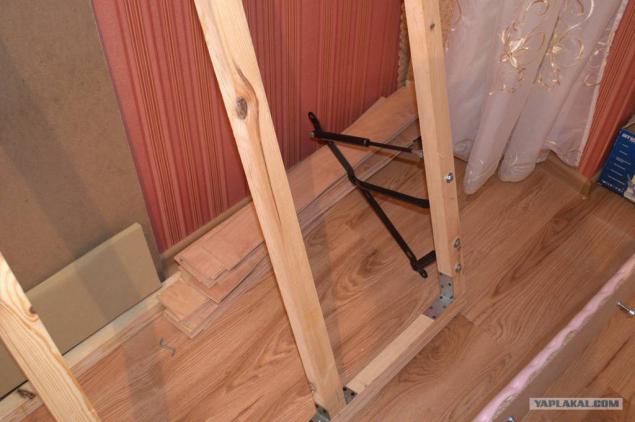
03. The preliminary estimates of parts, evaluation dimensions. Central partition of particle board height 20cm. The side panels are attached through the bars of the same height. Later, they will go to the mattress frame. Inside is not quite exactly napilennye "slats" plywood. Jigsaw in his hands for the third time in my life, so-so as there is.
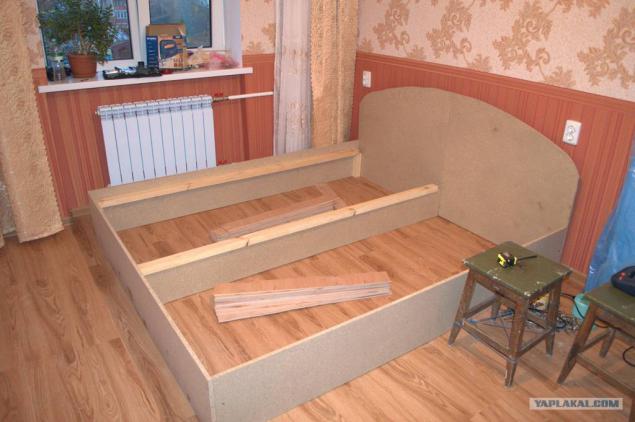
04. And this is the first mistake: preliminary estimates slats shown that they are very soft. I think that even if they were of 12mm plywood, it would also sagged. Need something to solve quickly, good bar took stock on the 4th more. That's estimate, it will look like frame with additional beams.
05. I went to work on the backrest upholstery foam.
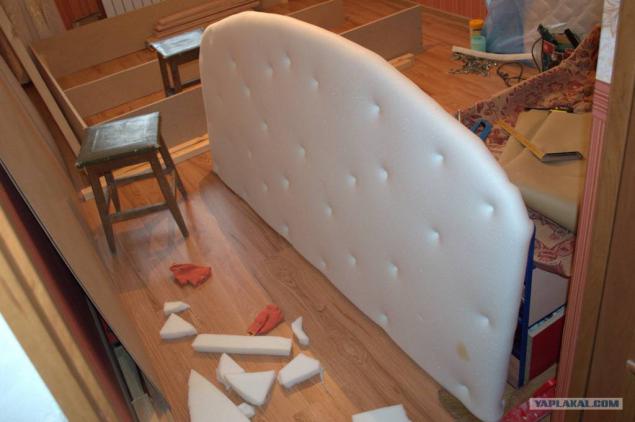
06. The back side.

07. Now, close-fitting cloth. Initially tissue stapler nailed on the bottom edge of the back, and now we pull it up and to the side to avoid wrinkles, fixing the whole thing stapler.
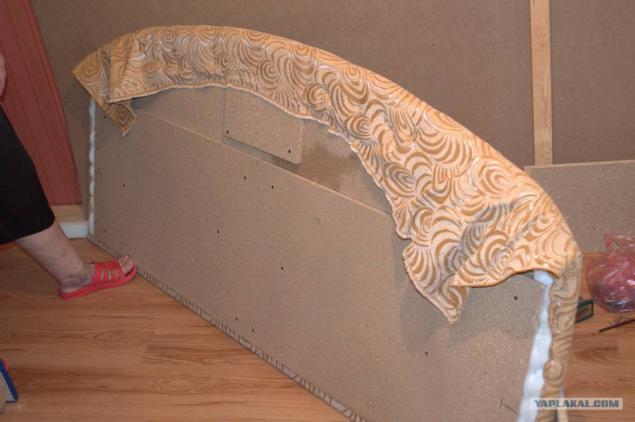
08. Almost upholstered backrest in front. Bab ear and immediately useful. By the way, it also acted as a seamstress -motoristki for all that concerned tissues.
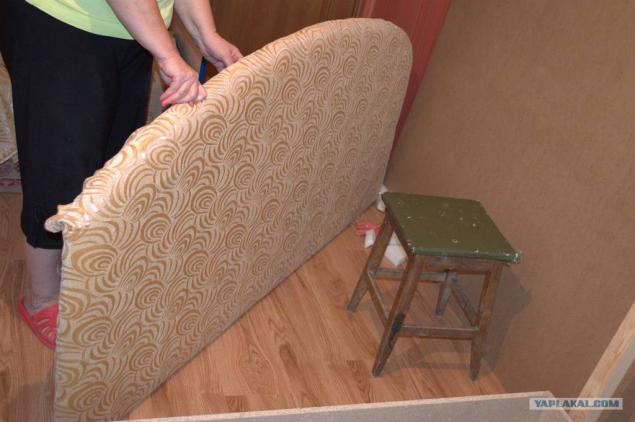
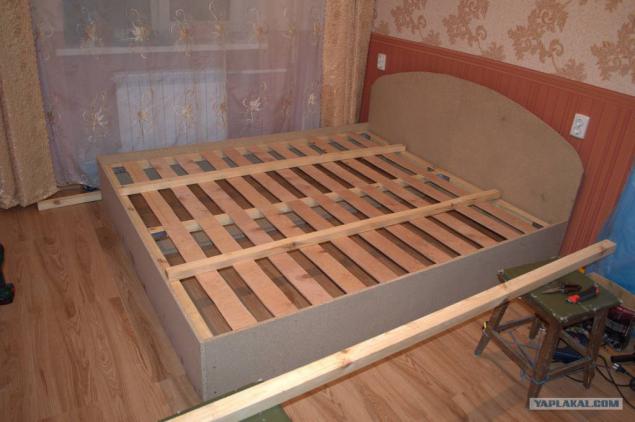
09. Still further strengthened frame bars.

10. Already I want to figure out how it will look.
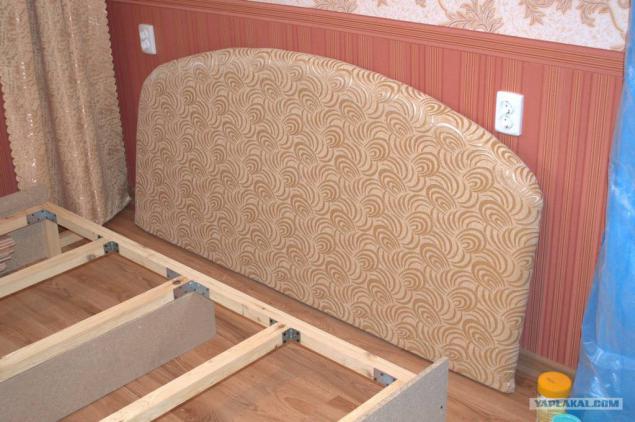
11. cording frame centimeter foam.
12. Another view.
13. I went to work on the slinky fabric bed frame. Before that, the pre-spaced and lock nuts bolts with Teflon bushings for mounting the hoist. By the way, and then span: experience has shown that it was necessary to make not two, but all four bolts on one side, because then when lowering the frame with a mattress lifting mechanisms to tighten up a little bit. Looking ahead, I will say that solved this problem with additional screws with thick washer of suitable diameter.
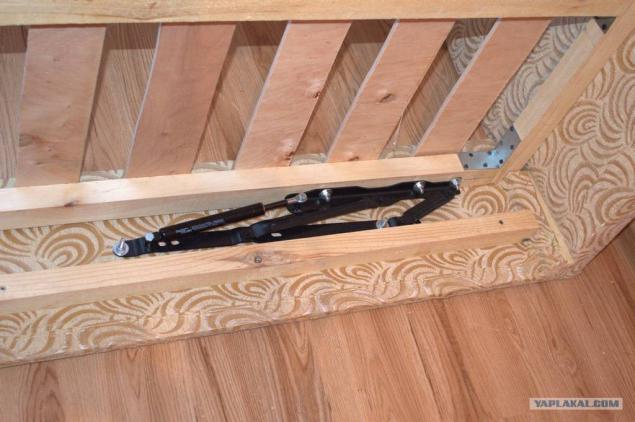
14. The lifting mechanism, screwed to the frame.
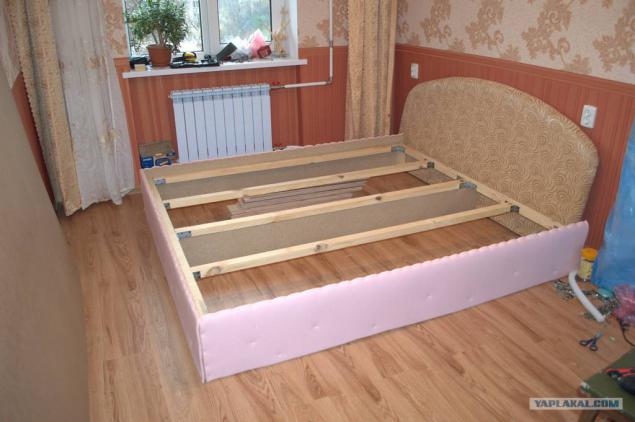
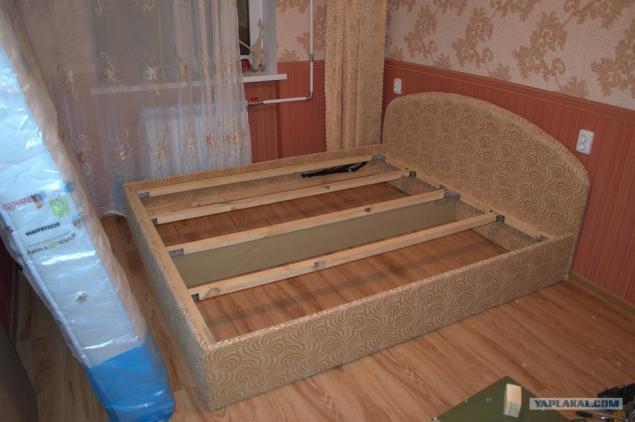
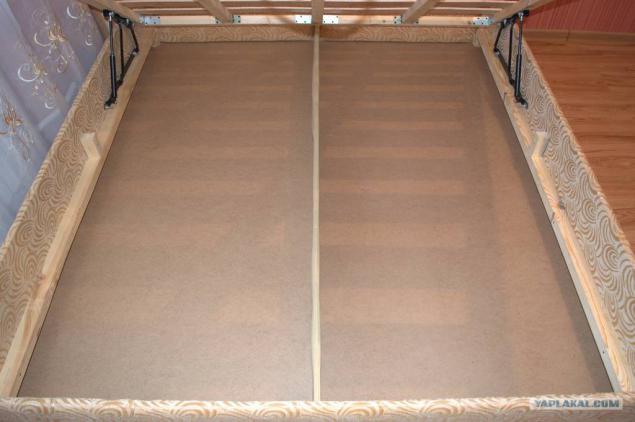
15. Bed frame, back frame and mattress assembly.
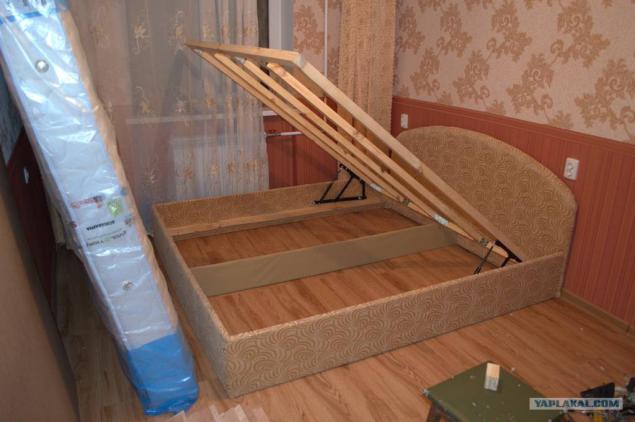
16. The frame of the mattress raised. There is also an explanation as Chipboard frame thin enough -16mm. In any case, he added, rib, from the remaining timber screwing it on the screws under the lifting mechanism.
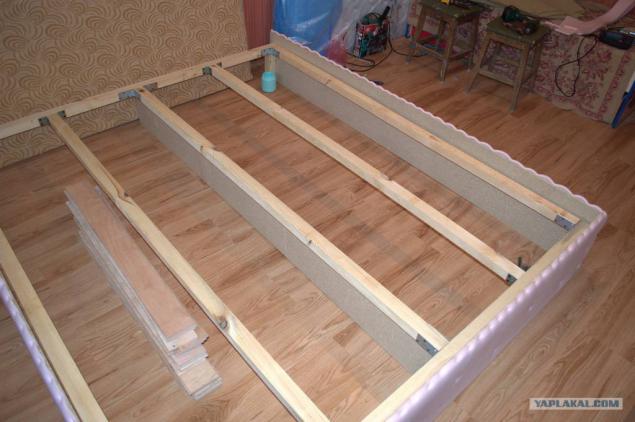
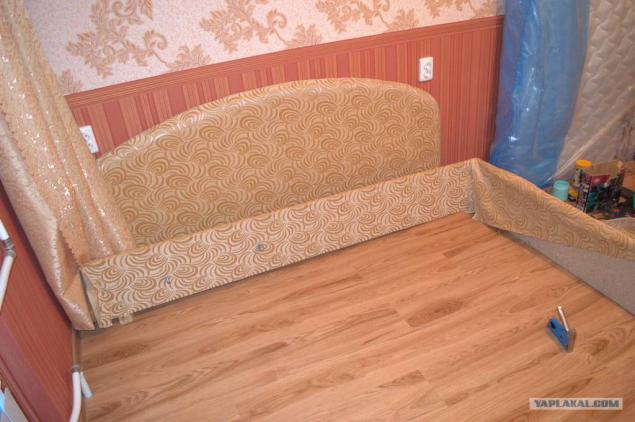
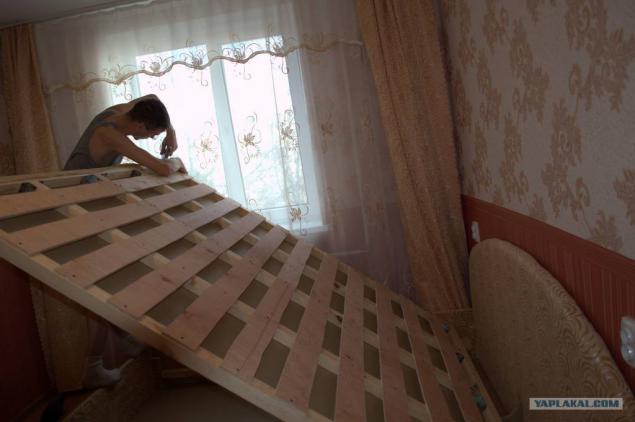
17. slats fastened, the main work on the frame is complete.
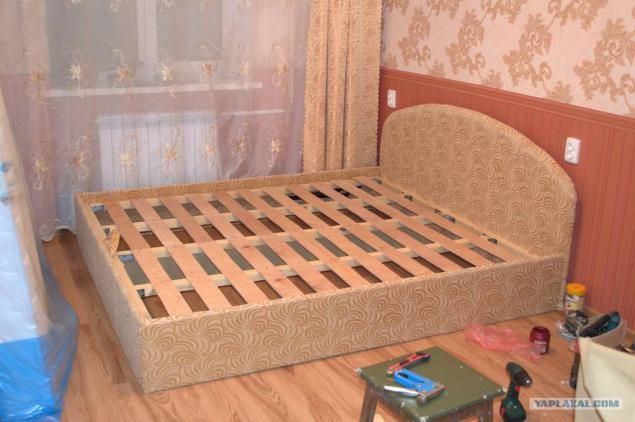
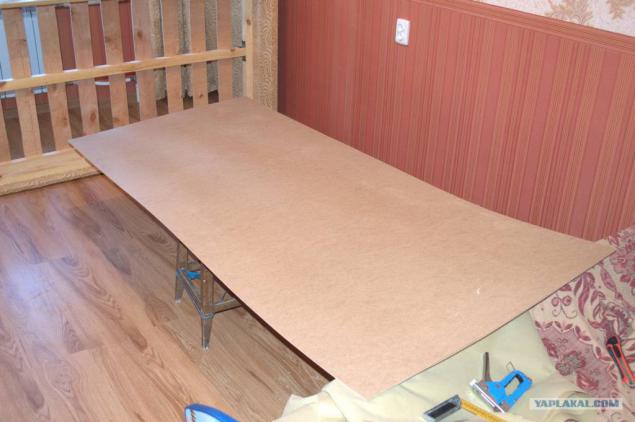
18. Turn the entire structure to the side to knock out fiberboard glovebox.

19. It was necessary to link to the base frame of the bed mattress, because when turning sharply to one side, he shot and nearly broke the window sill :)

20. Lifting gear folded.
21. The pillar had slotted to rise when it is not limited by the cross bar frame mattress.

22. Fit fiberboard sheets. In the foreground one of the most popular instruments of the day - a stapler. After his hand was sick for two days, like pionEra- onanist :)
23. One half ready.
24. obbivat back.
25. Done.
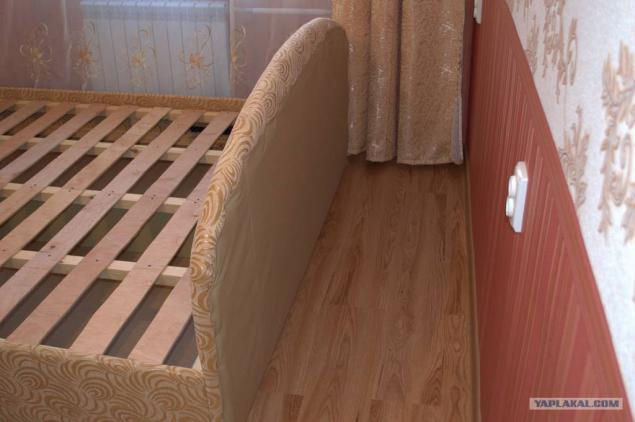
26. Actually, the almost finished product. In the center of the right and left thrust bars.
27. In order to frame the mattress and slats in the glove compartment did not fly all sorts of chips and sawdust, egged the bottom frame lining cloth. In the photo I'm at work :). Photographed wife said - especially for Yap ...
28. The thoughts still obbit frame mattress lining fabric on top of sipes, not to spoil the mattress, but slightly miscalculated, the fabric over, until the sheet under the mattress is, but this is temporary.

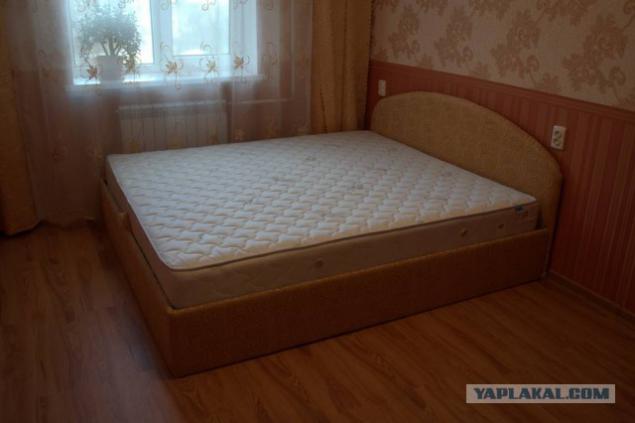
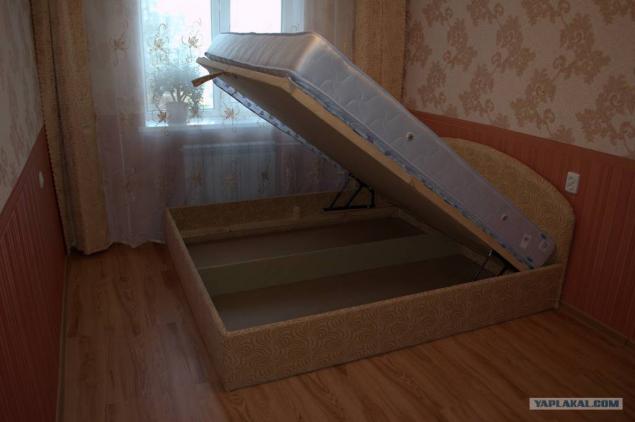
29. Have laid a mattress. The construction rises, do not say that with one finger, but easy enough.
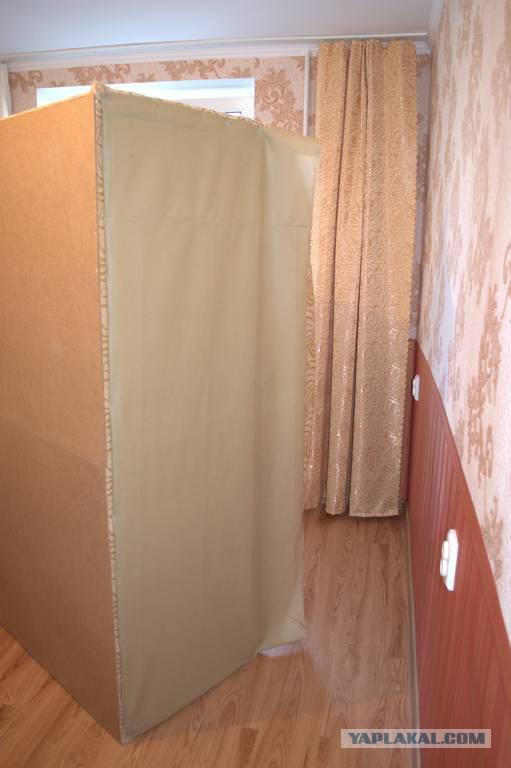
30. Bed folded.
Posted in [mergetime] 1384101401 [/ mergetime]
P.S. Anticipating comments about squeakiness design will say that I have a Shura and tighten the structure once a year for me is not difficult.
The timing - half to purchase all necessary, and two days to assemble, with breaks for small household chores.
According to the budget it turned out: all the consumables on the bed cost about 6,000 rubles. Mattress 1800h2000mm- 6,000 rubles. Outcome 12000rub. By the way, in most shops bed mattress without such a plan is 10,000 rubles. So I think, game worth the candle cost.
In principle, all this. You can kick. Thank you for attention!

Source:
There will be 30 pictures, I will inform you at the end, so please do not post rack.
Background. Once there was a question about buying a new bed as the family grows and we have the usual couch would not fit. Immediately identified with his wife in understanding what kind of beds we need. I wanted dvuspalku 180x200 cm with a lifting mechanism for the mattress, which will be kept under slow-moving items and bedding.
Initially, it was decided to buy a bed, but beating a number of furniture stores and comparing the proposed product with its cost, this idea seemed to me less and less interesting. And more and more there is a desire to make the bed, that I need to. Partly because of what they wanted in the shops, lomili, as for me, inadequate price. Moreover, some tools available on the farm, and they do not like the hands of the fifth point grow ...

Calculation and choice of material. For framing of the selected sheets of plain sanding chipboard 3500h1750h16 mm. For lameley- plywood 1525x1525mm 8mm FC. For tamping storage compartment -2 fiberboard sheet brushed 2440x1220x2.5 mm. Bruce 40h50mm. Upholstery foam sheet spinki- 3000h1000h30mm. To trim the outside of the carcass -porolon 3000h1000h10mm. And 5 p m. Shenila Facing 1500mm wide and 5 m f. Nonwoven fabric width 1600 mm for rough rapping. Reinforced lifting mechanism with gas shock absorbers, 8mm bolts with washers and nuts. Box Staples for stapler -6mm i10mm.
So as we minimize costs and fit into one sheet of particle board, I had to make the back of two parts, connected by a shield of the same particle board, but a bit smaller, which, however, had a positive effect on its rigidity.
01. That sheet cutting chipboard

02. The back side of the team back. Sticking her grandmother came to the rescue in time :)

03. The preliminary estimates of parts, evaluation dimensions. Central partition of particle board height 20cm. The side panels are attached through the bars of the same height. Later, they will go to the mattress frame. Inside is not quite exactly napilennye "slats" plywood. Jigsaw in his hands for the third time in my life, so-so as there is.

04. And this is the first mistake: preliminary estimates slats shown that they are very soft. I think that even if they were of 12mm plywood, it would also sagged. Need something to solve quickly, good bar took stock on the 4th more. That's estimate, it will look like frame with additional beams.

05. I went to work on the backrest upholstery foam.

06. The back side.

07. Now, close-fitting cloth. Initially tissue stapler nailed on the bottom edge of the back, and now we pull it up and to the side to avoid wrinkles, fixing the whole thing stapler.

08. Almost upholstered backrest in front. Bab ear and immediately useful. By the way, it also acted as a seamstress -motoristki for all that concerned tissues.

09. Still further strengthened frame bars.

10. Already I want to figure out how it will look.

11. cording frame centimeter foam.

12. Another view.

13. I went to work on the slinky fabric bed frame. Before that, the pre-spaced and lock nuts bolts with Teflon bushings for mounting the hoist. By the way, and then span: experience has shown that it was necessary to make not two, but all four bolts on one side, because then when lowering the frame with a mattress lifting mechanisms to tighten up a little bit. Looking ahead, I will say that solved this problem with additional screws with thick washer of suitable diameter.

14. The lifting mechanism, screwed to the frame.

15. Bed frame, back frame and mattress assembly.

16. The frame of the mattress raised. There is also an explanation as Chipboard frame thin enough -16mm. In any case, he added, rib, from the remaining timber screwing it on the screws under the lifting mechanism.

17. slats fastened, the main work on the frame is complete.

18. Turn the entire structure to the side to knock out fiberboard glovebox.

19. It was necessary to link to the base frame of the bed mattress, because when turning sharply to one side, he shot and nearly broke the window sill :)

20. Lifting gear folded.

21. The pillar had slotted to rise when it is not limited by the cross bar frame mattress.

22. Fit fiberboard sheets. In the foreground one of the most popular instruments of the day - a stapler. After his hand was sick for two days, like pionEra- onanist :)

23. One half ready.

24. obbivat back.

25. Done.

26. Actually, the almost finished product. In the center of the right and left thrust bars.

27. In order to frame the mattress and slats in the glove compartment did not fly all sorts of chips and sawdust, egged the bottom frame lining cloth. In the photo I'm at work :). Photographed wife said - especially for Yap ...

28. The thoughts still obbit frame mattress lining fabric on top of sipes, not to spoil the mattress, but slightly miscalculated, the fabric over, until the sheet under the mattress is, but this is temporary.

29. Have laid a mattress. The construction rises, do not say that with one finger, but easy enough.

30. Bed folded.
Posted in [mergetime] 1384101401 [/ mergetime]
P.S. Anticipating comments about squeakiness design will say that I have a Shura and tighten the structure once a year for me is not difficult.
The timing - half to purchase all necessary, and two days to assemble, with breaks for small household chores.
According to the budget it turned out: all the consumables on the bed cost about 6,000 rubles. Mattress 1800h2000mm- 6,000 rubles. Outcome 12000rub. By the way, in most shops bed mattress without such a plan is 10,000 rubles. So I think, game worth the candle cost.
In principle, all this. You can kick. Thank you for attention!

Source:
Tags
See also
As I pilaf gash
Knife KA-BAR USMC
Mouse and cheese
Hostel. Prague.
How to restore Victory
Nostalgia: Screenshots of Doom (25 photos)
Patriarchal American weekend
Baby Gadgets: to surprise, entertain and amuse children from 2+ years
How to zone bed: 12 interesting techniques