As I was doing the sled snowmobile
 Bashny.Net
There are letters and photos in the amount of 66 pieces (unfortunately, not the best quality).
It so happened that in the autumn of 2012, we bought the cottage: conveniently located land with a house, unfinished, attic which in the summer 2013 has turned into my studio.
Also that summer happened to me a happy event: true an old dream - the purchase of a snowmobile. Well, if there was a tractor - it means necessary and wagon :) In this case, the sled. Snowmobile I have never been, respectively, as the sled I do not know. But, following the popular wisdom "Prepare sledge in the summer, and in winter the cart," sledge going to do.
Few conferred with his wife. It should be noted, in recent times, it is very like handicrafts made of wood. And then the devil pulled me to say "Let's do sledges - wooden sleigh that use of the Far North." It is clear on that and decided to do. But here's the problem: I live sledges never seen the drawings on the Internet is not found. I only found a bunch of classic sledges to ride on dogs, but for a couple riding a reindeer (for the price of 25 000 rubles).

And I need something, for the most part, cargo. Then I remembered that my favorite snowmobile forum, upload photos freight sleds, which use the Khanty and fishers. However, again the problem: instead of Khanty hardware used rawhide leather Polevik yes, which can be dialed from the drillers. I do not have that luxury, so I decided to simplify the task. Yes, the screws will be used (which I have, in fact, is not happy, as the sledge will zhesche).
But first things first.
In fact, the topic I was preparing prodolzhitlnoe time making notes, correct something (with photos screwed). And then came the topic forum3/topic641704.html and blo almost changed his mind to post the results of my rukozhopiya: D
Let's start the process. Ideally I would like to make a sled with runners at least 250mm wide. Then I thought: 250mm - Aspen is - thick log and without knots. Perfect option. But! Sledges, I wanted long. The navel unleash drag a log on the site, but the money to pay for shipping - toad strangling. Because I changed my mind and decided to do the runners width 110-120mm. And, most convenient, birch: aspen handled a little more complicated, but do not bend much worse (it was hunting experience in manufacturing of skis, however, aspen, birch, but also tried to bend).
I gathered together and went to a nearby quarry. Why the bat? Because there is developed a new site, a forest cut out. I picked up in birch smoother and thickness necessary to me. With raskryzheval hatchet, I took the butt of 4 meters (1 meter margin, so that you can choose the better part of the logs). He took the butt of it, because there is much less knots than at the top.
A short note: it took a fresh tree, because I know that for bending hardwood moisture it should be around 25-30%, which is a natural moisture content of fresh wood. This means that when I have to bend the skis sledge - I do not need to be a couple of weeks to soak the tree (or 4 hours to steam).
It has successfully completed a quest for the delivery of a four-meter logs (I will call it a "blank") to the area (and in the car sedan, seats had to recline).
The preform is packed into two lumps - preparing for cutting (sorry for the quality of the photos, became interested in the process and did not monitor the quality of pictures, and twilight, as all do in the evenings after work).
Further, by using a chain saw, and began ripping the workpiece, moving from the center to the edges. Edges sawn as a last resort. He did so in order to see better the line of cut, because if not start to cut from the middle - a log is transformed into a slingshot - internal tension wood, probably.
Photo 02
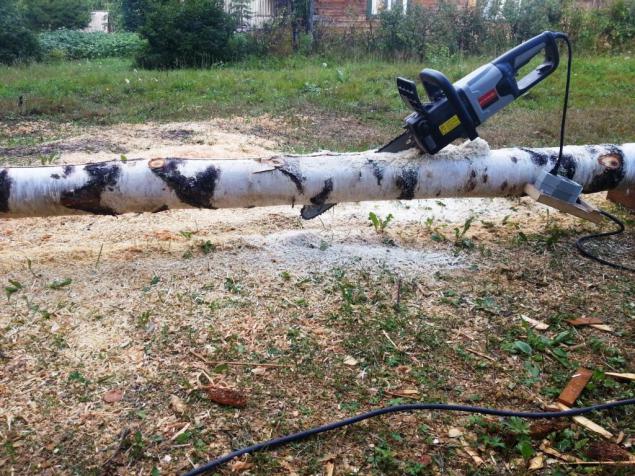
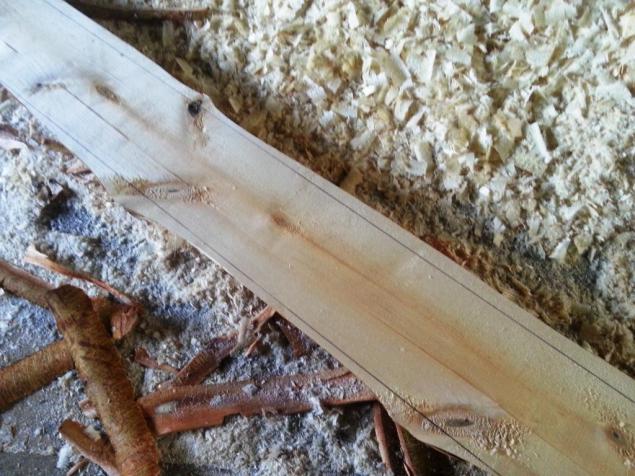
It turned out here are half that is more reminiscent of croaker than the board.
Photo 03

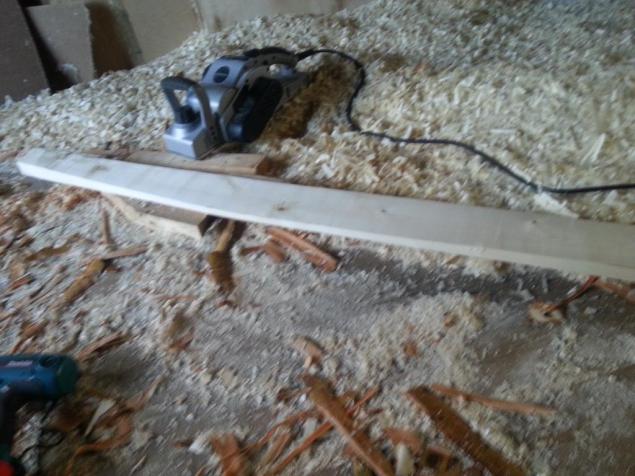
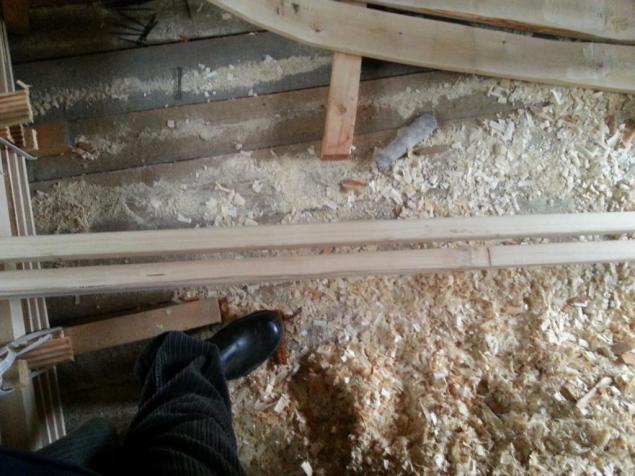
Zavoloko one half of the blank in his "workshop", laid between two wedges bolted to the floor so as not cool, because I have to level the surface electroplane.
Photo 04
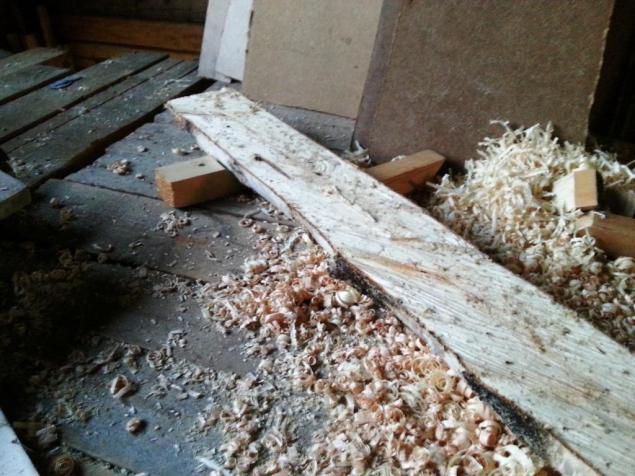
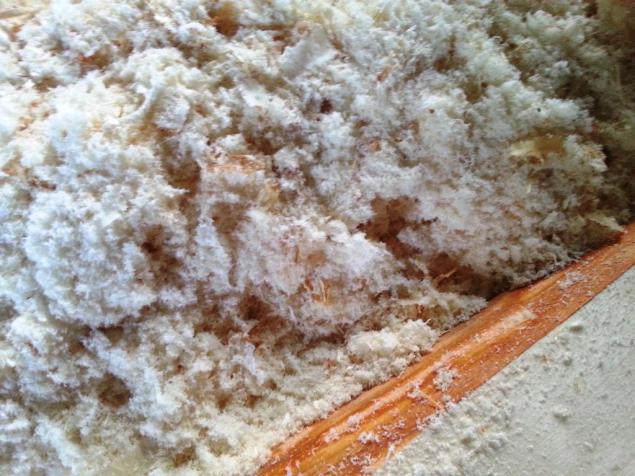
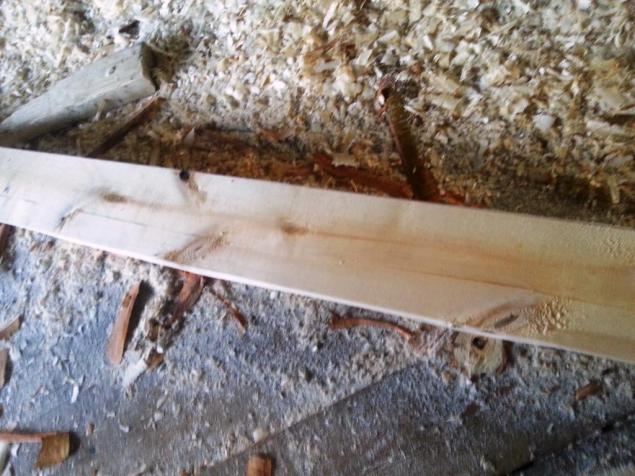
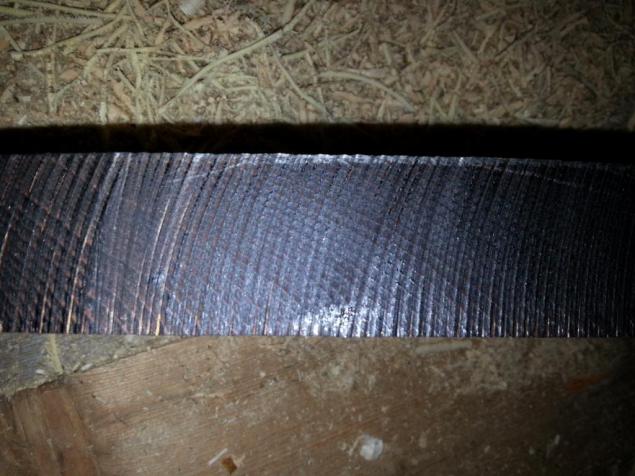
Here's what came of it: a smooth surface and a mountain of chips. Sorry for the quality of pictures - attic - unfinished, normal lighting not (carry hangs) and fotkal on the smartphone, as always forget to take a camera down the house.
Photo 05
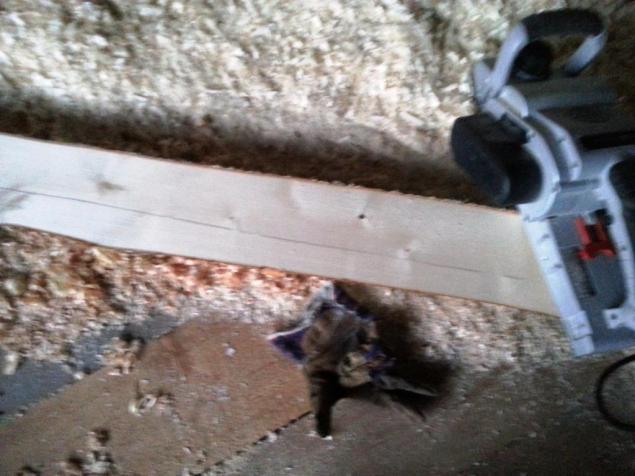
It should be noted, fresh birch very hard handled power tool. Dvuhkilovatny plane with svezhenatochennymi knives and 15 000 revolutions feels very heavy burden. Because it has to lead slowly, making chips more like dust, even dust.
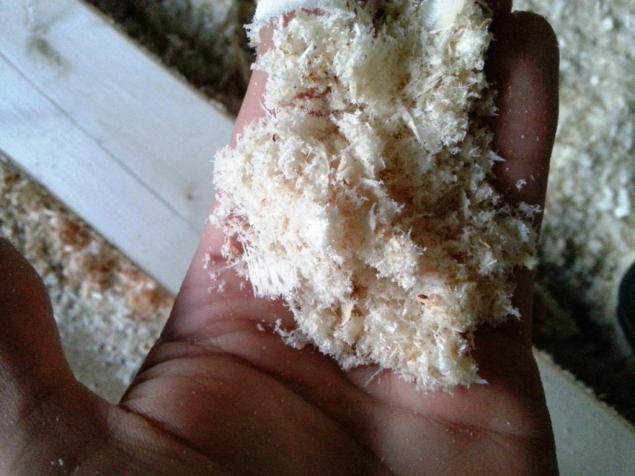
What a pity that in the post can not be transferred to the fragrance, which is filled with chips room :(
Photo 06
You probably noticed that I have not processed wood sanded? For this, too, there is a reason I have to bend the ski and that the workpiece is not quickly dried up, I oshkurival at the last moment, before the shaping of the board and direct sag.
So it happened that I like oshkurivat birch with a knife or an ax rather than a specially sharpened shovel.
Photo 07
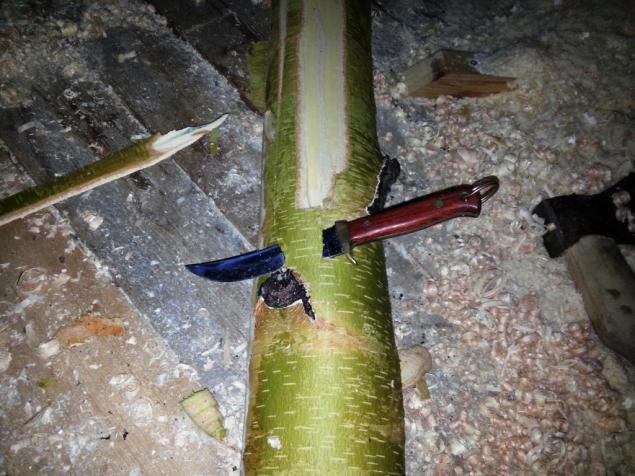
As usual, clumsy photos (Fota on stomesku).
Photo 08
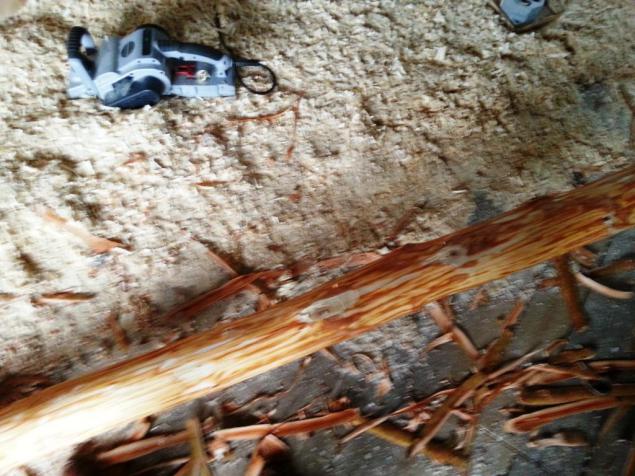
And now have to work quickly, as the workpiece sanded.
That turns into polubrevno board (sawmill I have not, because electroplane).
Forgot remove screwdriver, and priporoshit chips.
Photo 09

Again I admire chips. Mmmmmmm what the smell is!
Photo 10
Mark up blank - we need edged board as possible.
Photo 11
It was lazy to put in the line of circular saw, cooking bench, and enough space - building materials are stored. All electroplane done fast enough.
Wedge to clamp the workpiece between the two bars, nailed to the floor.
Again crooked photo :(
Photo 12

Here's what happened. Later, resurfacing will correct all schools. Tortsenul blanks to the length of 3200mm
Photo 13
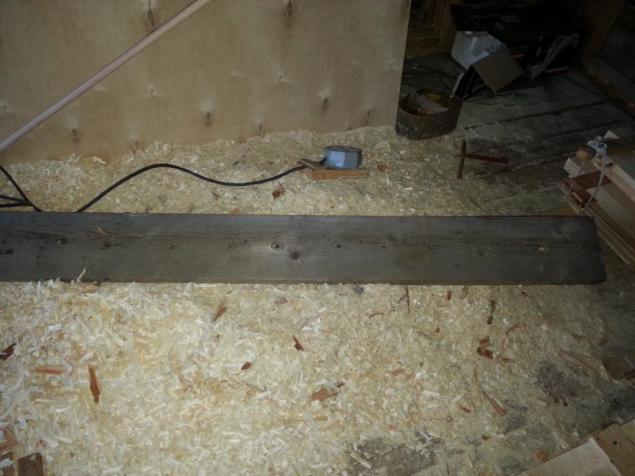
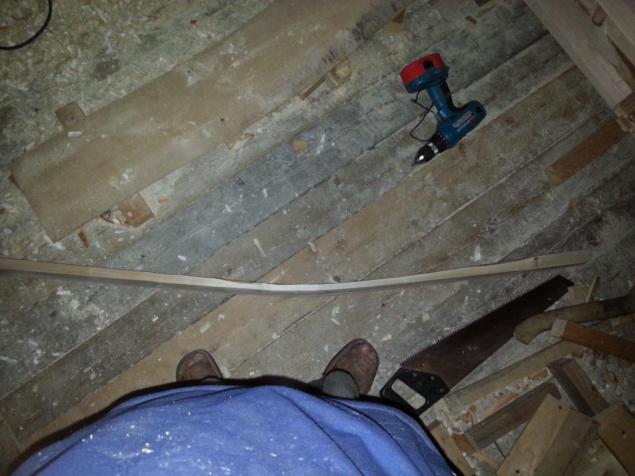
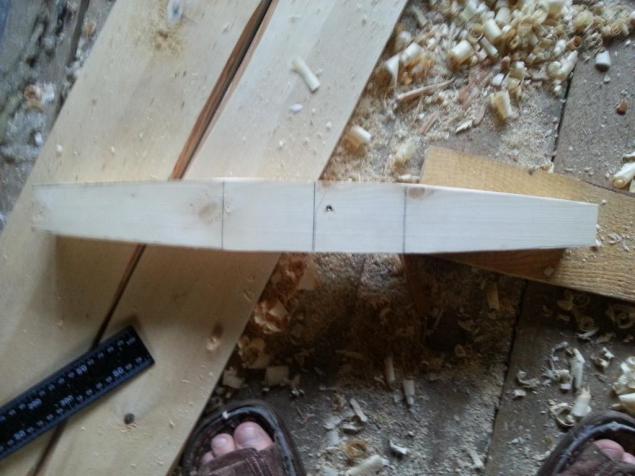
I am getting ready to bend. Bent of the need to make thinner, otherwise, first, navel unleash bending, and secondly - there is a risk to break the workpiece, considering that according to the law of meanness in place bend still got a knot.
That's a form I have given the board. Guess what quality photos?
ps: the photos of bending would be clearer what form I have given the workpiece.
Photo 14
It begins one of the most critical moments - bending. I will not go into the details of what processes are experiencing hardwood during bending. Just describe the process.
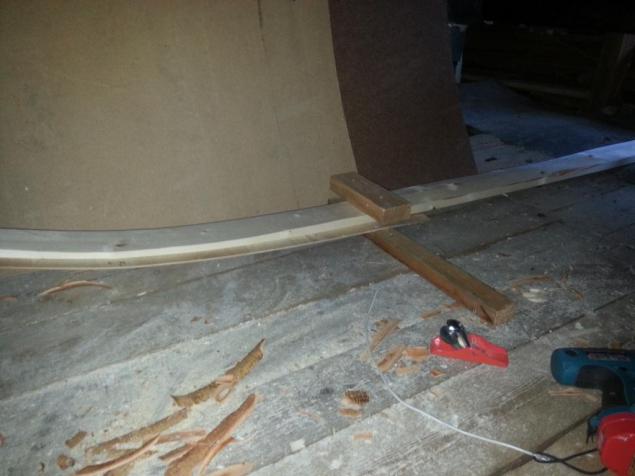
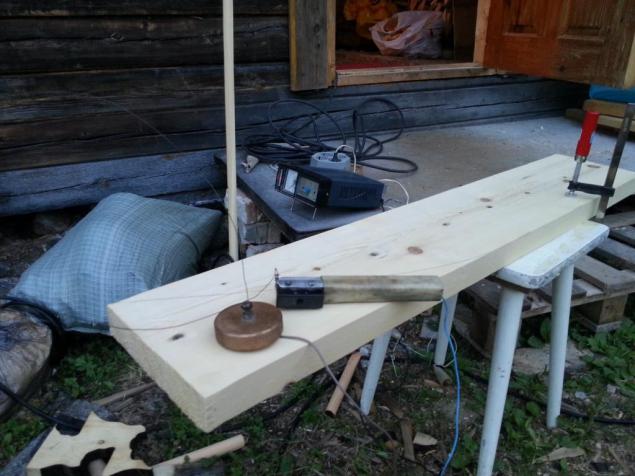
Bottom puts a blank strip of plywood 3-4mm, length equal to the distance by which to bend. One edge of the workpiece stifle the two bars using self-tapping screws. Substitute under the sock churochku - a bend limiter.
Photo 15
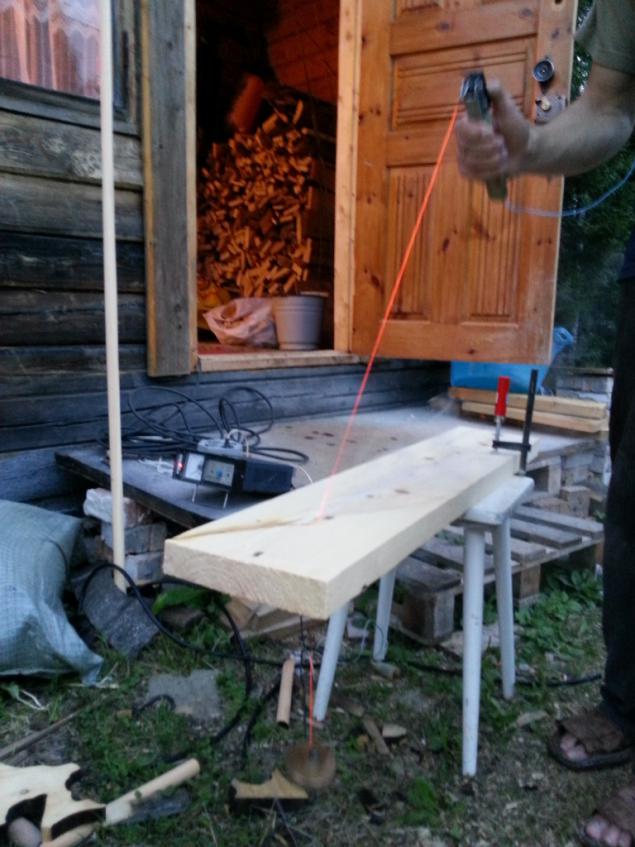
The second edge stifle similar, but firmly locking the entire structure to the floor.
Photo 16
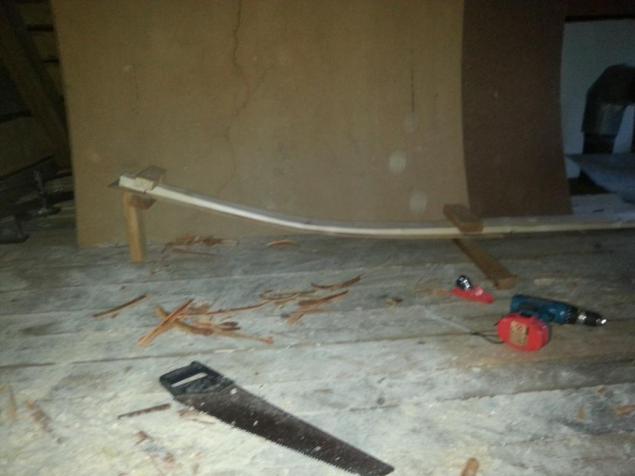
General form. Quality - as usual - in a hurry.
Photo 17
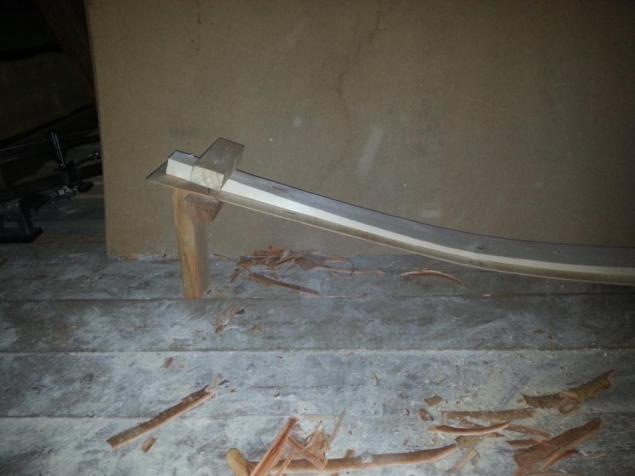
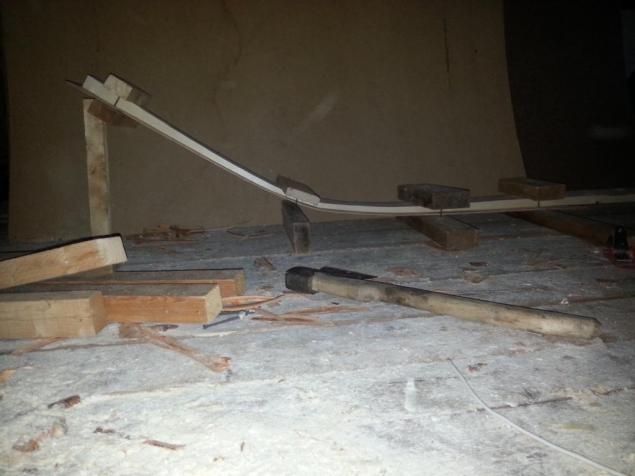
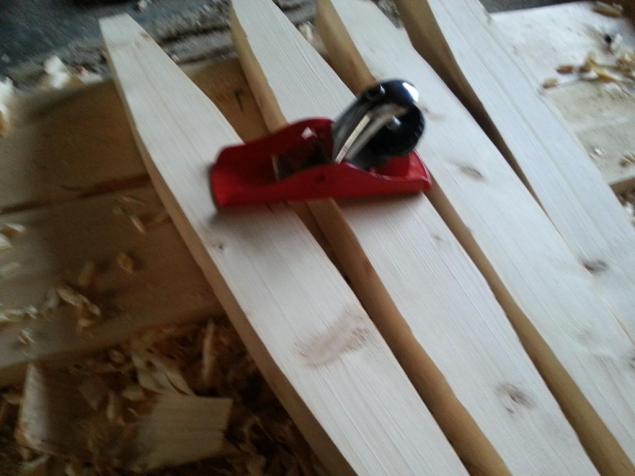
Molding. The central block is also firmly fixed to the floor bottom. The upper part of the draw in the workpiece accurately to the bottom of the screws, slowly, slowly, without sudden movements, with a sinking heart - though not hear the crackling.
Photo 18
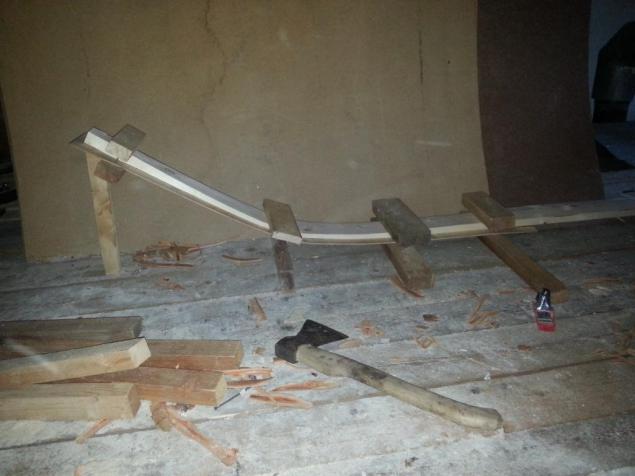
Another view.
Accordingly, the second workpiece skiing to be done all the same manipulations that are applied to the first.
In this position, leave to dry preform. And while they dry - you can do other things.
Photo 19
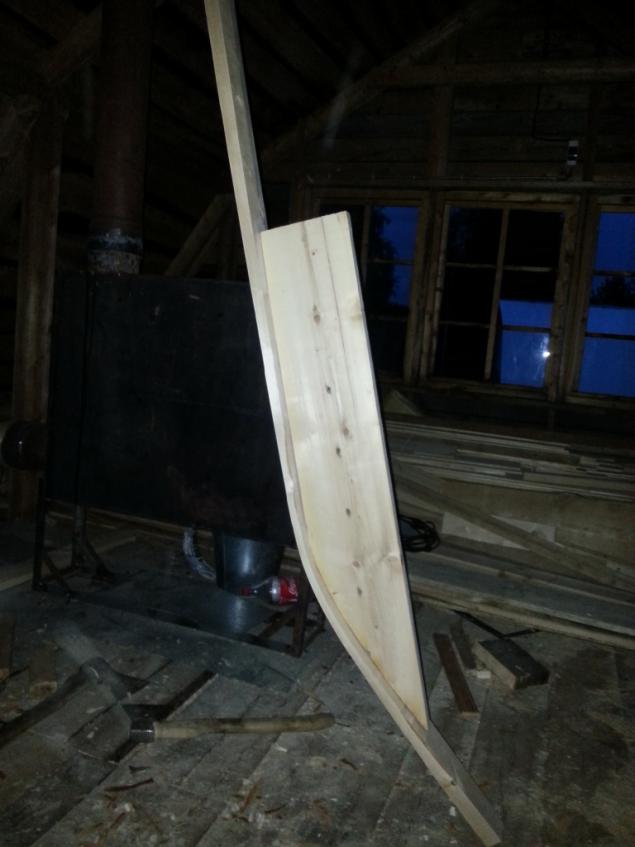
There was a small incident. I realized to continue - you need to be able to turn the skis in hand. Because drying they will conduct in a different position (week before dried up in the initial position).
It was found not need wide board.
Photo 20
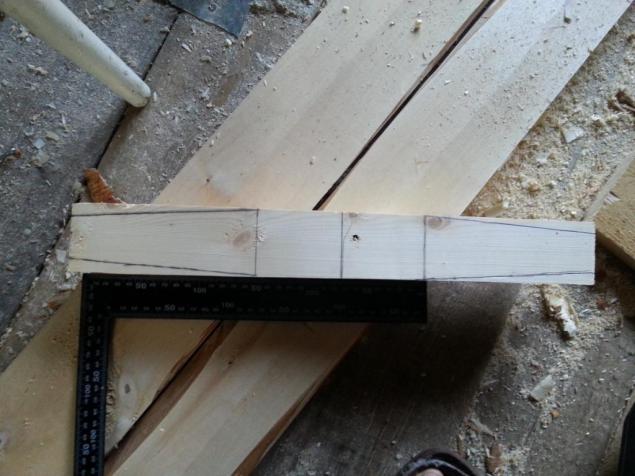
Cut off from her by 1100mm, prostrugana, otcherchena bending line skiing.
That's the handheld device is supposed to cut through.
Photo 21
So it happened in our family that nobody likes Jigsaw (and even more, tame).
About 30 years ago, my father, who was then working at the gas processing plant, went into the electric shop for electricians. I saw them a spiral of nichrome, performs the role of the cigarette lighter. I poked to stick - on (cut). I took them a little nichrome. He came home with change. Remembering that a hot nichrome string cut foam - decided to try a similar structure on the tree. He took a large ball bearing (a little less than a hen's egg) is welded to the bolt M6. Bite off cutters 60-70 cm Nichrome 0.65 podmotal one end to a bolt on the ball, pressed nut. He took an old ski pole, cut 15 cm, the part that is to handle. Primastyril mikrushku to (a switch button derzhesh - continuity, let - open), to mikrushke - hook with aluminum wire. Connect it to the conclusions of the entire economy 36V homemade welding transformer. He took a piece of wood, painted figure and tried to cut. Received showed mom. Mom whole thing very much, then this unit has been actively applied in our family: carved trim on the doors, windows, home of cash and so on. Well, that's another story.
Photo 22
Here's a slice obtained.
Photo 23
He took off his skis drying ... Something is very active dry (not surprisingly - took a little time) - the board took shape almost.
Photo 24
Fasten first wire to the workpiece could twirl.
Photo 25

And then in the screws (do not worry, the runners will still schlifovatsya, and also, ideally, I would like to hem runner disbanded HDPE pipe, if I can find).
Photo 26
Fasten two skis next to less space occupied, and the stands and seats for them to do would be more comfortable
Photo 27

Cut 8 rack size 440 * 60 * 40, marks the center, retreating from the center of 70mm on each side.
Photo 28
With hatchet hew the line and the right lapping a plane.
Photo 29
Here they stand. So far, four of them on one ski. With them finishing planer.
About the quality of pictures already starts to quietly keep quiet ... It's too keen on the process.
Photo 30
Using the moment there is no rain, fifties dismiss board here on these bars. Bars crooked - so much source material. It so happened that the former owner garden gates did not bother to properly folded. The result - led board.
Rasp bars. It will handrails, so to speak ... But splinters from them - to anything.
Photo 31
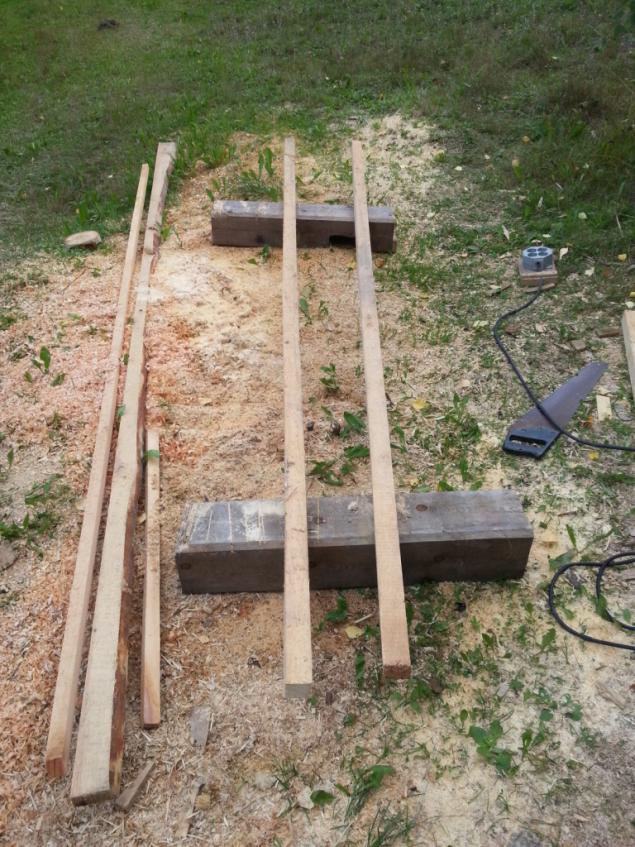
Finishing a plane rounded corners on the entire length of the bars to get something like this form
Photo 32
Rose bars upstairs in the "workshop". I forgot to say, the length of 3000 mm bars.
Photo 33
With a chisel do seating depth 20-25mm under the rack. Under each rack - individual placing marked up at the front. Racks in the seat should include tight, but not too much so as not to split the ski. All signed.
Photo 34
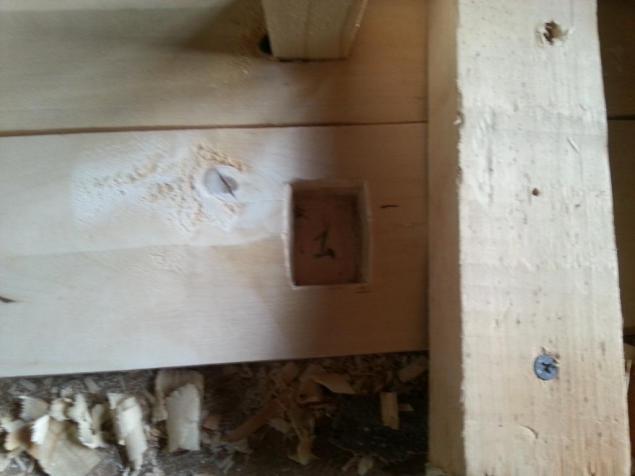
Scored Kiyanochka to their seats rack. I attach bars so that you can identify in bars gash under styki.
Photo 35
All scheduled. He took off the rack. Cut paper template - 20mm * 40mm box - it will be holes ... I do not know what to call it. Let it be "lags».
I went out into the street (No rain) to cut holes in racks under the joists.
Photo 36
Posted in [mergetime] 1391775136 [/ mergetime]
And as I write the next post - you can see video nebolshje.
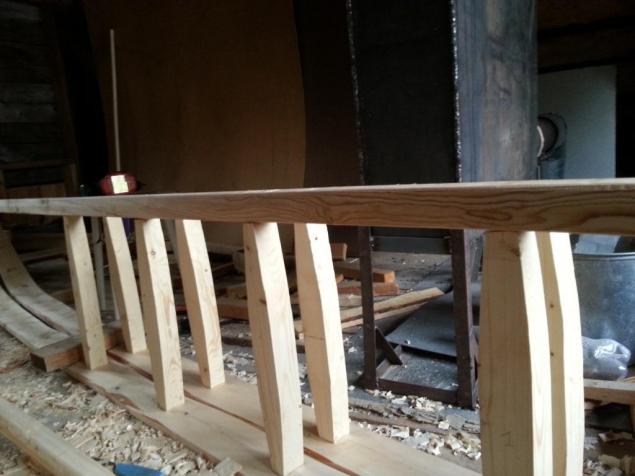
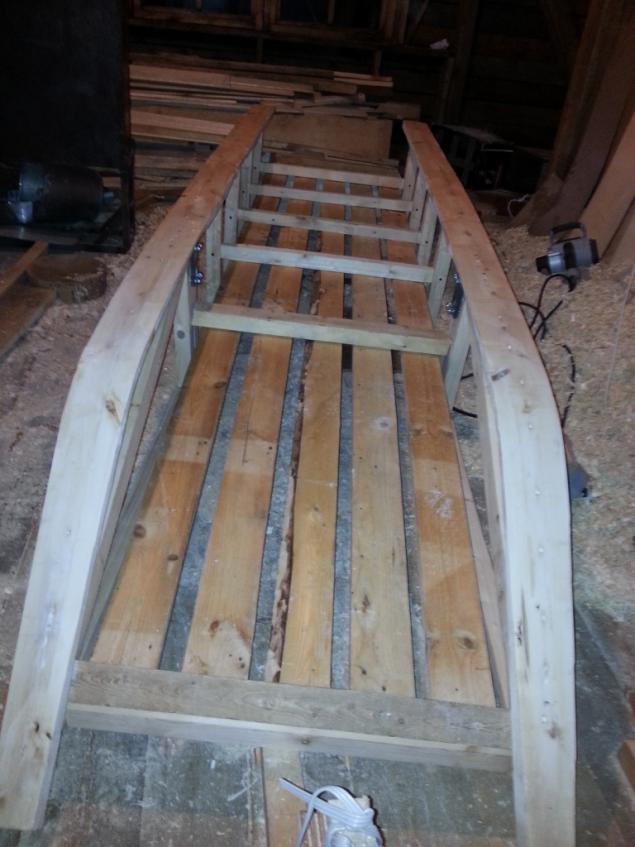
Establish a rack (Kopylov) in place. Established in its place handrails, front prishurupil them. Behind - I pulled the wire. It is too early to fix them tightly.
He started manufacturing lag. Their length is chosen based on the width of the tracks of a snowmobile (for Two track odnolyzhnogo snowmobile) or track skis (for odnogusenichnogo dvuhlyzhnogo snowmobile). That is, the sled must clearly fall within natoptannoy snowmobile trail.
I begin to install lag.
Photo 37

The bars are carefully adjusted stamesochkoy to their ends well, but tight, not a split rack, entered the hole racks (scored ax ax).
Photo 38
This part I called bumper :)
In the photo is not very visible, but some form of a plane devoted to this bar tight fit in the interface between the ski and the handrail. Just select the slot where you want to go to the flooring boards.
Photo 39

These racks are mounted drawbar. And at such a distance from the nose in order not to break the sled during the assault on hillsides, tripping.
They are fixed with just 6 screws each, without slots, as will be sufficiently loaded. They will still be attached Amplifiers bow (later show).
Photo 40
Further, between the racks thoroughly contractible wire rack to sit well in all slots, as far as possible.
Photo 41
Contractible screws handrails to the posts, turn over the sledge. We do the same thing with skis.
Stretched lag screws fixing points to the uprights.
Remove the wire.
Now you can shlifanut runners (not to flip back and forth sledges).
Photo 42
A little bit ...
priporoshit
Photo 43
Hard wished he forgot at home respirators ...
Hands, of course, also priporoshit ...
Photo 44
Amalyan my three-meter (slightly more than) the board of crates, which came to a snowmobile.
I chose five boards (width - 100mm, thickness - 20 mm), prostrogat and paved with large enough gaps.
Firstly, less consumption of boards.
Second, the less weight sledges.
Third, turn the sled breathe. I do not know how useful, but people praised it dyschaschie sledges. Let it be so.
Photo 45
That's from a different angle
Photo 46
Now started manufacturing tailgate. Prostrogat and vypel boards, hold them together.
For the convenience of layout board attached to the sledges with two screws - one in the order (the photo shows - top left and right).
Photo 47
A little reflection, decided to make easily removable tailgate: little did have to carry something long, for example, four-meter board.
Photo 48
Were Drill handrails and extreme beam at broadside. Stud threads, one that goes into the wood smeared with liquid nails (for safety).
Here's the finished board (do not forget to hang reflectors)
... Rope hitch on KrAZ hung a bucket and rope hung on a sledge :) In fact - is that eye-nuts are not unscrew.
You're just a little bit: bend to strengthen the place of skis, do dyshel mounting on racks Fifth, do yourself drawbar.
Photo 49
It's time to make amplifiers bow. It was dissolved in half a piece of board fifties (width 130mm).
Photo 50
Prostrogat and gives shape. Mark up by applying to the sledges.
Photo 51
Install an amp in its place.
Photo 52
As usual, without jambs did not work, but sorry ... Do not worry, this time to fix them.
Photo 53
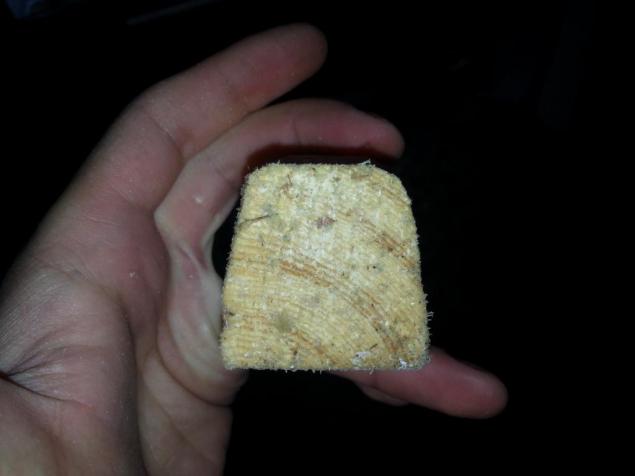
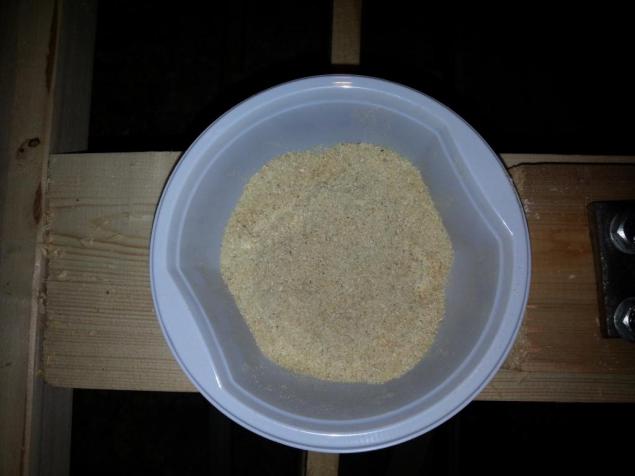
Naryl in the shed for the old equipment sitichko flour. That's it! Take the chips and sieved. Looking for fine sawdust.
Photo 54
The resulting "flour" interfere with PVA carpenter (not to be confused with the building, which is to be added to the dry mixture, such as plaster).
Now all the gaps / cracks / defects / cracks / knots dropped out, you can paint over this badyagoy. Putty is not better because it does not stick together. Even at school, from school work, I remember that PVA glue mixed with sawdust and stuffed into the gap gives strength is not bad, almost no inferior strength of the product.
Photo 55
Recessed runners in the screws too smeared the mixture (picture rails without putty).
Photo 56
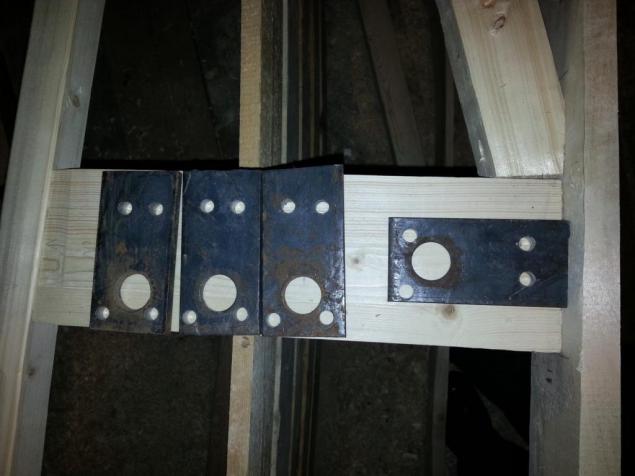
It's time to prepare for the fifth rack installation dyshel yet to be manufactured.
It was found 10mm metal plate, and drill does not need anything except four holes F10 bolt, with markings that I have, of course, nakosyachil: huddling on the first hole layout - all the others had to do the same. It's not scary, because the cap bolts will be cut, resulting welded studs to the plates, the welding Grind. This was then.
Photo 57
I hesitate to metal thickness. Still, the extra weight. Came chief mechanic. Also looking thoughtfully. Well, we rubles gained her chief mechanic called Delfi, voooon that Finotchka reds and decided, these two stand on the screw. I do not like it or uhaydohayu - Rewritten with all the stocks that will be identified during the operation.
Photo 58
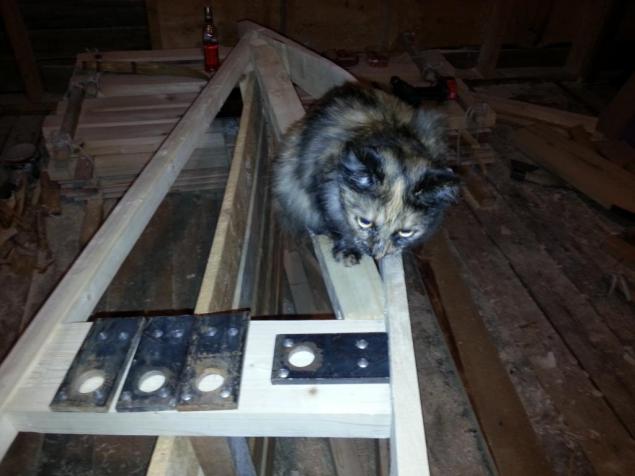
Well, something like that happened. This is semi-finished product. It can be said to mark. Yet to welding.
Photo 59
Another view
Photo 60
It is necessary to start making dyshel. Materials yet. Post this brings little benefit. Remember the so-called bumper, which I gave a definite shape. Not that it's bumper. This is more nasal lag. I photographed her form, since that post could not see the form (not the angle). To sculpt the photo did not, as the shadow of issues already built sleds. I decided not to disturb the chronology and make a retreat somewhere in the middle of my story. After all, no one is offended?
Photo 61
There was a trouble-trouble-grief! Part of the gallery was later made longer phone and fotikom, I managed to lose.
That's all I wanted to say.
Source:
It so happened that in the autumn of 2012, we bought the cottage: conveniently located land with a house, unfinished, attic which in the summer 2013 has turned into my studio.
Also that summer happened to me a happy event: true an old dream - the purchase of a snowmobile. Well, if there was a tractor - it means necessary and wagon :) In this case, the sled. Snowmobile I have never been, respectively, as the sled I do not know. But, following the popular wisdom "Prepare sledge in the summer, and in winter the cart," sledge going to do.
Few conferred with his wife. It should be noted, in recent times, it is very like handicrafts made of wood. And then the devil pulled me to say "Let's do sledges - wooden sleigh that use of the Far North." It is clear on that and decided to do. But here's the problem: I live sledges never seen the drawings on the Internet is not found. I only found a bunch of classic sledges to ride on dogs, but for a couple riding a reindeer (for the price of 25 000 rubles).

And I need something, for the most part, cargo. Then I remembered that my favorite snowmobile forum, upload photos freight sleds, which use the Khanty and fishers. However, again the problem: instead of Khanty hardware used rawhide leather Polevik yes, which can be dialed from the drillers. I do not have that luxury, so I decided to simplify the task. Yes, the screws will be used (which I have, in fact, is not happy, as the sledge will zhesche).
But first things first.
In fact, the topic I was preparing prodolzhitlnoe time making notes, correct something (with photos screwed). And then came the topic forum3/topic641704.html and blo almost changed his mind to post the results of my rukozhopiya: D
Let's start the process. Ideally I would like to make a sled with runners at least 250mm wide. Then I thought: 250mm - Aspen is - thick log and without knots. Perfect option. But! Sledges, I wanted long. The navel unleash drag a log on the site, but the money to pay for shipping - toad strangling. Because I changed my mind and decided to do the runners width 110-120mm. And, most convenient, birch: aspen handled a little more complicated, but do not bend much worse (it was hunting experience in manufacturing of skis, however, aspen, birch, but also tried to bend).
I gathered together and went to a nearby quarry. Why the bat? Because there is developed a new site, a forest cut out. I picked up in birch smoother and thickness necessary to me. With raskryzheval hatchet, I took the butt of 4 meters (1 meter margin, so that you can choose the better part of the logs). He took the butt of it, because there is much less knots than at the top.
A short note: it took a fresh tree, because I know that for bending hardwood moisture it should be around 25-30%, which is a natural moisture content of fresh wood. This means that when I have to bend the skis sledge - I do not need to be a couple of weeks to soak the tree (or 4 hours to steam).
It has successfully completed a quest for the delivery of a four-meter logs (I will call it a "blank") to the area (and in the car sedan, seats had to recline).
The preform is packed into two lumps - preparing for cutting (sorry for the quality of the photos, became interested in the process and did not monitor the quality of pictures, and twilight, as all do in the evenings after work).
Further, by using a chain saw, and began ripping the workpiece, moving from the center to the edges. Edges sawn as a last resort. He did so in order to see better the line of cut, because if not start to cut from the middle - a log is transformed into a slingshot - internal tension wood, probably.
Photo 02

It turned out here are half that is more reminiscent of croaker than the board.
Photo 03

Zavoloko one half of the blank in his "workshop", laid between two wedges bolted to the floor so as not cool, because I have to level the surface electroplane.
Photo 04

Here's what came of it: a smooth surface and a mountain of chips. Sorry for the quality of pictures - attic - unfinished, normal lighting not (carry hangs) and fotkal on the smartphone, as always forget to take a camera down the house.
Photo 05

It should be noted, fresh birch very hard handled power tool. Dvuhkilovatny plane with svezhenatochennymi knives and 15 000 revolutions feels very heavy burden. Because it has to lead slowly, making chips more like dust, even dust.
What a pity that in the post can not be transferred to the fragrance, which is filled with chips room :(
Photo 06

You probably noticed that I have not processed wood sanded? For this, too, there is a reason I have to bend the ski and that the workpiece is not quickly dried up, I oshkurival at the last moment, before the shaping of the board and direct sag.
So it happened that I like oshkurivat birch with a knife or an ax rather than a specially sharpened shovel.
Photo 07

As usual, clumsy photos (Fota on stomesku).
Photo 08

And now have to work quickly, as the workpiece sanded.
That turns into polubrevno board (sawmill I have not, because electroplane).
Forgot remove screwdriver, and priporoshit chips.
Photo 09

Again I admire chips. Mmmmmmm what the smell is!
Photo 10

Mark up blank - we need edged board as possible.
Photo 11

It was lazy to put in the line of circular saw, cooking bench, and enough space - building materials are stored. All electroplane done fast enough.
Wedge to clamp the workpiece between the two bars, nailed to the floor.
Again crooked photo :(
Photo 12

Here's what happened. Later, resurfacing will correct all schools. Tortsenul blanks to the length of 3200mm
Photo 13

I am getting ready to bend. Bent of the need to make thinner, otherwise, first, navel unleash bending, and secondly - there is a risk to break the workpiece, considering that according to the law of meanness in place bend still got a knot.
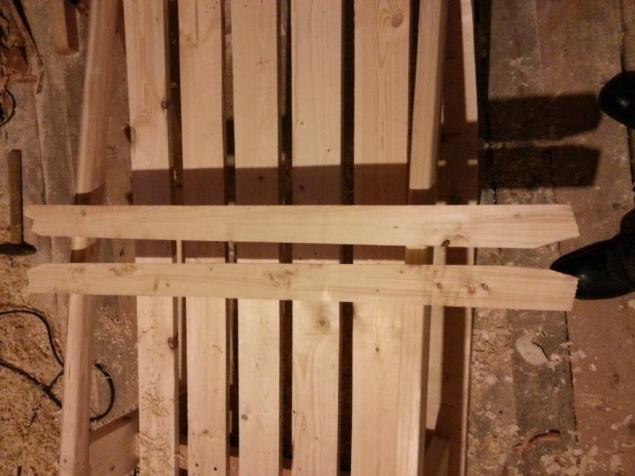
That's a form I have given the board. Guess what quality photos?
ps: the photos of bending would be clearer what form I have given the workpiece.
Photo 14

It begins one of the most critical moments - bending. I will not go into the details of what processes are experiencing hardwood during bending. Just describe the process.
Bottom puts a blank strip of plywood 3-4mm, length equal to the distance by which to bend. One edge of the workpiece stifle the two bars using self-tapping screws. Substitute under the sock churochku - a bend limiter.
Photo 15

The second edge stifle similar, but firmly locking the entire structure to the floor.
Photo 16

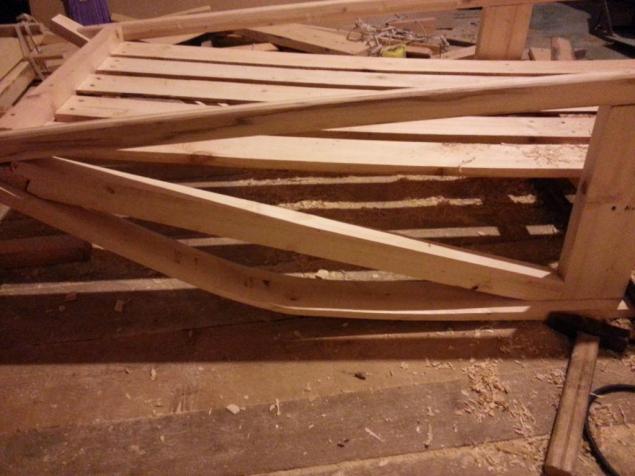
General form. Quality - as usual - in a hurry.
Photo 17

Molding. The central block is also firmly fixed to the floor bottom. The upper part of the draw in the workpiece accurately to the bottom of the screws, slowly, slowly, without sudden movements, with a sinking heart - though not hear the crackling.
Photo 18

Another view.
Accordingly, the second workpiece skiing to be done all the same manipulations that are applied to the first.
In this position, leave to dry preform. And while they dry - you can do other things.
Photo 19

There was a small incident. I realized to continue - you need to be able to turn the skis in hand. Because drying they will conduct in a different position (week before dried up in the initial position).
It was found not need wide board.
Photo 20

Cut off from her by 1100mm, prostrugana, otcherchena bending line skiing.
That's the handheld device is supposed to cut through.
Photo 21

So it happened in our family that nobody likes Jigsaw (and even more, tame).
About 30 years ago, my father, who was then working at the gas processing plant, went into the electric shop for electricians. I saw them a spiral of nichrome, performs the role of the cigarette lighter. I poked to stick - on (cut). I took them a little nichrome. He came home with change. Remembering that a hot nichrome string cut foam - decided to try a similar structure on the tree. He took a large ball bearing (a little less than a hen's egg) is welded to the bolt M6. Bite off cutters 60-70 cm Nichrome 0.65 podmotal one end to a bolt on the ball, pressed nut. He took an old ski pole, cut 15 cm, the part that is to handle. Primastyril mikrushku to (a switch button derzhesh - continuity, let - open), to mikrushke - hook with aluminum wire. Connect it to the conclusions of the entire economy 36V homemade welding transformer. He took a piece of wood, painted figure and tried to cut. Received showed mom. Mom whole thing very much, then this unit has been actively applied in our family: carved trim on the doors, windows, home of cash and so on. Well, that's another story.
Photo 22

Here's a slice obtained.
Photo 23

He took off his skis drying ... Something is very active dry (not surprisingly - took a little time) - the board took shape almost.
Photo 24

Fasten first wire to the workpiece could twirl.
Photo 25

And then in the screws (do not worry, the runners will still schlifovatsya, and also, ideally, I would like to hem runner disbanded HDPE pipe, if I can find).
Photo 26

Fasten two skis next to less space occupied, and the stands and seats for them to do would be more comfortable
Photo 27

Cut 8 rack size 440 * 60 * 40, marks the center, retreating from the center of 70mm on each side.
Photo 28

With hatchet hew the line and the right lapping a plane.
Photo 29

Here they stand. So far, four of them on one ski. With them finishing planer.
About the quality of pictures already starts to quietly keep quiet ... It's too keen on the process.
Photo 30

Using the moment there is no rain, fifties dismiss board here on these bars. Bars crooked - so much source material. It so happened that the former owner garden gates did not bother to properly folded. The result - led board.
Rasp bars. It will handrails, so to speak ... But splinters from them - to anything.
Photo 31

Finishing a plane rounded corners on the entire length of the bars to get something like this form
Photo 32

Rose bars upstairs in the "workshop". I forgot to say, the length of 3000 mm bars.
Photo 33

With a chisel do seating depth 20-25mm under the rack. Under each rack - individual placing marked up at the front. Racks in the seat should include tight, but not too much so as not to split the ski. All signed.
Photo 34

Scored Kiyanochka to their seats rack. I attach bars so that you can identify in bars gash under styki.
Photo 35

All scheduled. He took off the rack. Cut paper template - 20mm * 40mm box - it will be holes ... I do not know what to call it. Let it be "lags».
I went out into the street (No rain) to cut holes in racks under the joists.
Photo 36
Posted in [mergetime] 1391775136 [/ mergetime]
And as I write the next post - you can see video nebolshje.

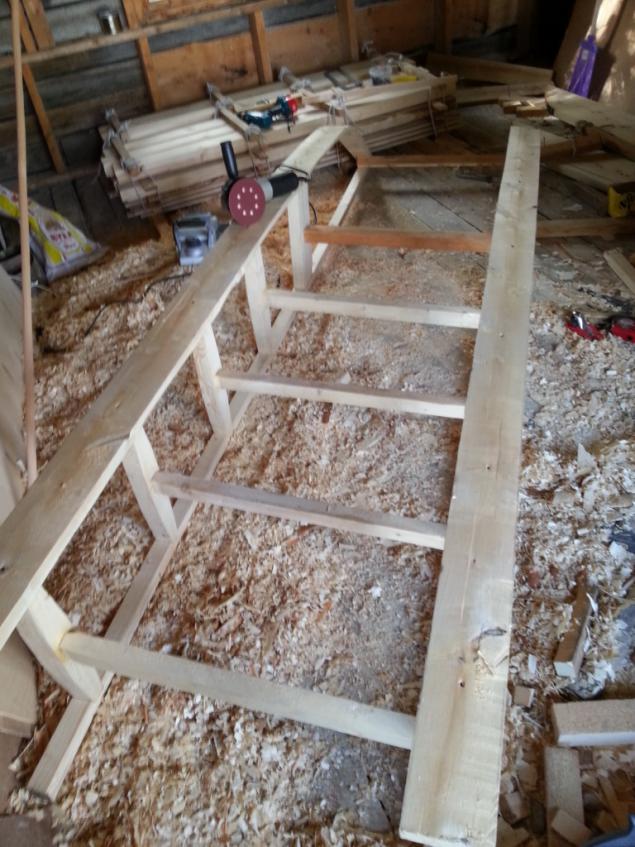
Establish a rack (Kopylov) in place. Established in its place handrails, front prishurupil them. Behind - I pulled the wire. It is too early to fix them tightly.
He started manufacturing lag. Their length is chosen based on the width of the tracks of a snowmobile (for Two track odnolyzhnogo snowmobile) or track skis (for odnogusenichnogo dvuhlyzhnogo snowmobile). That is, the sled must clearly fall within natoptannoy snowmobile trail.
I begin to install lag.
Photo 37

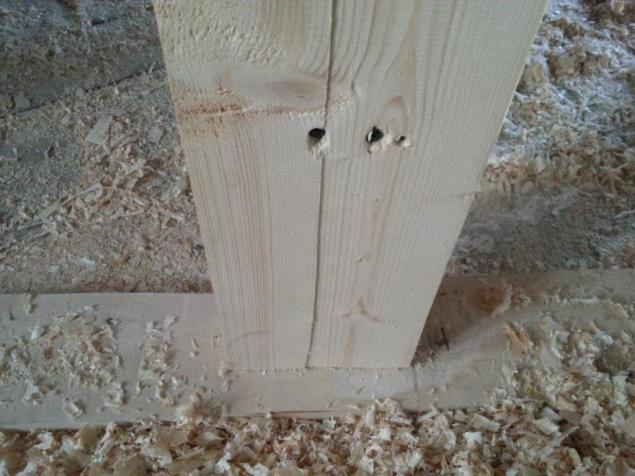
The bars are carefully adjusted stamesochkoy to their ends well, but tight, not a split rack, entered the hole racks (scored ax ax).
Photo 38

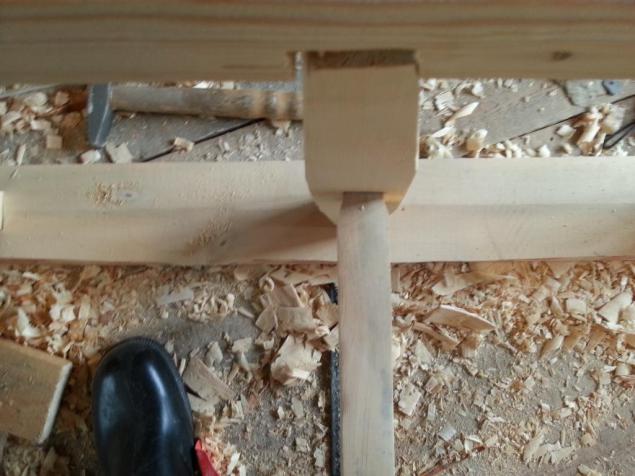
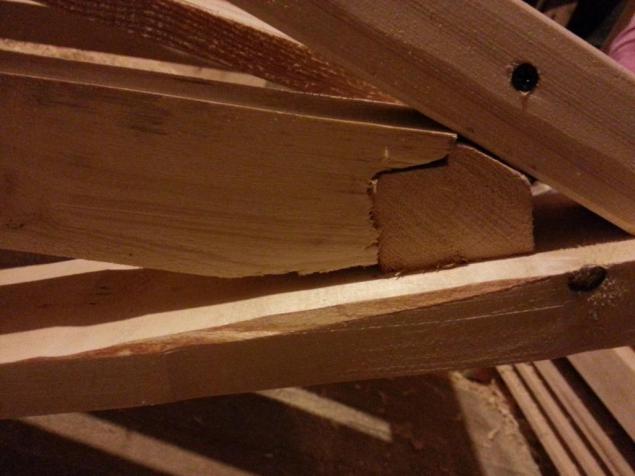
This part I called bumper :)
In the photo is not very visible, but some form of a plane devoted to this bar tight fit in the interface between the ski and the handrail. Just select the slot where you want to go to the flooring boards.
Photo 39

These racks are mounted drawbar. And at such a distance from the nose in order not to break the sled during the assault on hillsides, tripping.
They are fixed with just 6 screws each, without slots, as will be sufficiently loaded. They will still be attached Amplifiers bow (later show).
Photo 40

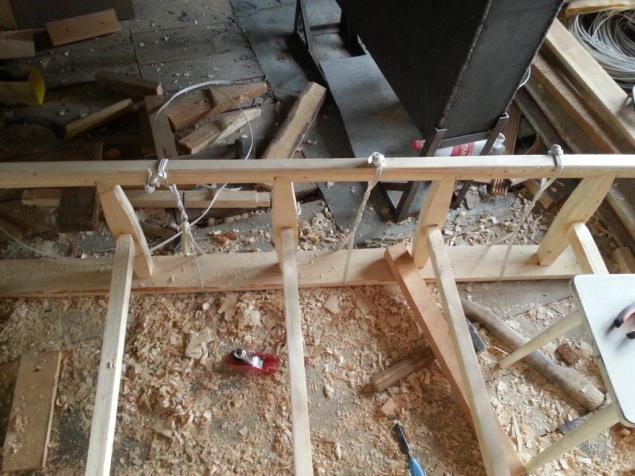
Further, between the racks thoroughly contractible wire rack to sit well in all slots, as far as possible.
Photo 41

Contractible screws handrails to the posts, turn over the sledge. We do the same thing with skis.
Stretched lag screws fixing points to the uprights.
Remove the wire.
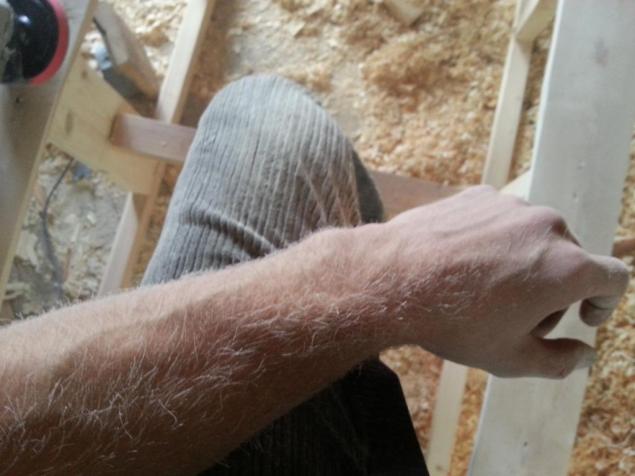
Now you can shlifanut runners (not to flip back and forth sledges).
Photo 42

A little bit ...
priporoshit
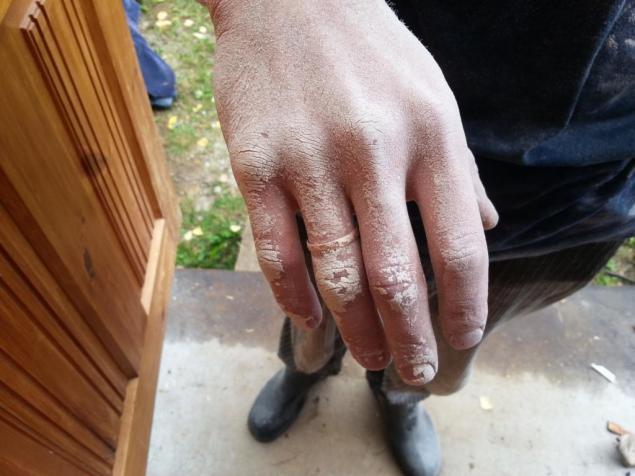
Photo 43

Hard wished he forgot at home respirators ...
Hands, of course, also priporoshit ...
Photo 44

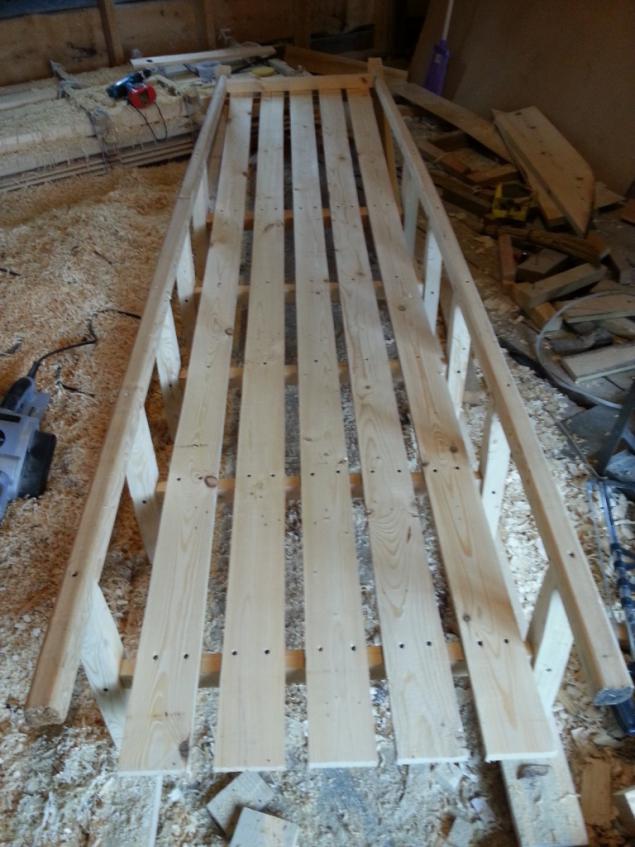
Amalyan my three-meter (slightly more than) the board of crates, which came to a snowmobile.
I chose five boards (width - 100mm, thickness - 20 mm), prostrogat and paved with large enough gaps.
Firstly, less consumption of boards.
Second, the less weight sledges.
Third, turn the sled breathe. I do not know how useful, but people praised it dyschaschie sledges. Let it be so.
Photo 45

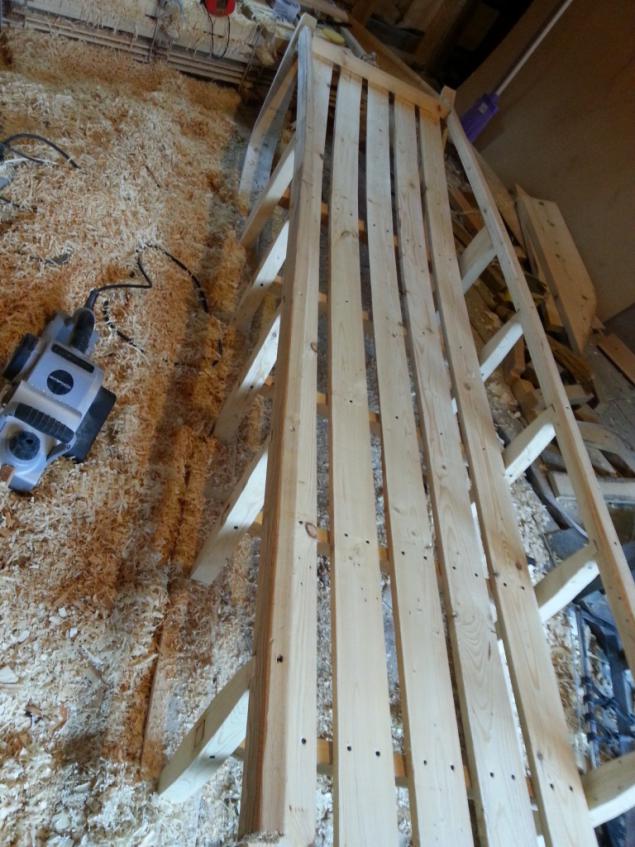
That's from a different angle
Photo 46

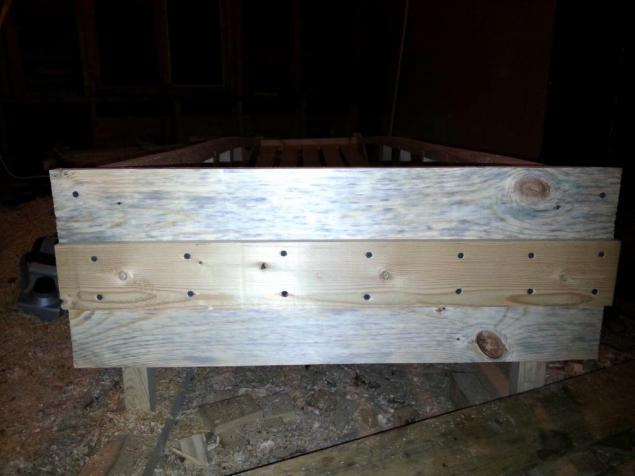
Now started manufacturing tailgate. Prostrogat and vypel boards, hold them together.
For the convenience of layout board attached to the sledges with two screws - one in the order (the photo shows - top left and right).
Photo 47

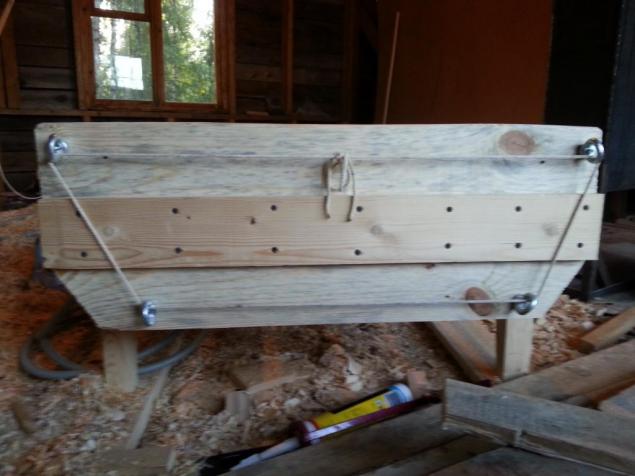
A little reflection, decided to make easily removable tailgate: little did have to carry something long, for example, four-meter board.
Photo 48

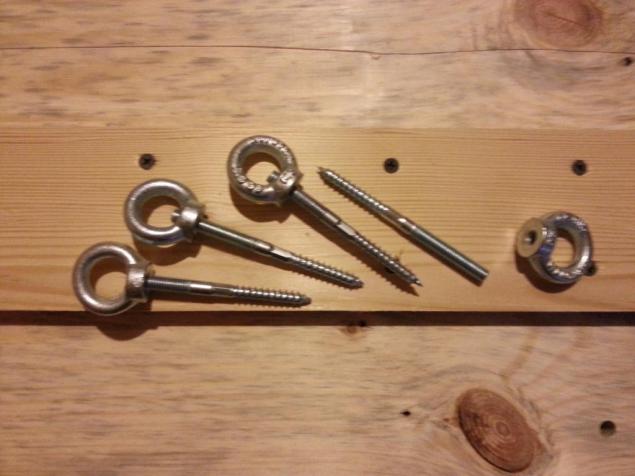
Were Drill handrails and extreme beam at broadside. Stud threads, one that goes into the wood smeared with liquid nails (for safety).
Here's the finished board (do not forget to hang reflectors)
... Rope hitch on KrAZ hung a bucket and rope hung on a sledge :) In fact - is that eye-nuts are not unscrew.
You're just a little bit: bend to strengthen the place of skis, do dyshel mounting on racks Fifth, do yourself drawbar.
Photo 49

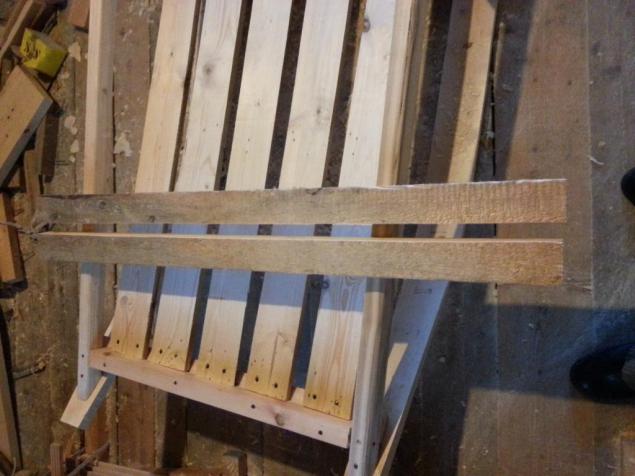
It's time to make amplifiers bow. It was dissolved in half a piece of board fifties (width 130mm).
Photo 50

Prostrogat and gives shape. Mark up by applying to the sledges.
Photo 51

Install an amp in its place.
Photo 52

As usual, without jambs did not work, but sorry ... Do not worry, this time to fix them.
Photo 53

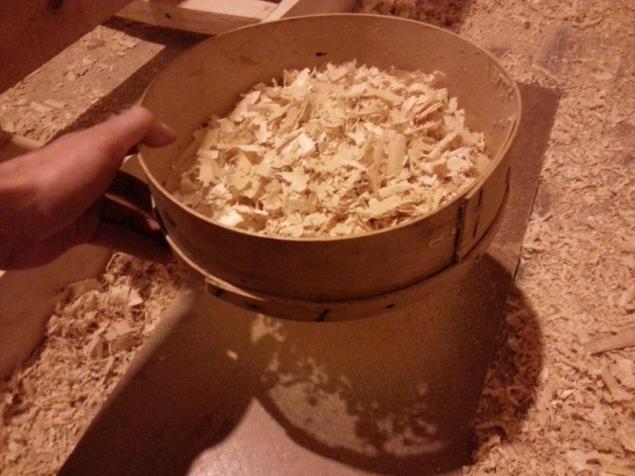
Naryl in the shed for the old equipment sitichko flour. That's it! Take the chips and sieved. Looking for fine sawdust.
Photo 54

The resulting "flour" interfere with PVA carpenter (not to be confused with the building, which is to be added to the dry mixture, such as plaster).
Now all the gaps / cracks / defects / cracks / knots dropped out, you can paint over this badyagoy. Putty is not better because it does not stick together. Even at school, from school work, I remember that PVA glue mixed with sawdust and stuffed into the gap gives strength is not bad, almost no inferior strength of the product.
Photo 55

Recessed runners in the screws too smeared the mixture (picture rails without putty).
Photo 56

It's time to prepare for the fifth rack installation dyshel yet to be manufactured.
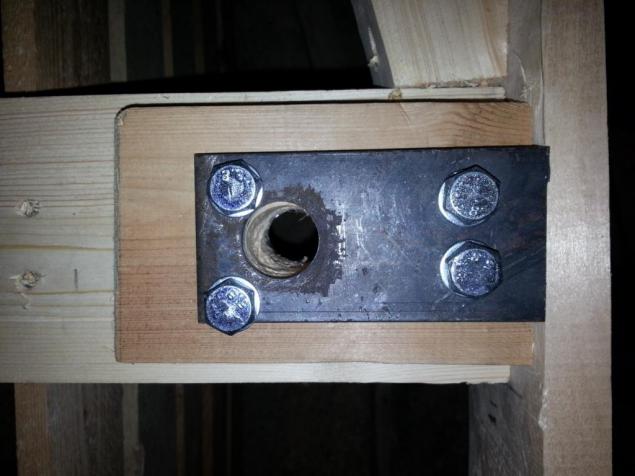
It was found 10mm metal plate, and drill does not need anything except four holes F10 bolt, with markings that I have, of course, nakosyachil: huddling on the first hole layout - all the others had to do the same. It's not scary, because the cap bolts will be cut, resulting welded studs to the plates, the welding Grind. This was then.
Photo 57

I hesitate to metal thickness. Still, the extra weight. Came chief mechanic. Also looking thoughtfully. Well, we rubles gained her chief mechanic called Delfi, voooon that Finotchka reds and decided, these two stand on the screw. I do not like it or uhaydohayu - Rewritten with all the stocks that will be identified during the operation.
Photo 58

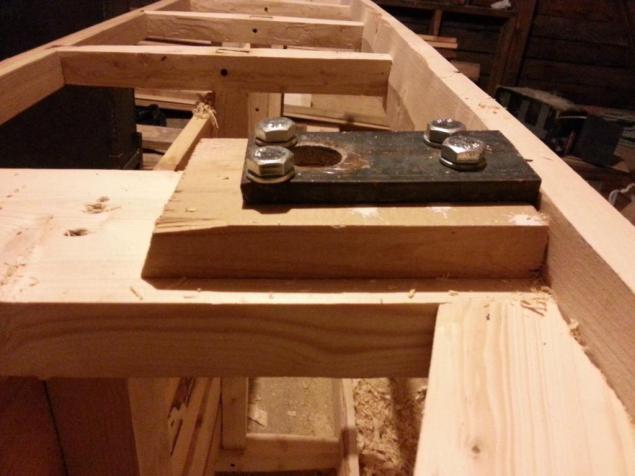
Well, something like that happened. This is semi-finished product. It can be said to mark. Yet to welding.
Photo 59

Another view
Photo 60

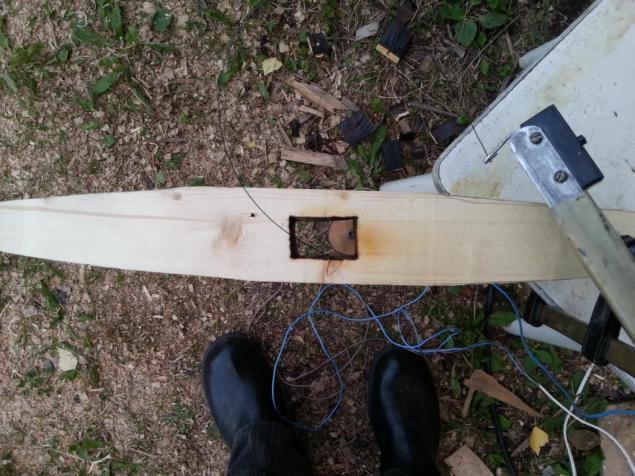
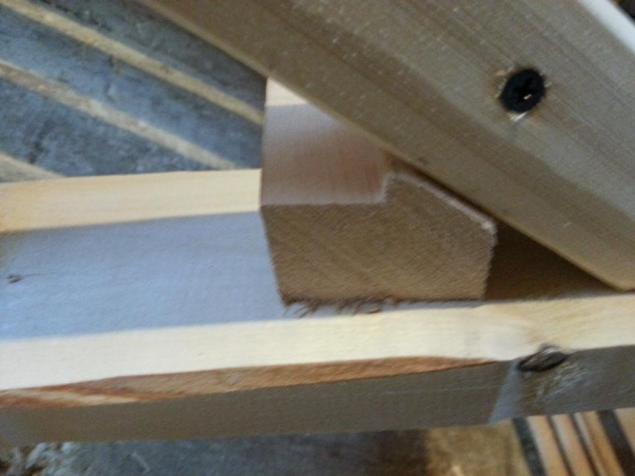
It is necessary to start making dyshel. Materials yet. Post this brings little benefit. Remember the so-called bumper, which I gave a definite shape. Not that it's bumper. This is more nasal lag. I photographed her form, since that post could not see the form (not the angle). To sculpt the photo did not, as the shadow of issues already built sleds. I decided not to disturb the chronology and make a retreat somewhere in the middle of my story. After all, no one is offended?
Photo 61

There was a trouble-trouble-grief! Part of the gallery was later made longer phone and fotikom, I managed to lose.
That's all I wanted to say.
Source:
Tags
See also
Sledges, homemade
Making chairs dollhouse
The Russians make the medals for the 2014 Olympics
As I was doing repairs in the bathroom.
How to properly prepare for SUV Offroad
How do prizes for strokes
Making the stairs to the dollhouse
As I was doing the headlamp for a bicycle
Let's get married: how celebrities make an offer
How to do stretching legs?